Artichoke à la Barigoule

It’s the time of year to enjoy artichokes: steamed, as a salad, in a pie or perhaps à la Barigoule. This is a rather intriguing recipe from the French Provence region. There are lots of variations, so we looked in books like La Cuisinière Provençale and La Cuisine Niçoise d’Hélène Barale to find the ‘original’ recipe.

Obviously you want to know what ‘barigoule’ means. According to Hélène Barale ‘barigoule’ means thyme, which is odd because she doesn’t add thyme to her Artichoke à la Barigoule. Is it perhaps derived from the Latin word mauruculai (meaning morel according to some and saffron milk cap to others) as the Larousse suggests? But what is the link between artichokes and mushrooms?

Three Versions

We found three different ways of preparing Artichoke à la Barigoule: cooked with onions, white wine and carrot, stuffed and preserved with lots of citrus. The stuffed one is probably the original version because the artichoke is stuffed with a mixture of mushrooms, thyme and garlic. Which makes the Larousse explanation more likely.

Preparing Artichokes a la Barigoule is quite a bit of work and the result, we must admit, looks like an old fashioned underbaked meatball. We could imagine you serve the artichoke halfway the recipe. If you do, best is to use smaller artichokes.

Wine Pairing

It’s not straightforward to pair artichokes with wine. According to various researchers this is due to cynarin, a chemical especially found in the leaves of the artichoke. When the wine and the cynarin meet in your mouth, the natural sweetness of the wine is enhanced, making it taste too sweet. So you have to pair artichokes with a bone-dry, crisp, unoaked white wine with clear, present acidity. For instance Sauvignon Blanc, Grüner Veltliner or Albariño. 

What You Need

  • Artichokes
  • Cooking liquid
    • Shallot
    • Carrot
    • Olive oil
    • White wine
    • Water
    • Thyme
  • Filling
    • Mushrooms
    • Egg yolk
    • Garlic
    • Shallot
    • 2 Strips of Bacon
    • Thyme
    • Black Pepper
  • Excellent Olive Oil

What You do

Remove outer leaves and stem of the artichokes. Add oil to a large pan, gently fry the chopped shallot and the chopped carrot. After 10 minutes or so add white wine, thyme and some water. Leave to simmer for 10 minutes. Add the artichokes to the liquid, close the pan and allow to cook and steam on low heat for 45-60 minutes or until nearly done. You could decide to stop here and serve the artichoke with the (reduced) sauce.
Let the artichokes cool, remove the leaves and the centre choke (the hairy part).  Use a spoon to remove the ‘meat’ from the leaves (bracts) of the artichokes. Set aside. In a small skillet heat some oil, add chopped shallot, glaze, add sliced bacon, mushrooms, garlic and thyme. Leave for 10 minutes until done. Add the artichoke meat from the leaves, stir, add the egg yolk and mix. Add freshly grounded black pepper. Use a food processor to make the mixture smoother, but not too smooth. Fill the artichokes with the mixture. It should look like an oversized golf ball on top of the bottom of the artichoke. You will probably have too much filling, which is fine. Gently transfer the artichokes to the pan with cooking liquid and allow to steam and warm for 30 minutes. Now transfer the artichokes to a warm oven (60 ˚C or 140 ˚F).  Add the reaming mixture to the liquid, use a powerful blender to create a sauce. Pass through a sieve and blender some more. Set the blender to low speed and add excellent olive oil. Taste and adjust. Serve the filled artichokes on a small plate with the sauce.

Pasta with Mushrooms and Bell Pepper

Udon is such a wonderful noodle. What better comfort food than a warm soup made with dashi, vegetables, tofu, udon and thinly sliced spring onions? Perhaps some tempura on top of the soup? Or would you prefer a very simple dish, called Mori Udon? The cold udon is served with a sauce of mirin, dashi and soy sauce on the side.
Udon is also a great alternative to Italian pasta, for instance with Caesar’s Mushrooms.

In this recipe we combine udon with roasted bell pepper and Trompettes de la Mort. We’re not sure why, but this combination works really well. Is it because of the smokey aroma of the roasted bell pepper mixed with the aromas of the mushroom? The crispy pancetta in combination with the soft textures of the other ingredients, including the udon? The overall richness and umami thanks to the Trompettes de la Mort?

Wine Pairing

We enjoyed our pasta with a glass of Bianco di Custoza, made by Monte del Frà from Italy. It is a well-balanced, dry white wine, with a fruity nose. Its colour is straw yellow, with pale green highlights. A glass of Soave, made from the Garganega grape, will also be an excellent choice. In general you’re looking for a fresh, aromatic dry white wine. 

What You Need

  • 1 Red Bell Pepper
  • 1 Bunch of Udon
  • 100 grams of Trompettes de la Mort
  • 1 Glove of cooked Garlic
  • 4 slices of Pancetta
  • Black pepper
  • Olive Oil

What You Do

Clean the bell pepper and cut in 4. Transfer to the oven and grill or roast for 10 minutes or until well charred. When still hot, put the bell pepper in a plastic container and close it. After one hour it’s easy to remove the skin of the bell pepper. Slice lengthwise to make nice strips. Set aside.
Slice the mushrooms in two and clean them with a soft brush. Check carefully for grit and other things you don’t like to eat.
Fill a large pan with water (no salt!) and bring to a boil. Add the udon and cook it according to the instruction. When nearly done, add some cooking liquid to a cup and set aside. Drain the udon.
In parallel heat a large heavy iron skillet, add olive oil and fry the mushrooms. Once they become a bit dryer, add the sliced bell pepper. Add the cooked garlic, crush it with a fork and mix. Now add the udon and continue mixing. Add cooking liquid until the pasta is sufficiently moist.
Also in parallel: grill the strips of pancetta (perhaps 5 minutes).
Add some black pepper to the pasta and serve with the grilled pancetta.

Pasta with Mushrooms and Bell Pepper ©cadwu

Classic White Asparagus

One of the classic ways of serving white asparagus is with melted butter, boiled eggs, ham and parsley. Preparing the asparagus this way, will allow you to taste the slight bitterness and sweetness of the asparagus. The butter and egg bring a velvety feeling to your palate, and the parsley and white pepper give a touch of sharpness to the dish. A great way to celebrate spring!

We use our Russel and Hobbs food steamer to prepare this classic dish. An essential kitchen aid for only 50 euro or US dollar. In this case the steamer cooks the asparagus, boils the eggs and heats the butter. Amazing!

A few years ago we enjoyed white asparagus with béarnaise and a small veal schnitzel accompanied by a glass of Silvaner at Café Heider in Potsdam, Germany. When we ordered we were asked how we would like our asparagus. Al dente, of course! If you like them more cooked, then steam them for an extra 5 minutes. 

Wine Pairing

Preferably serve the white asparagus with a dry Muscat from the Elzas. The delicate, slightly sweet but dry taste, the hint of bitterness and the rich aromas work very well with the asparagus. Muscat to us means the smell of fresh fruit. When drinking it is if you’re tasting the original grape. Wonderful wine and wonderful combination.
Or a glass of Silvaner of course. Just make sure the white wine has a touch of sweetness and is aromatic.

What You Need
  • 3 or 5 white asparagus per person
  • 2 Eggs
  • 100 grams Organic Cooked Ham
  • Parsley
  • Butter
  • White Pepper
What You Do
  1. Clean and peel the asparagus
  2. Chop the parsley.
  3. add the butter to a cup
  4. Steam them for 10+5+5 minutes
  5. After 10 minutes add the eggs to the steamer basket
  6. After 5 minutes, add a cup with cold butter
  7. Another 5 minutes later everything is ready; the eggs will be medium: the yolk is not set but also not running.
  8. Peel the egg and cut in four
  9. Serve the asparagus and eggs on a plate
  10. Pour the warm butter over the asparagus
  11. Dress the plate with ham (please make sure it has a bit of fat) and perhaps some extra butter
  12. Add some white pepper
  13. Sprinkle the parsley over the plate
Classic white Asparagus ©cadwu

Oden

A traditional Japanese dish, often enjoyed in winter. It is tasty, light and full of surprises. Oden is a meal that requires a bit more work (and of course time) then you would expect. It also requires some shopping, given some of the ingredients are not easy to find. We enjoyed our first Oden at the Taishunken restaurant in the famous Sankeien Garden in Yokohama. Loved it!
We are not from Japan so we humbly present our version of this classic. We hope it inspires you to cook Oden and enjoy it as much as we did.

Pairing

A cup of Japanese green tea is the obvious choice.
You could also combine your oden with a glass of Chardonnay (with a touch of oak perhaps), for instance if you serve it for dinner. Oden is rich in flavours, umami of course, but not spicy, so we would not suggest a Gewürztraminer or a Sauvignon Blanc.
A glass of cold, dry sake will also be great.

What You Need
  • For the Dashi
    • 1 litre of Water
    • 20 grams of Dashi Kombu (Rishiri Kombu)
    • 20 grams of Katsuobushi (Bonito Flakes)
  • For the Stew
    • One Daikon
    • One Pack of Konnyaku
    • 1 sheet of Hayani Kombu
    • Chikuwa Fish Cakes
    • One Pack of Gobo Maki Burdockroot Fish Cakes
    • 2 boiled eggs
    • Abura Age Fried Tofu
    • Mochi (Sticky Rice Cake)
    • Soy Sauce (preferably one with less salt)
    • Mirin
  • Karashi
  • Rice with ginger
What You Do
  1. Peel the daikon and slice it (2 centimeters is best)
  2. Use a sharp knife to plane of the edge of the daikon. This improves the presentation, and it is supposed to stop the daikon from falling apart
  3. Cook the daikon for one hour in water
  4. Drain and set aside
  5. In parallel: cut the konnyaku in triangles and cook these in water for 15 minutes. Konnyaku is made from the konjac plant and is specific for the Japanese cuisine
  6. Also in parallel: cook the sheet of Hayani Kombu for 5 minutes. This is young kombu and edible, different for the one you use when preparing dashi. Let cool a bit, slice and knot ribbons. Not sure why but is looks great when you serve it. (Yes, well spotted, it’s not in the picture; unfortunately, we couldn’t find Hayani when we prepared our oden.)
  7. Make 1 liter of dashi. This seems simple but requires precision. Clean the kombu with a wet cloth and put into one litre of cold water. Gently raise the temperature to 80 °C or 175 °F. Remove and discard the kombu. Bring the liquid to a boil, add the katsuobushi, bring to a boil and immediately set heat to zero. Wait 5 minutes or so. The katsuobushi will sink to the bottom of the pan. Now very gently pass the liquid through a wet towel or a sieve. Do not squeeze, just give it time. The result will be a great, clean dashi.
  8. Now it’s time to add the dashi to the pan (should be a clay pot, but we stick to our Le Creuset)
  9. Add one tablespoon of mirin
  10. One (or two, depending on your taste) of light soy sauce
  11. Add the daikon, the konnyaku, the chikuwa fish cakes and the gobo maki burdockroot fish cakes
  12. Allow to simmer for at least 2 hours
  13. 30 minutes before serving add boiled eggs, two Hayani ribbons, fried tofu and mochi
  14. The last two ingredients must be combined by putting the mochi into the tofu
  15. Serve with karashi (Japanese mustard, which is different from wasabi by the way) on the side
  • Oden ©cadwu
  • Oden with names of Ingredients ©cadwu

Confit of Duck: a home made alternative

The traditional way of making Confit of Duck is not complex. It’s a bit time consuming and it requires some planning, that’s all. The principle is to cure the meat in salt with various herbs (thyme, cumin, rosemary) and garlic. After 24 hours or so the duck is washed with water, patted dry and then slow cooked in goose or duck fat for several hours. When ready cool and store in fat.

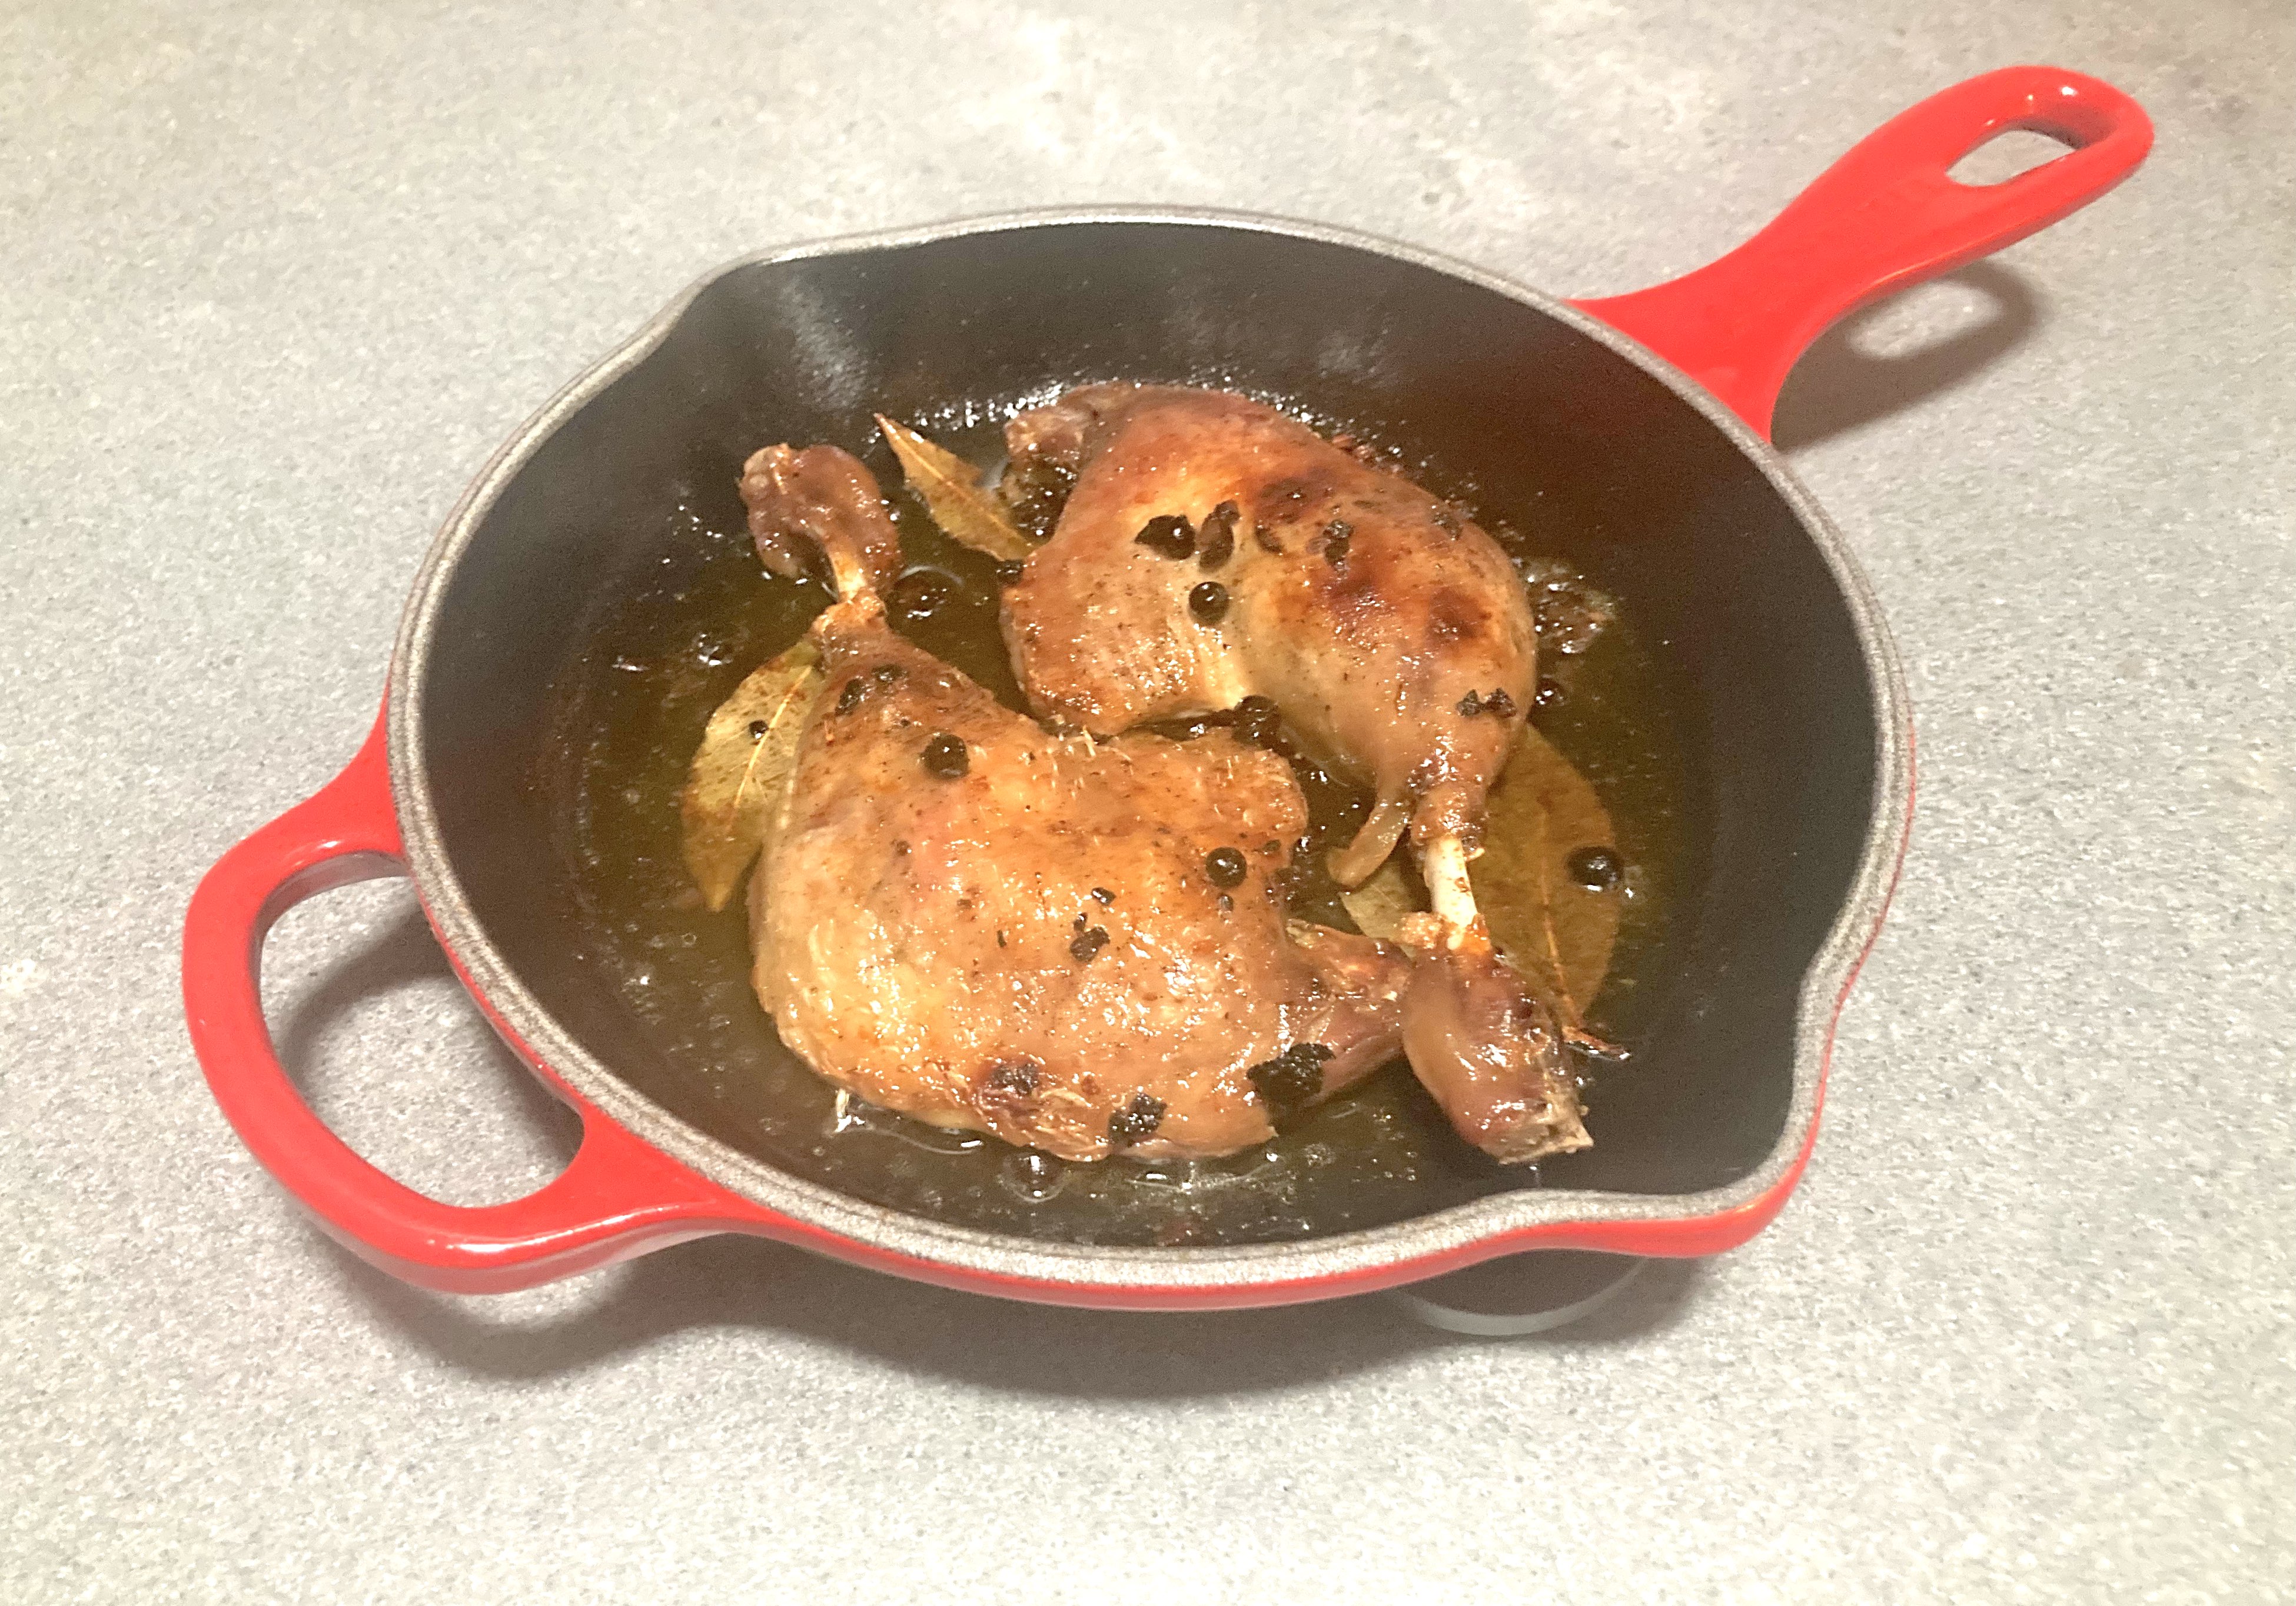
We take a different approach by slow cooking the duck legs in olive oil. The result is remarkable: juicy, full of flavours and aromas, provided you use first class duck (label rouge for instance). If not, the meat can become dry and tough. Another benefit: we don’t cure the meat so it’s not salty at all.
We serve the confit with celeriac mash. It’s light, nutty and refreshing compared to a mash made with potatoes.

Wine Pairing

Best choice is a full bodied, red wine with ripe fruit and smoothness. We decided to open a bottle of Herdade de São Miguel Colheita Seleccionada 2020 as produced by Casa Relvas. Such a pleasure! Its colour is deep ruby and the aromas made us think of ripe black fruit and dark cherries with some spiciness. The wine is well balanced with a nice structure and smooth tannins. Works very well with the juicy duck and the mash with its creamy texture and lemonish, celery flavours.

What You Need

  • For the Confit
    • 2 Duck Legs
    • Juniper berries
    • 4 Bay Leaves
    • Olive Oil
    • (optional) Garlic
  • For the Celeriac Mash
    • 1 Celeriac
    • Slice of Lemon
    • Cream
    • White Pepper
    • Nutmeg

Confit

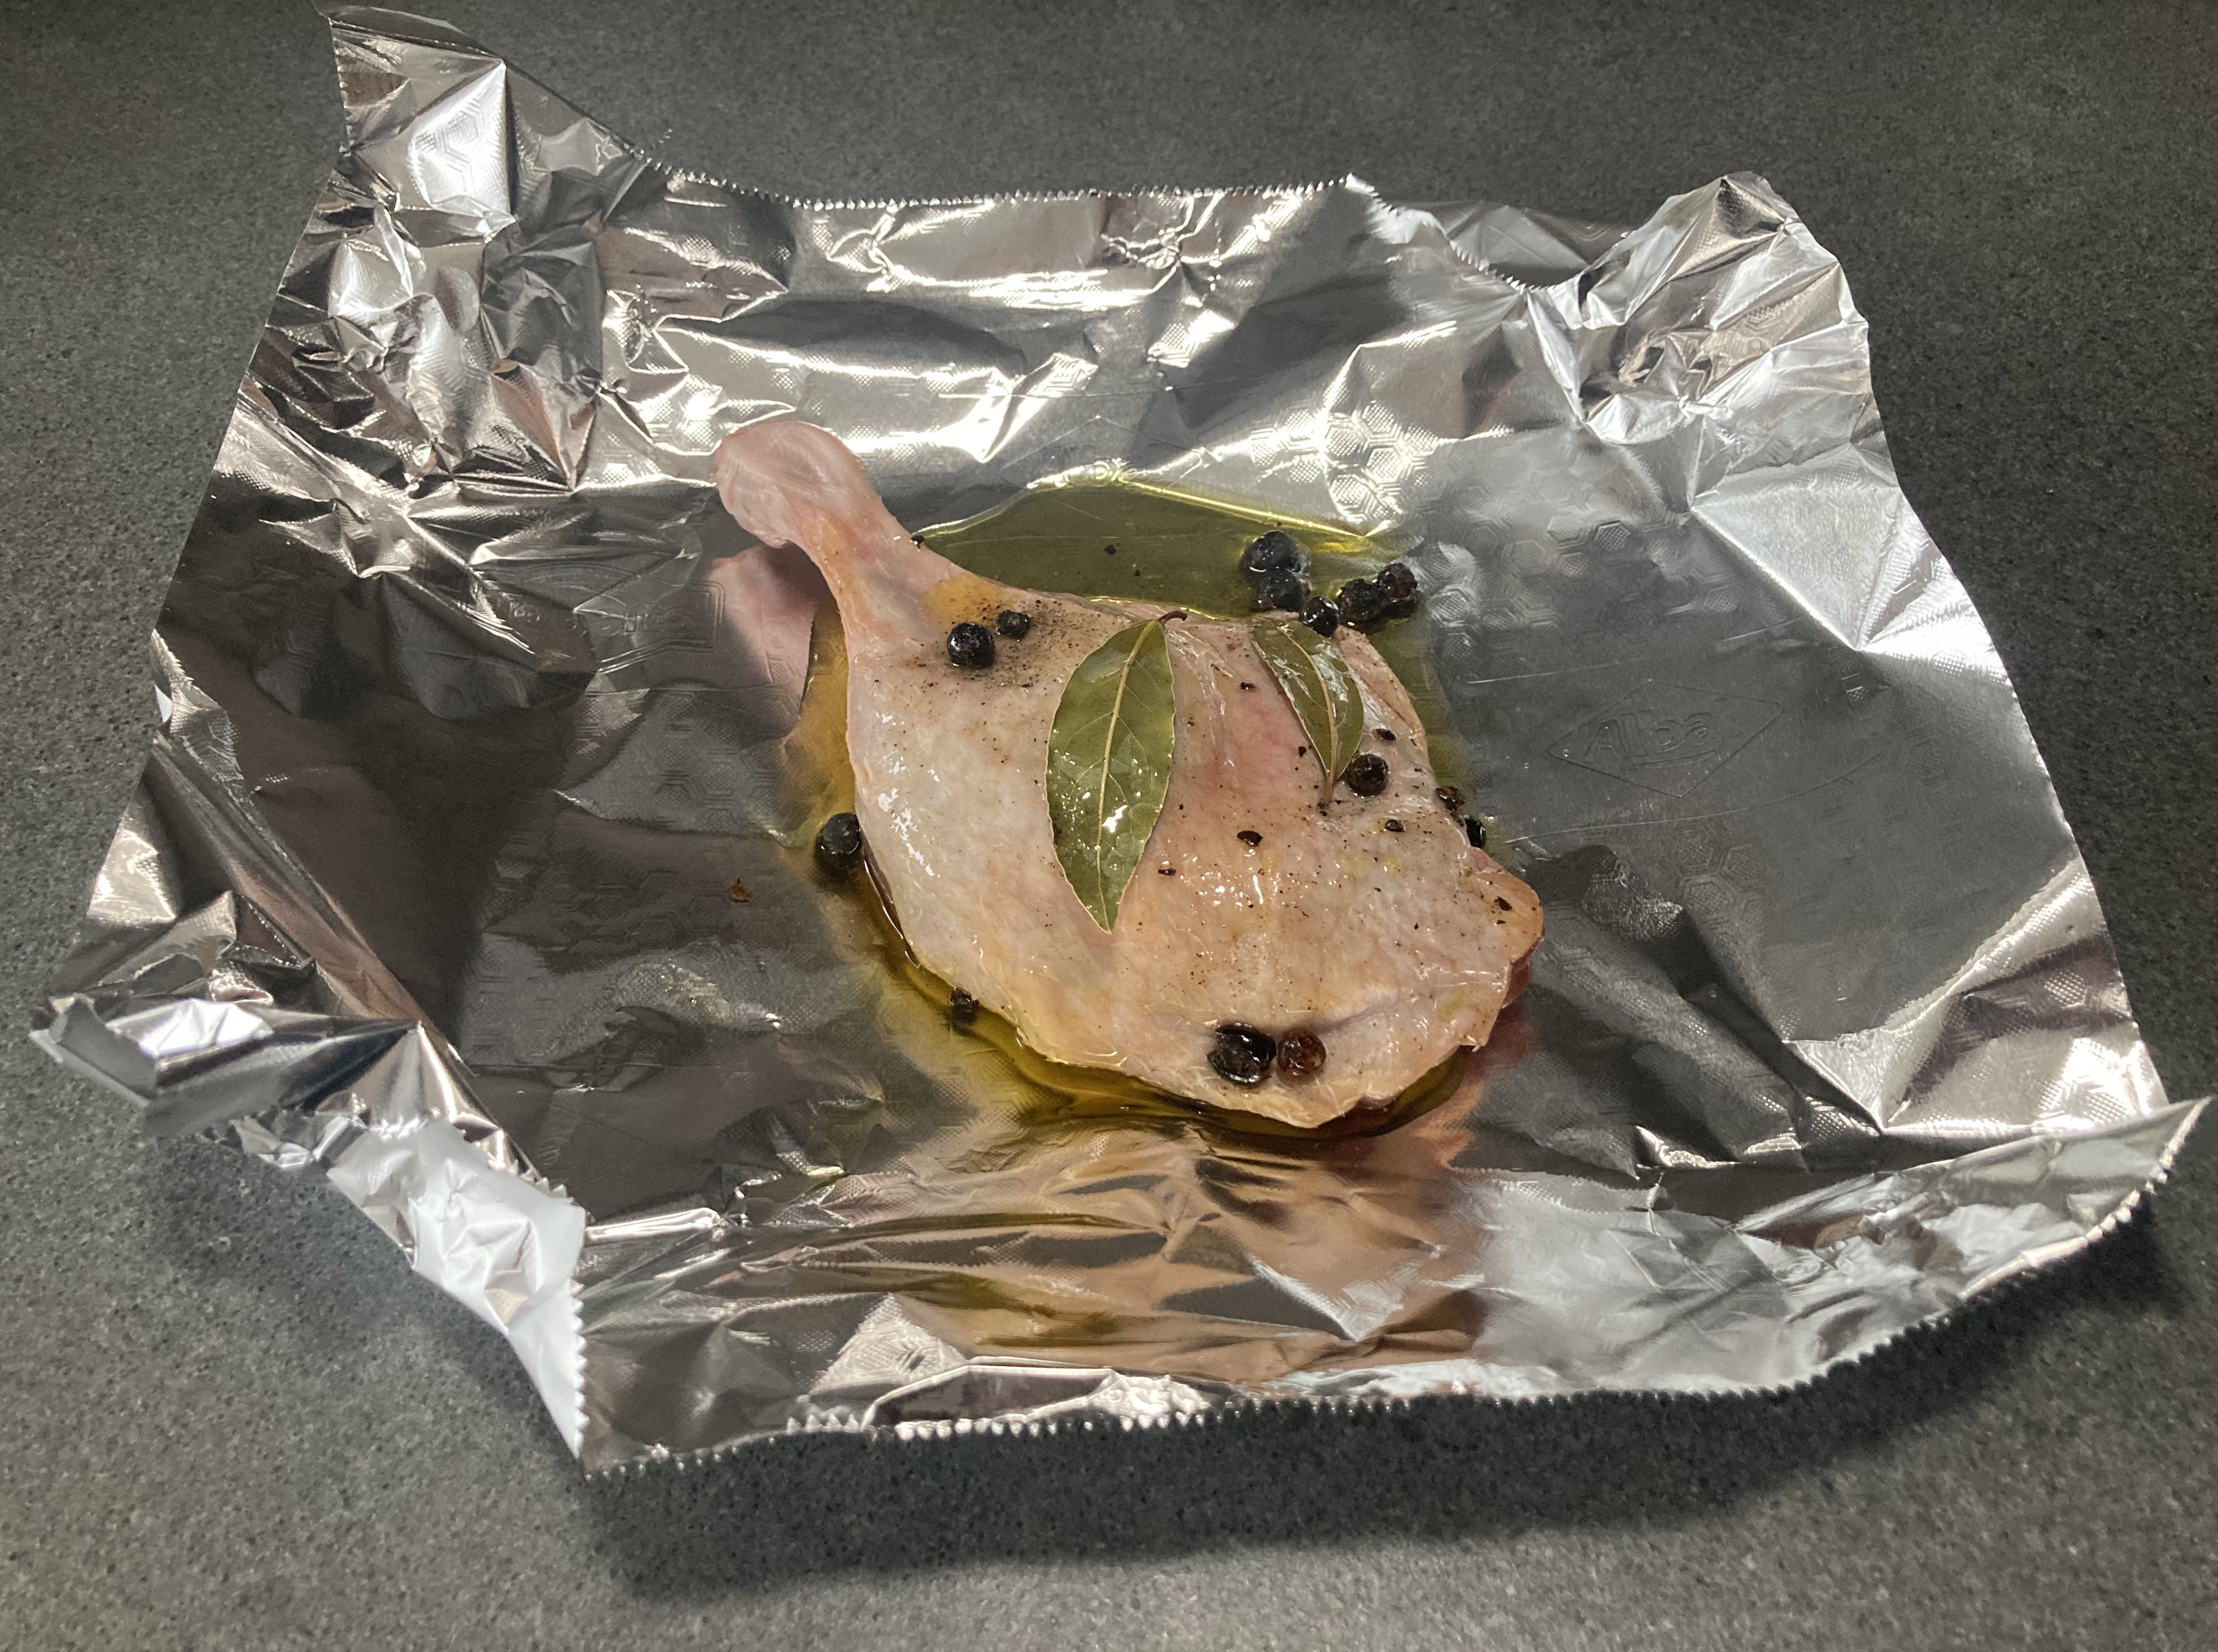
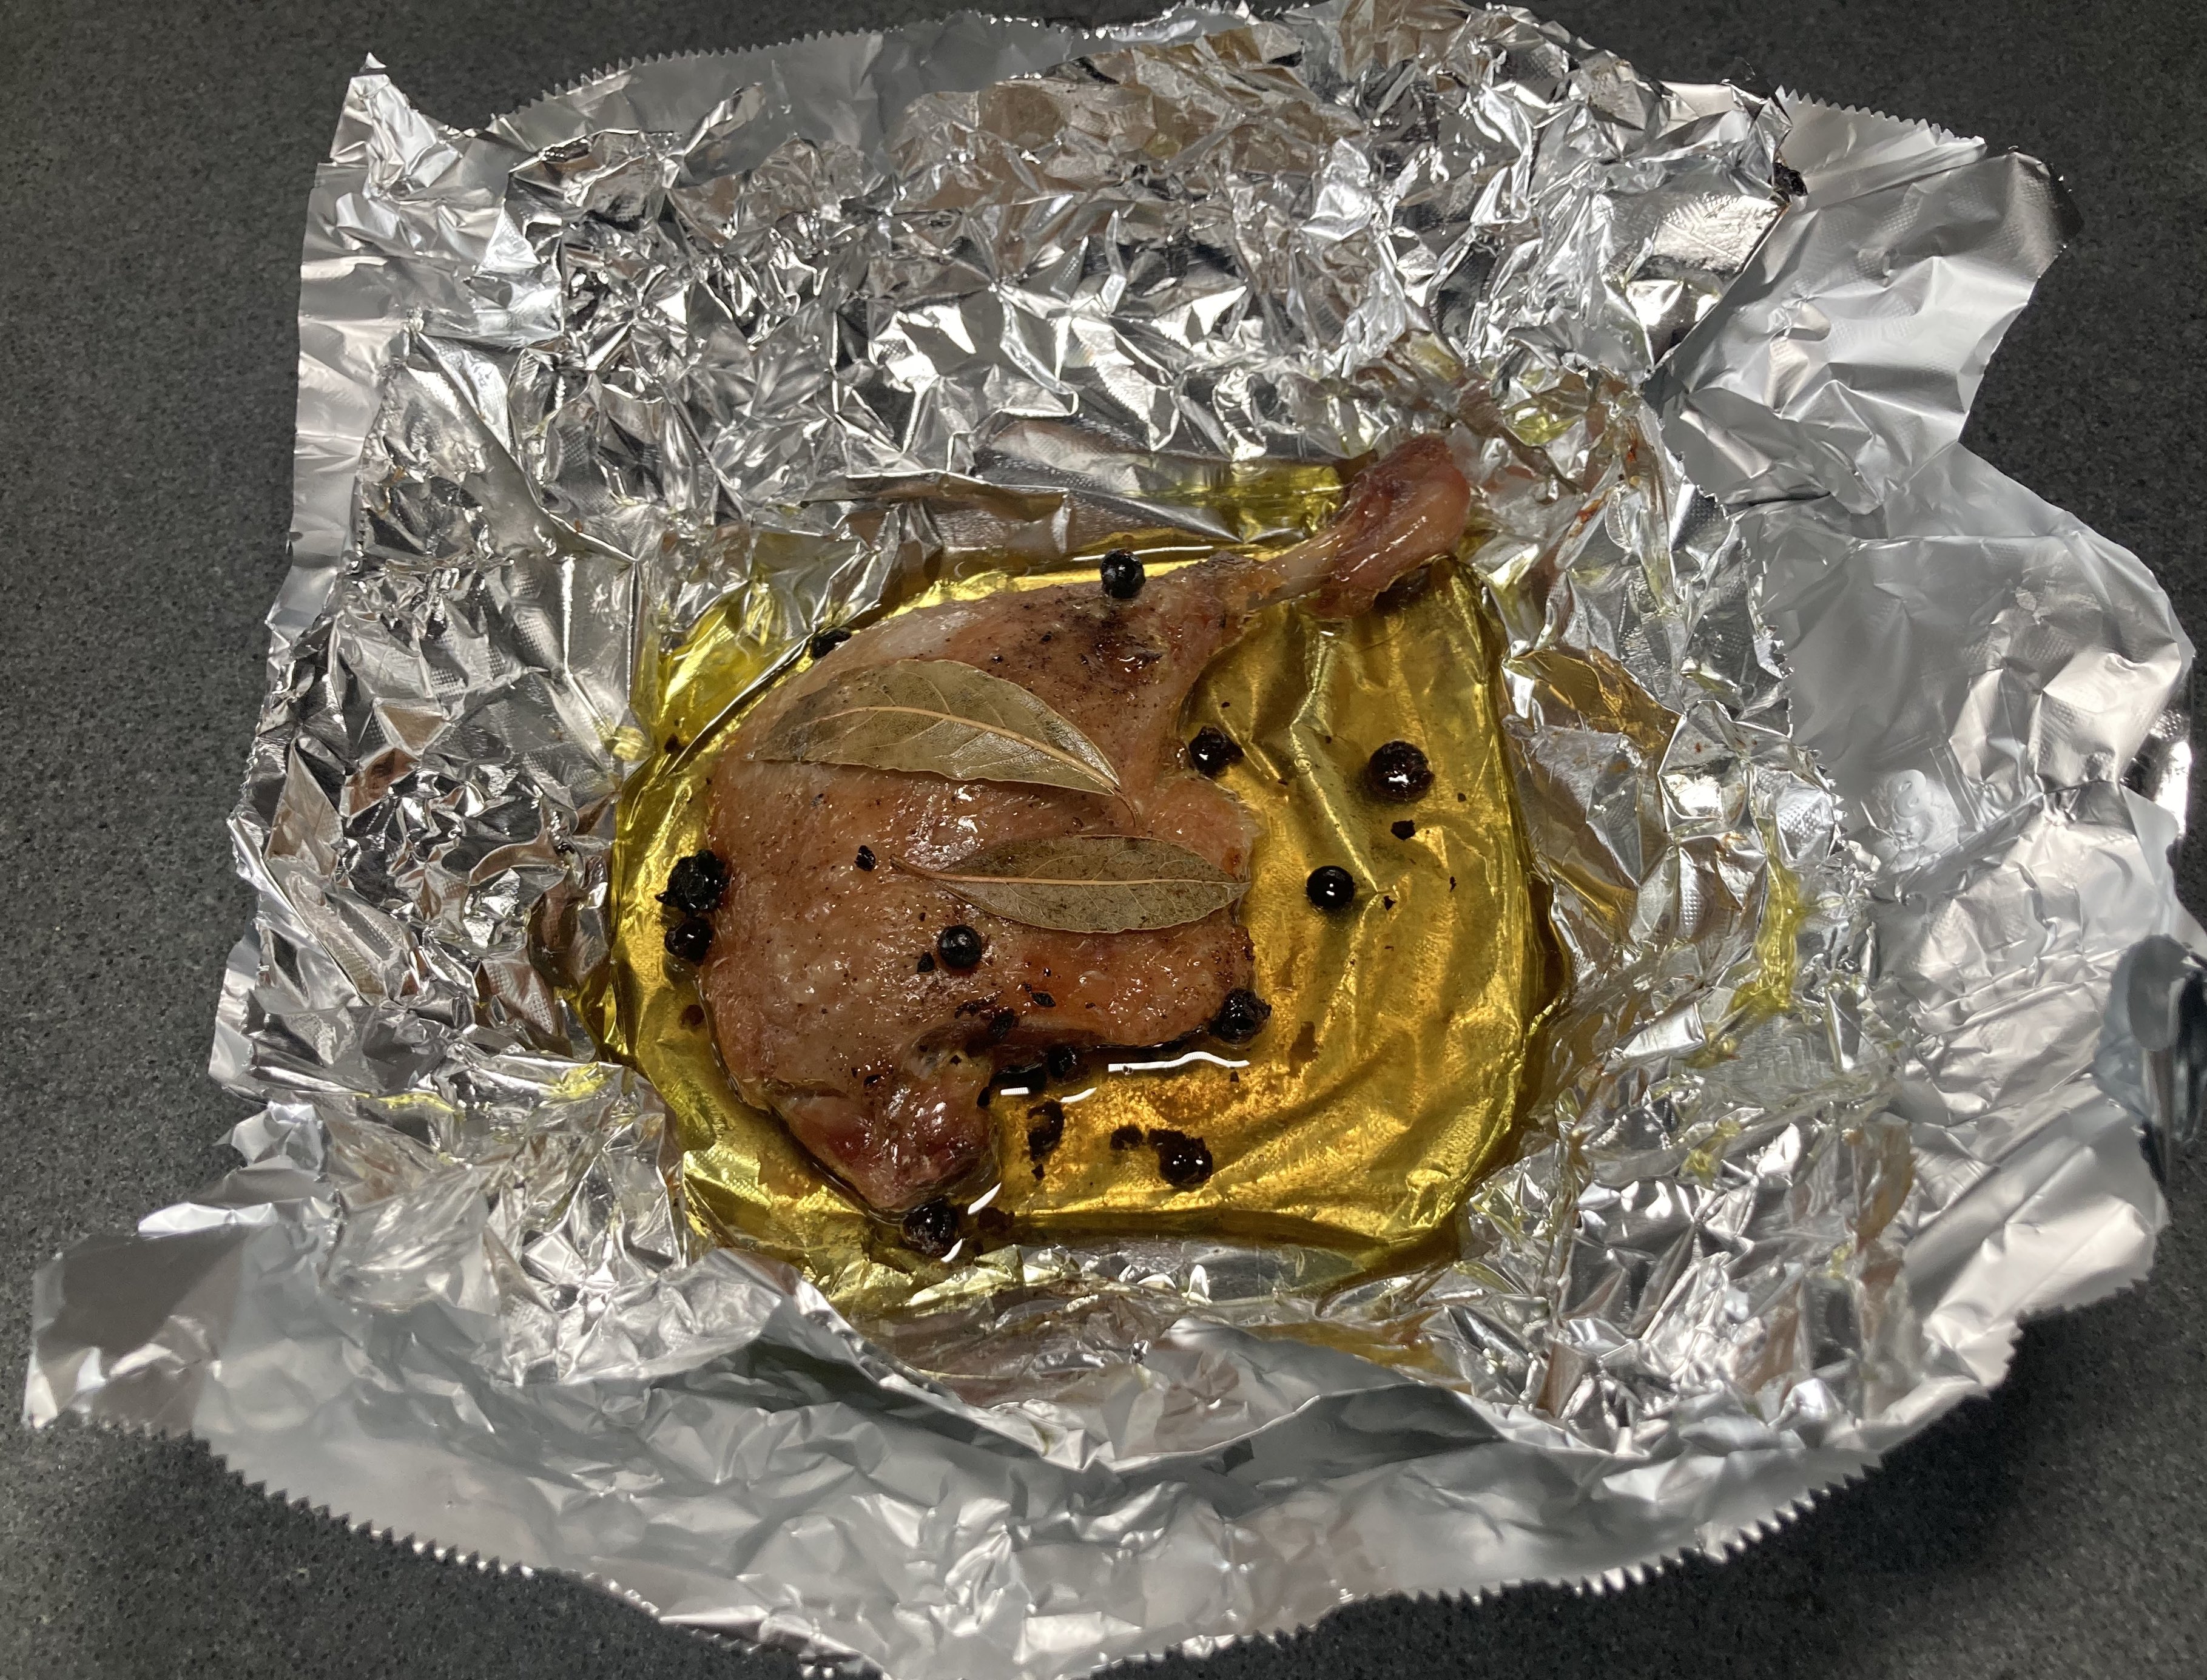
Take a sheet of aluminium foil and place the leg in the middle. Add lightly crushed juniper berries and two bay leaves. Perhaps some crushed garlic. Add a generous amount of olive oil and make sure everything is covered. Wrap foil around the duck. Take a second sheet of foil and wrap it around the package, making sure it’s closed. Repeat with the second leg. Transfer both packages to an oven at 120 °C or 240 °F. After one hour reduce the heat to 100 °C or 210 °F. After in total 4 to 5 hours, depending on the size of the legs, remove the legs from the oven, open the package and let cool. Then transfer to the refrigerator for use later on.

Heat the oven to 200 °C or 390 °F. Put the legs in an iron skillet, transfer to the oven and 15-20 minutes later the legs are ready. If the skin is not yet crispy, use the grill for 2 or 3 minutes.
Another idea is to pull the meat and use it to top a salad.

Mash

The Celeriac Mash: clean and dice the celeriac. Cook in minimum water with a nice slice of lemon until nearly done. Remove the lemon and drain. Add cream. Put on low heat for a few minutes; the celeriac should absorb the cream. When the celeriac is done, use a blender to create the puree. Pass through a sieve. Perhaps add extra lemon or cream. Just before serving add white pepper. Serve with freshly grated nutmeg.

Eggs Poached in Tomato Sauce

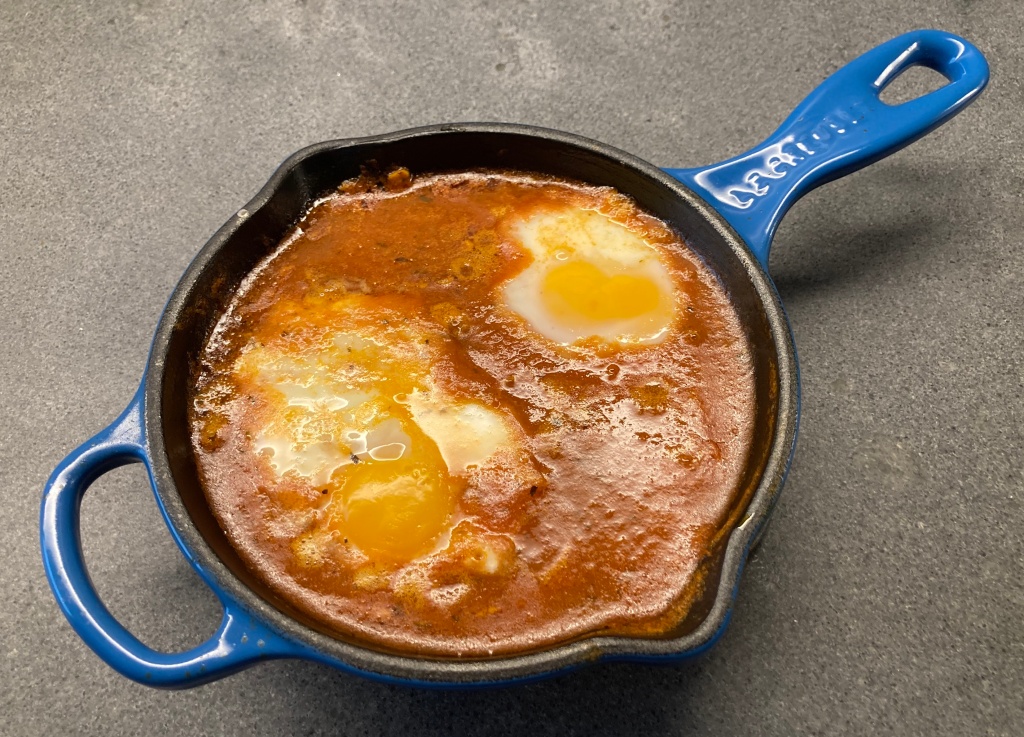
Poaching eggs in water requires a bit of technique or a nice tool. Poaching eggs in tomato sauce is slightly different: you want to keep the white close to the yolk, but it should not envelope it: the yolk must remain visible.

The combination of tomato sauce and egg seems to be a bit odd, but the rich, runny egg in combination with the slightly acidic, aromatic tomato sauce is really nice. Great suggestion for lunch or a hearty breakfast. Feel free to create your own version of this dish, for instance by adding some parsley or cheese. Serve with crusted bread.

In most cases the result is shown in a pan. For good reasons: it does not look very attractive when served on a plate. The fun is definitely in the flavours and aromas.

What You Need

What You Do

Warm the tomato sauce and reduce. Increase the heat until the sauce is nearly boiling, gently add the eggs (as you would do when poaching eggs in water) and reduce heat. Using a small spoon make sure the white remains close to the yolk, without covering it. Wait until the white is set. Perhaps add some freshly grounded black pepper.

Eggs Poached in Tomato Sauce ©cadwu

Mushroom Soup with Pancetta and Thyme

This morning when we looked outside, we saw a grey, foggy city. Knowing it would take hours for the fog to clear, we started thinking about something warm for lunch. Perhaps some soup with crusty bread? We opened our refrigerator. Various mushrooms, thyme, rosemary, cream, a carrot, some left over stock. Yes! We knew what we wanted to cook for lunch: Mushroom Soup with Pancetta. A hearty, rich soup, ideal for a cold, grey day. The combination of mushrooms, pancetta and cream works very well; the celery and leek add complexity and the thyme brings character.

Wine Pairing

It was much later that afternoon before the fog left the city, but since we also had some left over Chardonnay in the fridge, which we enjoyed with our soup, we didn’t mind that much.

What You Need

  • Pancetta
  • Shallot
  • Mushrooms (Best is a Mix of Champignons, Shiitake etcetera)
  • Celery
  • Leek
  • Carrot
  • Garlic
  • Stock (Chicken or Vegetable)
  • Bouquet Garni (Thyme, Rosemary and Bay Leaf)
  • Black pepper
  • Cream
  • Fresh Thyme
  • Olive Oil

What You Do

Keep two strips of pancetta apart (to be grilled just before serving). You probably need 4-6 strips in total. Slice the remaining pancetta and fry in olive oil on medium heat. Remove the pancetta from the pan, chop the shallot and glaze it in the fat and perhaps some extra olive oil. Clean and slice the mushrooms, slice half a stalk of celery, half a leek, a small carrot, chop two gloves of garlic and add this to the shallot. Gently fry for a few minutes. Add the pancetta, the stock and the bouquet garni. Allow to simmer for 30 minutes. Remove the bouquet garni. Blender the soup, pass through a sieve and leave on low heat for 10 minutes. The mushrooms will emulgate the soup, so no need to add a roux. Now it’s time to taste the soup and perhaps add some black pepper. Add cream and fresh thyme and leave for another 5-10 minutes. In the meantime grill the two strips of pancetta until brown and crispy. Cut the stripes in five pieces depending on the size. Serve the soup in a warm bowl with the pancetta on top of it.

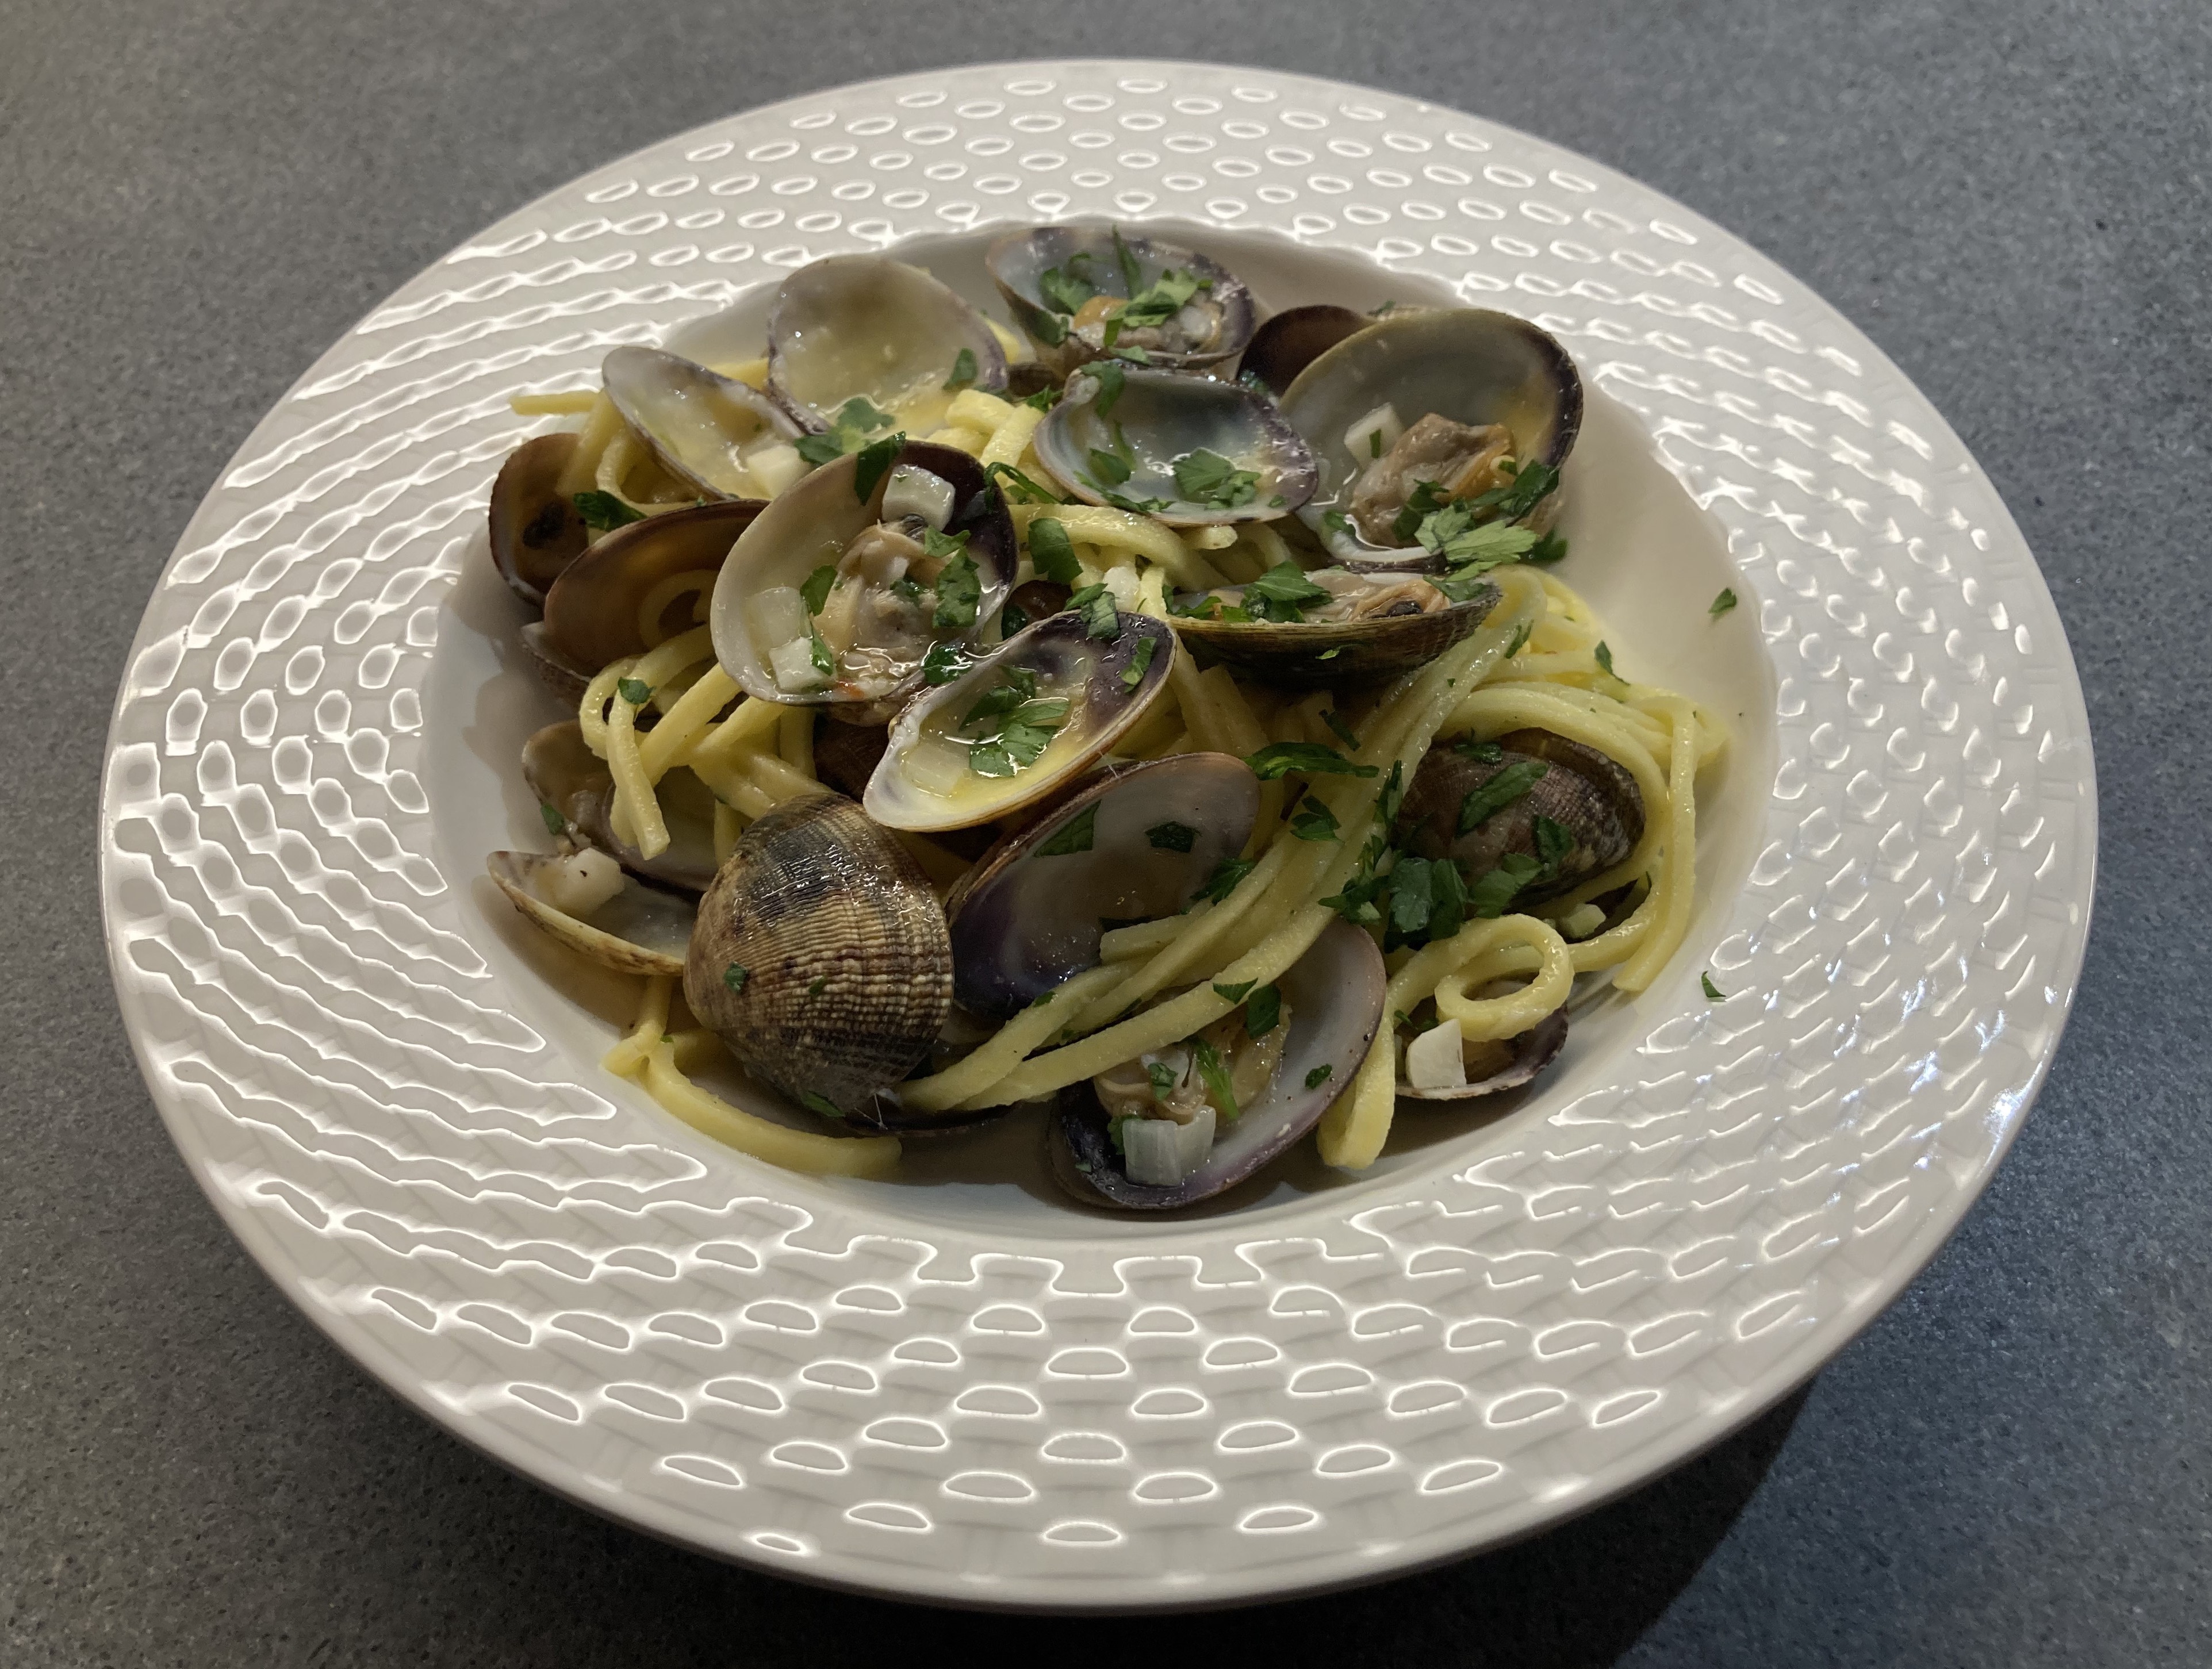
Pasta Alle Vongole

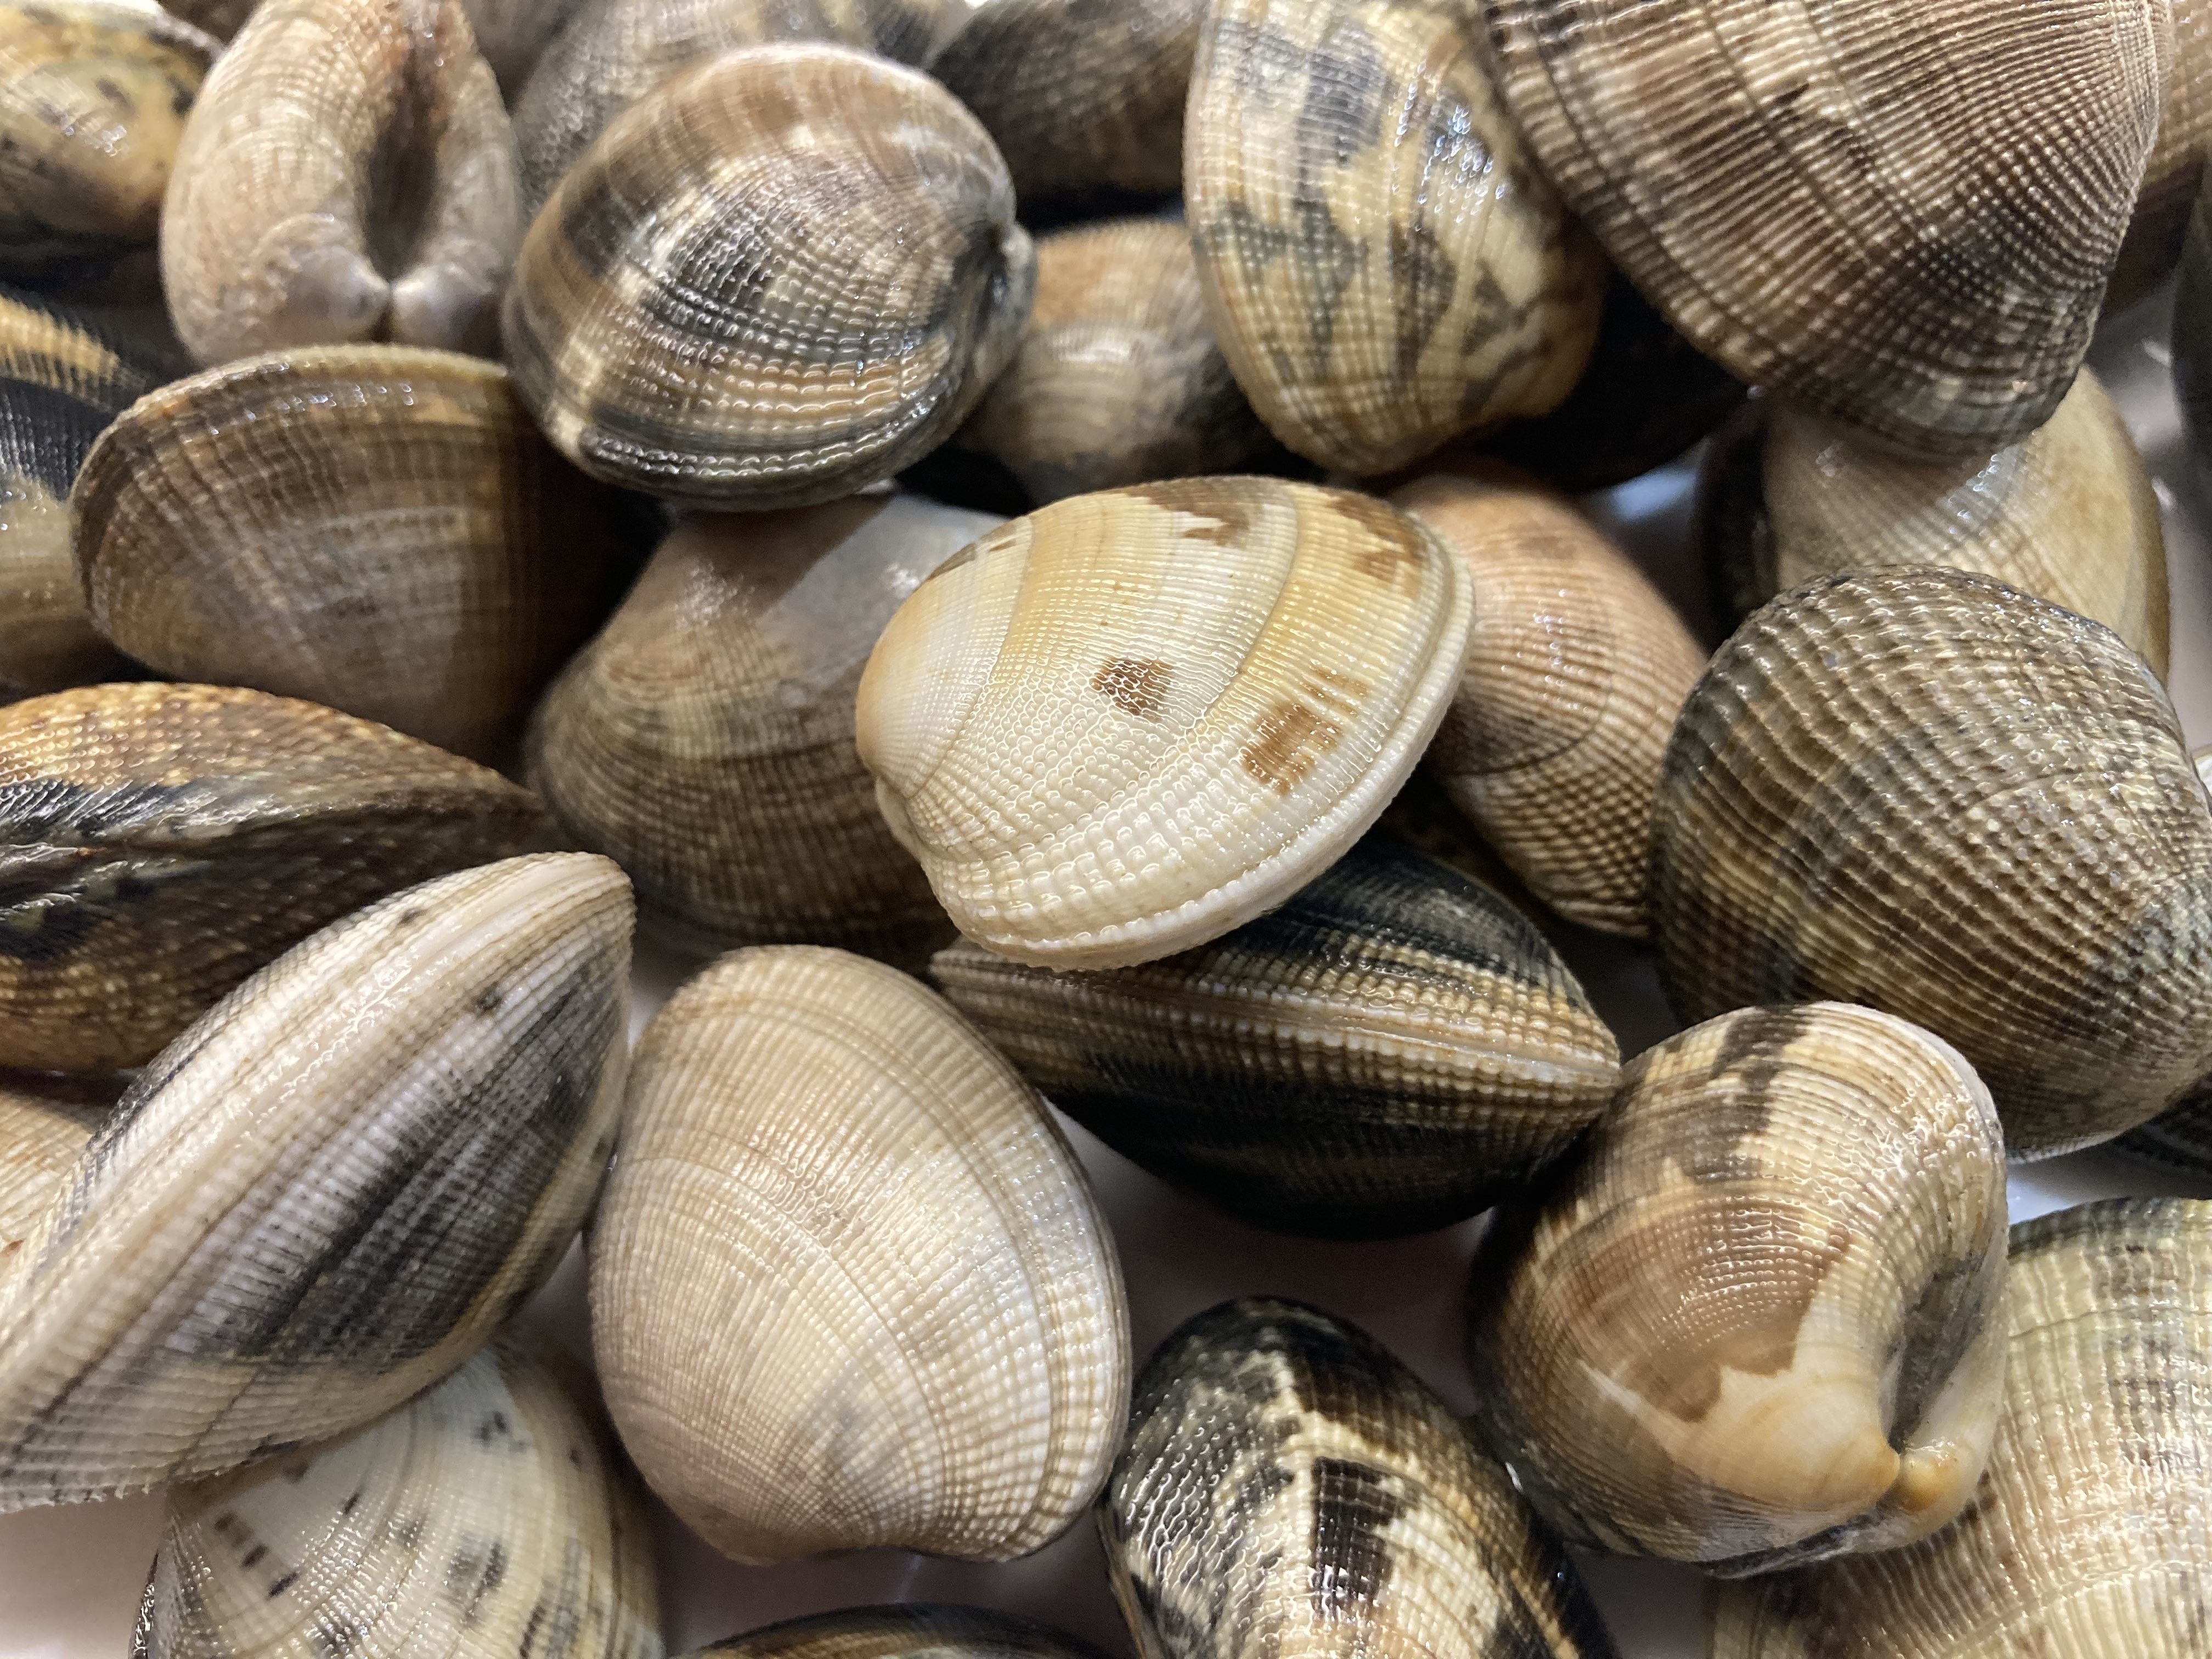
This is a truly delicious and simple starter, one that will only take a few minutes to prepare. The dish comes with two challenges: you need fresh, excellent vongole and you need to resist the temptation to add shallot, tomato, chilli, wine, lemon or butter.

Hey, we can hear you thinking, no wine? Indeed, no wine. We’re not fan of the acidity that comes with the wine plus we don’t want too much liquid. Basically we’re happy with the liquid as provided by the vongole. The idea is to steam the vongole in their own juices. This requires closely monitoring the cooking process. Next time you prepare Pasta Alle Vongole, please try to forget the wine.

Another ingredient to forget: salt. No need to cook the pasta with salt because the vongole will bring enough saltiness.

Obviously the vongole need to be clean, meaning without sand. Sometimes we’re lucky and our fishmonger offers washed vongole. If not lucky, we wash the vongole a few times with salted water.

Wine Pairing

Enjoy this classic Italian dish with a Soave: a beautiful, dry, crisp white wine from Italy. We opened a bottle of Cuvée XX, Soave Classico DOC, produced by Guerrieri Rizzardi. It proved to be ideal with the clams: refreshing and dry with floral and mineral notes.

What You Need

  • 500 grams of super fresh, washed Vongole
  • 2 Gloves of Garlic
  • Parsley
  • Spaghetti
  • Olive Oil
  • Black Pepper

What You Do

  1. Make sure you have everything ready: crushed garlic, chopped parsley, a pan with boiling water, a heavy pan (warm through and through), two warm plates
  2. Discard vongole that are broken or damaged
  3. Ready?
  4. Cook the pasta as mentioned on the package
  5. Increase heat, add a generous amount of olive oil to the heavy pan, add garlic, count 30 seconds, add vongole, close the pan and cook the vongole for 3-5 minutes in total
  6. After 1 minute (so 2-4 minutes to go) check if all is okay
  7. If too dry, then add extra olive oil or a splash of water
  8. When clams have opened, drain the pasta, remove the pan with the vongole from the heat, add pasta, chopped parsley and black pepper, mix and serve on two warm plates
  9. You could remove some, but not all, of the shells to make eating the dish a bit more elegant, although it’s fun eating the vongole with your hands
  10. Discard shells that have not opened
  11. PS Some recipes suggest cooking the vongole, preparing a sauce and then reheating the vongole with the pasta. If you do, the poor vongole will become rubbery, so not a good idea.

Pumpkin Soup (with Kombu Dashi)

It’s autumn, so obviously we want to cook pumpkin soup. A nice and warm combination of pumpkin, ginger, chilli and orange lentils for instance. Or with Jus de Truffe for a bit of extra umami and exclusivity.  Both are excellent vegetarian dishes, perfect for lunch with some crusted bread or as a starter.
Having recently prepared kabocha with shrimps, we decided to prepare a vegetarian soup with it. The basis of the soup is Kombu Dashi (made with dried Kelp). The dashi and the soy sauce bring saltiness and umami to the soup, which combines very well with the exceptional sweetness of the pumpkin and the mirin.

You could prepare the soup with the skin of the kabocha, but we love the intense orange colour of the inside.

What You Need

  • 20 grams of Kelp
  • 1 litre Water
  • 1 Kabocha
  • Light Soy Sauce
  • Mirin
  • Purple Shiso

What You Do

Add the kelp to one litre of cold water. Put on low heat and wait until it has reached 80 °C or 175 °F. Overheating it will make the dashi bitter. In the meantime, wash and peel the kabocha, remove the seeds and dice. Remove the kelp from the pan, discard and add the kabocha. Allow to simmer on low heat for 20-30 minutes until the kabocha is soft. Remove some of the liquid and blender the kabocha. Add liquid until you have the right consistency. In our experience you will need one litre of water to cook the kabocha but it might be too much liquid for a nice, velvety consistency of your soup. Add 2 or 3 tablespoons of mirin and 1 or 2 tablespoons of light soy sauce.  It’s a matter of your preference, ripeness of the kabocha and the kelp.
Best to decorate with some purple shiso, or with sprouts (as we did), provided they’re not too spicy.

Pâté with Mushrooms

Let’s celebrate the season by preparing a Pâté! The combination of a crispy crust, a structured, colourful filling and various flavours is always a pleasure. Making a pâté (or better: a Pâté en Croûte) can be a bit intimidating (especially if you look at the pâté’s prepared during the World Championship!) but that should not stop you from giving it a try. It’s a pleasure to think about the ingredients, work on the construction and enjoy the wonderful aromas from your oven while baking the pâté. And the joy when slicing it: is the pâté as beautiful as you expected it to be?
Feel free to make your own puff pastry, but if you buy ready-made pastry, please check it’s made with butter, flower, salt and water only and not with rapeseed oil, palm oil, yeast etcetera.

Wine Pairing

A red, medium bodied wine will be a great accompaniment of this Pâté en Croûte. In general you’re looking for a red wine with aromas of black fruit, floral notes and delicate wood. The tannins should be soft or well-integrated. We enjoyed a glass of Pinot Noir from La Cour Des Dames

What You Need

  • 150 grams of Cèpes
  • 250 grams of Champignon de Paris
  • 1 small Shallot
  • Handful of Spinach
  • Half a cup of Rice
  • Parmesan Cheese
  • Parsley
  • One Egg
  • Puff Pastry
  • Black Pepper

What You Do

Start by cooking some rice, you will probably need a tablespoon of cooked rice. Clean the cèpes and see how they best fit in the pâté baking mould. Perhaps you need to trim the stems or the caps to have the best result when it’s ready. Set the cèpes aside.
Clean the champignons and wash the spinach. Peel and finely chop the shallot. Warm a heavy iron skillet, glaze the shallot, add the cleaned and lengthwise halved mushrooms (and the leftovers of the cèpes) and cook them on medium heat for 10 minutes or so. In parallel blanch the spinach, drain and squeeze. Also in parallel, coat the mould first with baking paper and then with puff pastry. Make sure you have some extra pastry to create the lids for the chimneys. Chop the cooked mushrooms. Chop the spinach. Add the egg to a large bowl and whisk. Add the cooked mushrooms to the bowl, add some black pepper, chopped parsley and finely grated Parmesan Cheese. Add some spinach, just to have some extra colour. Add the rice. The rice will help absorb additional juices from the cèpes, so how much rice you need is a matter of looking at the mixture and the cèpes.

Now it’s time to build the pâté: start by creating a bottom with the mixture, position the cèpes and add the remainder of the mixture. Make sure the mixture envelops the mushrooms. Close the pâté with the pastry. Make two holes in the roof of the pâté and use baking paper to create 2 chimneys. Transfer to the oven (180 °C or 355 °F) for 45 minutes. Use the remainder of the puff pastry to make 4 mini cookies that will function as lid on the chimney (of course, you only need 2, but baking 4 allows you to choose the best). After 45 minutes add the 4 cookies, bake for another 10 minutes. Mix some egg yolk and coat the pâté and the cookies. Cook for another 5 to 10 minutes. The duration and temperatures very much depend on the shape of the mould and the pastry.

Transfer from the oven, remove the chimneys, glue the lids on the chimneys using some egg yolk and let cool. Once cool, remove from the mould, transfer to the refrigerator and wait until the next day.