Field Peas with Summer Savory

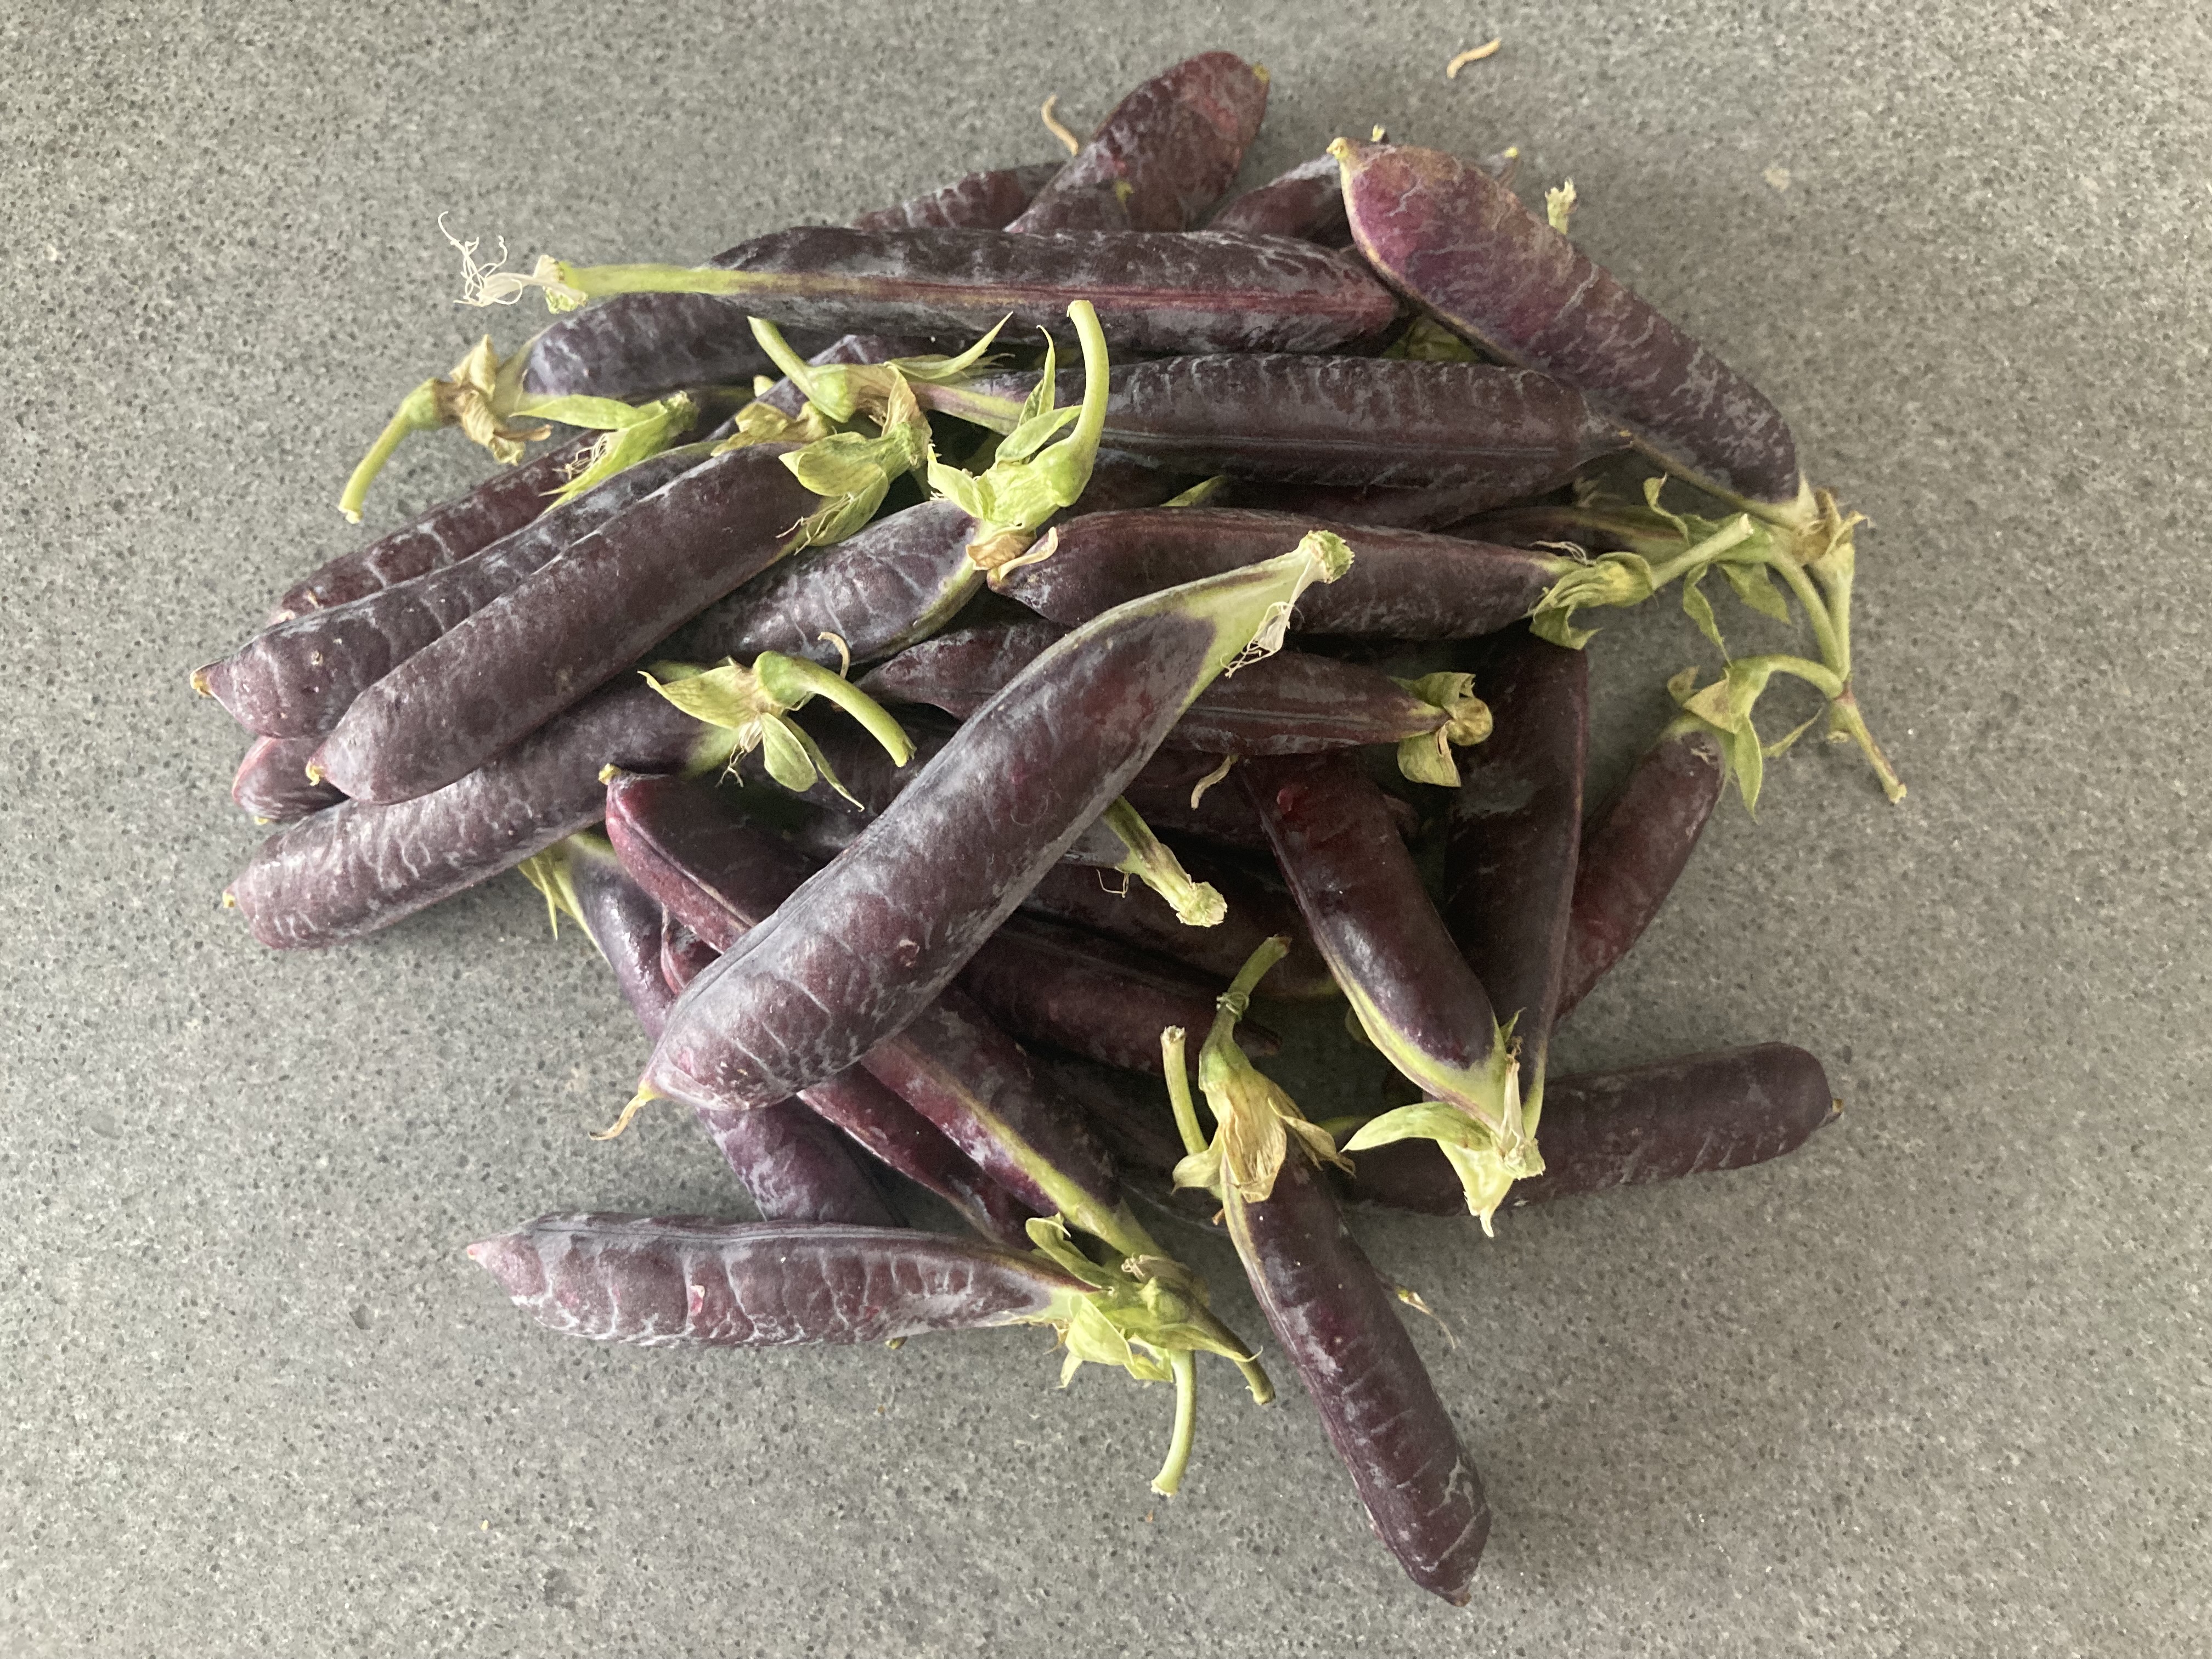
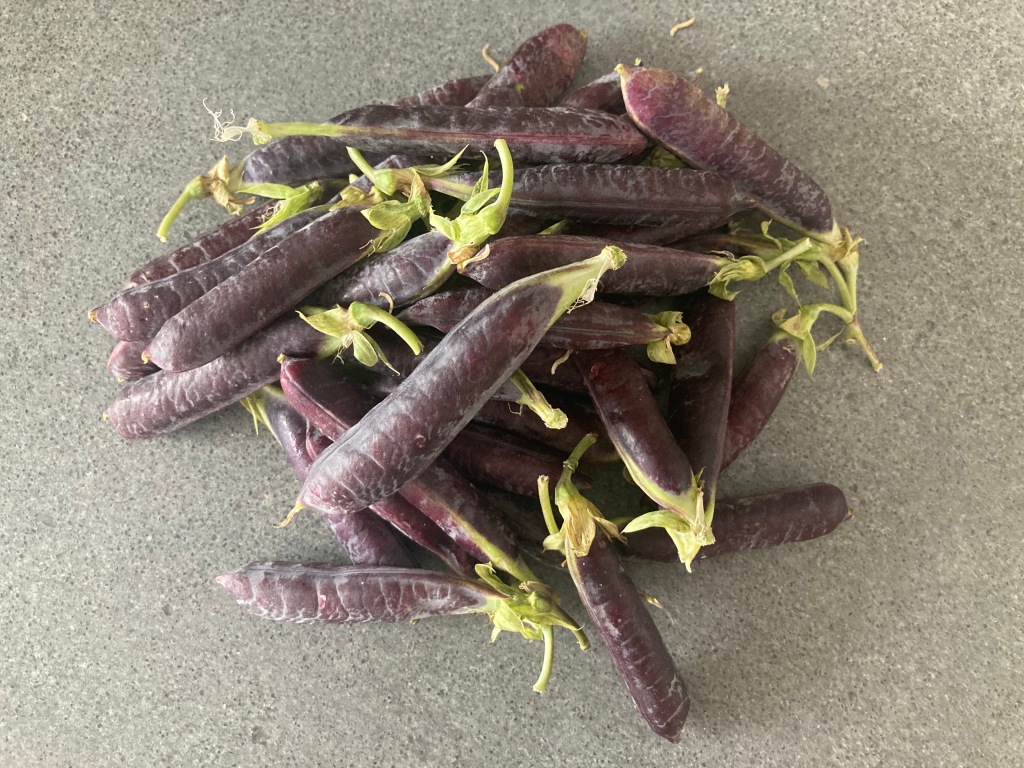
Seasonal products, we simply love them! Fresh field peas are available for a few weeks in June and July only. They are easy to recognise by their purple pod. An old and forgotten vegetable, perhaps because the (older) peas tend to be starchy and not very tasteful.
Young field peas, however, are sweet and moist with a good texture. Combining them with summer savory is a great idea, but if you want to give your field peas a more modern twist, then replace the savory with fresh oregano.
Field peas, different from fresh green peas, require some fat or oil. The combination with for instance crispy fried pork belly works really well. Simple, a bit old fashioned and delicious.

Wine Pairing

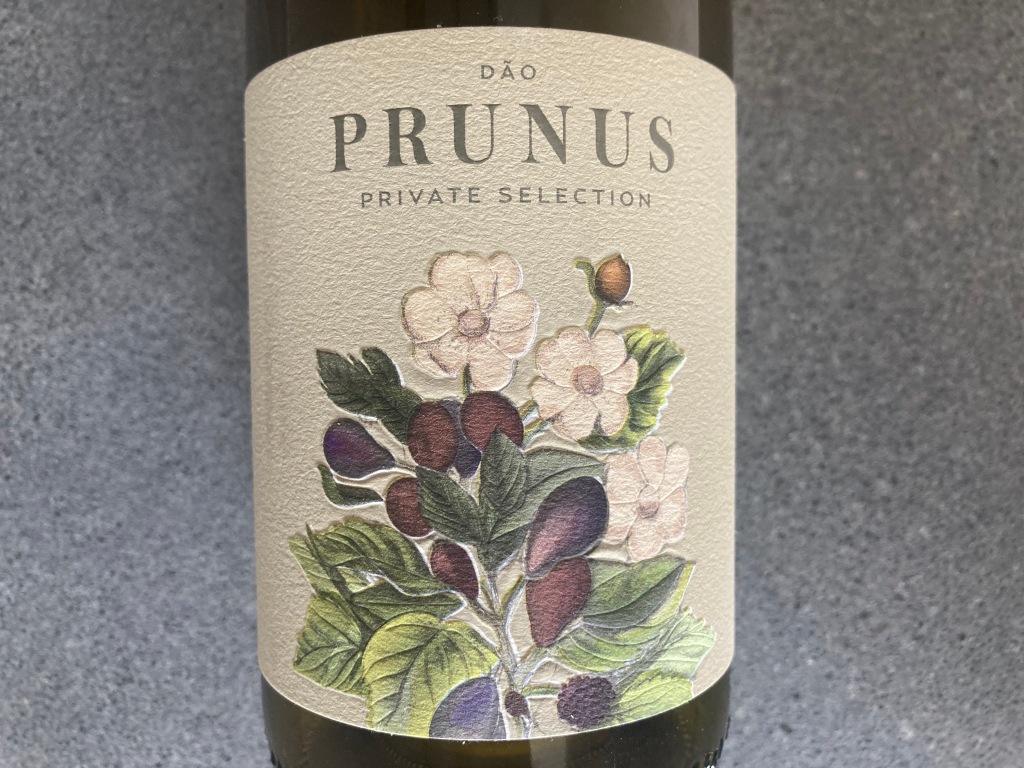
We combined our field peas with pork fillet. The dish is robust, so we decided to drink a red wine from the Dão region in Portugal, to be more precise we enjoyed a glass of Prunus as produced by Gotawine. One of our favourites! It has lots of dark fruit (plums, blackberries, cherries), it is lightly oaked and its taste is fruity, long and well balanced. Grapes include Jaen (also known as Menci), Tempranillo and Touriga Nacional. In general you’re looking for a medium bodied, not too complex, yet elegant red wine.

What You Need

  • Fresh Field Peas
  • Sprigs of Summer Savory
  • Olive Oil

What You Do

Shell the peas and steam them for 4 minutes maximum. Let cool and set aside. Heat a small skillet, add olive oil, reduce heat and very gently fry the peas. Add some finely chopped summer savory. Mix. Just before serving add the remaining chopped savory, mix and serve.

If you combine the field peas with pork fillet, then use excellent organic fillet only. Fry the fillet in a heavy iron skillet until nearly done. Wrap in foil and leave to rest for 10 minutes. Add the meat juices to the pan, add some mustard and (vegetable, veal or chicken) stock. Reduce. Add some cold water to help the emulsification. Slice the fillet. It should be a touch pink. Serve with some black pepper and the jus.
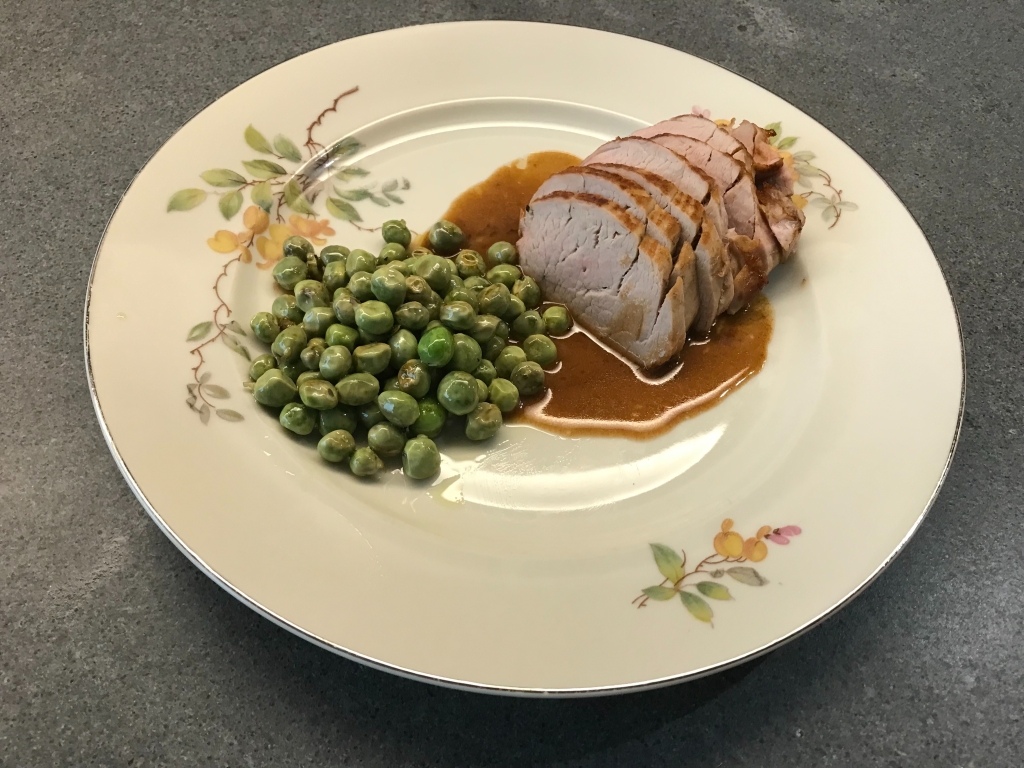
  • Field Peas with Summer Savory ©cadwu
  • Fresh Field Peas ©cadwu
  • Prunus Label ©cadwu

All Our Recipes For You

A few years ago we created an overview of recipes per season, simply because it’s such a good idea to enjoy what is available in the season. Nice to eat strawberries in Winter, but isn’t it a much better idea to enjoy seasonal slow cooked pears?

We then introduced overviews per course, ranging from side dish to lunch. The categories didn’t always make sense, so we added a few more, making our admin more complicated, especially when we updated a recipe or a picture.

The obvious thing happened: we lost track of recipes, noticed some links were broken and the overviews became incomplete.

So how to organise this blog?

After much debate and intense workshops (not really) we’re pleased to present to you an old fashioned, up to date and very easy to use (and maintain) index of All Our Recipes For You!

All Our Recipes For You ©cadwu

Asparagus with Basil and Olives

End of June means end-of-season for asparagus, morels and ramson (wild garlic). But let’s not be sad! It’s also the beginning of Summer; time to dine al fresco and serve vibrant, light flavours. We combine the very last white asparagus with green asparagus, black olives and basil. Feel free to use green asparagus only. The dish will lose some of its bitterness and complexity but it’s still a great combination of flavours and aromas.

Wine Pairing

Best to enjoy with a full bodied and elegant red wine. Flavour-wise you’re looking for lots of fruit, mild tannins and a touch of wood. We enjoyed our asparagus with a glass of Cantine Due Palme Salento Il Passo Nero 2019. This wine from Puglia (Italy) is made from late harvested negroamaro grapes. Dark berry fruit, medium full tannins and a beautiful deep colour.

What You Need

  • Asparagus
    • Equal Amount of White and Green Asparagus
    • Basil
    • Black Olives (preferably Cailletier or Taggiasca)
    • Olive oil
  • Lamb Chops
    • Olive Oil
    • Thyme
    • Garlic
    • Black Pepper

What You Do

Peel the white asparagus and cut of the end. Wash the green asparagus and cut of the end. Slice the asparagus in nice chunks (4 centimetres or so). Combine the asparagus with olive oil and a nice amount of black olives. Transfer to the refrigerator.
When ready for your al fresco dinner, heat your oven to 190˚- 200˚ Celsius (or 375˚- 390˚ Fahrenheit). Mix after 10 minutes and again after 20 minutes. The asparagus should now be ready (if not, another 10 minutes should do the trick). Add half of the basil leaves.

If you serve the asparagus with lamb chops: leave the chops to marinate in olive oil, crushed garlic and thyme for 24 hours in the refrigerator. Remove thyme. Heat a heavy iron skillet and fry the chops in olive oil (4 minutes depending on the size). When ready keep the chops warm in aluminium foil. Fry the thyme in the remaining oil. In parallel add more basil leaves to the asparagus and mix.

  • Asparagus with Basil and Olives ©cadwu
  • Ingredients of Asparagus with Basil and Olives © cadwu
  • Asparagus with Basil and Olives Ready to go into the Oven© cadwu

Grilled Asparagus with Parmesan Cheese

We enjoyed this dish as a starter when in Milan, on a beautiful evening, eating al fresco and enjoying the wonderful combination of the sweetness and bitterness of the asparagus, the slightly caramelised sugars as a result of grilling the asparagus and the salty and sweet cheese. A glass of Pinot Grigio was all we wanted.
In Milan we enjoyed grilled green asparagus, but it works equally well with white asparagus.
This is typically a dish to prepare when the asparagus season is at its high and outside temperatures feel like summer.

Wine Pairing

Serve with a glass of Pinot Grigio, a Muscat or Pinot Gris from the Alsace region or a rosé with character. The wine needs to combine with a range of very diverse flavors so it should be a bit complex.

What You Need
  • 3 Asparagus per person
  • Olive Oil
  • Parmesan Cheese
  • Black Pepper
What You Do
  1. Peel the asparagus and cook or steam until slightly tender
  2. Depending on the size we would say 10-15 minutes in the Russel Hobss steamer
  3. Leave and let cool
  4. Take a plate, add some oil to the plate and use it to coat the asparagus with oil
  5. Heat the pan and grill the asparagus for 4*1 minute, making sure you have a lovely brown (not too dark) pattern
  6. Or use a contact grill for 2*2 minutes
  7. Serve on a plate, add some grated Parmesan cheese and pepper
  8. Add a generous drizzle of very excellent olive oil.

Pasta with Sage

We love using wonderful Mediterranean herbs such as basil, thyme, sage, marjoram, rosemary, oregano, saffron and tarragon. So we couldn’t resist buying a large bunch of sage and cooking this very tasteful, simple and uplifting starter. Sage has been around for many, many years and is an essential ingredient in many countries, both for medicinal and culinary purposes. Its taste is somewhat soapy, with a touch of acidity, a little bitterness, subtle eucalyptus and slightly peppery. Did we mention unique?
Preferably use fresh, thin pasta or Japanese udon, lots of butter and your best olive oil when preparing this dish.

Wine Pairing

We enjoyed our pasta with a glass of Bianco di Custoza 2020, made by Monte del Frà from Italy. It is a well-balanced, dry white wine, with a fruity nose. Its colour is straw yellow, with pale green highlights. In general you’re looking for a light, aromatic dry white wine.

What You Need

  • Pasta
  • Butter
  • Bunch of Sage
  • Olive Oil
  • Parmesan Cheese
  • Black Pepper

What You Do

Melt the butter in a large pan, devein and chop the leaves, add the sage to the butter, stir. The butter should embrace the flavours and aromas of the sage. When the mixture is nearly ready (this will take only a few minutes) cook the pasta. Grate some fresh Parmesan cheese. Keep a glass of the cooking liquid of the pasta, drain the paste, add it to the pan, mix, add some olive oil, mix, add a spoonful or two of the cooking liquid and make sure the pasta is fully coated with sage, butter and oil. Perhaps some black pepper. Garnish with Parmesan Cheese and serve on a warm plate.

Onion Confit

In 2010 James Tanner published his inspiring book Takes 5: Delicious Dishes Using Just 5 Ingredients. Short shopping lists, easy recipes and tasty results: what more can you ask for! He could have included Onion Confit in his book, but he didn’t. Five ingredients: onions, olive oil, time and perhaps bay leaf and some water are all you need to create a condiment that is perfect with roasted meats and foie gras. It comes with subtle, natural sweetness and lots of umami.

Let’s first discuss the name: it is confit because it is cooked slowly, in fat, over a long period of time. It’s not chutney for the simple reason that it does not originate from India or Pakistan plus there is no need to add various herbs and spices. It’s also not marmalade because we don’t use the peel of the onion.

Onions contain a chemical substance called inulin (also to be found in for instance bananas and Jerusalem artichokes) and given time and warmth it will breakdown into fructose: fruit sugar. Vinegar stimulates this process. So it’s yes to adding vinegar and no to adding sugar.

So how to turn white onions into a deep brown confit? Obviously we don’t add brown caster sugar (as unfortunately so many recipes suggest). Perhaps use balsamic vinegar? Nice try, but no. The only thing you need to do is to cook the onions on very low heat for 8 hours or so.

Wine Pairing

We served our Onion Confit with Terrine de Foie Gras on toast and a glass of Coteaux du Layon produced by Château de la Roulerie. This is a slightly sweet, golden white wine, made from Chenin Blanc grapes. In general a late harvested, not too sweet wine will be an excellent choice but you could also go for a glass of Champagne or Gewurztraminer.

What You Need

  • 4 White (or Spanish) Onions
  • Olive Oil
  • 1 tablespoon of Vinegar
  • Optional
    • Bay Leaf
    • Water

What You Do

Peel, slice and quarter the onions. Warm a heavy enamelled iron pan, add olive oil and add the onions. Allow to simmer on very low heat for 30 minutes. Add the vinegar and allow to simmer for an additional 8 hours. Check every hour, give a gentle stir and if needed add some water. Let cool and store in the refrigerator. It will last for a week.

Omelet with Winter Truffle

Black truffles are harvested from November to March, so be extravagant and buy one before the season ends. When buying a truffle, please ask if it’s okay to smell them, because the aroma will tell you everything you need to know about the quality.
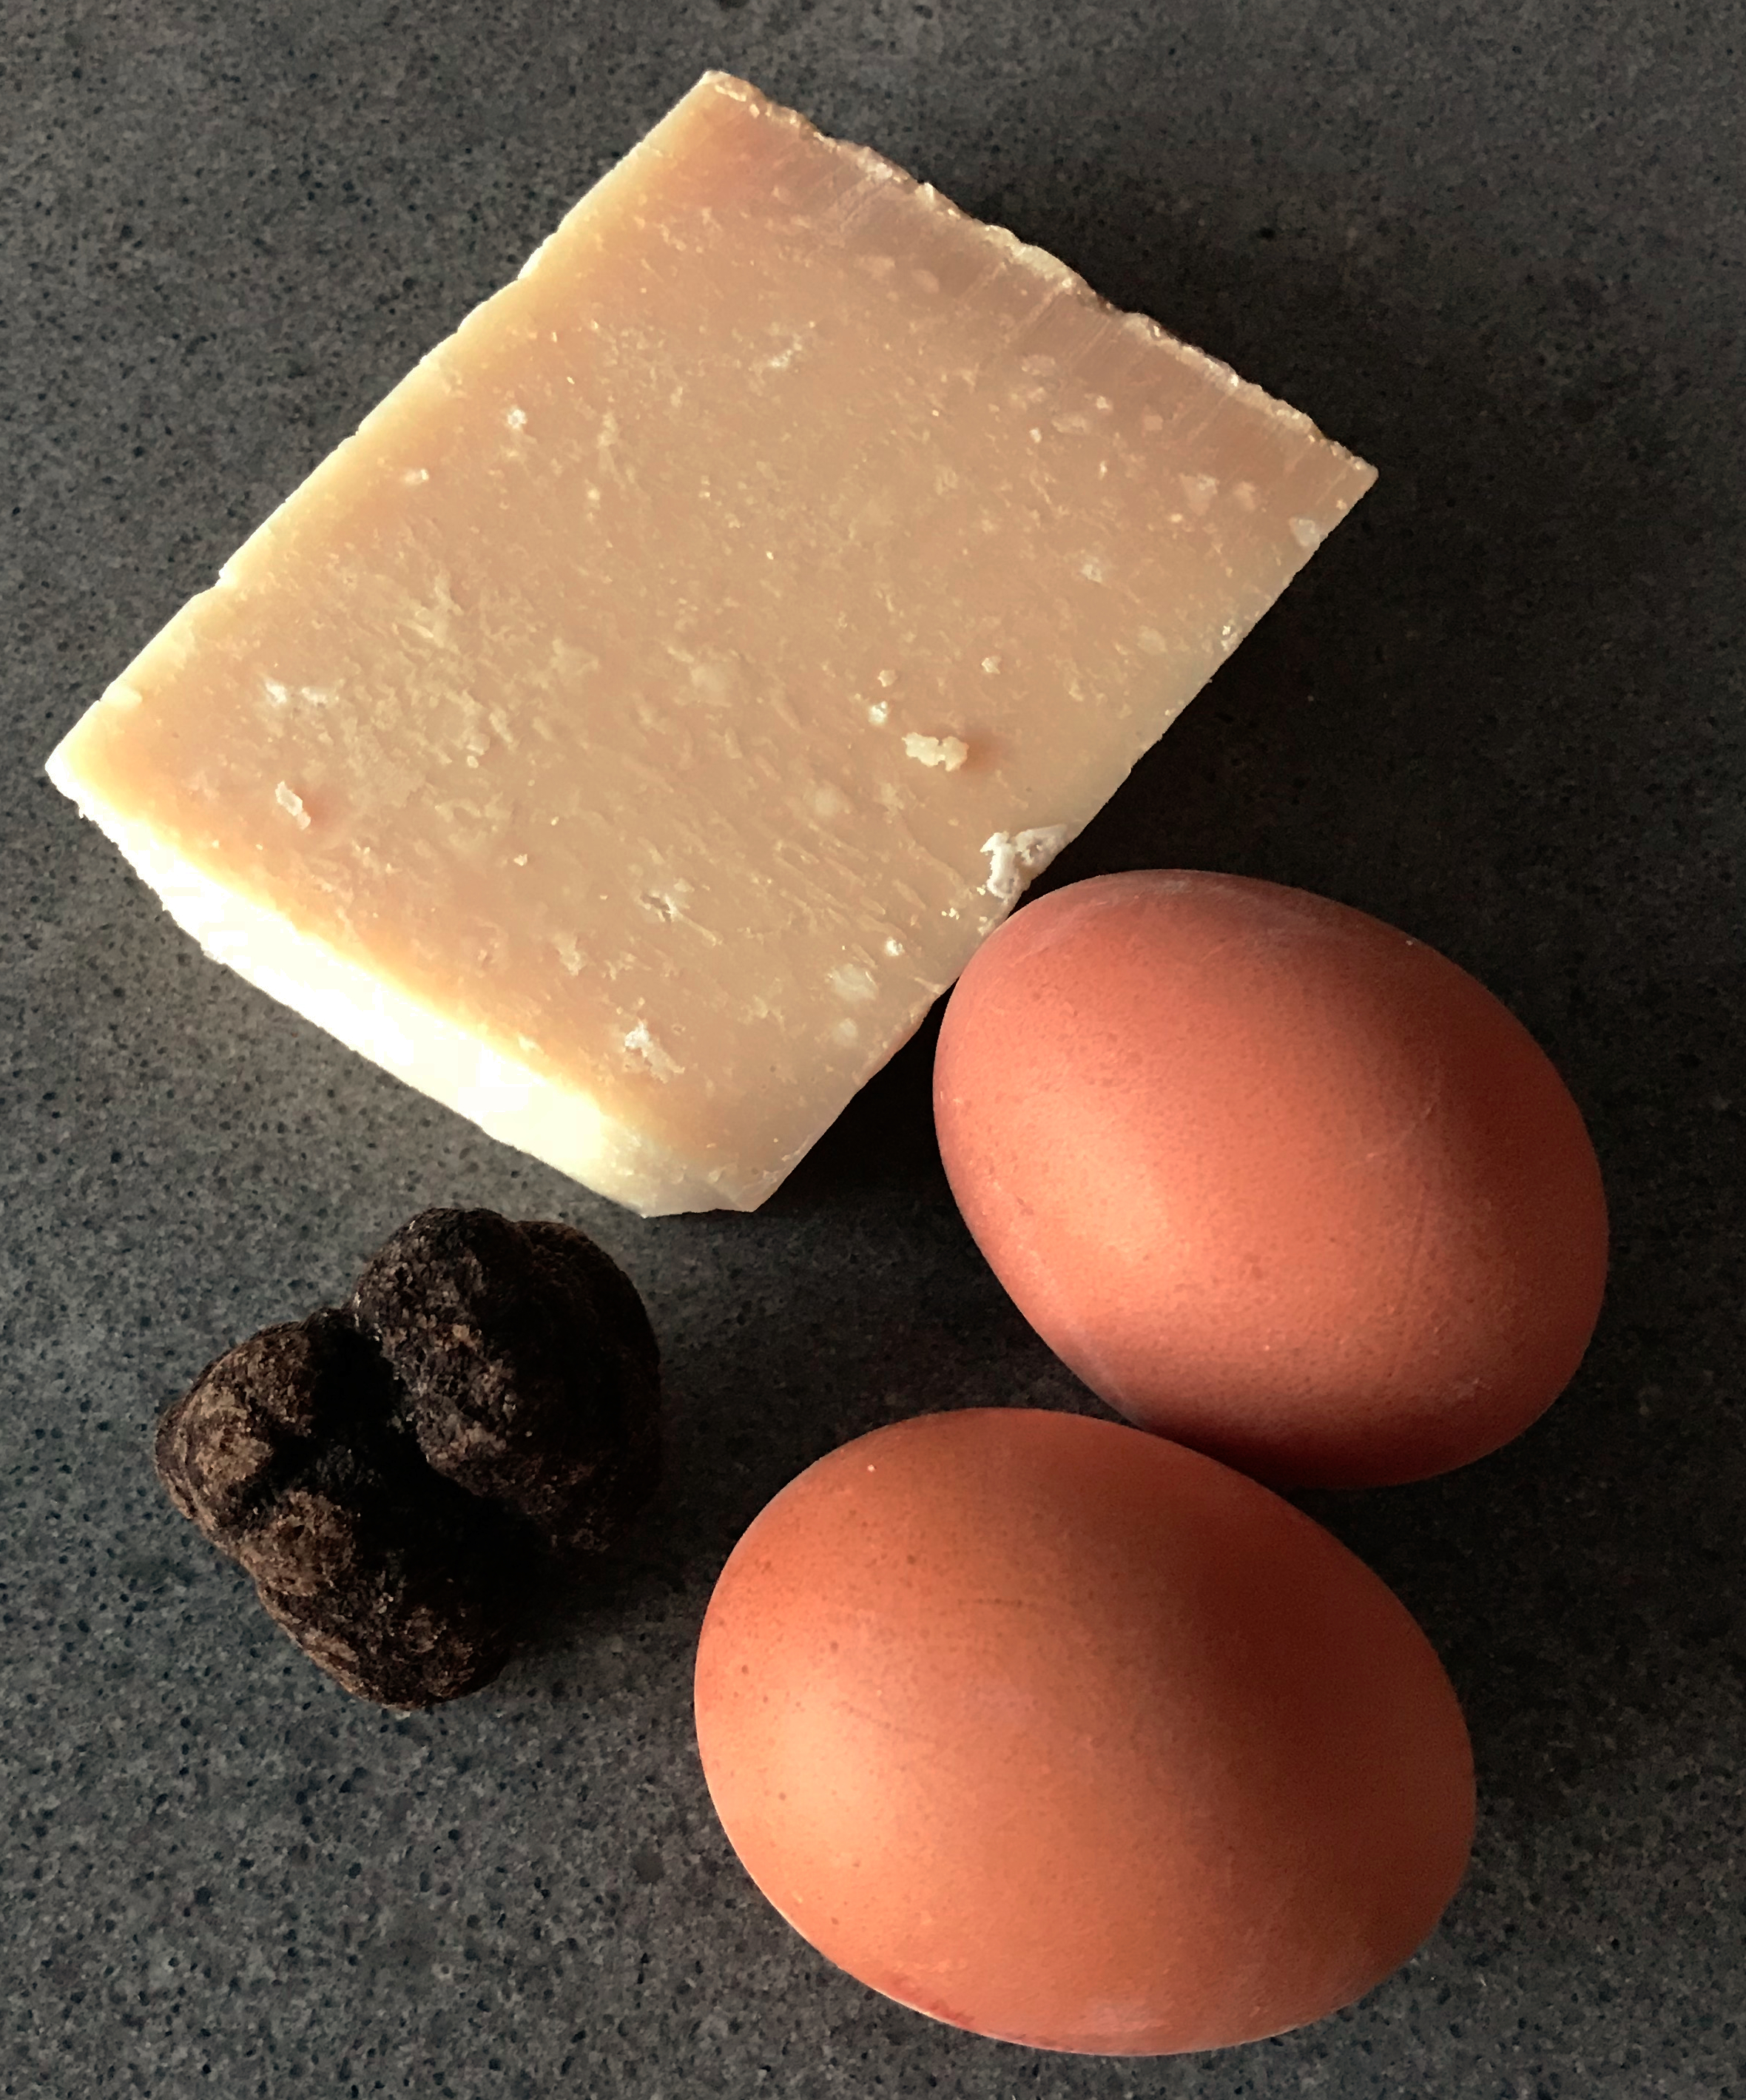
Black truffles combine really well with a warm purée of potatoes, with scallops, risotto and everything eggs. We used our truffle to make one of the simplest and tastiest truffle dishes ever: an omelet with truffle and Parmesan cheese.
If you store a black truffle for a day or so, then please store it in a small box with some rice and an egg. The rice will prevent the truffle of becoming wet and the egg will embrace the aromas of the truffle and become a treat in its own right.

Wine Pairing

A not too complex white wine goes very well with this omelet, best would be a classic Pinot Blanc or Riesling from the Alsace region (for instance produced by Kuentz-Bas). Think fruity aromas, floral characteristics, minerality and a touch of acidity and sweetness.

What You Need

  • 2 Eggs
  • Butter
  • Parmesan Cheese
  • 10 grams or (budget permitting) more Black Truffle
  • White Pepper

What You Do

Clean the truffle if necessary. Take a fairly small iron skillet and make sure the pan is warm through and through but not hot. Using a fork (a spoon is even better) whisk the two eggs together. Add butter to the pan and wait until it is melted. It should not change colour or sizzle. An omelet should not be fried; the bottom must remain yellow. Add the whisked egg to the pan and wait until the egg is beginning to set. Check the consistency with your fingers. There is no alternative to baveuse! Take your time.
Serve the omelet on a warm dish with some freshly grated Parmesan cheese, white pepper and grated black truffle.

Chioggia Beet Salad

An elegant Starter

What better way to start a nice long dinner than a dish that is light, colourful, surprising and refreshing? A Consommé of Yellow Tomatoes for instance? Or Scallops with Winter Truffle? Or would you prefer a salad made with Bietola da orto tonda di Chioggia? Sounds exotic, but actually it’s a salad made with Chioggia beet: a delicious beet with deep pink and white spirals. It originates from Italy or, to be more precise, from the coastal town of Chioggia, not far from Venice. When cooking the beet its colours fade, creating an even more enticing dish.

Another forgotten vegetable that is worth remembering when you do your Christmas shopping.

Wine Pairing

The dressing comes with firm acidity, balanced by the sweetness of the beet and the spring onion. Wine pairing is a not straightforward because of this combination. Our suggestion would be a Sauvignon Blanc. We enjoyed a glass of Domaine La Tour Beaumont Haut-Poitou Sauvignon Blanc 2019. It has clear fruity and citrus notes and it is well balanced with a good combination of freshness and roundness.

What You Need

  • One Chioggia Beet
  • Excellent Olive Oil
  • White Wine Vinegar
  • Spring Onion (or Scallion)
  • White Pepper

What You Do

The day before wash the beetroot and wrap in aluminium foil. Leave in the oven on 180° Celsius or 355° Fahrenheit for 60+ minutes. Cool and store in the refrigerator.
The next day peel the beet and use a vegetable slicer (or mandoline) to make ridges. This will not only make the dish look more inviting, it will also enhance the taste given there is more coated surface and more air when chewing it. Make a simply, relatively acidic dressing with olive oil and vinegar. Thinly slice the spring onion; best to use the green part only. Test a small slice of beet with the dressing and adjust when necessary. Perhaps some fresh white pepper? If you’re happy with the combination, toss the slices with the dressing making sure everything is nicely coated. Plate up and sprinkle the sliced spring onion on top of it.

Salad of Chioggia Beet ©cadwu

Pears (Slow Cooked)

In 1850 the Gieser Wildeman pear was created by Mr. Gieser Wildeman. The pear is hard, full of tannins and its texture is granulated. Not nice at all. However when cooked slowly, the unappealing pear turns into a red and refined pear. Its taste is sweet with a touch of vanilla. A true Gieser Wildeman will become red (through and through) without any problem, provided it’s cooked slowly.
Belle Angevine, Virulam, Black Worcester, Certeau, Sarrasin, Martin Sec and Saint Rémy (amongst others) will also do the trick although some will turn light red or pink. And perhaps you will have to add some sugar or honey to enhance the flavour.

If a pear doesn’t turn red, then you need to add port, crème de cassis or red wine. The colour of the outside will be red; the colour of the centre a disappointing white. Some people add cloves, prunes and vanilla to give additional flavour to their pears in red wine. No need for this, just buy the right slow cooking pear.

What You Need
  • Pears
  • One Cinnamon Stick
  • Water
What You Do
  1. Peel the pear and leave the stalks on
  2. Add some water to a heavy pan, add the pears and the cinnamon stick
  3. Allow to cook on low heat for at least 6 hours
  4. We cooked ours for 8 hours
  5. Cool and serve, perhaps the next day, for instance with home-made vanilla ice cream

Artichoke Pie

A few days after we published our recipe for Tourte de Blette a friend told us about the great taste of artichoke pie and how popular this dish is in Italy, especially in Liguria. Since we love artichokes, we dived into our cooking library, looking for recipes.
Interestingly most recipes refer to canned or marinated artichokes. But wouldn’t it be much better to use fresh, young artichokes? Other ingredients are cheese (Prescinsêua, or a combination of Parmesan or Pecorino and Ricotta, perhaps some Crème fraîche or even Feta), herbs (parsley, thyme or oregano) and eggs.
We like the combination of artichoke and thyme (as we did in our salad), but we could imagine oregano to be a good choice as well.
We remained close to Tourte de Blette and prepared a rustic, open pie, but feel free to create one with pastry on top.

Wine Pairing

It’s not straightforward to pair artichokes with wine. According to various researchers this is due to cynarin, a chemical especially found in the leaves of the artichoke. When the wine and the cynarin meet in your mouth, the natural sweetness of the wine is amplified, making it taste too sweet. So you have to pair freshly cooked or steamed artichokes with a bone-dry, crisp, unoaked white wine with clear, present acidity. For instance Sauvignon Blanc, Grüner Veltliner or Albariño.
We enjoyed our Artichoke Pie with a glass of Château Pajzos Tokaj “T” Furmint, a dry, bright, fresh wine with zesty, nutty and mineral flavours made from the Hungarian Furmint grape. A unique wine and perfect in combination with the artichokes.
Cynarin and wine are not a match made in heaven but the good news is that cynarin seems to protect your liver and even helps it regenerate.

What You Need

  • For the Dough
    • 100 gram of Flour
    • 50 gram of Water
    • 10 gram of Olive Oil
    • 1 gram of Salt
  • For the Mixture
    • 4-6 young Artichokes
    • One Shallot
    • Olive Oil
    • 30 grams of Rice
    • 2 Eggs
    • Fresh Thyme
    • 20 gram Freshly Grated Parmesan Cheese
    • Black Pepper

What You Do

Cook the rice and leave to rest.  Combine flour, salt, water and olive oil. Make the dough, kneed for a minute or so and store in the refrigerator for at least 30 minutes.
Clean the artichokes, steam for 30-45 minutes depending on the size and let cool. Chop the shallot. Warm a heavy skillet, add olive oil and gently fry the shallot. Transfer to a plate and let cool. Using a spoon remove the ‘meat’ from the leaves (bracts) of the artichokes. Chop the hearts in four. You may need to remove the centre choke (the hairs). Strip a generous amount of thyme.
Whisk two eggs and combine with the artichokes, the shallot, the rice, the thyme and the freshly grated Parmesan cheese. Add some black pepper.
Roll out the dough with a rolling pin on a lightly floured surface. Coat a 15 cm or 6 inch round baking form with oil (or use a sheet of baking paper). Place the dough in the baking form and add the filling. Transfer to the oven for 40-50 minutes on 180˚-200˚ Celsius or 355˚-390˚ Fahrenheit. Immediately after having removed the pie from the oven, brush the outside with olive oil. This will intensify the colour of the pastry. Let cool and enjoy luke warm.