Peaches with Lavender

The cookbook review project hosted by Bernadette has come to an end, unfortunately! It was inspiring to read cookbooks from chefs that were new to us, like Patricia Wells and Nagi Maehahi. It was fun preparing dishes for our esteemed panel and sharing their views with you. Thank you so much Bernadette, for running the project!

José Pizarro - Basque

Our suggestion to the cookbook review team was a book mentioned by Sheree: José Pizarro’s book Basque: Spanish Recipes from San Sebastián & Beyond, published in 2016. It’s a beautifully designed and edited book with a range of diverse dishes, for instance Veal Chops with Black-Eyed PeasPan Fried Cèpes with Egg Yolk and Cream Cheese Ice Cream with Blackcurrant and Camomile Syrup. The book is recommended by Claudia Roden (‘José Pizarro is an amazing cook who has brought us the best of Spanish food’) and Rick Stein (‘José’s recipes take us to the very heart of the best Spanish cooking’).

José Pizarro was born in the Extremadura region in Spain. Currently he owns seven restaurants in the UK and one in Abu Dhabi. He published six Spanish cookery books, received various awards and is often credited with making Spanish food popular in the UK.

We decided to make two dishes from the book, Grilled Octopus with Peppers and Aubergine and Roasted Lavender Peaches with Baked Custard. As a main dish we served Pork Belly with Sherry, Chickpeas and Chestnuts, following a recipe published in the Guardian. Our panellist Jan and Anton were happy to provide their feedback.

Grilled Octopus ©cadwu

The starter: Anton mentioned the octopus was tasty, with the right texture and nicely grilled. Jan was also pleasantly surprised by the octopus and its flavours. We all felt the dish as a whole could do with a bit more flavour and some acidity. We also expected the parsley oil to bring the various components together, but that didn’t really happen.

We enjoyed our starter with a glass of Portuguese Vinho Verde, made by Cazas Novas. It comes with floral and fruity notes, has some acidity and a medium body with a good texture and a fresh aftertaste. In general, you’re looking for a wine with freshness, minerality and some acidity.

Pork with Chestnuts, Chickpeas and Sherry ©cadwu

The dish with the pork belly strips was nice. Jan would have preferred the pork to be crispy. Perhaps prepare the stew and the pork separately? Anton enjoyed the chickpeas in the rich combination with sherry, onions, spinach and thyme. Surprisingly flavourful.

The recipe suggests leaving the pot in the oven for 30 to 40 minutes. The next day we decided leaving the leftovers in a warm oven for a few hours. The result was a very nicely integrated stew; a tribute to all ingredients. Next time we will prepare the vegetables a day ahead with some of the pork, perhaps allow for more time in the oven and serve with crispy fried pork.
We enjoyed the dish with a glass of Portuguese red wine, produced by Vidigal. The wine is made with aragonez, castelão and cabernet grapes. The wine has a nice red colour and aromas of fruit and herbs. Its taste is light, with some tannins and a touch of oak. In general, you’re looking for a smooth, easy to drink red wine with character.

Peaches, Lavender and Custard ©cadwu

Time for dessert. Peaches with Lavender? Four peaches and a tablespoon of lavender? Served with custard? We were intrigued.
We looked at the list of ingredients and noticed Patxaran, a sloe flavoured liqueur from the Basque country, normally served as a digestif.
Even more intriguing.

The combination of peaches, lavender, patxaran and custard was a winner. One night we served it with vanilla ice cream, which was a nice and tasty combination. We served our panel the peaches with home-made custard, following the recipe of José Pizarro. It’s a delicious combination. Rich, smooth, silky custard with uplifting, sweet and aromatic peaches. The sauce is a mixture of honey, patxaran and peach juice. Like us you would probably expect the lavender to be over the top, but it worked brilliantly. A winner! Our panel was very pleased and enjoyed the combination.
“Lovely custard, great way to prepare peaches, interesting how the lavender is supporting the fruit, present, never overwhelming, could I have another glass of patxaran?”
Of course you can!

Bernadette final review-question was: should this book be on your shelf? Our answer would be yes, because of the inspirational recipes, the use of ingredients and the beautiful pictures of food and the Basque country.

Basque: Spanish Recipes from San Sebastián & Beyond is available via your local bookshop or the usual channels for 15 euro or 40 US dollar. You can also enjoy the recipes José Pizarro publishes on a monthly basis in the Guardian.

Far Aux Mirabelles

Far Breton is a delicious dessert from the French region Bretagne. Originally there are two versions of Far: a savoury one with buckwheat, butter, milk, eggs, salt and lard (to be served as a side dish) and a sweet one with wheat flour, butter, milk, eggs, sugar and (optional) raisins. The savoury version is a component of the traditional dish Kig ha Farz (meaning ‘meat with far’). The sweet version is better known and nowadays made with prunes, preferably Pruneaux d’Agen. Easy to make and always a pleasure to serve.

Mirabelle (plums) are a speciality from the French region Alsace-Lorraine. The fruit is relatively small, sweet and full of flavour. Often used to make jam or eaux-de-vie. The season is fairly short (a few weeks in August and September only). When you see Mirabelle plums at your greengrocers, then don’t hesitate and buy them. Enjoy them as they are or turn them into Far Aux Mirabelles!

What You Need
  • 80 grams of Plain Flour
  • 2 organic Eggs
  • 50 grams of Sugar
  • 350 ml Milk
  • 15 grams of Butter
  • 500 grams of Mirabelle Plums
  • 15 ml Eaux-de-Vie de Mirabelle (optional)
  • Butter to coat dish
What You Do

Set the oven to 170 °C or 340 °F traditional. Wash, dry and halve the Mirabelle plums. Discard the pits. Add butter to the milk and heat until lukewarm and butter dissolved. Combine flour and sugar. Add one beaten egg and mix. Add the second beaten egg and mix. Add the milk and whisk until you have a smooth batter.  Coat the baking dish with butter, add the halved Mirabelle plums and the batter. After 40 minutes increase the heat to 190 °C or 375 °F and fan forced for 5 minutes. We prefer the far to be beautiful golden brown even though it seems that a Far Breton is supposed to be much more browned.
Enjoy the far lukewarm as a dessert or the next day cold with a cup of coffee. No need to dust with icing sugar. 

PS

Perhaps you recognize the combination of ingredients. The Far Breton is indeed similar to Clafoutis and Flaugnarde. Far is supposed to be denser than Clafoutis, originates from Bretagne and is made with prunes, whereas Clafoutis originates from the Limousin and is made with cherries. And Flaugnarde? With apricots?
Oh well, let’s simple enjoy these easy to make and delicious desserts.

Baba Au Mandarine Napoléon

On April 27th, we celebrate the birthday of the King Willem-Alexander of the Netherlands. The Dutch royal family is also known as ‘de Oranjes’, which is reflected in the use of the colour orange when referring to Dutch royalty. Actually, there is no link between the royal family and the colour. The ‘orange’ in their name refers to the French city of Orange, a Principality one of his ancestors inherited in 1544.

Over the years we prepared Orange Sabayon, Queen’s Soup, Orange and Almond Cake, Bouchée à la Reine, Orange Flan and Canard à l’Orange on this day. What better way to celebrate a birthday than baking a Baba, a flavourful and moist cake? Traditionally a Baba au Rhum (preferably with raisins or currents) is served with a syrup based on brown rum. Today we use a delicious Belgian liqueur: Mandarine Napoléon. It’s a unique mandarin liqueur, made from macerated Sicilian mandarins and cognac. It was originally created in 1892 by Napoleon’s physician. Rich, long, intense en delicious!

What You Need
  • 10 large Baba’s
    • 4 grams of dried Yeast
    • 100 ml Milk
    • 15 grams of Sugar
    • 200 grams All Purpose Flour
    • 2 Egg Yolks
    • 2 Eggs
    • 100 grams of Butter
    • 80 grams of chopped Candied Orange Peel
    • 2 grams of Salt
    • Butter to coat the moulds
    • Finely chopped Candied Orange Peel
  • Syrup
    • 500 ml of Water
    • 200 grams of Sugar
    • 200 ml Mandarine Napoléon
What You Do

The milk should be lukewarm and the butter melted but not hot. Start by combining milk, yeast and sugar. Mix well. Add the sieved flour and mix. Now it’s time to add the eggs and the egg yolks. Use kneading hooks to mix very, very well. This may take 10 minutes. The result should be an elastic, sticky dough. Add the butter, mix and then add the salt. The dough is now even stickier. Coat the moulds with butter. Add the dough to the moulds and let rise for approximately 2 hours. They should double in size. Preheat your oven to 200 °C or 400 °F and bake for 15 minutes depending on the size. Keep an eye on the baba’s, you may want to reduce the heat after 10 minutes.
In the meantime add water and sugar to a pan. Warm the mixture until nearly boiling. Stir and make sure the sugar is completely dissolved. Now add Mandarine Napoléon to taste. Leave to cool. Add an extra splash of Mandarine Napoléon to give the syrup an extra push. Allow the baba’s to cool somewhat, remove from the mould and let them soak in the syrup for a few hours, or longer. A day or two will be perfect, Sprinkle with finely chopped candied orange peel and serve at room temperature.

Baba au Mandarine Napoléon

Panna Cotta with Agar

A few days ago Suzanne’s Mom wrote about Piper McAloon. At 17 she became Pastry Chef at Foglia, an award-winning plant-based restaurant located in Bristol, Rhode Island. A truly inspiring story!
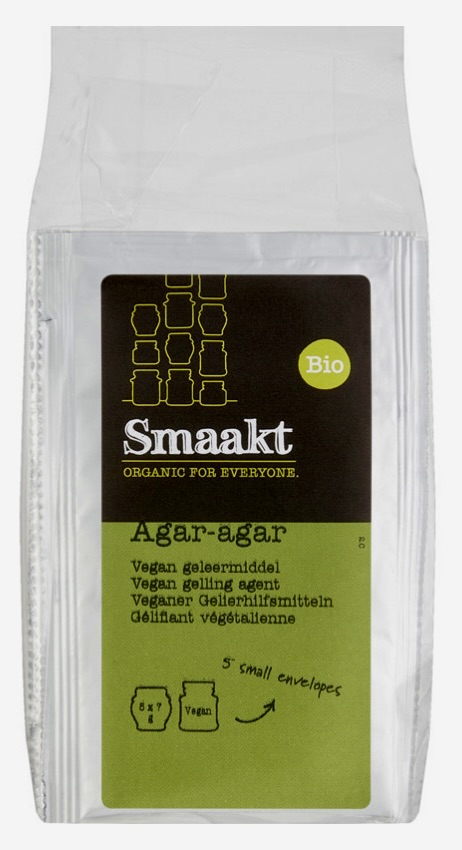
When asked what she is making right now, she mentioned Panna Cotta. At Foglia she makes a gluten-free version with agar. Which was something we wanted to do for a long time. We love Panna Cotta, but using gelatine (made from animals from the meat industry) is far from ideal. Agar is made from the cell walls of red algae. Popular throughout Asia and fortunately also available where we live.
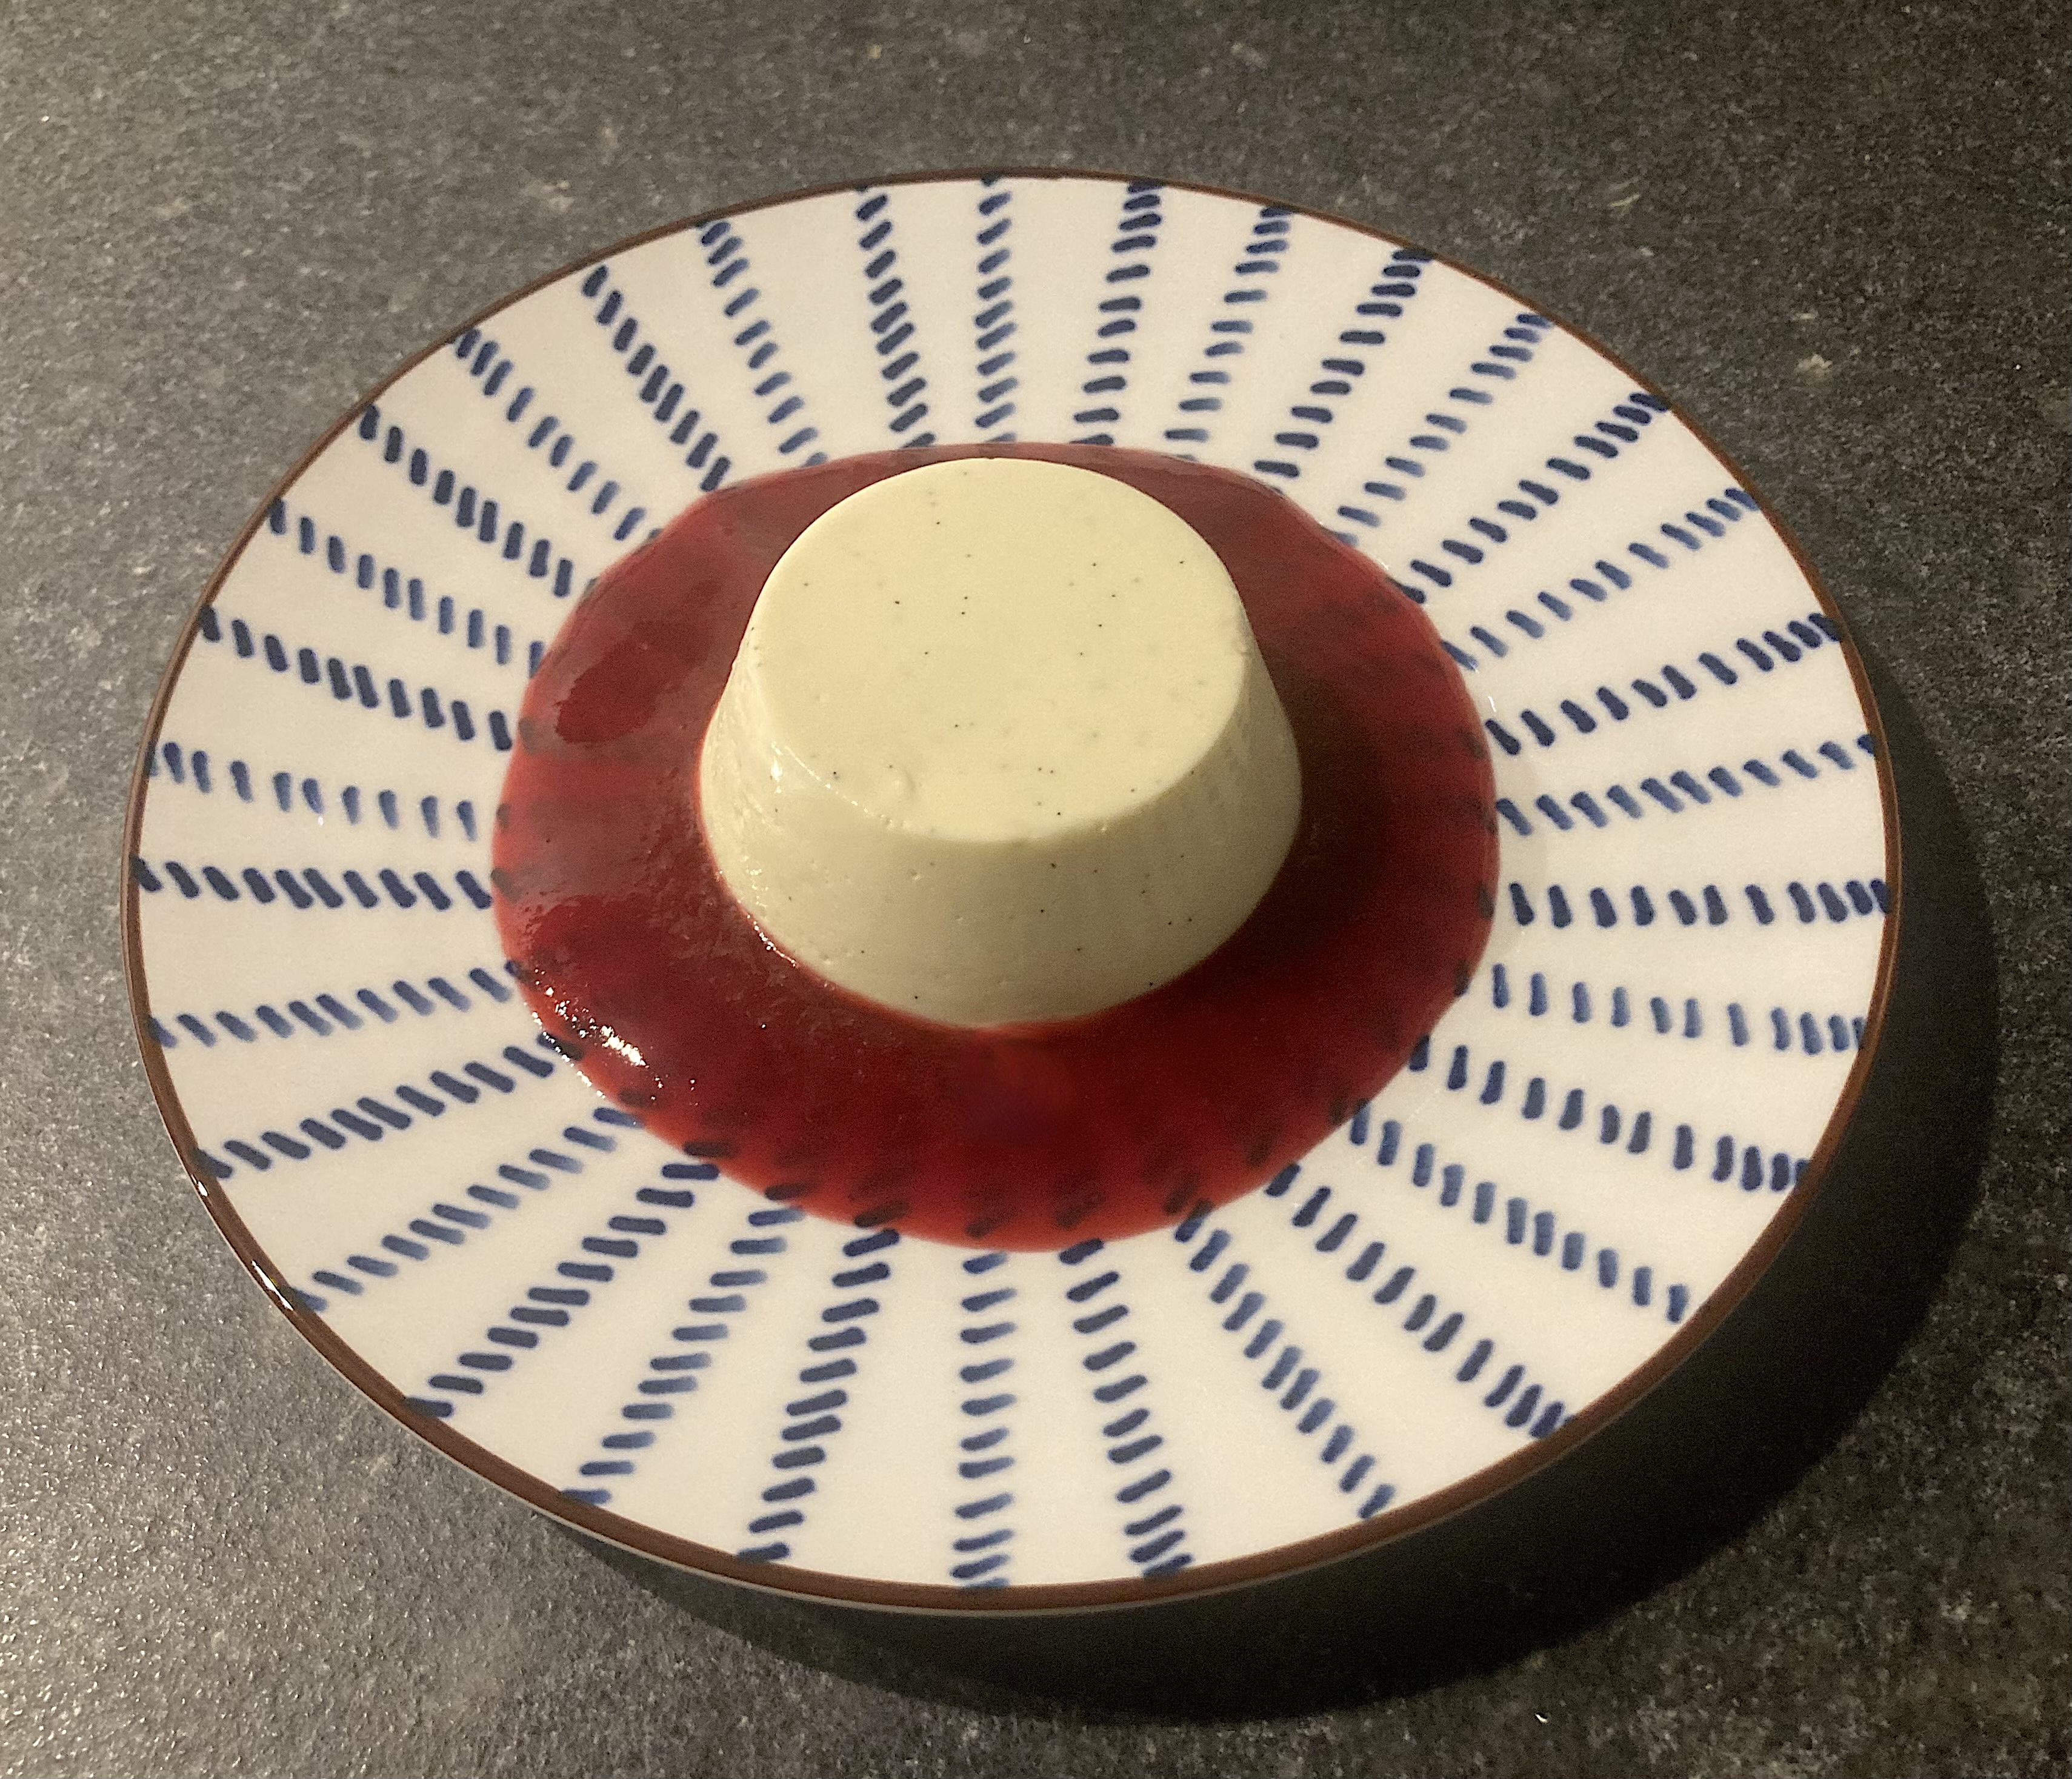
We served our Panna Cotta with a coulis of red berries. Very tasty, but was it a real Panna Cotta? It didn’t seem as creamy as the version with gelatine. The texture was certainly different. The version with gelatine was smoother and firmer; more how we think panna cotta should feel in your mouth. We were happy with the result, but we’re not sure if we will use agar next time we’re preparing Panna Cotta. To be continued!

What You Need (for 4)
  • 500 ml fresh Cream
  • 1,5 grams of Agar (powder)
  • 1 Vanilla Bean
  • 30 grams of Sugar
What You Do
  1. Add the agar, the seeds of the vanilla bean and the sugar to the cream
  2. Mix very well, the agar must to be completely dissolved
  3. Bring to the boil on slow/medium heat
  4. Stir frequently
  5. Keep close to boiling for 1 or 2 minutes
  6. Continue stirring
  7. Transfer to a water bath with cold water
  8. Cool the liquid somewhat before filling the forms. This is where you need to be careful. Gelatine gels at a lower temperature than agar. You need to transfer the mixture when it’s relatively warm
  9. Use silicone molds; they work very well panna cotta
  10. Let cool and then store in the refrigerator
  11. Don’t forget to seal with cling foil, otherwise your panna cotta will absorb aromas from other food in the refrigerator. 
PS
  1. Cook the red berries in some water for perhaps 5 to 10 minutes
  2. Transfer to a sieve and use the back of a spoon to squeeze out the liquid
  3. Add sugar and lemon juice to taste
  4. Reduce the liquid somewhat
  5. Let cool
  6. Alternatively you could also start by blending the berries. This makes squeezing out the liquid easier plus you will get a richer taste and some bitterness.

Pear and Chocolate Pie

A few weeks ago, we were very pleased to win the Great Bloggers Bake Off award in the pie-category with a Pear and Almond Pie. A delicious, uplifting combination that works very well thanks to the crème fraîche and the calvados. The Bake Off is organised by A Jeanne in the Kitchen.

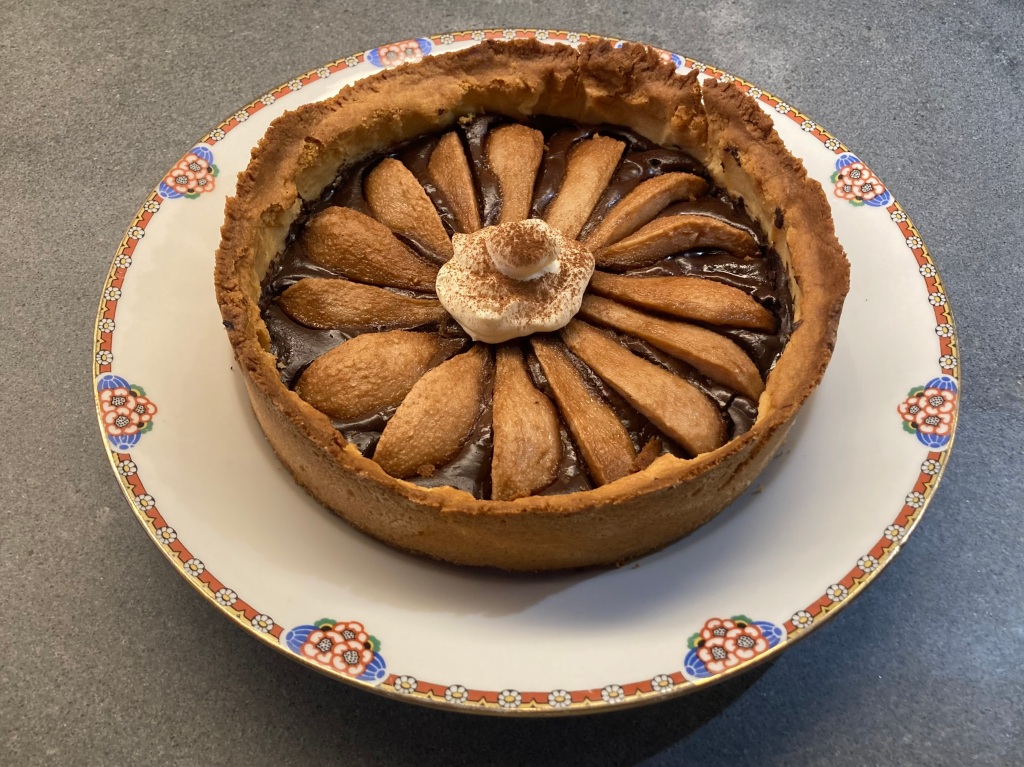
Pear and chocolate is a match made in heaven, that’s why we decided to make a Pear and Chocolate Pie. The result is a rich, intense flavoured pie. A small slice with an espresso will make for a very nice dessert.

What You Need

  • Dough
    • 50 grams White Caster Sugar
    • 100 grams soft Butter
    • ½ teaspoon grated Lemon Peel
    • Pinch of Salt
    • ½ Egg
    • 3 grams Baking Powder
    • 150 grams All Purpose Flour
  • Almond Paste
    • 225 grams of White Caster Sugar
    • 250 grams of Almond Flour
    • One Egg
    • Lemon zest
  • Filling
    • 200 grams Chocolate
    • 50 grams Double Cream
    • 50 grams Sugar
    • 1 Egg
    • 1 Egg Yolk
    • Pears, preferably Doyenné du Comice (or Conference)
  • Decoration
    • Whipped Cream
    • Cinnamon Powder

    What You Do

    Start by making the Dough. Beat the egg. Combine sugar and butter until smooth. Add Lemon zest and salt. Mix. Add the egg. Mix. Combine baking powder and flour. Pass through a sieve and add to the mixture. Best is to use a kitchen mixer with kneading hooks. Wrap in foil and transfer to the refrigerator for at least two hours. The dough freezes well so not a problem if you’ve made too much.

    Now make the Almond Paste. Combine almond flour and sugar. Add one beaten egg and (optional) lemon zest. Mix until you have a paste. Keeps well in the refrigerator for a week and in the freezer for months. You could also use 250 grams of white almonds. Grind these and continue as if almond flour. In this case you need half the quantity (or less).

    Preheat the oven to 180 °C or 355 °F. Coat your pie tin with butter (we used a 15 cm, 6 inch tin). Roll out the dough, it should be 5 mm (0.20 inch). Line the tin with the dough. Don’t worry if the dough breaks; it’s easy to repair. Remove the excess dough. Line with aluminium foil or parchment paper, add baking beans and bake the pie blind for 15 minutes.

    When the pie is in the oven, it’s time to make the Filling. We used cooking chocolate, that makes life a lot easier. Add the broken chocolate to the cream and melt gently in the microwave (set to low power) or au bain-marie. Add sugar. Allow to cool. Lukewarm is fine. Beat the egg.

    Use almond paste to make a thin layer on the bottom of the pie. Take half of the chocolate mixture and (using a spatula) add a layer of chocolate on top of the almond paste. Add the egg to the remaining chocolate, mix well and make a third layer. Peel the pears, quarter and push the pears into the mixture. Bake in the oven for 20 minutes (depending on the pears and the mixture).
    Allow to cool and then remove from the tin.

    Pear and Chocolate Pie ©cadwu
    Pear and Chocolate Pie ©cadwu

    Pear and Almond Pie

    Only a few weeks to go before we can enjoy fresh, new pears and apples. Time to start thinking about a traditional Dutch apple pie, about stuffed apples with raisins and cinnamon, about a chocolate-pear pie and of course about this classic pear and almond pie. Rich in taste with a crunchy crust and a soft, light, creamy filling. A very taste dessert but also great with a cup of tea in the afternoon.

    We begin by making the dough. It freezes well, so it’s a great idea to make a bit extra.

    What You Need
    • 50 grams of White Caster Sugar
    • 100 grams of soft Unsalted Butter
    • Egg (beaten)
    • ½ teaspoon of Lemon Zest
    • 1 gram of Salt
    • 3 grams of Baking Powder
    • 150 grams of All Purpose Flour
    What You Do

    Adding an egg to the dough makes its flavour richer and the dough will be easier to handle when lining the baking tin. The lemon in the crust will work very well in combination with the pear and the sweetness of the filling. Start by combining the sugar and the butter. Use a hand mixer with kneading hooks. When mixed, add halve of the beaten egg, then add the lemon zest. Combine salt, baking powder and flour. Pass through a sieve and add to the mixture. Use the kneading hooks to mix. When done, remove from the bowl and wrap in foil. Store in the refrigerator for at least two hours.

    The filling is a combination of almond paste, crème fraîche and pear. We used Conference, but you could also use the very aromatic Doyenne du Comice. 

    What You Need
    • 50 grams of Almond Paste
    • ½ egg
    • 100 grams of Crème Fraîche
    • 10 grams of Calvados
    • 2 or 3 pears
    What You Do

    Preheat your oven to 200 °C or 390 °F. Roll out the dough, it should be 4-5 mm (0,15-0,20 inch). Coat your pie tin with butter (we used a 15 cm, 6 inch tin). Line the tin with the dough. Don’t worry if the dough breaks; it’s easy to repair. Remove the excess dough. Peel the pears and slice in nice chunks. Combine the almond paste, the egg, the crème fraîche and the calvados until the mixture is smooth. Add the mixture to the tin, Add the pear. Transfer to the oven for in total 40 minutes. After 20 minutes reduce the heat to 160 °C or 320 °F. Allow to cool and then remove from the tin.

    PS

    In case you want to make your own almond paste, then combine 250 grams of almond flour with 225 grams of sugar. Add one beaten egg and (optional) lemon zest. Mix until you have a paste. Keeps well in the refrigerator for a week and in the freezer for months.
    You could also use 250 grams of white almonds. Grind these and continue as if almond flour.

    Tartelette aux Myrtilles

    We love seasonal products and although blueberries seem to be available all year round, however, we think they are best during summer. We use them to make a tartelette. Works very well as dessert, but also nice with a cup of afternoon tea.
    Earlier we baked the tartelette shell ourselves, based on a recipe of Dutch patissier Cees Holtkamp. You could of course also rely on a French classic, for instance Tarte Tatin by Ginette Mathiot. You could also buy the shell and focus on the filling.

    What You Need (Filling)

    • 500 grams of Blueberries
    • Gelatine
    • Sugar
    • Lemon Juice
    • Cream Cheese
    • Double Cream

    What You Do (Filling)

    Wash the blueberries. Keep a handful apart (to be used as decoration). Cook the blueberries with a touch of water and sugar for let’s say 5 minutes. Blender and keep on low heat. Add lemon juice to taste. Follow the instruction on the package of the gelatine. The idea is to thicken the blueberry mixture somewhat, but not to create a gummy layer. Add the gelatine, stir, transfer to the refrigerator and allow to set.
    Whip the double cream and the add some cream cheese. We used Philadelphia Original Soft Cheese but you could also use Mascarpone for a fresher result. Taste and perhaps add more cream cheese or some lemon juice.

    What You Need (Pâte Sucrée)

    • 50 grams of Butter
    • 125 grams of All Purpose Flour
    • 40 grams of Sugar
    • 1 Egg
    • Pinch of Salt

    What You Do (Crust)

    We use tartelette moulds with a diameter of approximately 7 centimetres (2,75 inches). The butter must be soft but not warm (18 °C or 65 °F). Beat the egg. Combine flour, sugar and salt. Dice the butter and knead with the mixture. You could use a hand mixer with kneading hooks. When well mixed, add the egg and knead until you have a nice dough. Leave to rest in the refrigerator for at least two hours.
    Coat the moulds with butter. Remove the pastry from the refrigerator. Place it on a floured surface and roll it out with a rolling pin. Perhaps dust the dough with flour. Divide the dough into 6 portions and make small circles. Press the pastry onto the bottom and to the sides. Cut of overhanging dough. Transfer to the refrigerator for at least 30 minutes.
    Preheat the oven to 175 °C or 350 °F.
    Line with parchment paper and use dry beans to fill the moulds. Blind bake for 10 minutes. Remove the paper and the beans. Bake for another 10 minutes. When golden brown, remove the tartelette from the mould and let cool on a grid.

    Assemble

    When cool and ready to serve, add the blueberry jam, the cream cheese mixture and decorate with remaining blueberries. The tartelette keeps well in the refrigerator for an hour or two. If you store them longer, then the blue of the berries will blur the cream cheese mixture.

    Tartelette aux Myrtilles ©cadwu
    Tartelette aux Myrtilles ©cadwu

    Classic Dutch Apple Pie

    Let’s enjoy some real Dutch comfort food, let’s make a classic Dutch Apple Pie, one that is rich and full of flavours. Could be eaten warm, could be served with whipped cream, as long as you use lots of apples, just the right amount of cinnamon and don’t forget to add some lemon zest to the dough.

    Apple-wise you’re looking for a tart apple, one that will keep its structure when cooked. If the apple is very high in acid content (for instance the Belle de Boskoop, another Dutch classic, also known as Goudrenet) then you risk having compote in your pie. We prefer using Jonagold. Widely available, tasty, just the right firmness and not expensive.

    Making a classic Dutch apple pie is a bit of work, especially when everything is homemade: the dough (shortcrust), the almond paste and the pie itself. Just keep thinking of the delicious result!

    What You Need (Dough)

    • 50 grams of White Caster Sugar
    • 100 grams of soft Unsalted Butter
    • ½ Egg (beaten)
    • ½ teaspoon of Lemon Zest
    • 1 gram of Salt
    • 3 grams of Baking Powder
    • 150 grams of All Purpose Flour

    What You Do

    Adding an egg to the dough makes its flavour richer and the dough will be easier to handle when lining the baking tin. The lemon in the crust will work very well in combination with the cinnamon and the sweetness of the filling. Start by combining the sugar and the butter. Use a hand mixer with kneading hooks. When mixed, add halve of the beaten egg, then add the lemon zest. Combine salt, baking powder and flour. Pass through a sieve and add to the mixture. Use the kneading hooks to mix. When done, remove from the bowl and wrap in foil. Store in the refrigerator for at least two hours. The dough freezes well, so it’s a great idea to make a bit extra.

    What You Need (Almond Paste)

    • 250 grams of Almond Flour
    • 225 grams of Sugar
    • 1 beaten Egg
    • (optional) Lemon Zest

    What You Do

    You could also use 250 grams of White Almonds. Grind these and continue as if Almond Flour.
    Combine the flour and the sugar. Add the beaten egg and lemon zest. Mix until you have a paste. Keeps well in the refrigerator for a week and in the freezer for months.

    What You Need (Classic Dutch Apple Pie)

    • 300 grams of Shortcrust Dough
    • 60 grams of Almond Paste
    • 700 grams of Jonagold
    • 30 grams of Sugar
    • Cinnamon
    • 30 grams of Raisins
    • 30 grams of Currents
    • Butter
    • 1 beaten Egg

    What You Do

    Start by soaking the raisins and currents for 10 minutes in hot water. Drain and squeeze gently. This way the raisins will be tasty and moist. Preheat your oven to 200 °C or 390 °F. Peel the apples, remove the core and chop coarsely. Combine with the raisins, currents, sugar and cinnamon. Roll out the dough, it should be 4-5 mm (0,15-0,20 inch). Coat your pie tin with butter (we used a 15 cm, 6 inch tin). Line the tin with the dough. Don’t worry if the dough breaks; it’s easy to repair. Remove the excess dough. Roll out the almond paste and cover the bottom of the pie with it. Now add the apple mixture, make sure it’s a bit compact. Make strips from the remaining dough and use them to make a criss cross pattern (lattice) on top of the pie.

    Transfer to the oven for in total 40-50 minutes. After 20 minutes reduce the heat to 160 °C or 320 °F and brush the strips with beaten egg. Allow to cool and then remove from the tin.

    Royal Orange and Almond Cake

    April 27th we celebrate the birthday of King Willem-Alexander of the Netherlands. Hip hip hooray!
    The Dutch royal family is also known as ‘de Oranjes’, which is reflected in the use of the colour orange when referring to Dutch royalty. Actually, there is no link between the royal family and the colour. The ‘Oranje’ in the name refers to the French city of Orange, a Principality one of his ancestors inherited in 1544.

    Nevertheless, over the years we prepared Orange Sabayon, Queen’s Soup, Bouchée à la Reine, Orange Flan and Canard à l’Orange on this day. What better way to celebrate a birthday than by baking a cake, a flavourful, moist Orange and Almond cake?

    What You Need

    • One large Orange
    • 3 Eggs
    • 100 grams Fine Caster Sugar
    • 125 grams of Almond Flour
    • 3 grams of Baking Powder

    What You Do

    1. Wash the orange and cook it (meaning the whole orange) for 2 hours in some water
    2. Let cool
    3. Preheat the oven to 170 °C or 340 °F.
    4. Coarsely cut the orange, remove the pits and blender the orange until you have a marmalade-like consistency
    5. Add the baking powder to the almond flour and mix
    6. Beat the eggs and the sugar until light and airy. This may take 5 minutes
    7. Add the blended orange and mix gently
    8. Add the almond flour and the baking powder and mix
    9. Coat a baking spring form (18 cm or 7 inch) with butter, add the mixture and transfer to the oven for 40-45 minutes.
    10. The cake will rise only a little during the baking process.
    11. When ready, leave the cake to cool in the tin.
    Orange and Almond Cake ©cadwu
    Orange and Almond Cake ©cadwu

    Eton Mess

    For some reason we were talking about summer, about typical summer food, about strawberries, green peas, melon, okra, peaches, spinach and new potatoes. Of course, most of these are available all year round, but we like to enjoy the season. Today was different, we really wanted to eat strawberries and we decided to make Eton Mess.
    According to Hilaire Walden in her excellent Book of Traditional English Cookery the strawberry dessert is eaten on June 4th in Eton during a picnic for pupils and parents of Eton College, as part of the annual prize giving ceremony. Others say it was first served during the annual cricket match between pupils of Harrow School and Eton College.
    One anecdote is that a chef planned to make Pavlova but it collapsed, the other anecdote is that the Pavlova was perfect but a dog sat on it, making a mess, an Eton Mess.

    Mascarpone is sometimes added to the cream, but that’s a bit over the top. No need to add sugar to the cream because the meringue is sufficiently sweet. Hilaire Walden suggests soaking the strawberries for two hours or longer in kirsch, an idea we liked. She also suggests using ready-made meringues, which make it even easier to make Eton Mess.

    What You Need

    • Strawberries
    • Raspberries (optional)
    • Kirsch (or Brandy)
    • Cream
    • Merengue
    • Lemon Zest

    What You Do

    Clean the fruit, chop, place in a bowl and sprinkle with kirsch or brandy (one or two small tablespoons per portion). Leave in the refrigerator for at least two hours. Whip the cream. Add some lemon zest, mix. Start assembling the Eton Mess: first a layer of merengue crumbles, then fruit, then whipped cream, then a second layer, same order but make sure you can see some of the red fruit. Serve immediately.

    PS

    In case you want to make your own (French) meringues: you need 2 egg whites and 100 grams of (finely granulated) sugar. The weight ratio should be 1:2, egg white to sugar. Set your oven to 90 °C or 190 °F. Whip the egg whites until somewhat stiff. Start slowly adding the sugar and continue whipping until the egg white mixture shows stiff peaks. Pipe the mixture on a baking sheet, transfer to the oven for 2 hours. The shape of the meringues is not important because you will need crumble for the Eton Mess

    • Eton Mess ©cadwu
    • Book of Traditional English Cookery - Hilaire Walden