Ramson, Wild Garlic, Daslook, Bear Leek, Ail des Ours, Bärlauch: so many names for this great plant: Allium ursinum is one of the highlights of spring. Powerful, pure and tasty. Some say you should only eat the leaves before the plant starts to bloom. But then you can’t combine the leaves and the tasty white flowers in your dish, so we suggest ignoring that idea. The flowers are (if you’re lucky) just a touch sweet because of the nectar. It can be harvested from the wild, but some garden centers also sell ramson. The taste is a combination of onion and garlic, but much greener, longer lasting and with a touch of bitterness at the end. You can turn the leaves into a strong pesto, but better use it as herb with for instance potatoes or gnocchi. See our recipe for Farfalle with Ramson (or Wild Garlic) and Parmesan Cheese.
Johnny Acton and Nick Sandler included two recipes in their classic book Mushrooms (published by Kyle Books and still available via for instance Amazon and other channels). One is a combination of Cod, Trompette des Morts (Black Trumpet) and Ramson. The other one is an intriguing combination of white Asparagus, Morels and Ramson.
Wine pairing
We suggest a full-bodied white wine with a fine acidity. For instance Herdade São Miguel, Colheita Seleccionada. The wine comes with distinctive minerals, along with excellent harmony and a long and well-balanced finish. It works well with the slight bitterness and sweetness of the asparagus; the gently onion and garlic taste of the ramson and the pancake-like taste of the morels.
Many years ago Belgium television broadcasted a program called Duizend Seconden. In this show Herwig Van Hove, Chef and professor in chemistry) would create a three-course meal in 1000 seconds (or less). The show was hosted by Felice (Dré Steemans) who also assisted the Chef when necessary. During the show Herwig van Hove would not only show how things had to be done, but he would also explain why. He came up with the great yet simple idea to create Hollandaise using a microwave.
We all know that sauces like Hollandaise, Béarnaise and many more rely on raising the temperature in a controlled and slow way. That’s why we learn to use a bowl, a pan with gently simmering water, carefully avoiding direct contact between the bowl and the water, whisk, and whisk some more. Some add the butter gradually; others start with the complete mixture. Some add mustard (which is always a great way of creating smoothness and enhancing consistency) and others add corn starch (strictly forbidden). Others dash of to the supermarket and buy some hideous powder (you wouldn’t do that of course). Back to Herwig van Hove: the crucial part is to add warmth to the mixture in a controlled and slow way. So why not use a microwave? It gives you all the control you need for a perfect Hollandaise. We would love to add a link to YouTube, but alas, none of their many shows is on the channel.
Wine Pairing
We enjoyed our Asparagus and Hollandaise with a glass of Petit Sois, 2015, (produced by Bodegas Costers del Sio, Spain) which is a blend of Viognier, Chardonnay and Muscat. The Viognier brings a touch of freshness to the dish, which works well with the lemon in the Hollandaise. Combining white asparagus with Muscat is a classic. The Chardonnay is a bridge to the buttery aspect of the sauce. So the wine in your glass has multiple links to what’s on your plate, which makes it a truly wonderful dish.
What You Need
One Egg Yolk
50 grams of Butter
1 tablespoon of Water
½ tablespoon of Lemon Juice
White Pepper
4 Asparagus
What You Do
Melt the butter in the microwave on low power (10-30% of the power of your microwave, depending on the specifics of your oven). Make sure the butter is luke warm. Now whisk the yolk a bit, add the water and the lemon juice and whisk some more. Add this mixture to the butter and whisk some more. Now transfer to the microwave and give it let’s say 10 seconds of 30%. Remove from oven and whisk. Repeat. You will now feel the consistency changing. If not, don’t worry, just repeat the step. Towards the end of the cooking move to steps of 5 seconds on 10% power. Whisk, play and feel free to find your own way (it also depends on the amount of water in the butter, the temperature of the egg et cetera). When the Hollandaise is ready take it out of the oven, continue whisking gently and cool slightly in a bath of cold water. In parallel steam the asparagus (depending on the size 25 or 30 minutes; they should be well done for this dish). Serve the asparagus with just a bit of white pepper and a generous helping of Hollandaise.
The Bay Bolete is a tasty, fairly common mushroom. Its cap is chestnut (bay) brown. They are easy to find under pines and other conifers in Europe and North America (but we’re not mushroom hunters) and unfortunately not so easy to find on the market. The main season for the Bay Bolete is late summer and autumn. Bay Boletes are rarely infested with maggots. They dry very well. When comparing the taste of Bay Boletes and Cepes we think that Cepes have a more powerful and complex taste whereas Bay Boletes are nuttier.
We remember Brussels sprouts from our youth: over- cooked, greyish, soggy and oh-that-smell (it’s sulphur actually)! Once in a blue moon we take a trip down memory lane and cook them this way, but we prefer a more modern approach, for instance steamed and served with a drizzle of olive oil. Nutmeg is a must by the way.
Wine
We very much enjoyed a glass of Portuguese Segredos de São Miguel, a full-bodied, warm red wine, made from grapes such as Alicante Bouschet, Aragonez, Touriga Nacional and Trincadeira. You will taste lots of fruit and a touch of toast. A juicy wine with nice acidity and smooth tannins. Fresh and vigorous finish.
You could also go for a Malbec. Taste wise the mushrooms and the sprouts are very powerful, so you’re looking for a wine that will clearly support the beef and will also combine with the nuttiness of the mushrooms and the touch of bitterness of the sprouts.
Here is what you need
Boletes
150 grams of Bay Boletes
Olive Oil
Butter
One glove of Fresh Garlic
Parsley
Brussels Sprouts
200 grams of Brussels Sprouts
Butter
Nutmeg
150 grams of excellent Beef (Tenderloin is best in this case)
Black Pepper
Let’s Start Cooking
We begin with the Brussels sprouts: clean them (don’t cut in half as so many do nowadays) and cook or steam them until they are nearly okay. Set aside and let cool. Clean the mushrooms with a brush and/or kitchen paper. Slice (not too thin). Heat a skillet, add olive oil and butter. Add the sliced mushrooms and fry gently over medium heat. In parallel warm a pan with some butter and add the sprouts. The idea is to coat them with butter and warm them, giving them just the cuisson you prefer. Heat a second skillet with olive oil and butter, fry the beef and let rest for 5 minutes or so in aluminum foil. Season the sprouts with some nutmeg. Back to the mushrooms: add chopped garlic to the pan. Wait a few minutes and then add chopped parsley. You could make a jus in the skillet you used for the beef. Serve on a hot plate with extra nutmeg and black pepper.
Caesar’s mushroom (or Amanita Caesarea) is a true delicacy, especially when eaten very young. And raw. Since the young ones have the shape of an egg, they are called ovoli in Italian. It is not recommended to pick these young ones yourself, unless you’re an expert. The young Caesar’s mushroom looks very similar to young Fly Agaric, Death Cap or Destroying Angels. Ones we would not like to see on (y)our plate. The mature Caesar’s mushroom looks very distinct from these very dangerous mushrooms, so fewer risks involved. When you’re in North America, you will probably be able to buy Amanita Jacksonii or Amanita Arkansana, which seem to be very similar, but not completely. As far as we know eating cooked Amanita Caesarea and Arkansana is not a problem; eating them raw could be.
The classic recipe for ovoli is to include them in a salad, with shaved white truffle, parsley, olive oil and parmesan cheese. Another option is to add them to your risotto.
In this recipe we combine the delicate flavour of the Caesar’s mushroom with lots of thyme, rosemary, bay leaf, a touch of garlic, Parmesan cheese and olive oil. Best would be to use Calamintha Nepeta, but using thyme will also do the trick. A garlic glove must be added because the garlic will turn black if your mushrooms are poisonous (not a story to rely on).
Ideally served with Japanese udon because the noodles will be nicely coated with the cooking juices, but feel free to use good pasta as an alternative. One of the benefits of udon is that it is really white, allowing for the yellow of the mushroom to be more present.
We enjoyed our Caesar’s mushrooms with a glass of traditional Burgundy wine from France (100% pinot noir). The wine should have delicate fruit aromas (black cherries, plum) and some earthiness. The wine should be medium bodied and have a crisp acidity. Not too much oak, because oak will overpower the mushrooms. The pinot noir should also be relatively light, allowing for herbal and floral tones. Pinot Noir wines from the new world are in general rounder and higher in alcohol, making these wines more like Syrah or Malbec. We don’t recommend these wines, however tasty, in combination with the dish. A glass of Chardonnay is also an option provided it’s fresh with just a touch of oak and butter.
Clean the Caesar’s mushrooms and remove the white veil (or volva). Make a bouquet garni with lots of thyme, rosemary and a bay leaf. Start by making flavoured olive oil by warming the olive oil in a large skillet and adding the herbs and the garlic glove. Not too hot, you only want the flavours and essential oils to be added to the olive oil. After 15 minutes or so remove the garlic and the bouquet. Now add the sliced Ceasar’s mushrooms and very gently fry them. Just cooked is perfect. In parallel cook the udon. When ready (12 minutes in our case, you don’t want the udon to be al dente), drain the udon but keep some of the cooking liquid. If there is too much starch on the pasta, then think Japan and wash your pasta with cold water. This will remove the starch and allow for a better result. Remove the Caesar’s mushrooms from the pan and keep warm. Add the pasta to the pan, stir and make sure the pasta is fully coated. Add a spoonful or two of the cooking liquid to the pan. Add some grated Parmesan cheese and black pepper. Transfer the Caesar’s mushroom back to the pan and stir very gently, making it into one yellow, tasty mixture. Just before serving sprinkle with extra Parmesan cheese.
Cherries, cherries, cherries! We love them! The rich, sweet taste in combination with the right texture! They just want to be eaten, one after the other. So what better summer dessert than Clafoutis? Small, black or dark red cherries are the best for Clafoutis. We used very taste Dutch cherries, but these can be a bit oversized (but so tasty!). Don’t use candied cherries, Maraschino or anything canned or jarred. Clafoutis is made with milk and eggs, so in a way familiar to Crème Brûlée and Far Breton. But in case of Clafoutis you only need to whisk and wait for it to bake in the oven. That’s all. There are many recipes for Clafoutis, some with cold milk, some with hot. Some use milk and cream, others just milk. We use warm milk because you get a better feel for the consistency, but cold milk will also do the job.
Some add Kirsch and others add Vanilla. We can’t see the benefit of adding Kirsch when using tasty cherries. Vanilla is distracting, so not recommended.
Another decision to make: use whole cherries or pitted ones? Not removing the pits is less work (obviously) and it reduces the risk of a soggy Clafoutis. The pits contain amygdalin, a toxic compound that can also be found in almonds, apple seeds and apricot stones. Amygdalin has the taste of almonds. In this recipe we pit the cherries and compensate for the lack of almond taste by using some almond flour. If you decide to pit the cherries, make sure you remove all of them!
Finally, yes, you can replace the cherries with fresh apricots, berries, peaches or prunes. Then it’s called a Flaugnarde. But nothing as tasty as Clafoutis made with fresh cherries!
Here is what you need:
2,5 dl of regular Milk
2 Eggs
30 grams of plain Flour
10 grams of Almond Flour
20 grams of Sugar
500 grams of Cherries, pitted
10 grams of Butter
Pre heat the oven to 180° Celsius or 350° Fahrenheit. Whisk together the eggs, plain flour, almond flour and sugar. Bring the milk almost to a boil. Stir the milk into the mixture. Butter a large, shallow baking dish, add cherries to the dish and make sure the bottom is nicely covered with cherries. No need to have two layers of cherries. Pour the mixture over the cherries. Bake (lower third of the oven) for 20 minutes, add a few dots of butter, continue baking for another 20 minutes or until the Clafoutis is golden. Leave to cool for 60 minutes or so, this will enhance the taste. Clafoutis should be served luke-warm. You could decorate the clafoutis with icing sugar, but it’s not essential.
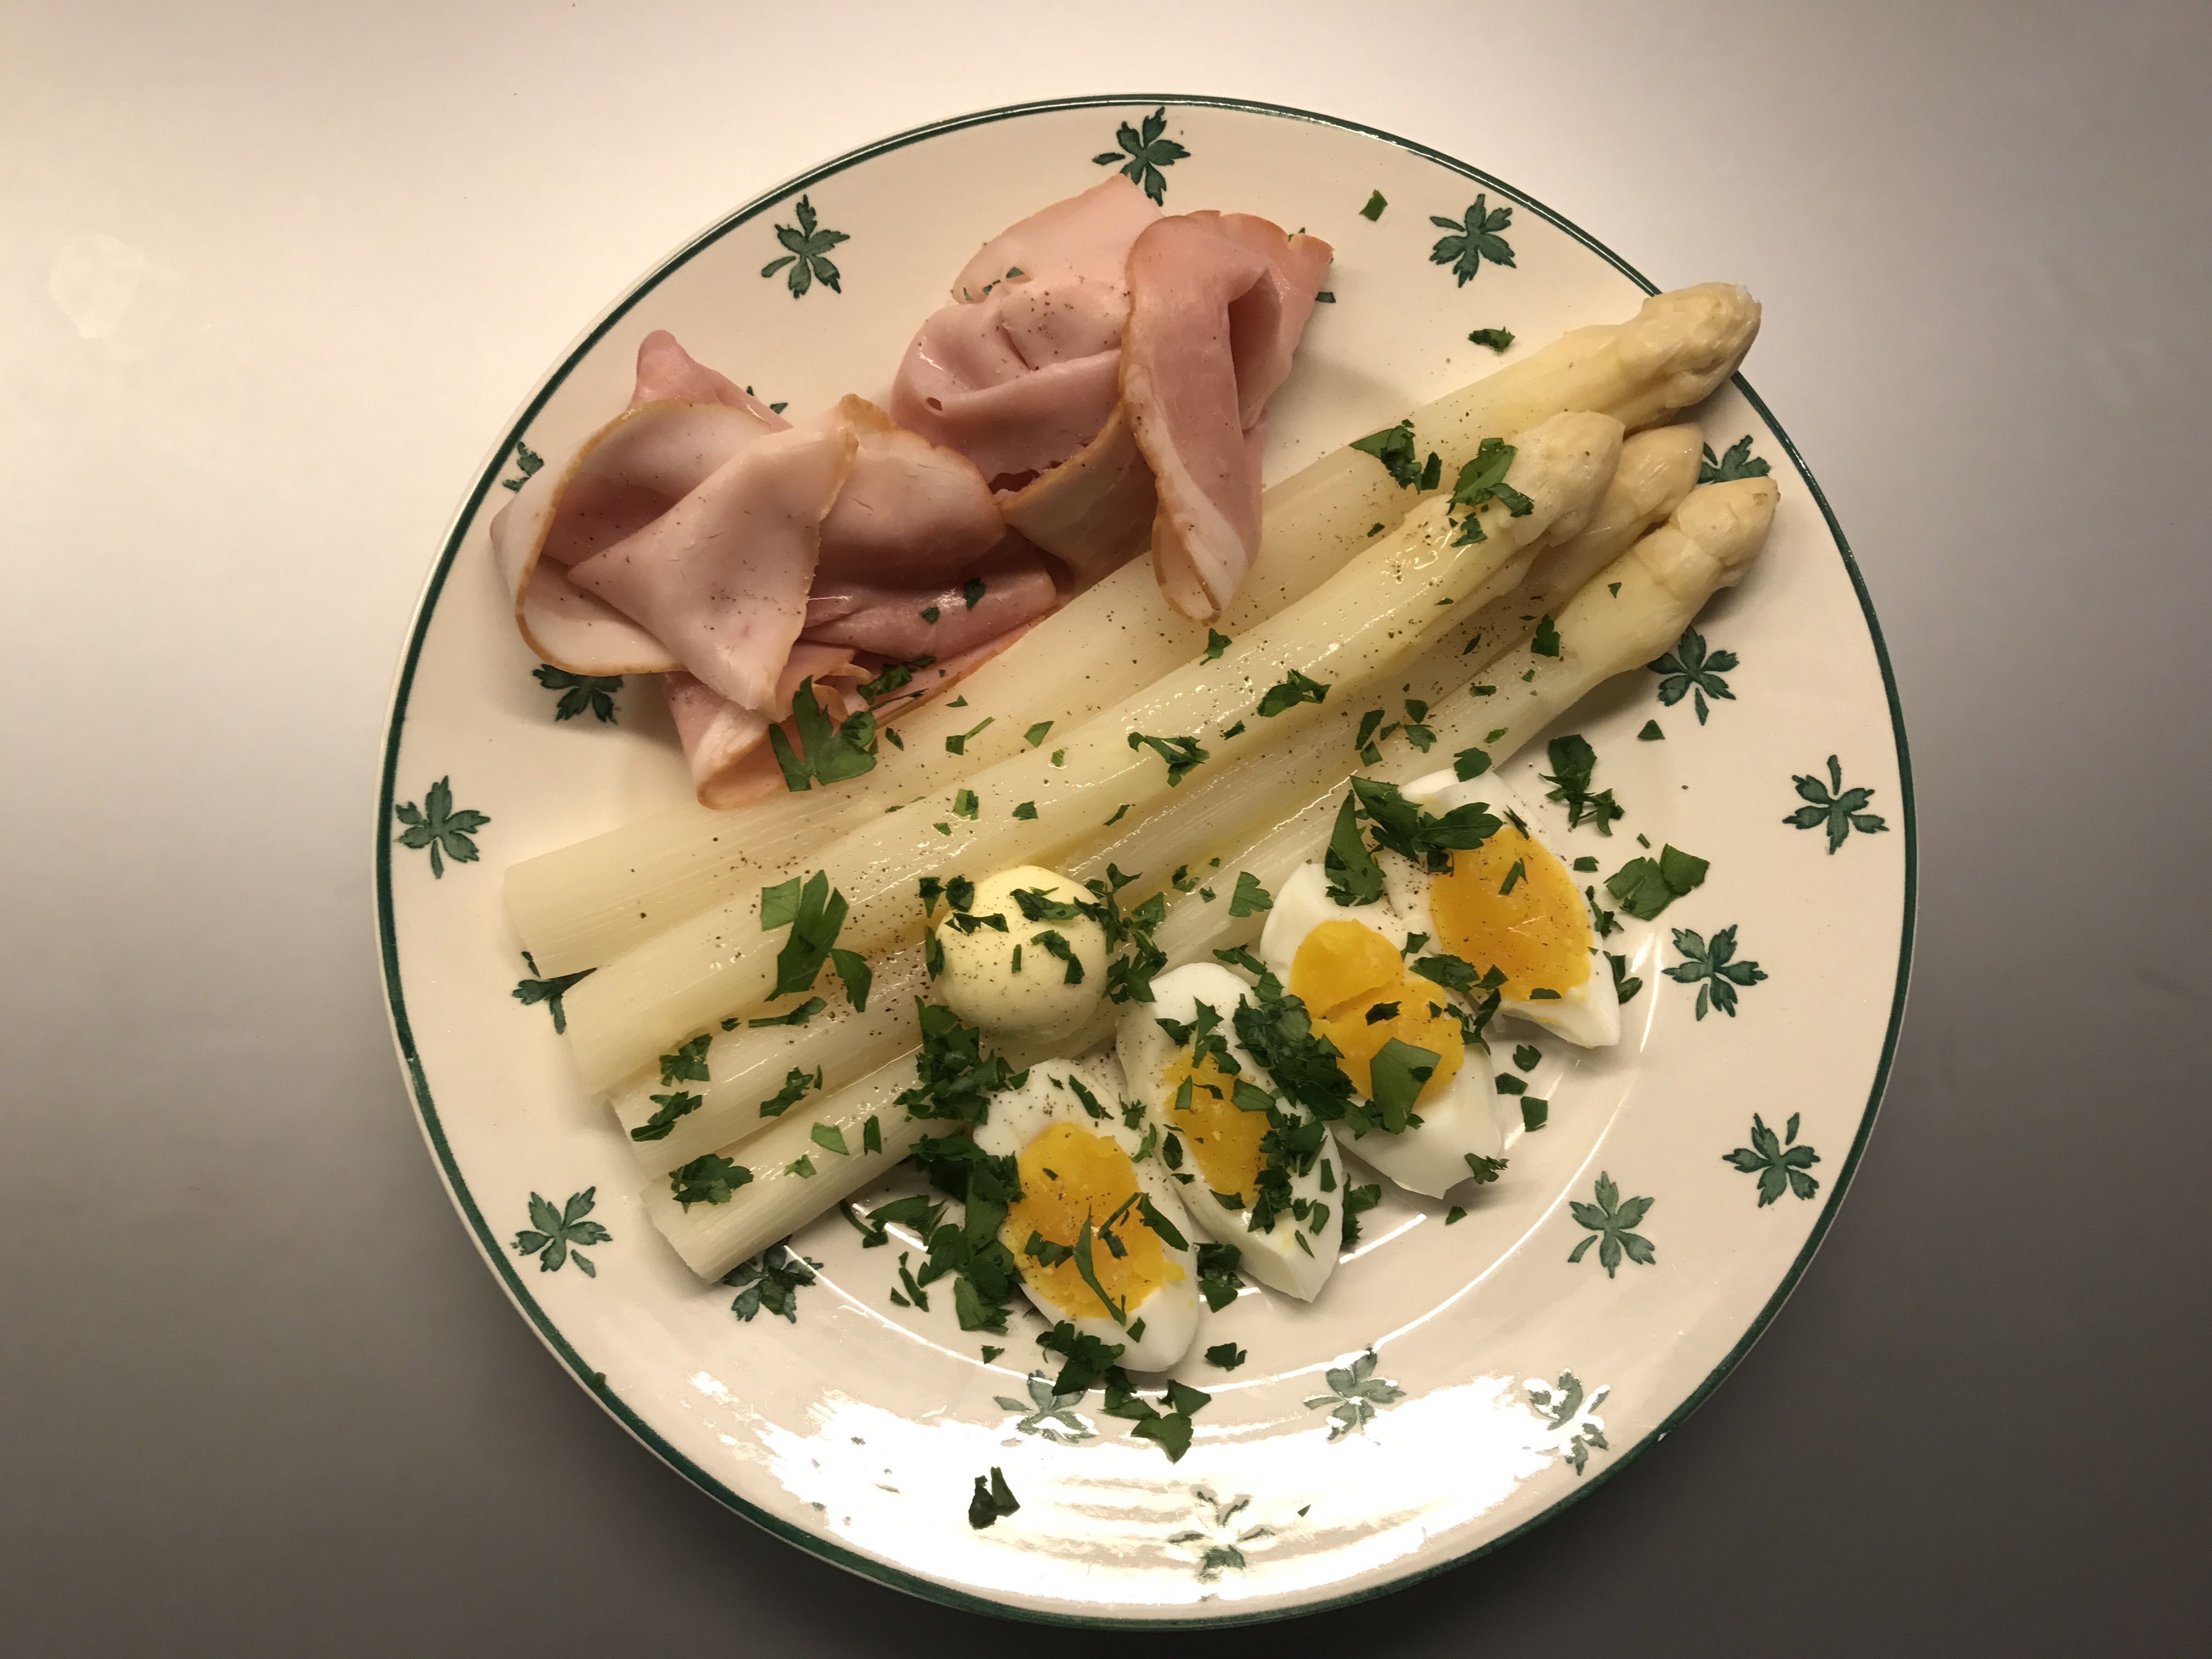
White asparagus is such a great vegetable! In this recipe we describe the classic way of serving asparagus: A la Flamande. This way you will be able to taste the slight bitterness and sweetness of the asparagus. The butter and egg bring a feeling of velvet to your palate, which is ideal to taste the asparagus. The parsley and white pepper give a touch of sharpness to the dish.
Wine Pairing
Serve the white asparagus with a dry Muscat from the Elzas. The delicate, slightly sweet but dry taste, the hint of bitterness and the rich aromas work very well with white asparagus. Muscat to us means the smell of fresh fruit. When drinking it is if you’re tasting the original grape. Wonderful wine and wonderful combination. We recently combined the asparagus with a Riesling (2015, Trocken, Meulenhof) from the German Mosel region. Worked very well.
What You Need
3 or 5 White Asparagus per person
2 Eggs
100 gram Ham
Parsley
Butter
White Pepper
What You Do
Steam the white asparagus and cook or steam the eggs medium, making sure the yolk is not set but also not running. Peel the egg and cut in four. Chop the parsley. Serve the asparagus and eggs warm on a plate. Dress the plate with ham (please make sure it has a bit of fat) and butter; sprinkle the parsley over the plate. Add some white pepper. As an alternative warm the butter and pour it gently over the asparagus.
We enjoyed this dish as a starter when in Milan, on a beautiful evening, eating al fresco and enjoying the wonderful combination of the sweetness and bitterness of the asparagus, the slightly caramelised sugars as a result of grilling the asparagus and the salty and sweet cheese. A glass of Pinot Grigio was all we wanted. In Milan they served us green asparagus, but it works even better with white asparagus. This is typically a dish you would make when the asparagus season is at its high and outside temperatures feel like summer. You could drink a Pinot Grigio, a Muscat from the Alsace region or a Rose with character. Remember the wine needs to combine with a range of very diverse flavours in the dish.
Here is what you need:
2 Asparagus per person
Olive Oil
Parmesan Cheese
Black Pepper
Peel the asparagus and cook or steam until slightly tender. Depending on the size we would say 10-15 minutes in the Russel Hobss steamer. Leave and let cool. Take a plate, add some oil to the plate and use it to cover the asparagus in oil. Heat the pan and grill the asparagus for 4*1 minute, making sure you have a lovely brown (not too dark) pattern. Serve on a plate, add some grated Parmesan cheese and pepper. Add a generous drizzle of very good olive oil.
White Asparagus with Parmesan Cheese (c) cadwu
White Grilled Asparagus with Parmesan Cheese (c) cadwu
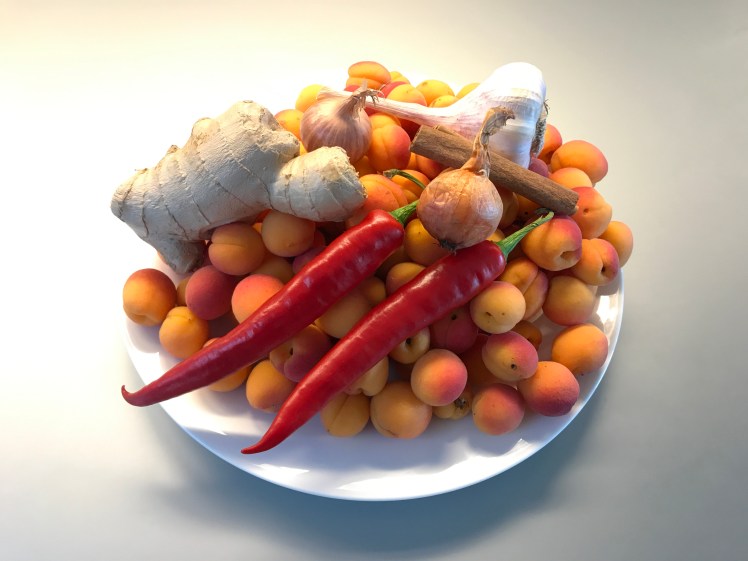
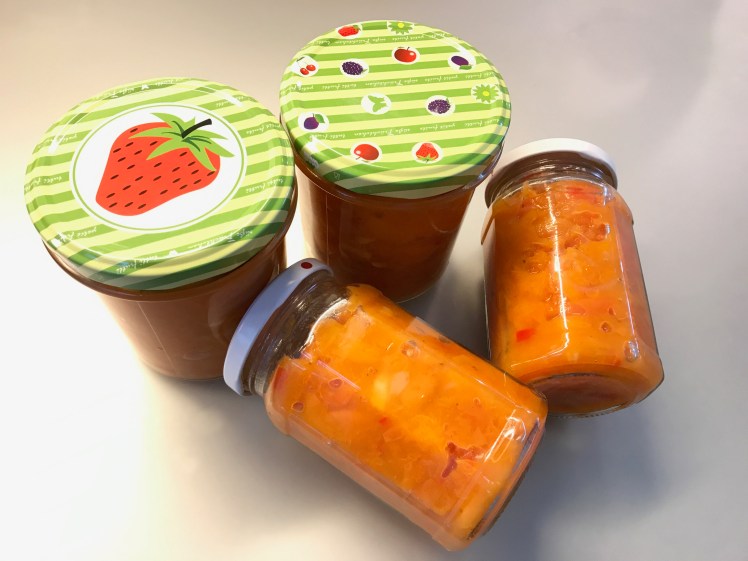
Something you have to have in your cupboard (or refrigerator in our case): chutney. Why? Because once in a while you don’t feel like making a sauce when you eat duck, rib eye or grilled lamb chops. Or because you want to eat something nice, simple and vegetarian, like rice with lentils and, there we are, chutney. If there would be a top three of main ingredients for chutney it would read mango-tomato-apricot. The basic recipe is the same for all three; it’s a matter of adjusting the quantities and choosing the spices. Chutney needs to integrate, much more than jam or marmalade. So cook it for an hour or so and leave it in a jar for at least a week before using it. The fact that it needs to integrate will create a hopefully nice surprise when opening the jar. If not, there is little you can do (eat more quickly, give a jar to a not too close friend et cetera). We use just a bit of sugar so our chutney needs to be stored in the refrigerator. Too much sugar (200 grams on 1 kilo of mango for instance) will only hide the taste of the mango. Chutney is a balance of sweet (fresh fruit, onion, garlic, cinnamon), sour (vinegar), bitter (the skin of the apricot or tomato), spiciness (ginger, red chilli, garlic) and depth (cardamom, nutmeg, cumin). Too much sugar will only disturb the balance. Cooking is about pairing tastes and textures, not about creating a simple, one-dimensional product. Why would we make apricot chutney if it’s our number 3? Simple: we like the touch of bitterness that comes with the apricot. When making mango chutney, try using unripe mangos. The chutney will be much tastier and complex!
What You Need
1 kilo stoned Apricots (meaning 1,25 kilo of Apricots)
Stone and quarter the apricots. Cut the shallots in 4 and slice (not too thin). Slice the fresh garlic. Same with the seeded red chilli. Cut let’s say 5 cm of ginger in small bits. Start by glazing the shallots for 10 minutes in olive oil, making sure they will enhance the sweetness of the chutney. Then add all other ingredients to the pan, mix, add the grated ginger, the spices of your choice, mix and bring slowly to a simmer. We used vinegar and water given the acidity of our apricots. If your apricots are really sweet and ripe use 200 ml of vinegar. Spices wise we prefer using cardamom, cinnamon, and a touch of cumin and nutmeg. Leave to simmer for at least one hour. Stir occasionally but gently. After an hour increase the heat and transfer to very, very clean glass jars. Close the jars, leave them to cool a bit, then put in cold water and later on transfer to the refrigerator.
Artichokes are not very popular, with the exception of marinated artichokes hearts in a jar. Pity! These hearts are simply not as tasty as freshly made ones. They are all about marinade, vinegar, sugar and some unidentified spices. Whereas our artichokes are about taste and texture. Remember it’s a thistle you’re eating and not something white and fluffy from a jar. Bigger artichokes are a wonderful, relaxing starter and the smaller ones are great when turned into a salad. One thing is important: take your time to cook the artichokes. The small ones should be cooked 30 minutes or so, which means they lose most if not all of their flavour. So it should read: take your time to steam the artichokes. Then the artichokes are ready to eat and keep their original taste. Key to the salad is the combination of artichokes and thyme. Lots of thyme!
Wine Pairing
You can serve this salad to accompany an aperitif, or with some bread as a starter. Make sure you have plenty of dressing.
Remove the stem of the artichokes and steam the artichokes for 45 minutes, depending on the size. Remove and let cool. Peel of the first layers of the outer leaves. Make the dressing by turning the mustard and the garlic into a smooth paste. Then gently add the other ingredients and whisk well to make it really smooth, thick dressing. Cut the artichokes in 6 or 8 parts. Add to the dressing, mix well, coating all artichokes. Sprinkle lots of thyme and mix again. Put in the refrigerator for at least 3 hours. Mix again, taste, add some more thyme and serve!
A bit of magic in your kitchen! This soup requires ‘clarification’ in order to become a true consommé. Clarification is a simple and very effective way of making a liquid clear, regardless if it’s cold (wine) of warm. The goal of clarification is to remove all insoluble matter before serving (or bottling in case of wine). The ‘matter’ is in most cases too small to be removed using a filter. Hence clarification. In this case we use a mixture of tomatoes, basil and egg white, the so-called clarifique. We use yellow tomatoes to create a bit of a surprise. When you use red tomatoes your guests will immediately guess it’s a consommé of tomatoes. Using yellow tomatoes will definitely surprise them. Plus we think the yellow ones are a bit more gently, fresher, more refined. You could also use all of the tomatoes for the soup and add ravioli to the consommé: turning it into Ravioli in Brodo. A quick comment before you start : it’s a bit of work and it requires a bit of patience as well. It’s not your ordinary soup!
Peel all 6 tomatoes by leaving them for 10-15 seconds in gently boiling water. Cool and peel, one by one. Keep the skin. Set 2 tomatoes aside. Chop the 4 tomatoes in smaller bits. Add butter and olive oil to the pan and gently glace the chopped shallot for 10 minutes. Add the garlic and the finely chopped red pepper and leave for 1 minute. Now add the tomatoes and the peel and fry for a minute or so. Then add thyme, rosemary, parsley, bay leaf and water. Bring to a boil and leave to simmer for 45 minutes. Taste and if so required add a touch of black pepper. If you do so, leave for an extra 5 minutes. Adding pepper later on is not a good idea because you want a completely clear soup. Pass through a sieve and cool to room temperature. Remove seeds and the internal white from the two tomatoes, keeping the outside of the tomatoes only. Set the outside apart. Using a bowl create a mixture of tomato left overs, cooked garlic, lots of basil and the two egg whites. Mix with a spoon and then blender a few seconds. This is the clarifique. Transfer the soup to a pan and add the clarifique. Stir with a spoon, making sure the mixture is homogenous. Start heating the mixture gently, until just below boiling. Some people will argue it’s should be 80º Celsius, exactly, which we think is not the case. You don’t want it to boil because that will destroy the funny looking cake on top of the mixture. Leave it for 30 minutes. No lid required. Now use a slotted spoon to remove most of the cake. You can simply throw it away. Pour the liquid into a sieve lined with wet cheesecloth (or a clean cotton kitchen towel if you cannot find a cheesecloth, as long it’s odour free it will work; if not odour free soak in water for 24 hours). And Lo and Behold: you have a clear soup, a true consommé! Just taste it and be surprised! Herbs, even basil and of course tomato. Cut the remains of the 2 tomatoes in small chunks and put them in a warm soup plate and transfer to the table. Pour the consommé around the tomato and enjoy!