We enjoyed this dish as a starter when in Milan, on a beautiful evening, eating al fresco and enjoying the wonderful combination of the sweetness and bitterness of the asparagus, the slightly caramelised sugars as a result of grilling the asparagus and the salty and sweet cheese. A glass of Pinot Grigio was all we wanted. In Milan they served us green asparagus, but it works even better with white asparagus. This is typically a dish you would make when the asparagus season is at its high and outside temperatures feel like summer. You could drink a Pinot Grigio, a Muscat from the Alsace region or a Rose with character. Remember the wine needs to combine with a range of very diverse flavours in the dish.
Here is what you need:
2 Asparagus per person
Olive Oil
Parmesan Cheese
Black Pepper
Peel the asparagus and cook or steam until slightly tender. Depending on the size we would say 10-15 minutes in the Russel Hobss steamer. Leave and let cool. Take a plate, add some oil to the plate and use it to cover the asparagus in oil. Heat the pan and grill the asparagus for 4*1 minute, making sure you have a lovely brown (not too dark) pattern. Serve on a plate, add some grated Parmesan cheese and pepper. Add a generous drizzle of very good olive oil.
White Asparagus with Parmesan Cheese (c) cadwu
White Grilled Asparagus with Parmesan Cheese (c) cadwu
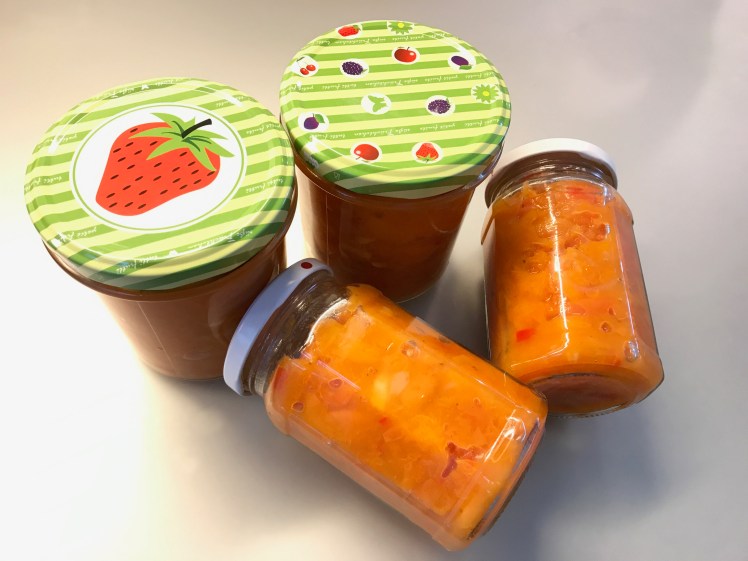
Something you have to have in your cupboard (or refrigerator in our case): chutney. Why? Because once in a while you don’t feel like making a sauce when you eat duck, rib eye or grilled lamb chops. Or because you want to eat something nice, simple and vegetarian, like rice with lentils and, there we are, chutney. If there would be a top three of main ingredients for chutney it would read mango-tomato-apricot. The basic recipe is the same for all three; it’s a matter of adjusting the quantities and choosing the spices. Chutney needs to integrate, much more than jam or marmalade. So cook it for an hour or so and leave it in a jar for at least a week before using it. The fact that it needs to integrate will create a hopefully nice surprise when opening the jar. If not, there is little you can do (eat more quickly, give a jar to a not too close friend et cetera). We use just a bit of sugar so our chutney needs to be stored in the refrigerator. Too much sugar (200 grams on 1 kilo of mango for instance) will only hide the taste of the mango. Chutney is a balance of sweet (fresh fruit, onion, garlic, cinnamon), sour (vinegar), bitter (the skin of the apricot or tomato), spiciness (ginger, red chilli, garlic) and depth (cardamom, nutmeg, cumin). Too much sugar will only disturb the balance. Cooking is about pairing tastes and textures, not about creating a simple, one-dimensional product. Why would we make apricot chutney if it’s our number 3? Simple: we like the touch of bitterness that comes with the apricot. When making mango chutney, try using unripe mangos. The chutney will be much tastier and complex!
What You Need
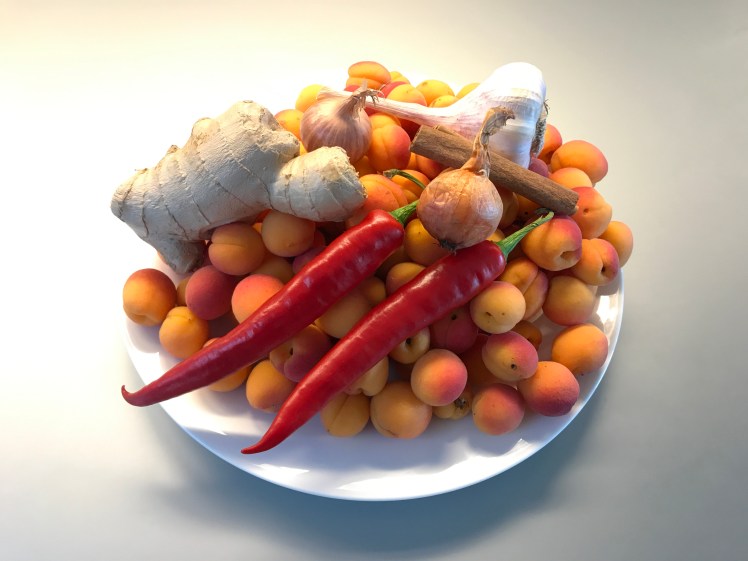
1 kilo stoned Apricots (meaning 1,25 kilo of Apricots)
Stone and quarter the apricots. Cut the shallots in 4 and slice (not too thin). Slice the fresh garlic. Same with the seeded red chilli. Cut let’s say 5 cm of ginger in small bits. Start by glazing the shallots for 10 minutes in olive oil, making sure they will enhance the sweetness of the chutney. Then add all other ingredients to the pan, mix, add the grated ginger, the spices of your choice, mix and bring slowly to a simmer. We used vinegar and water given the acidity of our apricots. If your apricots are really sweet and ripe use 200 ml of vinegar. Spices wise we prefer using cardamom, cinnamon, and a touch of cumin and nutmeg. Leave to simmer for at least one hour. Stir occasionally but gently. After an hour increase the heat and transfer to very, very clean glass jars. Close the jars, leave them to cool a bit, then put in cold water and later on transfer to the refrigerator.
Artichokes are not very popular, with the exception of marinated artichokes hearts in a jar. Pity! These hearts are simply not as tasty as freshly made ones. They are all about marinade, vinegar, sugar and some unidentified spices. Whereas our artichokes are about taste and texture. Remember it’s a thistle you’re eating and not something white and fluffy from a jar. Bigger artichokes are a wonderful, relaxing starter and the smaller ones are great when turned into a salad. One thing is important: take your time to cook the artichokes. The small ones should be cooked 30 minutes or so, which means they lose most if not all of their flavour. So it should read: take your time to steam the artichokes. Then the artichokes are ready to eat and keep their original taste. Key to the salad is the combination of artichokes and thyme. Lots of thyme!
Wine Pairing
You can serve this salad to accompany an aperitif, or with some bread as a starter. Make sure you have plenty of dressing.
Remove the stem of the artichokes and steam the artichokes for 45 minutes, depending on the size. Remove and let cool. Peel of the first layers of the outer leaves. Make the dressing by turning the mustard and the garlic into a smooth paste. Then gently add the other ingredients and whisk well to make it really smooth, thick dressing. Cut the artichokes in 6 or 8 parts. Add to the dressing, mix well, coating all artichokes. Sprinkle lots of thyme and mix again. Put in the refrigerator for at least 3 hours. Mix again, taste, add some more thyme and serve!
A bit of magic in your kitchen! This soup requires ‘clarification’ in order to become a true consommé. Clarification is a simple and very effective way of making a liquid clear, regardless if it’s cold (wine) of warm. The goal of clarification is to remove all insoluble matter before serving (or bottling in case of wine). The ‘matter’ is in most cases too small to be removed using a filter. Hence clarification. In this case we use a mixture of tomatoes, basil and egg white, the so-called clarifique. We use yellow tomatoes to create a bit of a surprise. When you use red tomatoes your guests will immediately guess it’s a consommé of tomatoes. Using yellow tomatoes will definitely surprise them. Plus we think the yellow ones are a bit more gently, fresher, more refined. You could also use all of the tomatoes for the soup and add ravioli to the consommé: turning it into Ravioli in Brodo. A quick comment before you start : it’s a bit of work and it requires a bit of patience as well. It’s not your ordinary soup!
Peel all 6 tomatoes by leaving them for 10-15 seconds in gently boiling water. Cool and peel, one by one. Keep the skin. Set 2 tomatoes aside. Chop the 4 tomatoes in smaller bits. Add butter and olive oil to the pan and gently glace the chopped shallot for 10 minutes. Add the garlic and the finely chopped red pepper and leave for 1 minute. Now add the tomatoes and the peel and fry for a minute or so. Then add thyme, rosemary, parsley, bay leaf and water. Bring to a boil and leave to simmer for 45 minutes. Taste and if so required add a touch of black pepper. If you do so, leave for an extra 5 minutes. Adding pepper later on is not a good idea because you want a completely clear soup. Pass through a sieve and cool to room temperature. Remove seeds and the internal white from the two tomatoes, keeping the outside of the tomatoes only. Set the outside apart. Using a bowl create a mixture of tomato left overs, cooked garlic, lots of basil and the two egg whites. Mix with a spoon and then blender a few seconds. This is the clarifique. Transfer the soup to a pan and add the clarifique. Stir with a spoon, making sure the mixture is homogenous. Start heating the mixture gently, until just below boiling. Some people will argue it’s should be 80º Celsius, exactly, which we think is not the case. You don’t want it to boil because that will destroy the funny looking cake on top of the mixture. Leave it for 30 minutes. No lid required. Now use a slotted spoon to remove most of the cake. You can simply throw it away. Pour the liquid into a sieve lined with wet cheesecloth (or a clean cotton kitchen towel if you cannot find a cheesecloth, as long it’s odour free it will work; if not odour free soak in water for 24 hours). And Lo and Behold: you have a clear soup, a true consommé! Just taste it and be surprised! Herbs, even basil and of course tomato. Cut the remains of the 2 tomatoes in small chunks and put them in a warm soup plate and transfer to the table. Pour the consommé around the tomato and enjoy!
A simple but very tasty main dish. Serve it with some rice and you will have a lovely and rich dish.
We enjoyed our curry with a glass of Spanish gewürztraminer. The white wine needs to be aromatic and herbal. The gewürztraminer should come with a touch of sweetness which links nicely to the coconut and the cardamom.
What You Need
1 small Red Onion or a bigger Shallot
1 Chilly Pepper (a quarter or a half, depending on the spiciness)
1 or 2 Djeroek Poeroet leaves (these are the leaves of the Makrut or Thai Lime (Citrus Hystrix); if fresh use 1 leave
Curry Powder
6 – 10 fresh Shrimps
Coconut Milk (150 ml)
Olive Oil
Black Pepper
What You Do
Clean the shrimps and remove the parts you don’t want to eat, especially the dark vein. This is actually the shrimp’s gastrointestinal tract, so not something you want to eat
Once cleaned, set aside
Cut the onion in four and then slice
Remove the seeds from the chilly pepper and cut the pepper in small bits
Fry the onion gently in a skillet with olive oil
Use a mortar to crush the coriander and cardamom seeds
Add the curry powder, the cardamom, the coriander, the grated nutmeg and the chilly pepper to the pan
Fry a bit more, making sure you get all the tastes
Add one clove of fresh garlic, one prepared and the grated ginger
Fry and stir
Start adding the coconut milk and keep stirring
Add the djeroek poeroet
When the sauce starts to thicken, check if you have sufficient sauce for the shrimps.
f not, add some more coconut milk
When thickened, add the shrimps and let cook for 4 minutes, maximum, depending on size
Chop the fresh coriander leaves
Just before serving add three quarters of the fresh coriander leaves to the curry and mix
Check if some black pepper is required
Sprinkle some more fresh coriander just before serving the dish.
Serve with rice, preferably Camargue red rice because it offers such a wealth of taste. Indian Basmati will also do the trick of course.