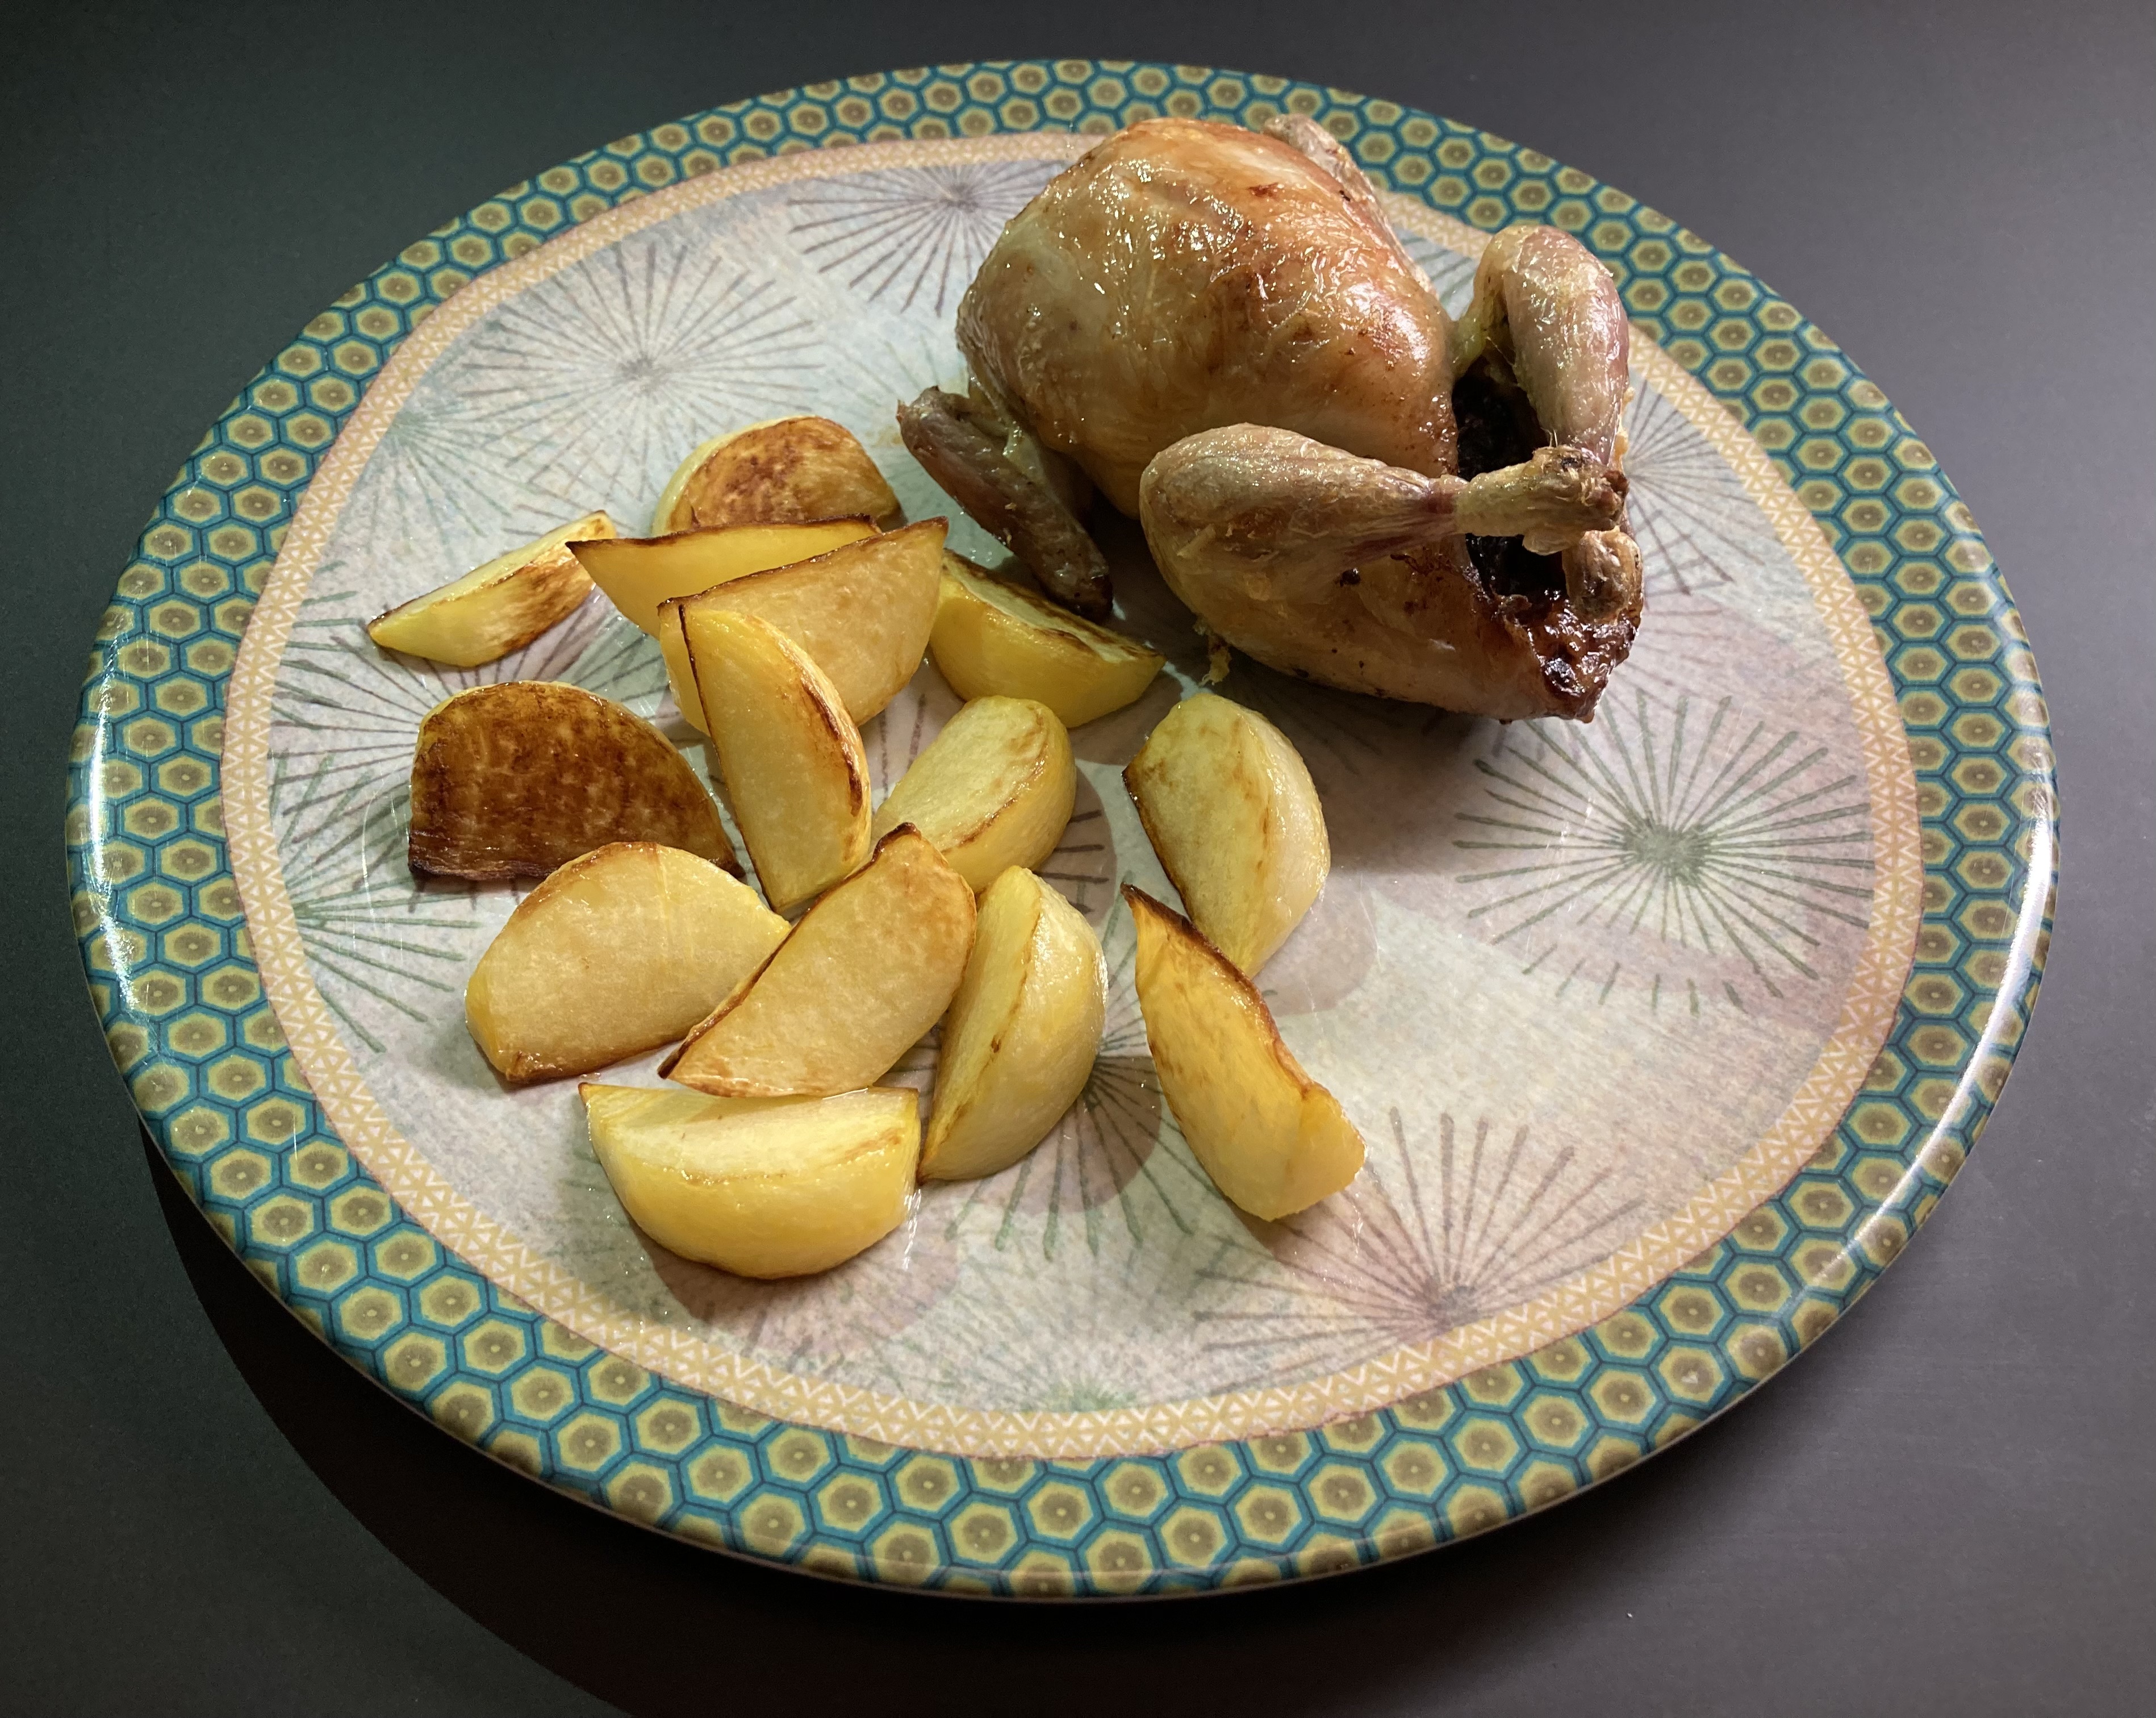
Potato, Fennel and Wild Garlic

So many names for this great plant: Ramson(s), Wild Garlic, Bear Leek, Daslook, Ail des Ours, Bärlauch, Ramsløg, Aglio Orsino, Allium ursinum, it is one of the highlights of spring. Powerful, pure and tasty. It can be harvested from the wild, but fortunately some green grocers also sell Wild Garlic. The taste is a combination of onion and garlic, but much greener, longer lasting and with a touch of bitterness at the end. You can turn the leaves into a strong pesto, but better use it as herb with for instance potatoes or gnocchi. It is also great when used in a dish with white asparagus and morels. The flowers are also edible and are a great decoration for savory dishes and salads.

We combine Wild Garlic with potatoes and fresh fennel. The anise-taste and the light crunchiness of the fennel go very well with this rich, lightly onion flavoured potato mash.

What You Need

  • Potato
  • Butter
  • Cream
  • Fennel
  • Wild Garlic
  • Black Pepper
  • Salt (optional)

What You Do

Dice the peeled potatoes and cook until ready to mash. Very finely dice some fennel, let’s say one tablespoon per one large potato. Add cream, butter and diced fennel to the mashed potato, mix and leave on very low heat. Remove the veins from the wild garlic leaves and tear the leaves, as you would do with basil. Add some of them to the mash, add black pepper and perhaps a pinch of salt. Leave for a few minutes, add more butter or cream if so required and more leaves. If you’re happy with the consistency and the taste, it’s time to add some more torn leaves to the mash. Serve immediately.

PS

Other elements on the plate are Saucisse de Morteau, Frankfurter and petit farci. More about the latter in one of our next posts!

Bucatini All’Amatriciana

Let’s prepare a delicious and simple Italian dish, packed with flavours. The challenge when making Bucatini All’Amatriciana is with getting the right ingredients. You must have Guanciale, Bucatini, San Marzano tomatoes, dried Spanish pepper and Pecorino Romano. Five challenges actually…

Bucatini is an interesting pasta. It looks like thick spaghetti but has a hole running though the centre. Indeed, a dried tube. When cooked it’s different from spaghetti, thicker of course and you need to chew longer, making the dish more filling and the taste longer lasting, without the paste itself being chewy. Could you replace bucatini with spaghetti? Probably yes, although the dish will become simpler.

How about Guanciale (cured pork cheek)? It is the key ingredient of Spaghetti Carbonara. Could you replace it with Pancetta? Probably yes, even Antonio Carluccio uses pancetta when preparing Bucatini All’Amatriciana with Gennaro Contaldo in this video.

Parmesan Cheese? That’s a no-go. We tried the dish with both Parmesan and Pecorino. The version with Parmesan cheese (made from cow milk) was okay, the one made with Pecorino (made from sheep milk) was delicious. The cheese combined very well with the spiciness and sweetness of the sauce.

San Marzano tomatoes have lots of flesh, just a few seeds and the taste is sweet and not very acidic. They are often used for canned tomatoes. If you can’t find San Marzano, then ask your greengrocer for similar tomatoes.

Shopping for the ingredients of Bucatini All’Amatriciana may be a challenge, preparing it is simple. Just keep an eye on the pan and the pasta. Within 30 minutes you can enjoy a classic Italian dish.

Wine Pairing

A red Italian wine is the obvious choice. We opened a bottle of Villa Castello Terre di Chieti Sangiovese 2022. The wine is made with 100% Sangiovese grapes. A touch of oak, not too much alcohol, full bodied, smooth, and with aromas of dark fruit. We loved it with our Bucatini All’Amatriciana. In general, an (Italian) wine made with Sangiovese grapes will be a great choice.

What You Need

  • 150 grams of Guanciale
  • 300 grams San Marzano tomatoes
  • 1 small Yellow Onion
  • 1 dried Spanish Pepper
  • White Wine
  • Bucatini
  • Pecorino Romano

What You Do

  1. Remove the outer layer of the guanciale and dice
  2. Coarsely chop the onion
  3. Wash and dry the tomatoes
  4. Chop the tomatoes, also coarsely
  5. Finely chop the Spanish pepper. Depending on your taste you could use the seeds
  6. Heat a large pan, add the guanciale and fry gently, making sure you get some nice fat without frying the meat crispy
  7. Add the onion and some of the Spanish pepper *depending on your taste and its spiciness)
  8. Glaze the onion
  9. Add some white wine and reduce the heat
  10. Add the chopped tomatoes and leave to simmer
  11. Taste and perhaps add some more pepper
  12. In parallel cook the bucatini al dente, this will probably take some 10 minutes
  13. When ready transfer the bucatini straight from the water to the sauce, combine and leave for a minute or two
  14. Taste and if necessary, adjust by adding pepper
  15. Serve the Bucatini All’Amatriciana with some freshly grated Pecorino Romano.

Small-Spotted Catshark with Dashi and Bok Choy

Earlier we wrote about small-spotted catshark, also known as lesser-spotted dogfish or rock salmon. It’s a very common fish, not endangered, it doesn’t have bones (sharks have a cartilaginous skeleton), it’s tasty and the texture of the meat is moist and pleasant. When we tasted the fish with a tomato and red bell pepper stew, we started talking about other ways of preparing it. Perhaps a Portuguese version with piri piri, tomatoes and potatoes? Or a fish stew with shark, mullet, monkfish and clams? Or with dashi, soy sauce, mirin, ginger and lemon?

Wine Pairing

A Pinot Gris or a Sylvaner from the Alsace region will be perfect, dry, floral and a touch of sweetness. In general a light bodied, aromatic, unoaked white wine will be a good choice.

What You Need
  • For the Fish
    • 200 grams of Small-Spotted Catshark
    • Dashi
    • Mirin
    • Light Soy Sauce
    • Sake
    • Lemon Juice
    • Olive Oil
  • For the Vegetables
    • Bok Choy
    • Oyster Sauce
    • Soy Sauce
    • Fresh Ginger
What You Do
  1. Add some olive oil to a pan and fry the fish
  2. Combine dashi, a teaspoon of mirin, soy sauce and sake
  3. Taste and adjust. You’re looking for a firm, not too sweet mixture
  4. After a few minutes add the mixture to the pan
  5. The idea is to stew the fish in this mixture
  6. When the fish is done (this will take some 20 minutes), reduce the liquid, add a splash of lemon juice and coat the fish with the reduction
  7. In parallel chop the bok choy and simmer the white of the vegetable in a mixture of water, soy sauce and oyster sauce
  8. Just before serving add some grated ginger and the chopped green of the bok choy to the pan
  9. Serve the fish on top of the vegetables.
Small-Spotted Catshark with Dashi and Bok Choy ©cadwu

Small-Spotted Catshark with Tomatoes

Once in a while your fishmonger will have small-spotted catshark, also known as lesser-spotted dogfish or rock salmon. Popular in Portugal (pata-roxa), less so in many other countries. It’s a very common shark, not endangered, it doesn’t have bones (sharks have a cartilaginous skeleton), it’s tasty and the texture of the meat is moist and pleasant. So why isn’t it more often on our menu?

We think the taste is very delicate so be careful withs herbs and spices. The structure of the meat made us think of monkfish. We know that some chefs compare catshark with sea eel, but that’s a big mistake as far as we are concerned. Catshark is much more refined.

Skinning a catshark requires special equipment, so the shark on sale is already skinned and cleaned, making it even more easy to prepare.  It looks a bit like a tube, long and round. Cut in chunks and start cooking!

Wine Pairing

The flavour and aroma of this dish are gentle. A not too complex, dry white wine with some acidity or a Provence rosé will be great with the cat shark stew.

What You Need

  • 200 grams of Small-Spotted Catshark
  • 2 ripe Tomatoes
  • 1 Red Bell Pepper
  • 1 Shallot
  • 1 Garlic Glove
  • Capers (in Brine)
  • A few Small Black Olives
  • Bouquet Garni (Thyme, Bay Leaf, Parsley)
  • Black Pepper
  • Olive Oil

What You Do

Clean the bell pepper, cut in large chunks and grill for 10 minutes until charred. Transfer to a small container, close it and leave for a few hours. Remove the skin of the bell pepper and dice. Clean the tomatoes, remove the seeds and dice. Chop the shallot and the garlic. Heat a pan, add olive oil and fry the catshark for a few minutes. Remove from the pan and keep warm in the oven at 50 °C or 120 °F. Add the shallot, fry gently on reduced heat, add the garlic, wait for one minute, add the tomatoes, half of the bell pepper and the bouquet. Allow to simmer for 5 minutes. Add the shark to the pan and allow to stew for 20-30 minutes, depending on the size of the fish. Five minutes before serving add the olives and the capers. Remove the bouquet.

Small-Spotted Catshark ©cadwu

Oyakodon

Hope you enjoyed Netflix’s The Makanai: Cooking for the Maiko House as much as we did. Two friends (Kiyo and Sumire) move from rural Japan to Kyoto, following their dream of becoming maiko’s. Once in Kyoto it turns out that their dreams are very different. Kiyo is passionate about food and becomes the person to prepare the makanai, the food for the people living in the Maiko house. Every episode shows Japanese food, from dumplings in red bean soup to baked sweet potato and onigiri (rice balls).

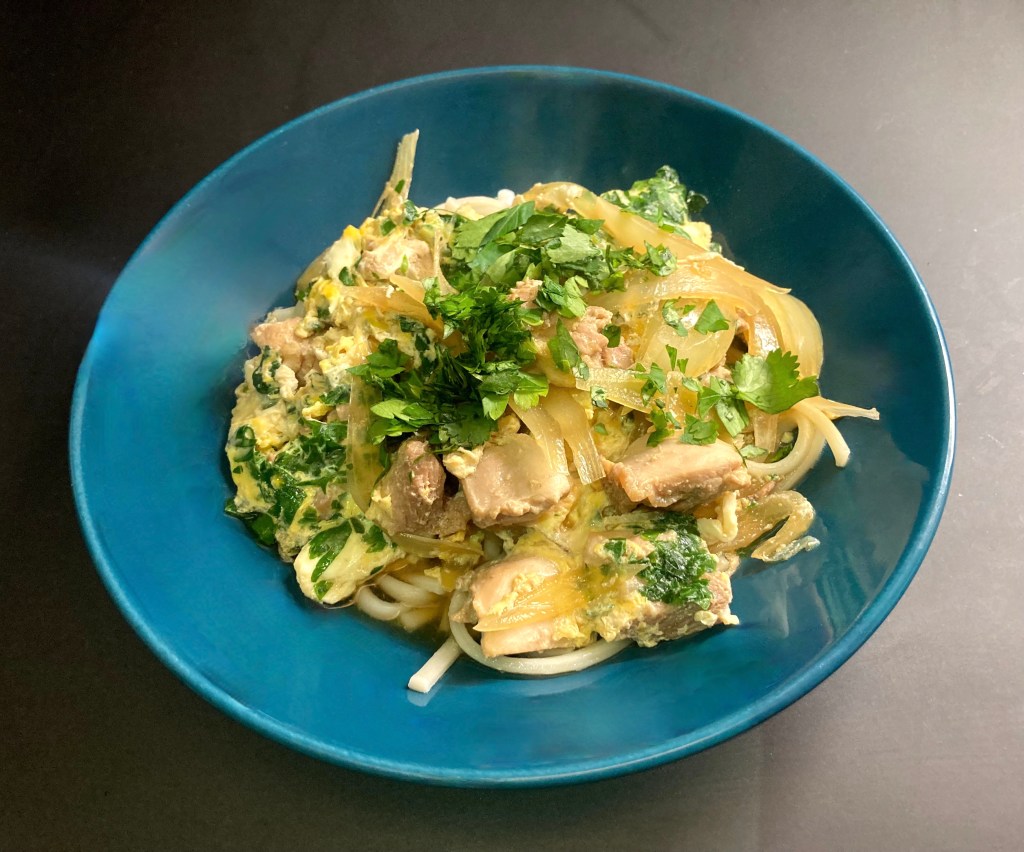
The first dish Kiyo prepares for the house is Oyakodon, a rice dish with egg and chicken, a popular dish in Japan. Easy to make, nutritious and the flavours and aromas are very satisfying. On Cooking With Dog you’ll find a helpful video showing you how to make Oyakodon. 

San Francisco based chef Namiko Hirasawa Chen (founder of Just One Cookbook, an award winning blog about food) was brave enough to cook all the food shown in the series. Obviously you’ll find all makanai recipes on their website.

What You Need
  • 100 grams of Chicken Breast (skin off)
  • 1 medium White Onion
  • 2 Eggs
  • 100 ml Dashi
  • 2 tablespoons Mirin
  • 2 tablespoons Soy Sauce
  • Mitsuba (or a mix of Parsley and Cilantro)
  • Rice
What You Do
  1. Make sure your dashi is full of flavours, perhaps a bit stronger than usual
  2. Make a broth with mirin and soy sauce
  3. Peel the onion and slice from top to bottom (banana shaped slices)
  4. Chop the chicken breast in comfortable slices
  5. Add the onion and the chicken to the broth, cover the pan with a lid and cook until nearly done
  6. Add half of the mitsuba (or the combination of parsley and cilantro)
  7. Add the eggs to a bowl and lightly beat the eggs but don’t mix. You should be able to distinguish the white and the yolk easily
  8. Add the first half to the broth and use chopsticks to distribute the combination in the pan
  9. Wait for a few moments and add the second half
  10. Serve over a bowl of warm rice
  11. Decorate with mitsuba.
PS

Perhaps you noticed that we used udon for our oyakodon, basically because we love udon, but it should be served with rice. Most (all?) recipes suggest adding sugar. We think the mirin brings sufficient sweetness to the dish, but feel free to add just a bit of sugar.

Artichokes Roasted In the Oven

We love artichokes, as a salad, stuffed, with pasta, always a treat. We saw young, small, purple artichokes on the market and decided to take a different approach. Let’s roast them in the oven with lots of fresh thyme, rosemary and bay leaf.
The bitter, nutty taste of the artichokes was clearly present, and it was delicious in combination with the mouthfeel (the olive oil) and the aromatic herbs. Compared to steamed artichokes the roasted ones come with stronger but not too strong flavours.

The artichokes were clearly young because there was no centre choke (the hairy part), which meant that we could eat most of the artichoke, including the stem.

Wine Pairing

Normally pairing artichokes and wine is a real challenge. According to various researchers this is due to cynarin, a chemical especially found in the leaves of the artichoke. When the wine and the cynarin meet in your mouth, the natural sweetness of the wine is enhanced, making it taste too sweet. Meaning you must pair artichokes with a bone-dry, crisp, unoaked white wine with clear, present acidity. Roasting the artichokes in the oven seems to reduce the impact of the cynarin. We suggest serving the artichokes with a medium bodied, dry red wine, not too complex. Could be Merlot, perhaps Malbec or Carménère.

What You Need

  • Young, Small Artichokes
  • One Garlic Clove
  • Fresh Thyme, Rosemary and Bay Leaf
  • One Lemon
  • Olive Oil

What You Do

Heat your oven to 150 °C or 300 °F. Press the lemon and add the juice to a bowl of cold water. Slice the artichokes lengthwise in two. Add them to the water. Check if they have a centre choke. If so, try to remove. Let the artichokes soak for a few minutes. In the meantime peel the garlic and chop, coarsely. Add a generous amount of olive oil to your baking dish, dry the artichokes somewhat, add them to the dish, add the garlic, the sprigs of thyme and rosemary, the bay leaf. Mix. Sprinkle with more olive oil. Cover with aluminium foil and transfer to the oven for 15 minutes. After 15 minutes increase the temperature to 180 °C or 355 °F. Leave for 30 minutes. Check if the artichokes are ready. The trick is simple. If you can remove a leave without too much trouble, they are ready, if not, give them 5 more minutes. You could also check the stem, it should be soft. Remove the foil and leave in the oven for another 5-10 minutes. In parallel fry some merguez sausages.

PS

Artichokes require eating with your hands. Given the olive oil you may need an extra napkin or two.

Cabbage Stew

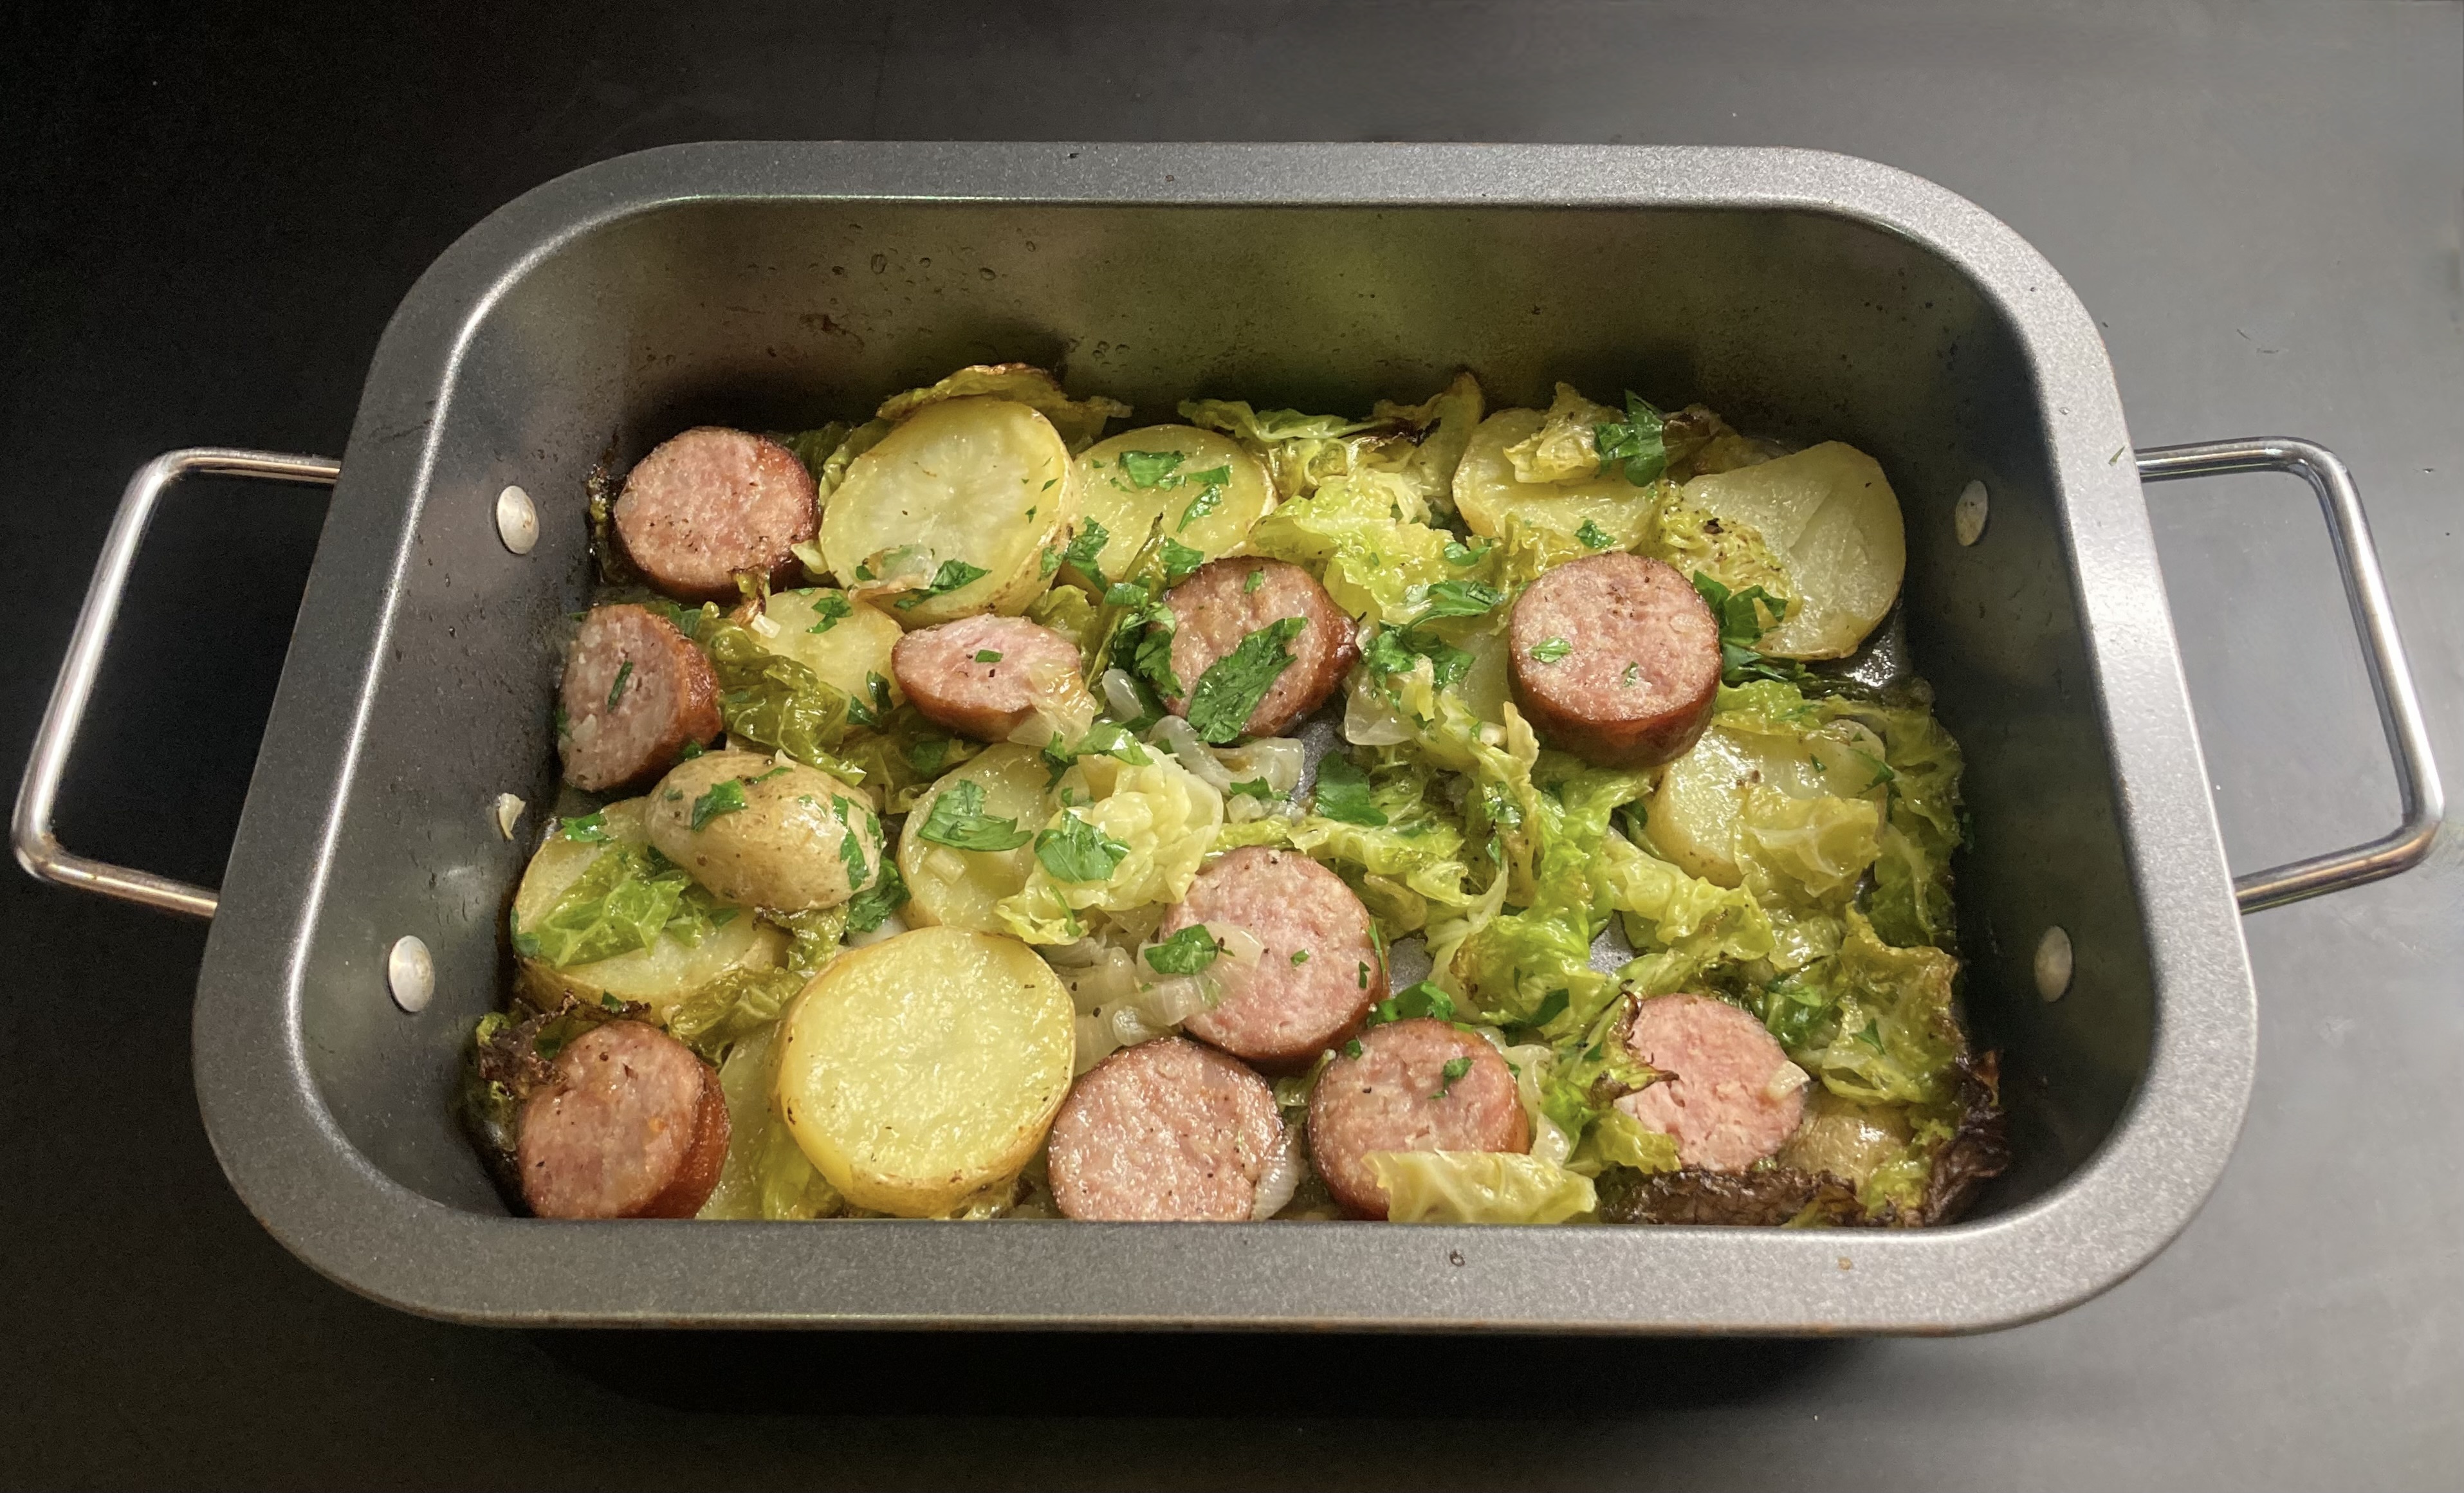
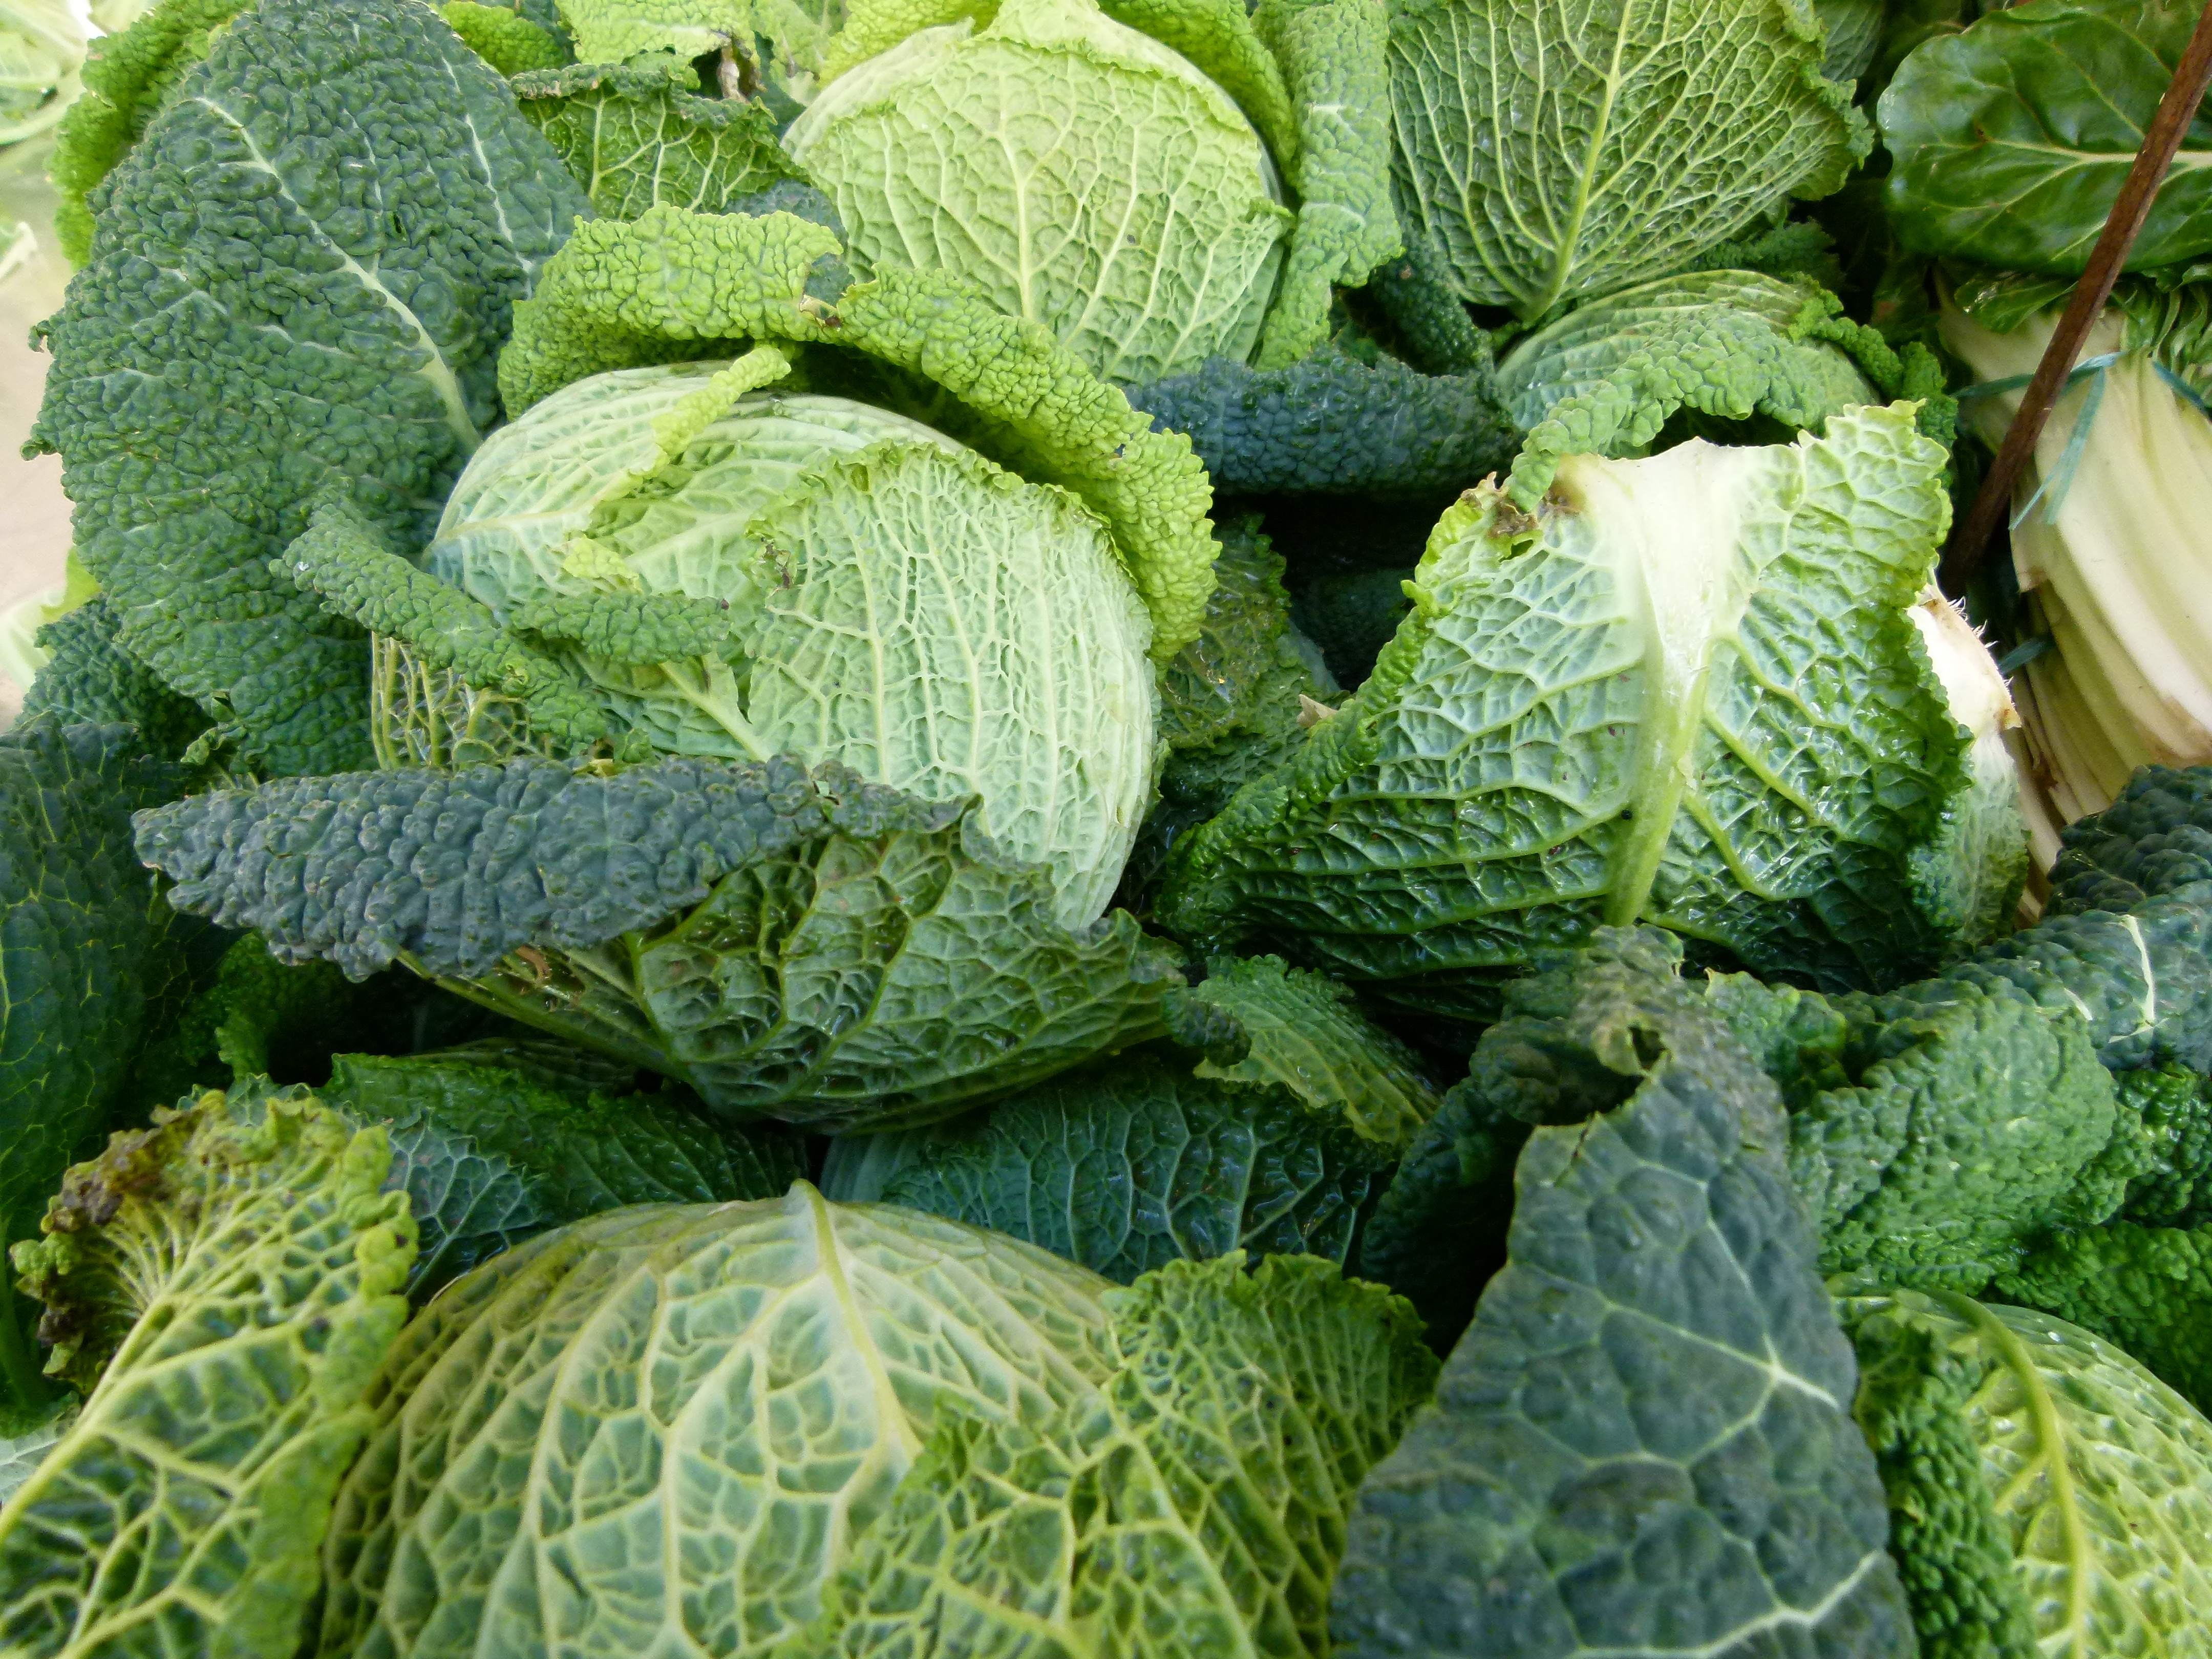
This delicious dish with cabbage, sausage and potatoes looks a bit wintery but actually thanks to the taste and the texture of the Savoy Cabbage it’s uplifting and even a bit refreshing. The structure of the leaves is very firm, so we cook the leaves before adding them to the stew. The risk is, as with all cabbages, to overcook them, which will cause the typical nasty sulphur smell. The leaves can also be used to make a roulade, or a dolma shaped snack.

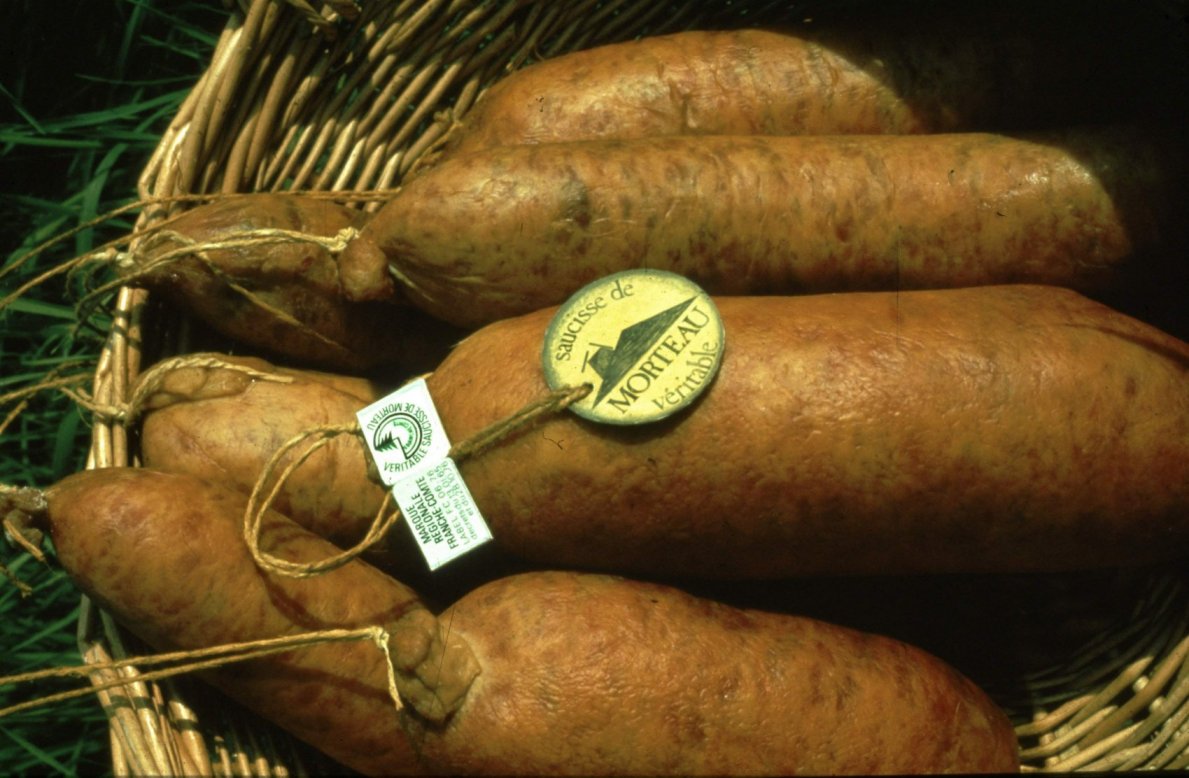
We used Saucisse de Morteau which is a smoked sausage from the Franche-Comté region. In general, you’re looking for a smoked pork sausage. The Saucisse de Morteau is smoked for 48 hours so the taste is very present, which allows you to buy a small sausage. The main role in this dish is for the Savoy Cabbage!

Drink Pairing

A medium bodied red wine will be great, but we could also imagine enjoying it with a beer. The flavours are bold, so a not too complex beer or wine will be perfect.

What You Need

  • One Onion
  • Two Garlic Cloves
  • Half a Savoy Cabbage
  • One Potato
  • One Smoked Sausage
  • Olive Oil
  • Parsley
  • Black Pepper

What You Do

Heat a pan with water. Wash the potato and cook until nearly ready. Use a potato that remains firm when cooked. We used Mona Lisa, a tasty, starchy all purpose potato. Remove the potato from the boiling water. Peel off the outer leaves of the cabbage and discard. Peal off the reaming leaves, remove the veins and cook for 3-5 minutes in hot water. Remove the leaves, cool with cold water and let dry. Add the sausage to the pan, 20 minutes in hot (not boiling) water should be fine. In parallel quarter the onion and fry in olive oil. After a few minutes add the chopped garlic. Now it’s time to combine all ingredient in an oven dish. Cover with aluminium foil. Set your oven to 160 °C or 320 °F and leave for 3*10 minutes . Toss gently after 10 minutes. Remove the aluminium foil and set your oven to 180 °C or 355 °F . Allow to cook for another 10 minutes. Add some chopped parsley and black pepper just before serving

Golden Turnips

A forgotten vegetable, ridiculed by Baldrick in the British series Blackadder (remember the Turnip Surprise that he prepared for Blackadder? It contained, obviously, turnip and the surprise? There was nothing else in it except turnip) and it still not very popular.
To be called a golden turnip and remain forgotten is of course a bit sad.

Let’s give credit to the turnip: it has been around for many years (according to some sources as early as 2000 BC), it is used in many cuisines, from America to Japan, the leaves are also edible and it was once an important vegetable in the four-year-crop-rotation system. Next time you see turnips, just buy them, look for a recipe and enjoy.

The golden turnip has indeed a beautiful yellow colour, its taste is sweet and delicate, the structure smooth. Great to turn into a mash (with butter and perhaps nutmeg). They can be eaten raw (crunchy and the taste is peppery, radish-like). You could also mix them with other vegetables such as Jerusalem artichoke and parsnip (fry in the oven). 

We combined the turnip with a very tasty quail, stuffed with prunes, pancetta and bay leaf.

Wine Pairing

The turnip was cheap, the quail expensive so we decided to spend even more money and bought a bottle of Château de Crémat from the Bellet region near Nice. The wine is made with 75% folle noir and 25% grenache. Folle noir is a grape typical for the Provence region. Once very popular, this grape is now hardly used.
The wine is very balanced with flavours like prune and blackberries, a touch of oak and an aroma that made us think of flowers and dark fruit. In general you’re looking for a full bodied red wine, one that matches the quail and the presence of the bay leaf and the herbs in the pancetta.

What You Need
  • 4 Golden Turnips
  • Black Pepper
  • Nutmeg
  • Olive Oil
What You Do
  1. For the quail see our earlier post
  2. For the turnips: peel these as thinly as possible
  3. Cook or steam for perhaps 5 minutes and let cool
  4. Slice in eight
  5. Heat a pan, add olive oil and colour the turnips quickly
  6. The idea is to add some colour and taste to the turnip and keep its golden colour
  7. Serve with some black pepper and nutmeg.
PS

Use the remainder of the quails to make a very tasty stock. Put in ice cube bags, freeze and use when making sauces.

Partridge with Sauerkraut and Parsley Root

Partridge is perhaps the most delicate of game birds. Tasty, aromatic, mild. It is also one of the most vulnerable birds, given it is under threat from loss of habitat. Especially the grey partridge is becoming scarce. They are also expensive (we paid 10 euro per partridge) and the best part of the season (September-November) is relatively short, so don’t wait too long if you want to enjoy partridge once a year, like we do.

The meat of a partridge is lean and tends to become very dry when preparing it. So what to do? Of course! Put a strip of bacon on each breast and transfer the partridge to a hot oven.
Not really. The bacon will impact the delicate taste of the partridge. And placing such a small, lean bird in a hot oven is a massive risk. Just a few minutes too long (simply because something else you are preparing takes a bit longer) and the meat is bone dry. Stuffing the partridge doesn’t help either; the filling will be moist, but the meat will be dry anyway.

The key to an excellent partridge is to be brave enough to use an oven on a really low temperature, meaning on the temperature the meat should have when it’s served, which is 70 °Celsius or 160 °Fahrenheit.  Dutch chef Peter Lute presents this method in two highly recommended videos.

Partridge combines very well with a range of vegetables and herbs. You could celebrate the end of summer by enjoying your partridge with a thyme-courgette cake. Easy to make and full of flavours. This year we decided to combine our annual partridge with Sauerkraut (Elzas-style) and Parsley Root Puree. 

Wine Pairing

We enjoyed our Partridge with a glass of Riesling, produced by Markus Molitor. A classic Moselle Riesling from Germany. Clear mineral aromas, also fruit, herbal, delicate and pure. Excellent with the flavors of the partridge and the sauerkraut.
In general you’re looking for an aromatic white wine, with perhaps a touch of sweetness.

What You Need
  • For the Partridge
    • Two Partridges
    • Two Garlic Cloves
    • Bay Leaf
    • Butter
    • Olive Oil
  • For the Sauerkraut
    • 250 grams of Sauerkraut
    • 50 grams of Bacon
    • One small Shallot
    • Bay Leaf
    • Caraway (Cumin)
    • Pink (or Red) Peppercorns
    • Juniper Berries
    • White Wine
    • Butter
  • For the Parsley Root Puree
    • Parsley Root
    • Cream
    • White Pepper
    • Nutmeg
What You Do
  1. Start with preparing the sauerkraut
  2. Slice the bacon and chop the shallot
  3. Fry the bacon in some butter in a small iron skillet
  4. After a few minutes add the shallot
  5. Mix sauerkraut, pink peppercorns, crushed juniper berries, crushed caraway, white wine and a splash of olive oil
  6. Add the sauerkraut to the skillet, add bay leaf, some butter, cover with foil and transfer to the oven (110° Celsius or 230° Fahrenheit)
  7. Leave in the oven for 4-6 hours
  8. Check the sauerkraut every hour, mix and add water if needed.
  9. A very helpful instruction (in Dutch) how to prepare partridge is presented and demonstrated by Peter Lute in two excellent videos. Please watch them and see how it should be done.
  10. In summary: prepare the partridge by carefully cutting off the two legs and removing the lower part of the back of the bird (the tail bone area)
  11. Warm a heavy iron pan and add butter
  12. Coat the birds with butter, making sure they have a very light brown colour
  13. Transfer the pan to a warm oven: 70° Celsius or 160° Fahrenheit
  14. Leave in the oven for 50-60 minutes
  15. Since the oven is on the ideal temperature for the meat, it doesn’t really matter if you leave them in the oven longer.
  16. Set aside.
  17. Peel the parsley root, chop and put in a pan with water and bring to a boil
  18. When the parsley root is halfway remove the water and add cream
  19. Let cook on low heat until tender
  20. Use a blender to create a puree. Add white pepper and nutmeg. You could also use a fork for a more structured puree
  21. Add a touch of olive oil to a non-stick pan, and quickly brown the meat, skin side only
  22. Just before serving separate the tenderloin from the breast and remove the fleece before serving the breasts
  23. If all is well you will see a beautiful pink colour, indicating your cuisson is perfect and your partridge as tasty and delicate as possible
Partridge with Sauerkraut and Parsley Root ©cadwu

The Art of Sauces: Cameline

Welcome to the Middle Ages, welcome to the world of bread sauces and strong flavours. Already in the thirteenth century Sauce Cameline was very popular and in the fourteenth century it could be bought ready-made from vendors. It was used as accompaniment with fish, wild boar, chicken and it was served warm or cold.

Different from béchamel, velouté, Hollandaise or other modern sauces, a bread sauce has a very specific structure. In the United Kingdom a bread sauce with milk, onion, cloves, bay leaf and peppercorns is served with turkey as part of the traditional Christmas dinner.

Recipes for Sauce Cameline are included in several books, for instance in Two Fifteenth Century Cookery by Faulke Watling and Thomas Austin, 1888 and in The Viandier of Taillevent: An Edition of All Extant Manuscripts by Terrence Scully, 1988. Both books are available via the well-known channels.

The Viandier of Taillevent is very much a historical research into the origin of 5 manuscripts with recipes, all ranging from probably the same source, but all different. The oldest is from the second half on the thirteenth century. Taillevent, also known as Guillaume Tirel (ca. 1310 – 1395), was cook to the court of France (Charles V and many others). As the dates suggest it’s not very likely that he is the author of the oldest version of the recipes but on the other hand no other name is mentioned.

Terence Scully explains in wonderful detail the background of the manuscripts and the recipes. He also includes a modern version of 220 recipes, based on his historical and culinary interpretation of all manuscripts. A very impressive book.
The Viandier of Taillevent is also the inspiration for many other historical cookbooks.

There is no original recipe for Sauce Cameline. Our impression is that it must contain vinegar, bread, cinnamon, cloves, grains of paradise, mace and ginger. 

Food Pairing

We would suggest pairing it with chicken. Depending on your choice of ingredients you could combine it with pork or wild boar. We enjoyed Sauce Cameline with small chicken roulades, stuffed with chopped raisins and rosemary.

What You Need

  • Old White Bread
  • Red Wine Vinegar
  • Cinnamon Powder
  • Ginger Powder
  • Mace
  • Clove
  • Grains of Paradise
  • Optional
    • Nutmeg
    • Raisins
    • Almonds
    • Black Pepper
    • Salt 

What You Do

  1. Soak the bread in red wine vinegar (and water)
  2. In a mortar combine cinnamon, ginger and other spices
  3. When using raisins, make sure to soak them.
  4. The first option is to strain the bread and then combine it with the mixture. We didn’t think that worked very well!
  5. The second option is to drain the bread, add the mixture to the liquid and add some of the bread. We used a blender to create a sauce. We added a bit more bread and cinnamon to make it tastier and thicker.
  6. The third option is to cook and reduce the mixture
  7. According to the Viandier it should be a cold sauce, but others claim a warm sauce was served during winter.
  8. Regardless the way you prepare it, keep in mind it should be a fairly acidic sauce with a dominant cinnamon taste.

PS

Grains of Paradise? New to me!
The grains are common to the North and West African cuisine. They were brought to Europe in the thirteenth century.
The taste is supposed to be hot, peppery and fruity. Unfortunately, we couldn’t find them and we didn’t feel the need to order the grains online. We substituted them with freshly grounded black pepper. The other flavours were sufficiently intense!