Choucroute de la Mer with Riesling

The traditional Choucroute Garnie or d’Alsa­ce comes with various sausages, smoked pork belly, confit de canard, steamed potatoes and Dijon mustard. Combine it with a glass of Riesling and you will have a great dinner. Perhaps a bit heavy on the stomach, but the sauerkraut itself will make things lighter.
A very interesting variation is called Choucroute de la Mer. We have fond memories of restaurant Bofinger in Paris. They serve an excellent Choucroute de la Mer with haddock, salmon, sea bass, king prawns, boiled potatoes and horseradish butter. The haddock is actually smoked haddock, which works really well with the choucroute. The sharp horseradish is an excellent alternative for the Dijon mustard. When in Paris, go to Bofinger and order Choucroute de la Mer!

For some reason it’s hard to find smoked haddock where we live, so we tried smoked herring (kippers). Worked very well. And because we wanted to give the fish a deeper, fermented flavour (after all, the choucroute is fermented white cabbage) we marinated the fish in miso before frying it. Excellent result, deep and intense flavours and not to heavy on your stomach.

Wine Pairing

We very much enjoyed a glass of Riesling with our Choucroute de la Mer. We decided to buy a bottle of 2017 Riesling Kalkmergel, produced by Weingut Rings. It’s a classic, organic Riesling from the Pfalz in Germany. It is juicy and fresh with balanced acidity. Great combination with the sauerkraut, the fish and the umami from the miso.

What You Need
  • For the Marinated Fish
    • Salmon
    • Haddock
    • Miso
  • For the Choucroute
    • One Shallot
    • 500 grams of Sauerkraut
    • 10 – 20 Juniper Berries
    • Dry White Wine
    • Olive Oil
    • Bay Leaf
    • Butter
  • For the Horseradish Butter
    • Horseradish
    • Soft Butter
  • For the Mash
    • Parsnip
    • Jerusalem Artichoke
    • Parsley Root
    • Or a combination of these
    • White Pepper
    • Crème Fraiche
    • Olive Oil
  • 4 Large Shrimps
  • Kippers
What You Do

This recipe requires a bit of planning!
The fish needs to be marinated for five days. Use a shallow bowl, cover the bottom with miso and place the fish on top of it. Now cover the fish with miso, making sure it’s completely coated. It requires a bit of patience. Cover the bowl with foil and transfer to the refrigerator for 5 days. Check every day and if necessary add some miso. We use miso with less salt (and more flavours). After five days the salmon will have a deep red colour and the white haddock will be also have an beautiful red/brown colour. The miso marinate will also change the structure of the fish, so carefully monitor when frying. We have the best results with thinner pieces of fish.
Four days later (so one day before your want to serve the choucroute de la mer): taste the sauerkraut. If too much acidity, then squeeze and remove some of the liquid. Cut and slice a shallot. Crush the juniper berries (feel free to add a few more, we just love them). Now combine the sauerkraut with the shallot and the berries. Mix. Add white wine, a generous splash of olive oil and a bay leaf. Coat a heavy (iron) oven dish with butter and add the mix. Put aluminium foil on top of it, making sure you press it on the sauerkraut (as if it’s a cartouche). Leave for 4-6 hours in the oven on 80° Celsius or 175° Fahrenheit. Cool and store in the refrigirator for the next day.
Warm the dish in the oven (same temperature, let’s say one hour) and in parallel make the mash. Finish with some crème fraiche, a dash of excellent olive oil and white pepper. Keep warm.
Combine the soft butter with the grated horseradish. Taste and adjust. Set aside.
Clean the prawns without removing the head
Make sure you have three nice, warm pans. One heavy iron skillet for the prawns, two non-sticky ones for the salmon and the haddock.
Wash and dry the salmon and the haddock. Decide on the order of frying. We started with the salmon. We like to have a bit of caramelisation on the salmon.
In parallel (planning!) remove the skin from the kippers. Transfer to the the oven and grill two minutes on the former skin side. Turn, drizzle with some olive oil and grill for another three minutes.
Make sure salmon, haddock, shrimps and kippers are ready to be served at the same time.
Serve the sauerkraut on a warm plate and decorate with salmon, kippers, haddock and shrimps. Add the mash. And don’t forget the horseradish butter!
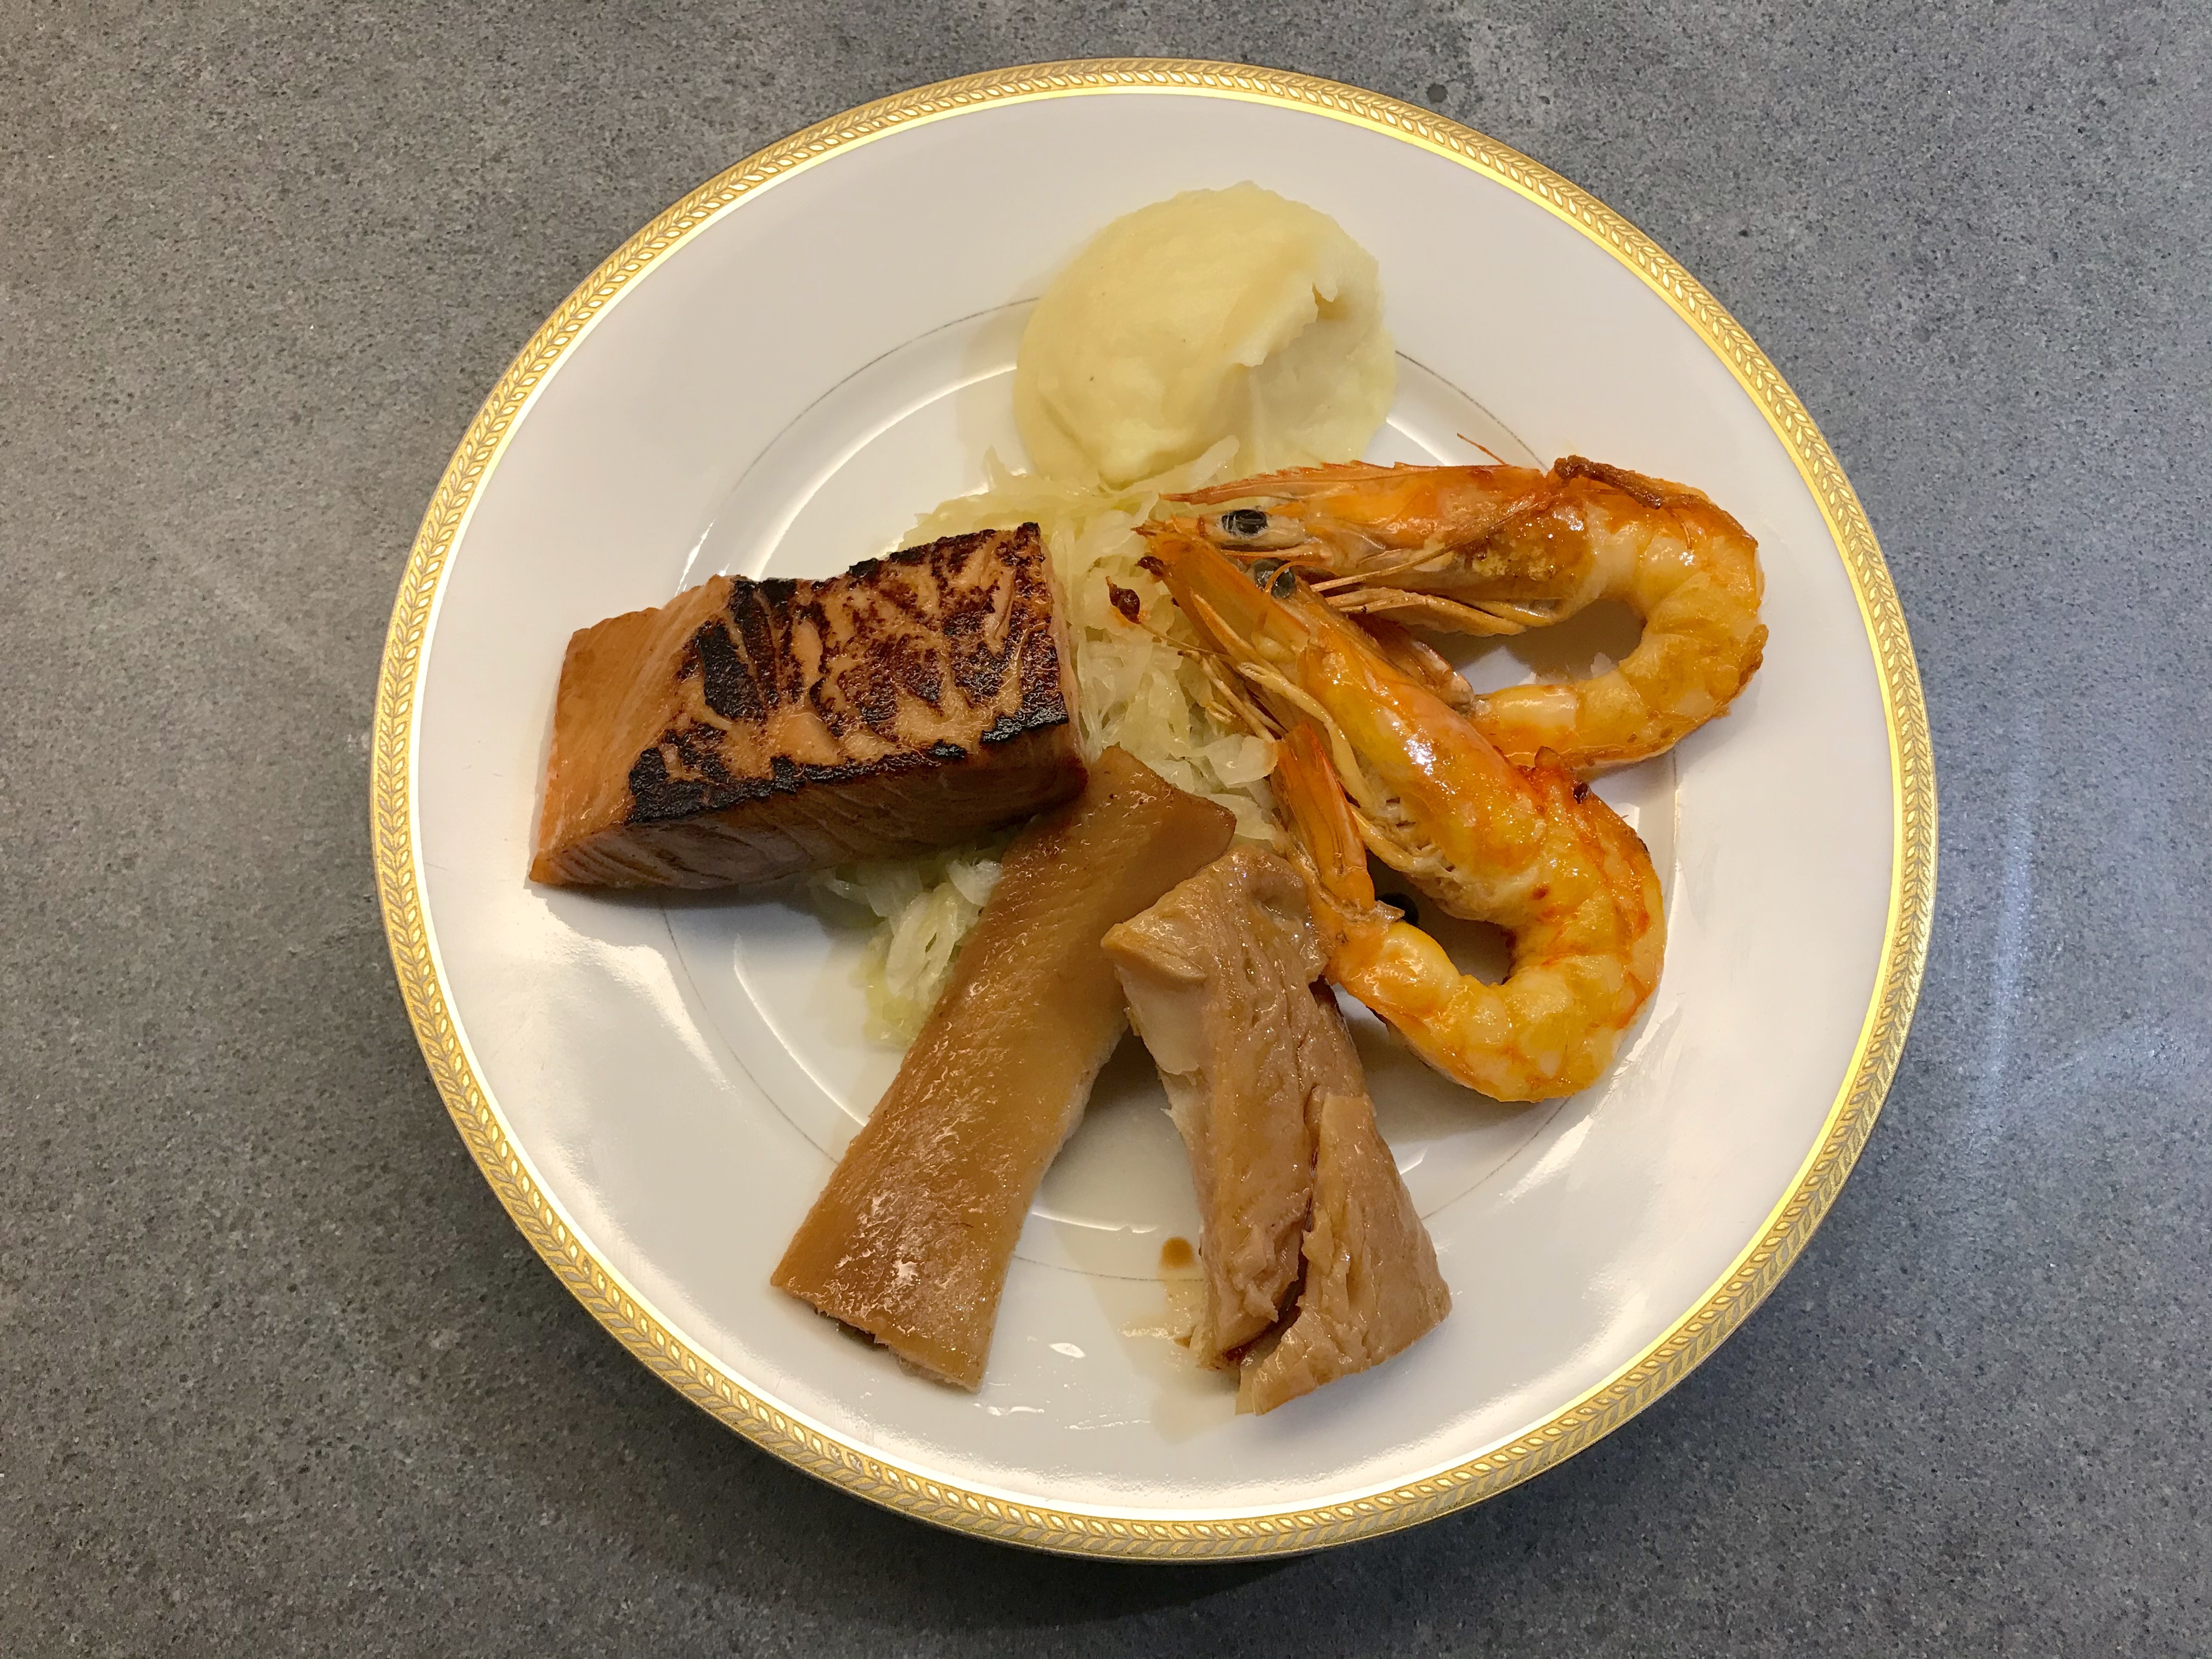
Choucroute de la Mer © cadwu

Partridge with Courgette and Thyme

Delicate

Partridge is perhaps the most delicate of game birds. They come in two sorts: the red-legged and the grey-legged. The grey-legged ones are more expensive and in general they may be hunted for a few days per year only. In all cases it is best to buy them early in the year (September until mid November). The season is short, so don’t wait too long!

The meat of a partridge is lean and tends to become very dry when preparing it. So what to do? Of course! Put a strip of bacon on each breast and transfer the poor bird to a hot oven.
Not really. The bacon will impact the characteristic taste of the partridge which is of course not something you want to do. And placing such a small, lean bird in a hot oven is a massive risk. Just a few minutes too long (simply because something else you are preparing takes a bit longer than expected) and the meat is bone dry. Stuffing the bird doesn’t help, the filling will be moist but the meat will be dry anyway.

The key to an excellent partridge is to be brave enough to use an oven on a really low temperature, meaning the temperature the meat should have when you serve it. Restaurant owner and celebrated Chef Peter Lute introduced this method in the Netherlands.

Another interesting aspect is that, different from many other birds, the legs of the partridge are not that special. They are fairly small and have lots of tendons.
So, no bacon, no hot oven and focus on the breast.

Partridge combines very well with a range of vegetables and herbs. The classic combination is with choucroute (Alsace style). We wanted to link our partridge to late summer by combing it with a thyme-courgette cake. Easy to make and full of flavours.

Wine Pairing

A red wine is preferred, one that is not overpowering, with hints of red fruit, a touch of oak and soft tannins. Our choice was a 2016 Shiraz from Australia: the River Retreat Murray Darling Shiraz. Great value for the price.

What You Need

  • For the partridge
    • One Partridge
    • Two Garlic Gloves
    • Bay Leaf
    • Butter
    • Olive Oil
  • For the thyme-courgette cake
    • One Courgette
    • One Egg
    • Thyme
    • Parmesan Cheese
    • Olive Oil
  • Black pepper

What You Do

Start with preparing the partridge. This means carefully cutting of the two legs and removing the lower part of the back of the bird (the tail bone area, see picture). Warm a heavy iron pan and add butter. Add bay leaf and halved garlic gloves. Coat the bird with butter, making sure you get a very light brown colour. Put the legs on a plate and cover with foil. Now transfer the pan and the plate to a warm oven: 70° Celsius or 160° Fahrenheit. Leave in the oven for 50 – 60 minutes. Since the oven is on the ideal temperature for the meat, it doesn’t really mater if you leave them in the oven for 70 minutes. Remove the two breasts from the bird. Remove the bigger bone from the leg. Coat the meat with the fat from the pan. Transfer to a plate and cover with plastic foil.

Grate the courgette, transfer to a bowl, add a teaspoon of salt, mix and transfer to a sieve. Let rest for at least two hours. Discard the liquid. Wash the courgette with cold water and put the grated courgette in a clean cloth. Squeeze out as much liquid as you can. Beat the egg slightly; mix with the courgette, the grated Parmesan cheese and a generous amount of thyme. Add olive oil to a fairly hot non-sticky pan and start frying the courgette mixture. This takes longer than expected! In the mean time make sure your heavy iron skillet is heated through and through. Flip the courgette cake and fry the other side. In parallel add olive oil to the skillet, and quickly brown the meat. Separate the tenderloin from the breast and remove the fleece before serving the breasts. If all is well you will see a beautiful pink colour, indicating your cuisson is perfect and your partridge as tasty and delicate as possible. Before serving add some black pepper and extra thyme.

Duck with Ginger, Mirin, Soy Sauce and Yuzu

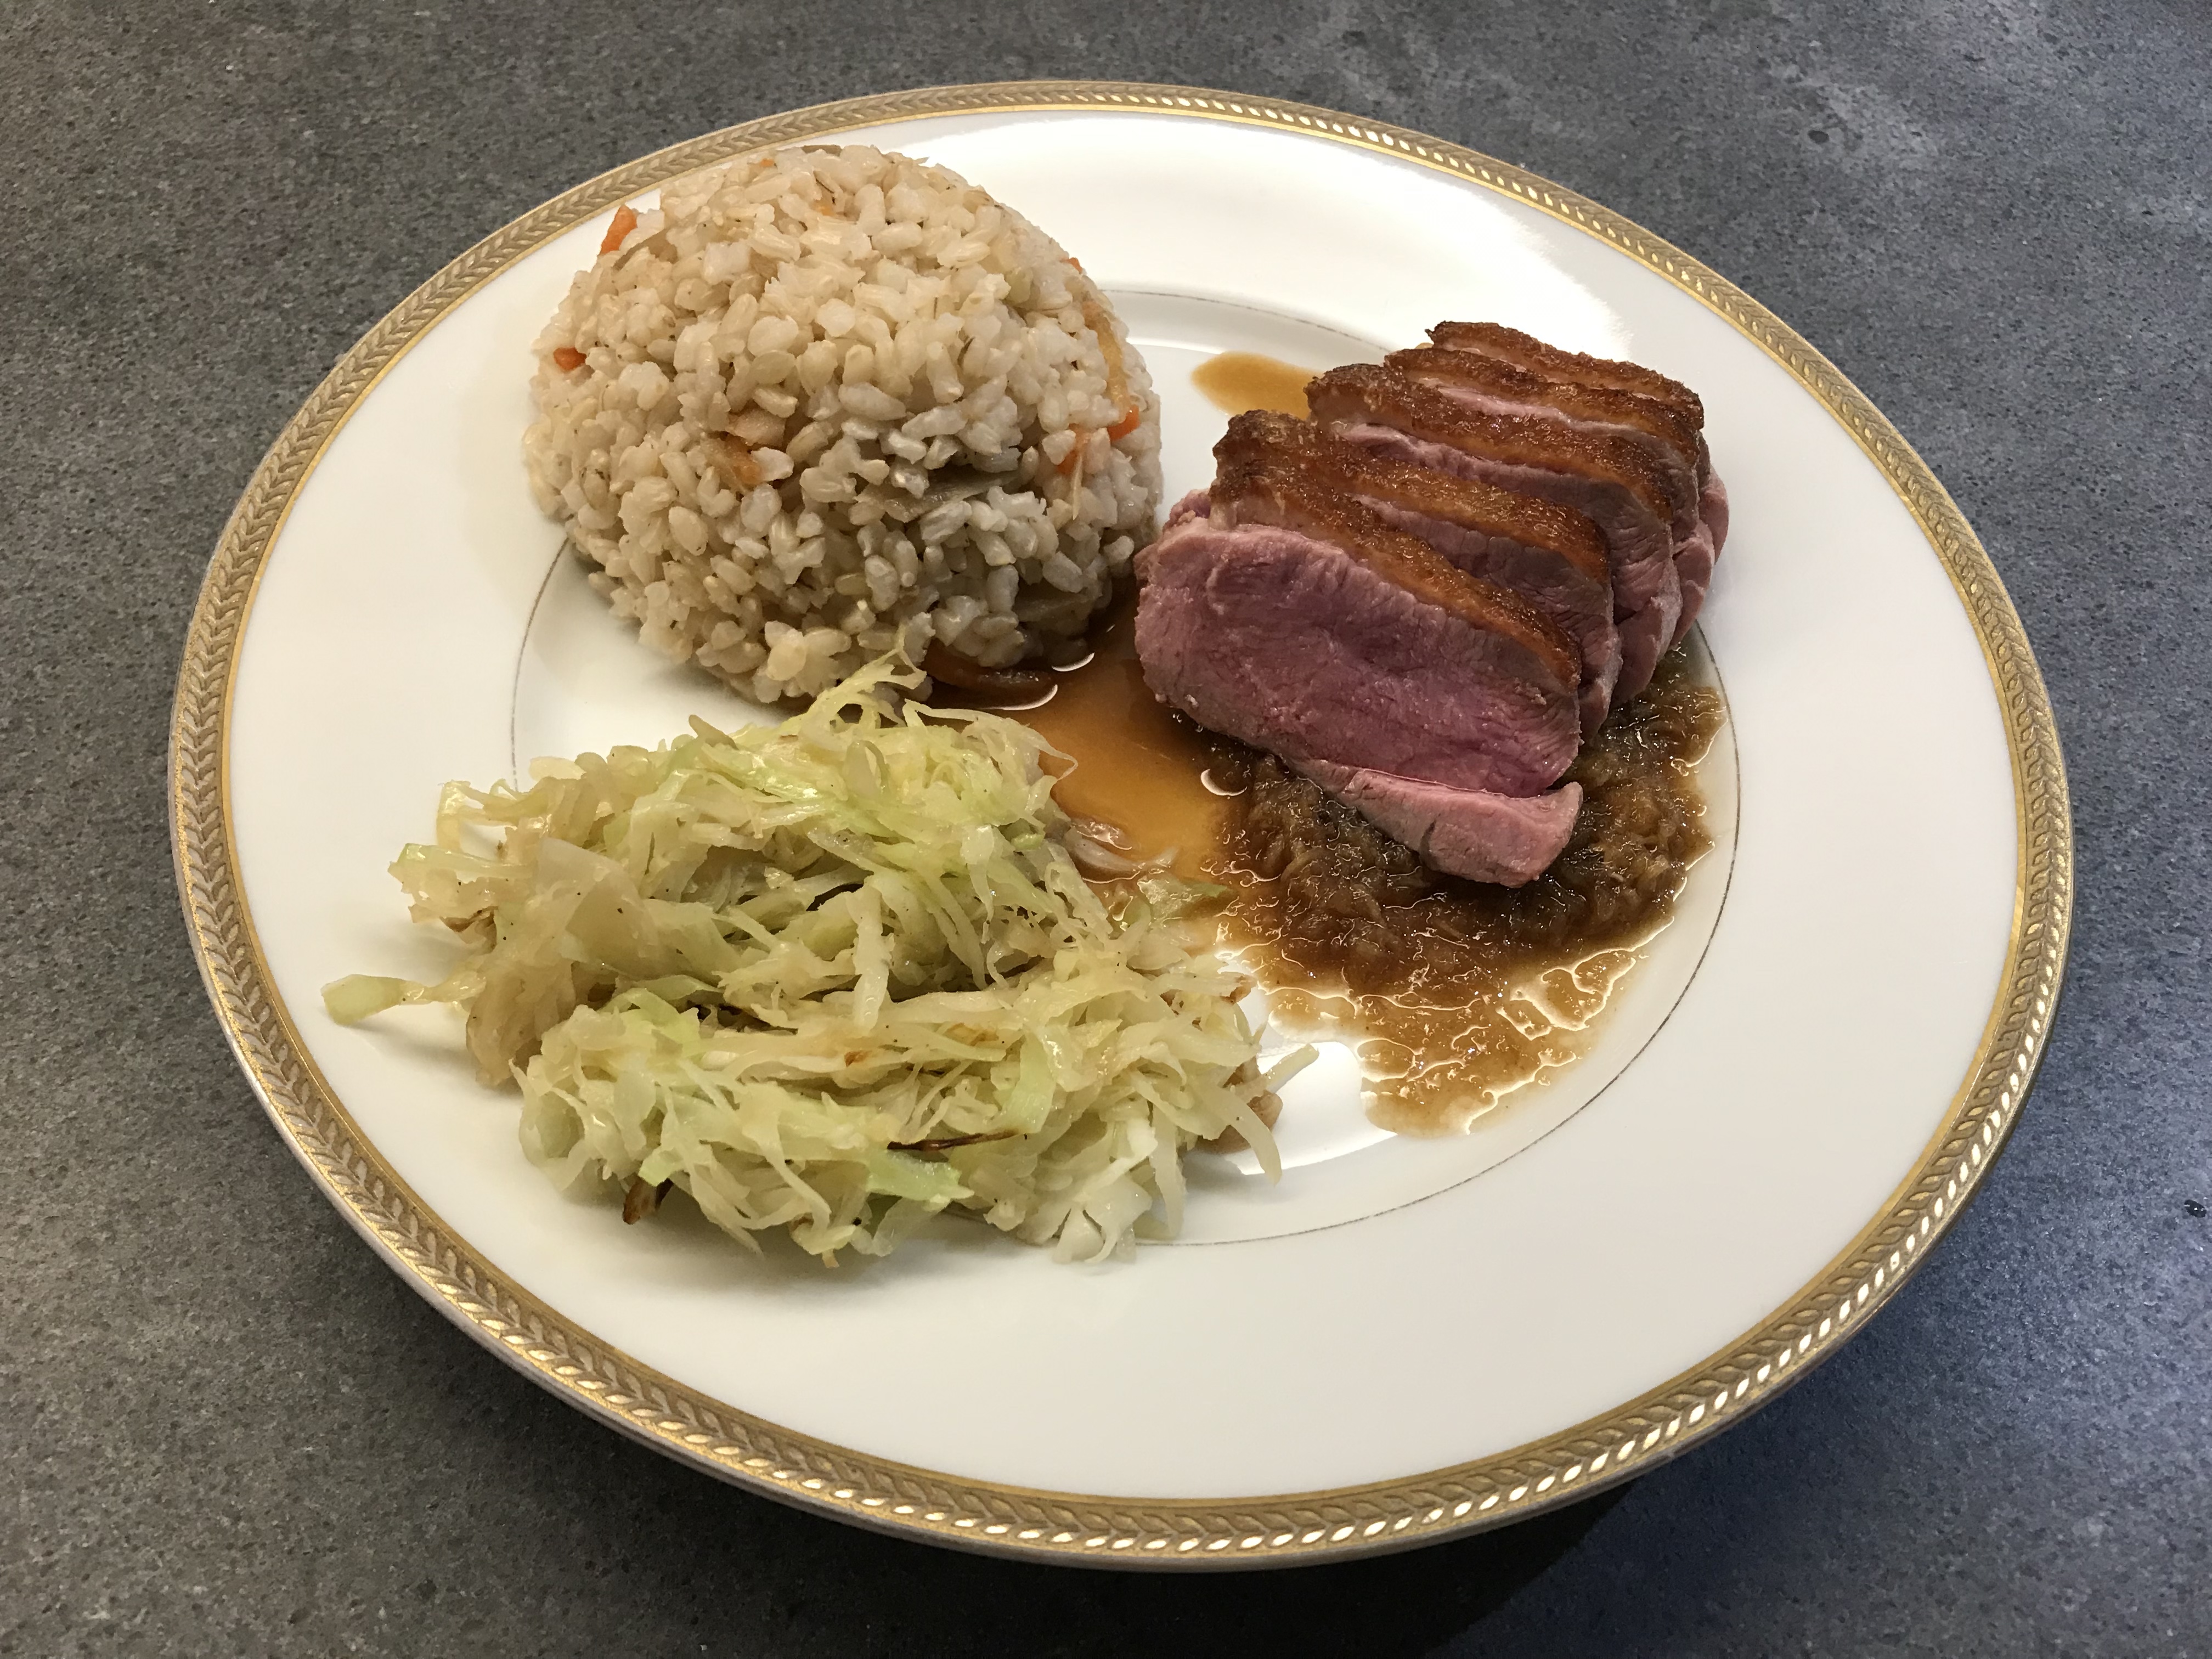
Obviously Breast of Duck is great when combined with an orange sauce (or even better, with Mandarine Napoléon). Or combined with a Green Pepper Sauce, or with hoisin, soy sauce and five-spice powder (as used for Peking Duck). We combine the duck with fresh ginger (a bit spicy, but since the ginger is cooked in the sauce it will be very mild), yuzu (citrus fruit originaly from Japan, Korea and China) and sweet mirin and soy sauce. The cabbage comes with tamari and sesame oil, so this dish is full of wonderful flavours. Have we mentioned the pickled cucumber?

Wine Pairing

You could combine the duck with white wine, provided it has lots of character, for instance a Gewürztraminer. A red wine is the more obvious choice: a rich, warm Carignan will do nicely. The wine needs to combine with the richness of the dish and of course the sweetness of the soy sauce and the mirin. Duck is somewhat sweet in its own right and the sauce amplifies this. The wine should be fruity (plum), spicy and definitely not too woody.

What You Need
  • 1 Breasts of Duck (250 grams)
  • Soy Sauce (we prefer the version with less salt)
  • Mirin
  • Yuzu
  • Ginger (fresh)
  • Water
What You Do
  1. Check the breast of duck for remainders of feathers
  2. Remove the vein on the meat side of the breast (and the odd membrane you don’t like)
  3. Put on a dish, cover and transfer to the refrigerator
  4. Leave in the refrigerator for a few hours, making sure it’s nice, firm and cold. We want crispy fat, so we need to fry the meat relatively long. In order to get the right cuisson, we start with cold meat (so not your normal room temperature).
  5. Fry the duck in a hot, non-sticky skillet for 12 minutes on the skin side
  6. Reduce the heat after a few minutes. You don’t need oil or butter, the duck fat will do the trick
  7. Flip and fry for 2-3 minutes on the other side
  8. Remove from the pan and cover the meat with aluminium foil in such a way that the crispy skin is not covered. The foil should only cover meat
  9. You may want to remove some fat from the pan
  10. Add water (2 tablespoons) and a generous amount of grated ginger (let’s say 3-4 centimeter), stir, add mirin (2 teaspoons) and soy sauce (1 tablespoon)
  11. Keep warm
  12. Add liquid from the duck to the sauce
  13. After 10 minutes or so the ginger should be soft and the flavours integrated. If not, just give it a few more minutes
  14. Remove the breast from the foil and slice
  15. Make sure that any liquid left is added to the sauce
  16. Quickly stir the sauce, add a bit of Yuzu (1 teaspoon) to bring acidity to the sauce, heat a bit more, dress on a plate and put the slices of duck on top of it.
  17. PS quantities of soy sauce, yuzu and mirin may vary depending on the brand, sweetness, saltiness and the quality of the meat
Serve with…
  • Vegetables
    • Oxheart or Chinese Cabbage
    • Olive Oil
    • Tamari
    • Sesame Oil
  • Rice
    • Whole Grain Rice
    • Pickled cucumber

Grate the cabbage. Fry in a warm skillet in some olive oil. Add some tamari. Taste and adjust if necessary. Before serving add some excellent sesame oil. In parallel cook the rice and add some chopped pickled cucumbers to the rice.

Duck with Ginger, Mirin and Soy Sauce © cadwu


No-Knead Bread – UPDATE

Slow Rise Fermentation

A few months ago we shared a recipe of no-knead bread, based on the recipe courtesy of Jim Lahey, owner of Sullivan Street Bakery, New York. It was published in the New York Times in 2006 and can also be found in his book My Bread. It takes a bit of planning but preparing no-knead bread is simple and straightforward with a great result. We truly love it.
The recipe is based on slow rise fermentation. With only one gram of yeast in combination with 18+2 hours of rest, the yeast will do a wonderful job. The dough will be perfect. And kneading, as you would expect, is not required.

UPDATE – Talmière

Recently when enjoying the luxury of having a classic French bakery around the corner of our holiday apartment, we explored a range of beautiful French bread. One of these was the Talmière. It is enriched with various seeds, such as poppy seed, linseed, sunflower seeds and sesame seeds. Sometimes honey is added. The Talmière came with a beautiful crust and a rich taste. The bread is a bit compact compared to the usual Baguette or Tradition, probably as a result of the seeds in the dough.
We combined our ingredients with blue poppy seed and brown linseed.
Our best bread ever?

What You Need

  • 430 gram of Flour (we use 200 gram of Whole Grain Flour and 230 gram of Plain White Flour of French T65 Flour)
  • 25 gram Blue Poppy Seed
  • 30 gram Brown Linseed
  • 1 gram Instant Yeast
  • 4 gram Salt
  • 355 grams Water
  • Additional All Purpose Flour
  • Bran

What You Do

The easiest way is to read and follow the recipe and video as provided by the New York Times.
Or if you feel confident: mix flour, seeds, yeast and salt. Add water and create one mixture. Let rest in a bowl covered with foil for 18 hours. Dust your worktop with a generous amount of additional flour. Remove dough from bowl and fold 4 times. Let rest on a towel also generously dusted with flour and bran for 2 hours. Heat your oven to 230˚ Celsius or 450˚ Fahrenheit. Make sure the pot is also hot. We used a 20 cm Le Creuset Cast Iron Round Casserole. Put the dough, seam side up, in the pot, close it and bake for 30 minutes. Remove the lid and bake for 15 minutes until it is nicely browned. Let cool on a wire rack for at least an hour before slicing you no-knead with blue poppy seeds and brown linseed.

Bavette with Mai Take

Powerful combination

Mai Take (Hen of the Woods) is originally a mushroom from Japan and China. The Mai Take is known as a medicinal mushroom (but we’re not sure what it is supposed to cure; we just love the texture and the taste!). It can be wild or cultivated. One of our favourites is a salad with Mai Take, Shrimp, Crab, Coquilles St Jacques, Coriander, Dill and Parsley, created by Antonio Carluccio and published in 2003 in the Complete Mushroom Book. Go to your local bookstore and buy it! The book has a wealth of wonderful, simple recipes.

Bavette is beef from the flank. Other names are Flap Meat, Sirloin Tip and maybe Hanger Meat. Bavette (and other meat from the flank) is often used for stewing and poaching. Not many know it is actually very tasty and great when eaten saignant. Plus it’s not expensive at all. It is however hard to find because most butchers will use it for stews and assume their customers are not interested in it. If your butcher is a real butcher (so one that buys a complete animal and not just vacuumed bits) it’s a matter of asking.
Thyme is an essential element in the dish because it brings Bavette and Mai Take together. It’s not just a bridge between the two, it envelopes them.

Wine Pairing

We enjoyed our bavette with a glass of Verdarail, a rich wine from the south of France, with lots of red and black fruits. Spicy. A wine with a long finish and well-integrated tannins.

What You Need

  • Bavette
  • 100 gram Mai Take
  • Olive Oil
  • Butter
  • Thyme
  • Black Pepper

What You Do

We’re not the world greatest carnivores. Bavette has an intense taste, so we would recommend 100 grams per person maximum.
The bavette must be room temperature. So take it out of the refrigerator let’s say 2 hours in advance. Heat a heavy iron skillet, add olive oil. Fry as you would do a normal steak, but significantly longer. We fried our 214 gram of bavette for maybe 6 minutes. Agreed, you think your lovely bavette will be overcooked, but it will be fine. Ad some butter towards the end to coat the meat. Arroser and turn frequently. Check the firmness of the beef. As soon as you feel it becomes firmer, transfer to a plate and allow to rest for 15 minutes.
The Mai Take need a few minutes only. Fry them gently in the same pan. You may want to add some of the juices of the bavette.
Slice the bavette and serve with the Mai Take, a generous amount of fresh thyme and black pepper.

Monkfish Spanish Style

Rape a la Marinera

In October 2016 Jamie Oliver was criticised for making paella the wrong way. He dared adding chorizo to one of the most Spanish dishes ever. Paella should be made with rabbit, snails, chicken, beans, saffron and rice. How dare he insult all of Spain by adding chorizo to his Paella? Naked chef or not, ambassador of healthy food or not, no one touches Paella.

Rape a la Marinera is among our favourites because it’s all about monkfish, which is such a tasty fish. The monkfish is presented with a generous tomato sauce, large shrimps, vongole and bread. What better way to enjoy life!

In this recipe we will probably do a few things very wrong, but never mind, simply don’t tell your Spanish friends.

Wine Pairing

We very much enjoyed a glass of Spanish Verdejo. In our case a bottle of Monteabellon Rueda. In general wines made from the Verdejo grape combine very well with fish. The wine comes with the right acidity, giving freshness to the wine. It has floral aromas typical for the Verdejo grape. You may recognize the aromas of banana and exotic fruit.

What You Need

  • Monkfish
  • Olive Oil
  • Optional
    • Bay Leaf
    • Saffron
  • 4 Large Shrimps
  • Vongole (clams, Vongola Veraci)
  • White wine
  • Bouquet Garni

What You Do

The day before serving Rape a la Marinera make the tomato sauce.
Start by cleaning the monkfish and remove the skin where necessary. Clean the shrimps by removing the intestinal tract. Leave the head and the tail. Check the vongole and discard ones that are broken. In general vongole don’t need much cleaning. Vongola Verace are tasty, slightly sweet and juicy; great for Spaghetti Vongole and Rape a la Marinera.

In a large skillet fry the monkfish. When coloured add the sauce. Gently heat the sauce and cover the fish with it. Baste (arroser) and continue to do so. In parallel add some wine to a pan with a bouquet garni and let gently cook for 5 minutes.
Now it’s about timing! Add the raw shrimps to the pan with the monkfish, cover the shrimps with the sauce, continue basting both the fish and the shrimps. Add the vongole to the pan with the white wine. Cook quickly until open. Add some of the cooking juices of the vongole to the tomato sauce, mix, taste and add a touch of pepper. Serve the vongole on top of the monkfish and shrimps.
Serve with crusted bread.

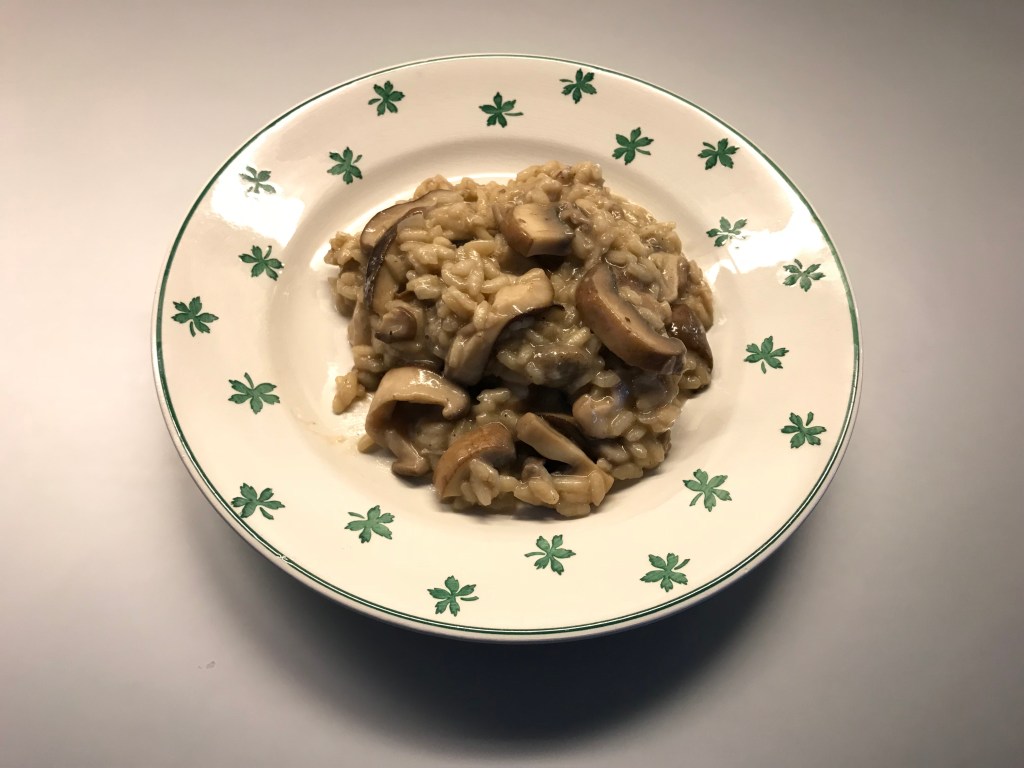
Risotto with Mushrooms

And on the 8th day he remembered he had forgotten to create food. So he quickly created something so simple, so tasty, so fulfilling that he knew people would still enjoy it, many, many years later. He called it Risotto.

Five Challenges When Making Risotto
  1. We’re always too busy! We are tempted to buy risotto rice that cooks quickly and can be served in under 10 minutes. Never rush a risotto!
    And by the way, what is so important that you don’t have 34 minutes to cook your own lovely, genuine, risotto? Why would quick be more important than tasty?
  2. And since we are too busy: why look for fresh cèpes if you can buy a pack of risotto rice with cèpes. Second mistake. You will not taste cèpes but a series of nasty E numbers and salt. Just look at the package! It will probably contain 0,01% of cèpes.
  3. We think risotto is too basic, so we’ve decided to prepare a luxurious version. Let’s add tomatoes, or salmon, or spinach and pumpkin, or chicken, or saffron, shrimps and peas. Please don’t. It will only ruin the lovely combination of rice, butter, stock and Parmesan cheese.
  4. Risotto is too heavy, too rich. Let’s use crème fraîche or Mozzarella and not Parmesan and not butter, let’s simply skip the butter. Fourth mistake: butter and Parmesan cheese are essential, for the taste, the mouthfeel and the consistency.
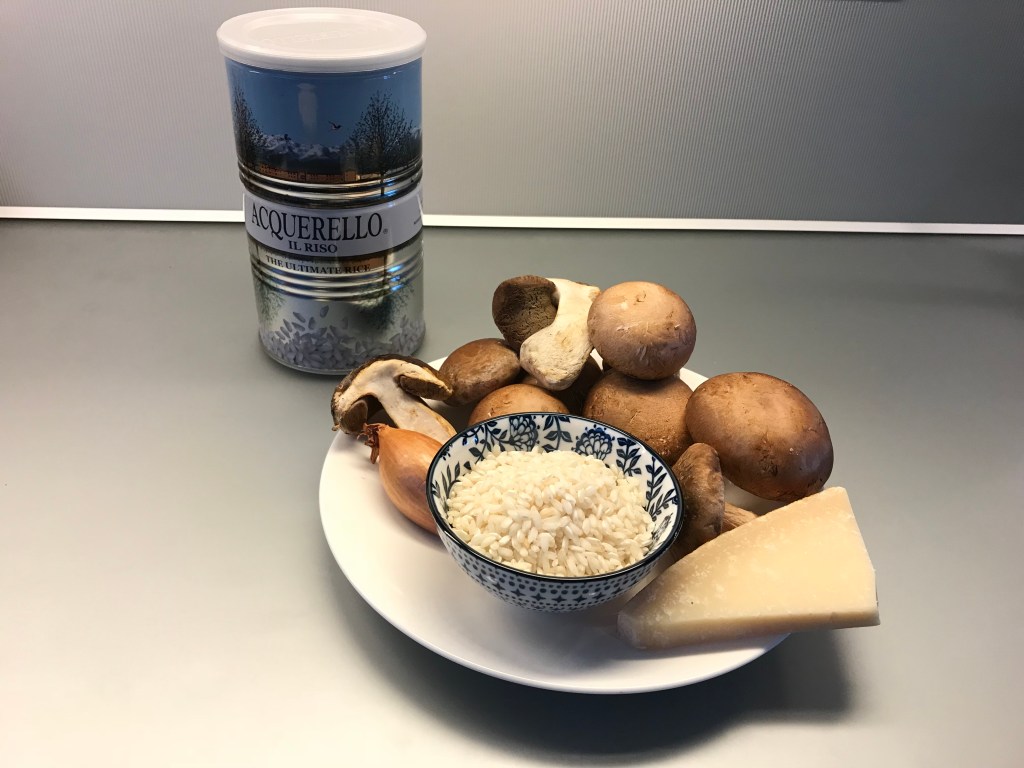
  5. Buy risotto-rice without checking if it’s the right rice. We use beautiful Carnaroli rice, superfine quality, produced by Acquerello. It doesn’t come cheap (we pay € 11,95 per kilo) but why would you not treat yourself to the best risotto rice? It has all the right qualities and the taste is outstanding.
Wine Pairing

We enjoyed our Risotto with a glass of Soave. Some acidity, touch of bitterness, nicely balanced with the butter and the cheese. It’s light and fruity; it elevates the risotto.

What You Need
  • 70 grams of Acquerello rice
  • 1 Shallot
  • Butter
  • Olive Oil
  • 100 gram of Shiitake
  • 200 gram of mushrooms, for instance Chestnut Mushrooms
  • optional: 100 gram of Cèpes
  • Chicken Stock
  • Parmesan Cheese
What You Do
  1. Peel and chop the shallot
  2. Add butter and olive oil to the pan and glaze the shallot
  3. In parallel clean and slice the various mushrooms. Feel free to use other mushrooms as well. We think the Shiitake is an important one because it adds depth to the taste
  4. Bring the stock to a boil
  5. After 5 minutes add the mushrooms to the pan and fry gently for 5 minutes
  6. Add the rice to the pan and coat the rice for 2 minutes
  7. Start adding the stock, spoon by spoon and stir the rice frequently
  8. When using Acquerello rice it takes 18 minutes
  9. Check the rice
  10. When okay, transfer the pan to the kitchen counter top and leave to rest for 2 minutes.
  11. Add chunks of butter, stir, add a bit more butter and the grated Parmesan cheese
  12. Stir, a bit of black pepper, add more butter or Parmesan cheese if so required
  13. Serve immediately.

Gordon Ramsay’s Authentic Asian Cuisine

Lucky Cat

This spring Gordon Ramsay opened a new restaurant in London: the Lucky Cat. Offering Asian food in a restaurant inspired by Tokyo’s 1930s teahouses and Shanghai’s drinking dens. A pre-view opening night for critics and journalists triggered a debate about authenticity. Could Gordon Ramsey claim to offer ‘authentic Asian food’ or should he stick to mashed potatoes, fish and chips? Was Ramsay guilty of Cultural Appropriation (dominant cultures profiting from the preparations and traditions of other cultures while those cultures are unable to do the same)?

Which brings us to Authenticity. Can a country, a city, a culture claim ownership of food? Can Nice claim the Salade Niçoise, can France claim French Fries? Can Japan claim udon and soba?

Unfortunately the debate derailed because of the aggressive way people started to contribute (or contributed right from the start Gordon would say). A pity because it’s interesting to study the origin and background of food. Why do we eat the food we eat? Why do we cook the way we do? Why do we add certain herbs? What’s the origin?

Udon Noodles

Earlier this year we visited the inspiring city of Hakata, also to see the monument dedicated to Udon and Soba. There are not many food-related monuments, so this was special. The story is that Shoichi Kokushi (a Japanese Buddhist monk) returned from China in 1241 to Hakata where he founded the Joten-Ji temple. He introduced udon and soba (amongst other products) to Japan, notably to Hakata. People in Hakata claim to produce udon noodles based on Shoichi Kokushi‘s recipe. Authentic Udon Noodles.

Back to Gordon Ramsay

Cultural Appropriation is a nasty concept. It’s culinary theft based on perceived ownership. But in reality culinary traditions evolve and continue to evolve, for better and for worse. That’s how Udon became Japanese, that’s why you can order a Hawaiian pizza, that why some people prepare a Salade Niçoise with balsamic vinegar, cucumber, basil, croutons or even red bell pepper.

In the mean time Gordon Ramsay made a clever move: he dropped the tag ‘authentic’ and simply opened the doors of his restaurant.

(This week’s recipe: Caesar’s Mushrooms with Udon)


The Art of Sauces: Kimizu with Tarragon

Béarnaise

After having prepared Kimizu with White Asparagus, we continued our experiment by making Kimizu with tarragon, indeed, Béarnaise based on Kimizu. Great result! The taste was wonderful with the tarragon clearly present in combination with a touch of sweetness (shallot) and acidity (rice vinegar). The sauce is elegant on the stomach compared to Béarnaise, which can be rather filling (as a result of the butter) in combination with red meat.

Wine Pairing

Obviously we want to drink a glass of red wine with our steak and Béarnaise. In general the fattier or more marbled the meat is, the more robust the wine needs to be. A Côte du Rhône, Syrah or blend of Grenache, Syrah and Mourvèdre is perfect with a rib eye. A Bordeaux with clear tannins would also be a good choice. With a leaner fillet we would serve a Pinot Noir or a Gamay (Beaujolais).

What You Need

  • Two Egg Yolks
  • 4 Tablespoons of Castrique
    • 3 Tablespoons of Rice Vinegar
    • 3 Tablespoons of White Wine
    • 2 Tablespoons of Fresh Tarragon
    • 1 Shallot
    • 2 coarsely crushed Peppercorns
  • Chopped Fresh Tarragon
  • Optional: Shopped Fresh Parsley and/or Chervil
  • Rib Eye
  • Olive oil

What You Do

Start by making the castrique. Basically this is a tarragon and shallot flavoured liquid with some acidity that replaces the water in the Kimizu. Same difference between Hollandaise and Béarnaise. Thinly chop the shallot. Combine the vinegar, shallot, white wine, peppercorns and tarragon in a small pan and slowly reduce the liquid until you have four tablespoons of castrique. Check the acidity. If needed add an extra table spoon of rice vinegar or an extra tablespoon of water and reduce again. Pass through a sieve, let cool and set aside.

Whisk the two egg yolks, add the castrique and whisk some more. Now transfer to the microwave and give it let’s say 10 seconds of 30%. Remove from oven and whisk well. Repeat. You will now feel the consistency changing. If not, don’t worry, just repeat the step. After 2 or 3 steps of 10 seconds, move to steps of 5 seconds on 30% power. Whisk, whisk again and feel free to find your own way. When the sauce is ready take it out of the microwave, continue whisking gently and (optional) cool slightly in a water bath.

In parallel add olive oil to a hot iron skillet and quickly sear the rib eye. Once it has a nice colour and is saignant transfer it to some aluminium foil and let rest for 10 minutes. Don’t wrap the meat in the foil, because then the cooking will continue and the meat will be medium.
If you however prefer the meat to be medium, then reduce the heat after having seared the meat, add some butter to the pan and turn the meat for a few minutes.

Add chopped tarragon (and chervil and parsley) to the sauce, stir and serve with the steak, rib eye or fillet.

Rib Eye with Kimizu and Tarragon def

Veal Rib Eye with Morels

Morels or Not?

In January 2019 one person died and over 30 people became ill after having eaten at Riff, the one Michelin star restaurant in Valencia. Media were quick in their analysis and decided that it was caused by the morels in one of the dishes. Today (April 4th) it’s not yet clear what caused the catastrophe.

Most sources mention that Morels contain some kind of toxin, one that can be destroyed by heating the morels. So lesson one with morels is not to eat them raw; they must be sautéed for a few minutes. Luckily the taste improves when sautéing them a bit longer, let’s say 10 minutes, so the toxin should be gone by then. However… some people report an upset stomach after having eaten morels and drinking alcohol. If you’re not used to eating morels, it could be wise to eat just a few and see how you react.

Look-A-Likes

A clear risk with morels is the fact that some other mushrooms are true look-a-likes. For example the highly toxic early morel or wrinkled thimble-cap and other ‘false’ morels. So picking them yourself is not a good idea unless you are an experienced morel-hunter. If you buy them (like we do), then buy them fresh or dried from a reliable source.

China

Some media mentioned that the morels used at Riff were brought in from China. Is that a problem? Yes from a sustainability point of view and No from a morel point of view. Morels are found in abundance in North America, Australia, China, Poland, France, India, Pakistan and many other countries, so why distrust them when they originate from China?

Back to Riff

Our humble view is that morels are in the mushroom top three together with Cèpes and Truffle. We are perfectly happy to eat them, for instance combined with Veal. And we look forward to having dinner at Riff when we are in Valencia later this year.

Wine Pairing

We prefer a full-bodied red wine, for instance a Nero d’Avola. We enjoyed a glass of Vanitá Nero d’Avola Organico Terre Siciliane I.G.T. 2016. It goes very well with the rich flavours of the veal and the morels. The wine comes with raspberries, red fruits and just a touch of vanilla. It has medium sweetness and a hint of herbs and spices, almost cinnamon. A long aftertaste and light tannins.

What You Need

  • Rib Eye of Veal
  • Butter
  • Olive Oil
  • Morels
  • Veal stock
  • Spinach

What You Do

Fry the Rib Eye in a heavy iron skillet for a few minutes until (very) pink. Wrap in aluminium foil and allow to rest. Reduce the heat and if necessary add some extra butter to the pan. Add the cleaned and halved morels and sauté gently. Add some veal stock and juices from the rib eye. In a small pan heat some olive oil, add the dry spinach and stir constantly. Serve the rib eye with the sauce, the morels and the spinach. Spring on your plate!