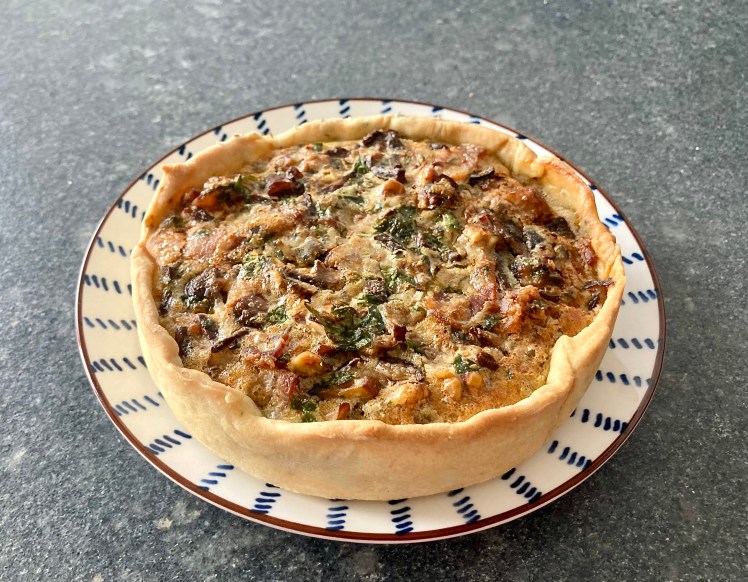
Pie with Walnuts, Mushrooms and Blue Cheese

The walnuts are the star of this pie! They have a drying effect, thanks to the tannins in the seed coat (the brown around the edible kernel) and they are slightly bitter, which pairs beautifully with the Roquefort. The walnuts give the pie a pleasant crunch.
We use a mix of mushrooms. If not possible, use chestnut mushrooms. Don’t use oyster mushrooms, as they release too much moisture.

Wine Pairing

Serve as a starter with a glass of unoaked, dry white wine. A cold beer will also be nice. The cake is not fussy!

What You Need
  • For the Pastry (15 cm or 6 in springform cake tin)
    • 100 grams of Flour
    • 50 grams of Water
    • 10 grams of Olive Oil
    • teaspoon Oregano
    • 1 gram of Salt
  • For the Filling
    • 4 rashers of Bacon
    • 150 grams of Mushrooms (Button Mushrooms, Shiitake, Nameko)
    • small Shallot
    • one Garlic Clove
    • Parsley
    • 2 organic Eggs
    • 50 ml Double Cream
    • 30 grams of Crème Fraîche
    • handful of Walnuts
    • 75 grams of Roquefort
    • Black Pepper
What You Do
  1. Combine flour, oregano and salt
  2. Add water and olive oil
  3. Kneed for a minute or so and store in the refrigerator for at least 30 minutes
  4. Preheat your oven to 180˚ C or 355˚ F
  5. Roll out the dough with a rolling pin on a lightly floured surface
  6. Coat a 15 cm or 6 inch round springform cake tin with oil
  7. Place the dough in the baking form
  8. Use a fork to make small holes in the pastry
  9. Line the pastry with parchment paper or aluminium foil, add baking beans and bake blind for 10 minutes. Best is to use the second level of the oven rack, so just below the central one
  10. Remove the beans and the paper or foil
  11. Leave the pie shell in the oven for 5 minutes
  12. Remove from the oven and allow to cool
  13. Chop the shallot, the mushrooms, the parsley and the garlic
  14. Crush the walnuts
  15. Crumble the roquefort
  16. Heat a heavy iron skillet
  17. Fry the bacon until golden brown
  18. Remove from the pan and allow to cool
  19. Reduce heat
  20. Add the shallot to the pan and glaze
  21. Increase heat, add mushrooms and fry
  22. After a few minutes reduce heat and add garlic
  23. After 5-10 minutes transfer to a plate and allow to cool
  24. Slice the bacon
  25. Add the eggs to a bowl and whisk
  26. Add cream and crème fraîche and mix
  27. Add Roquefort, parsley and black pepper and mix well
  28. Add bacon and mushroom mixture to the bowl and combine
  29. Add the filling to the blind-baed pie shell
  30. Transfer to the oven for 30-40 minutes on on 180˚ C or 355˚ F, same level as earlier
  31. Immediately after having removed the pie from the oven, brush the outside with olive oil. This will intensify the colour of the pastry
  32. Let cool and enjoy lukewarm (65˚ C or 150˚ F)
PS

Feel free to use more cream and less crème fraîche if you prefer a richer filling. If using a blue cheese with less presence, add more of it.

Pie with Blue Cheese, Mushrooms and Walnuts ©cadwu plus bacon, oregano, parsley and eggs
Pie with Blue Cheese, Mushrooms and Walnuts ©cadwu

The Art of Sauces: Remoulade

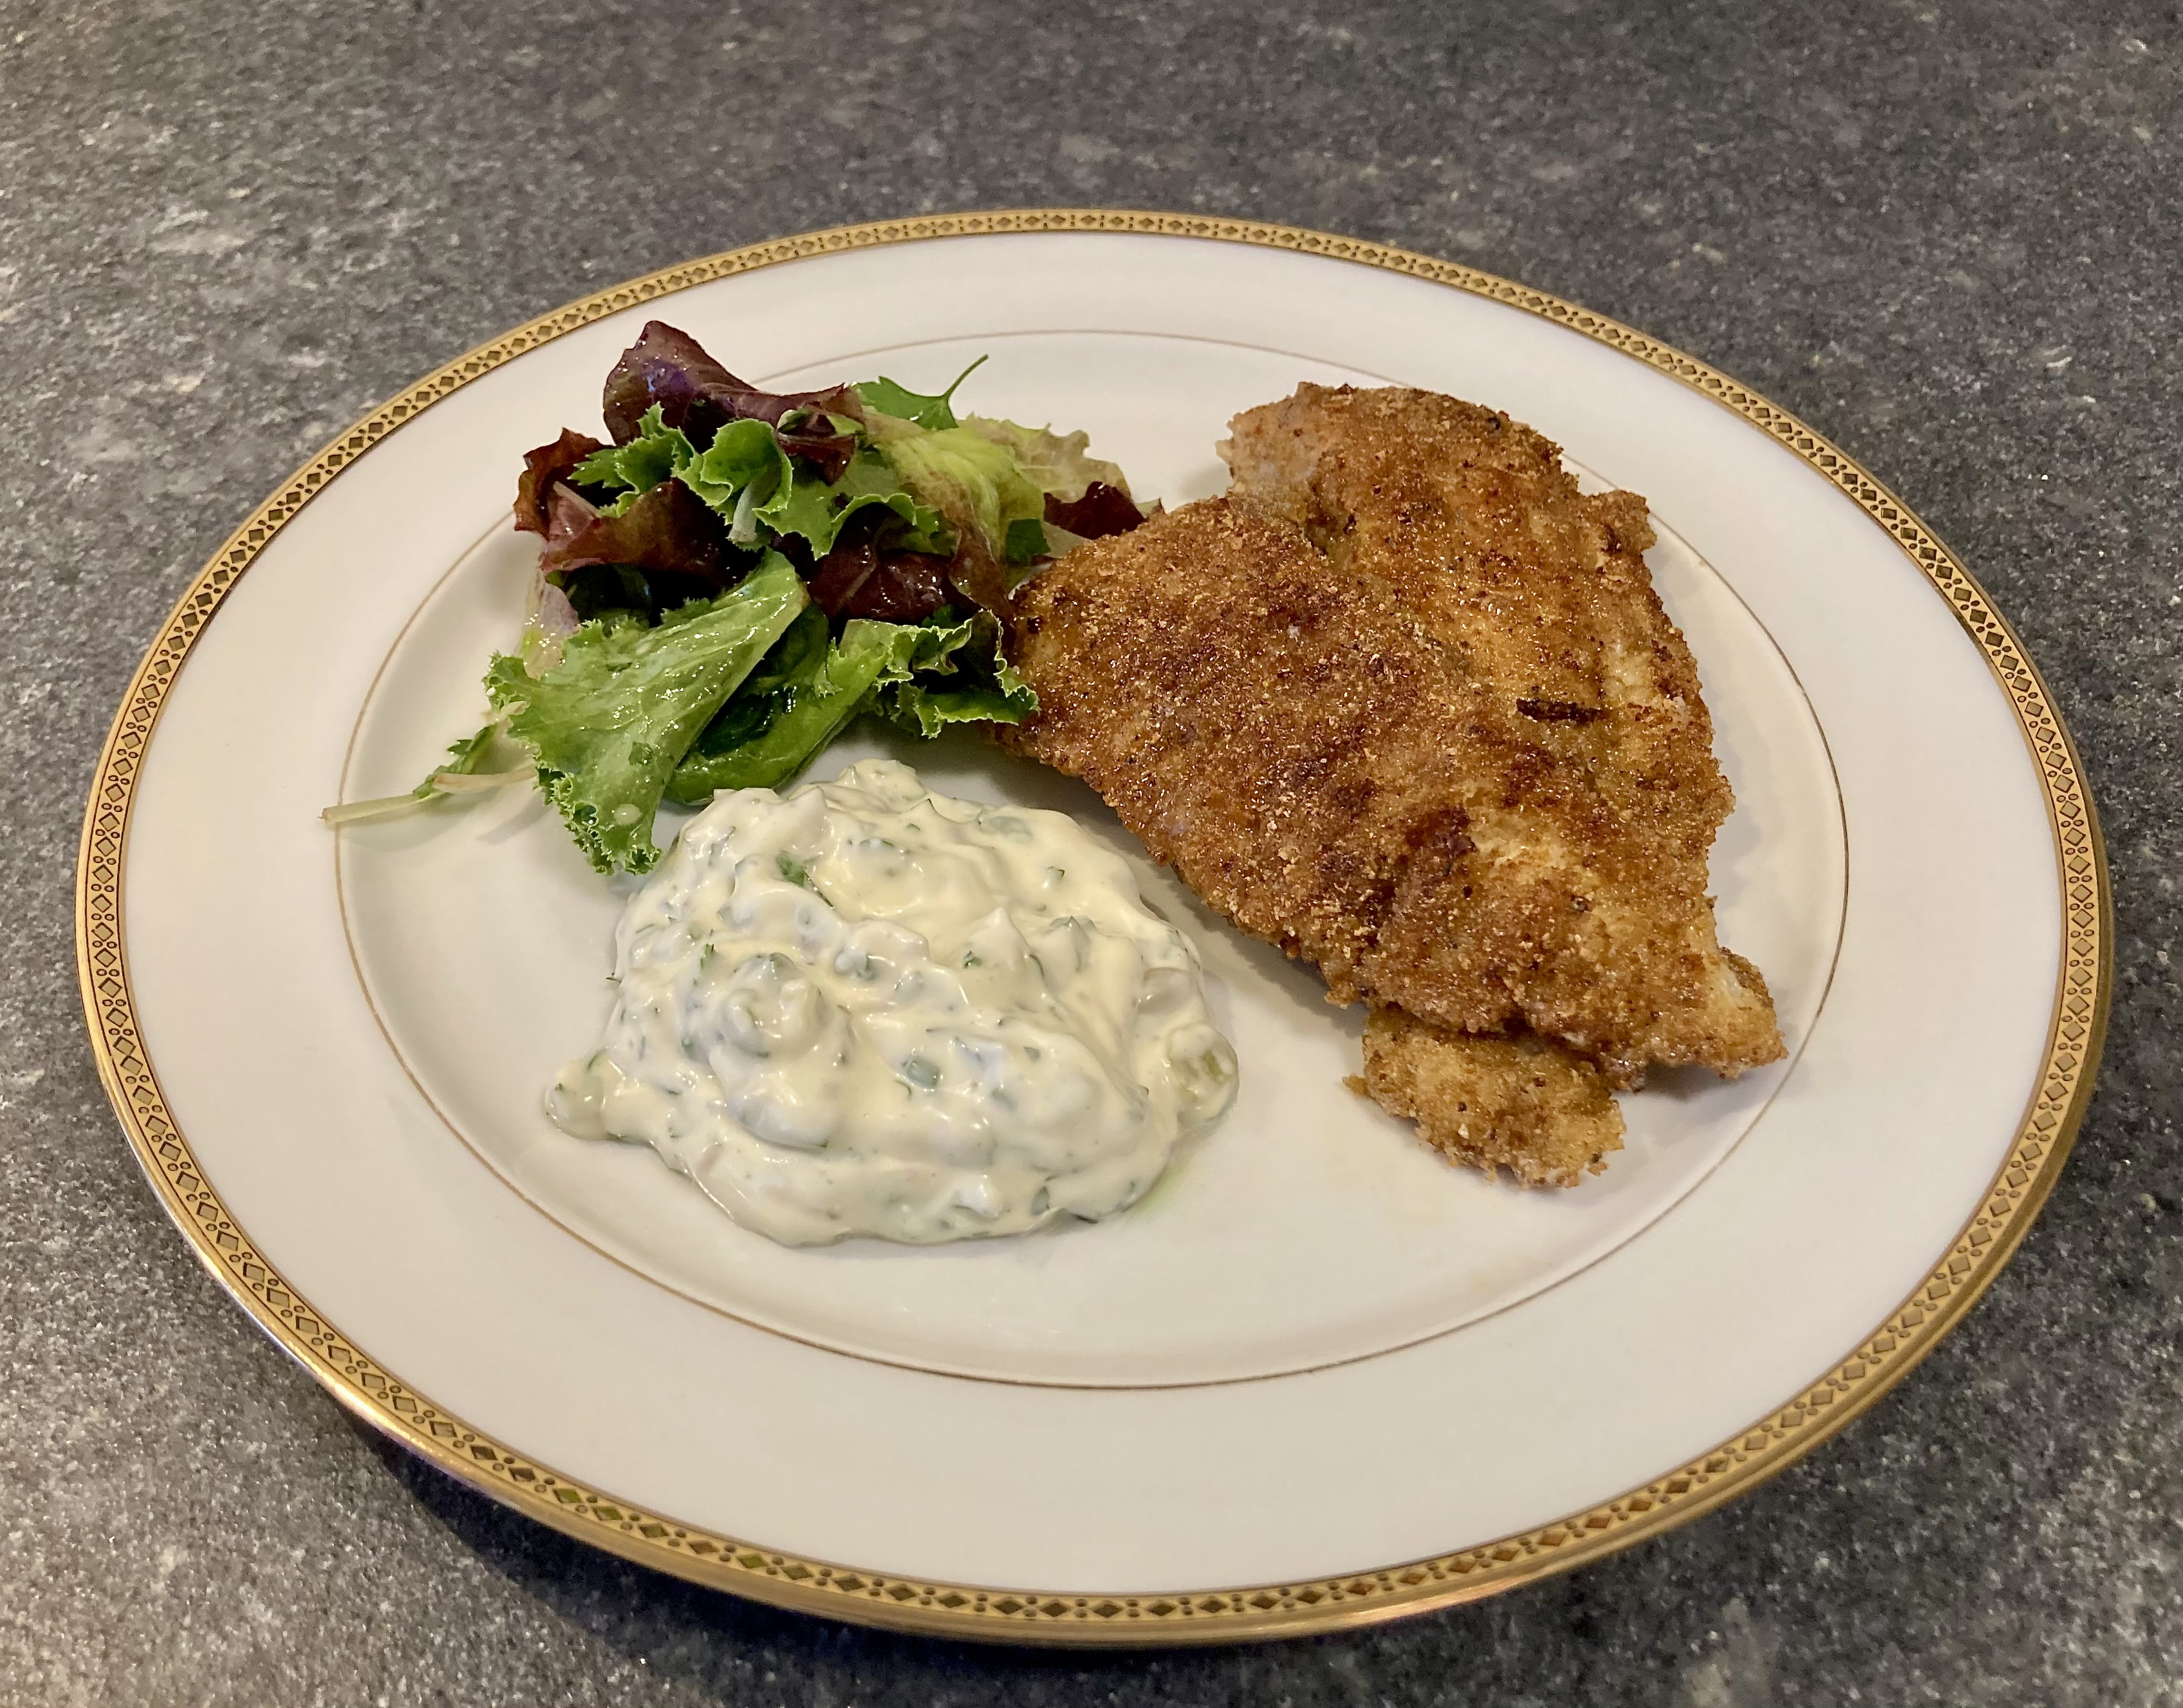
A few months ago we read an article in a Dutch wine magazine about pairing wine with a combination of fried cod, remoulade and a small salad. A nice challenge given the acidity in both the salad and the sauce plus the richness of the fried fish.

Remoulade is a sauce that goes very well with cold meat and fried or smoked fish. It combines mayonnaise with mustard, cornichons, capers, lemon and various herbs. Additional ingredients include anchovies, shallot and horseradish. Herbs could be parsley, tarragon, chives and chervil.
Turn it into a traditional French starter by adding celeriac (celery root).

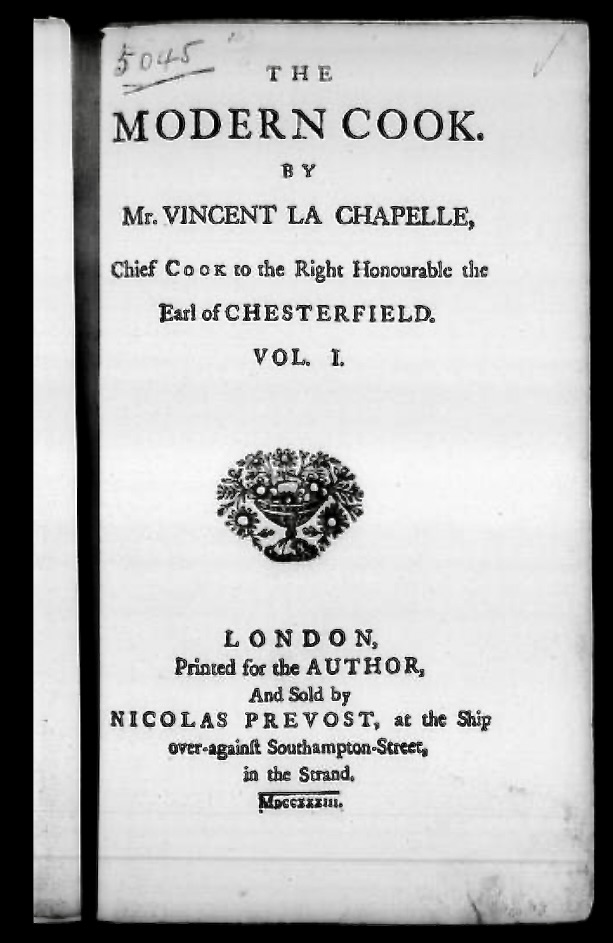
One of the first recipes for remoulade (actually two recipes) was published in London in 1733 by Vincent La Chappelle, chef to the Earl of Chesterfield, in volume 1 of his book The Modern Cook.  Both versions contain oil, shallot, garlic, lemon, parsley, mustard, cullis (meat broth) and capers. Other ingredients of the first version (hot remoulade) are gravy, wine and cloves. Additional ingredients of the second version are green onions and anchovies.

Wine Pairing

According to the magazine’s wine expert the flavours in the dish are round and filming. The expert suggests a white wine with some oak or a white wine from a warmer country. We decided to drink a glass of  Verdejo made by Castelo de Medina with 100% verdejo grapes. The wine is well balanced, fresh and full bodied. It has a delicate bitterness which works very well with all components in the dish.

What You Need
  • Remoulade
    • 200 ml Mayonaise
    • teaspoon of Mustard
    • 2 Cornichons
    • teaspoon of Capers (in brine)
    • ½ small Shallot
    • Lemon Juice
    • 2 tablespoons of mixed herbs (Parsley, Chervil and Chives)
  • Fish
    • Cod, Hake, Haddock, Weever or another firm white fish
    • one Egg
    • Chapelure
  • Salad
    • Mâche, Mesclun
    • dressing made with olive oil, lemon and mustard
What You Do
  1. Remoulade
    1. Make the mayonnaise
    2. Very finely chop the shallot
    3. Dry and slice the cornichons and the capers
    4. Chop the herbs
    5. Combine all ingredients
    6. Add lemon juice to taste
    7. Transfer to the refrigerator for a few hours
  2. Fish
    1. Beat the egg
    2. Heat a non stick pan
    3. Add oil to the pan
    4. Coat the fish with egg
    5. Coat the fish with chapelure
    6. Fry the fish until golden
  3. Dish
    1. Make a dressing by combining olive oil. lemon and mustard
    2. Toss the salad with the dressing
    3. Serve the fried fish with the remoulade and the salad
PS

Comparing the list of ingredients used by Chef La Chapelle you wil notice that modern remoulade doesn’t contain garlic or cullis. He didn’t use mayonnaise for the simple reason that the first recipe for mayonnaise was published in 1828, nearly one hundred years later.

Mayonnaise

Over the years we wrote about a range of sauces, from very classic Béchamel to intriguing sauces like Kimizu and Cameline. But for some reason we never wrote about mayonnaise!
The average Dutch person consumes some 2.2 kilo of mayonnaise per year, same for the US. These figures are based on mayonnaise produced by companies like Hellmann, Kraft, Heinz and many others. They all claim to produce ‘real mayonnaise’.

The historical back ground of mayonnaise is full of anecdotes as you would expect. Its origin could be a sauce  from from Bayon (France, Bayonaise), or from Mahón (Spain, Mahónaise) or perhaps it goes back to aioli (another sauce we need to write about!).

In 1828 Antonin Carême published a recipe for magnonaisse in his book Le Cuisinier Parisien, ou l’Art de la Cuisine Française au Dix-Neuvième Siècle. He describes three methods for making the sauce. The first combines two egg yolks, tarragon vinegar, oil (from Aix en Provence), salt and white pepper. Interestingly he suggests making the sauce in a terrine on crushed ice. He also describes what to do if the sauce splits: put a spoonful of cold béchamel with an egg yolk in a bowl, plus a spoonful of the magnonnaise (with the wooden spoon), and you stir this mixture vigorously, which becomes smooth and velvety. You mix in part, the magnonnaise, which by this work becomes again what it was at first.

Mayonnaise is an emulsified combination of egg yolk, oil, vinegar, salt and white pepper. Adding a teaspoon of mustard kickstarts the emulsification. The recipe below is for a neutral mayonnaise. It is velvety, soft and creamy with a subtle, pure flavour. It’s easy to adjust to your taste or to the dish you want to use it for.

We use a hand (immersion) blender to make our mayonnaise. The cup must be slightly larger than the head of the blender. For some reason you have to use a whole egg. We tried it with egg yolk only, which didn’t work.

What You Need
  • 1 organic Egg
  • 2 teaspoons of Mustard
  • 3 teaspoons of White Wine Vinegar
  • pinch of Salt
  • 300 ml Oil, for instance Rapeseed Oil or Canola Oil
  • White Pepper
What You Do
  1. All ingredients must be at room temperature
  2. Add egg, mustard, white wine vinegar and salt to the cup
  3. Gentle pour the oil on top
  4. Lower the blender into the cup
  5. Place the head of the blender against the bottom of the cup
  6. Start at the bottom on medium speed
  7. Move the blender upwards, very slowly, this may take 30 – 60 seconds
  8. You may want to increase the speed, going upwards
  9. When ready, add white pepper
  10. Put the mayonnaise to a bowl and transfer to the refrigerator
  11. The mayonnaise will last for 3 – 7 days, provided you use fresh ingredients and you store it at 4 °C (40 °F) or lower. However we suggest eating it within one or two days, because it’s so very tasty!
PS

Hellmann’s original mayonnaise also contains water, sugar, flavourings, paprika extract and antioxidant; Heinz Seriously Good Mayonnaise also contains water, sugar and spice. Kraft’s Real Mayo also contains water, sugar, dried garlic, dried onion, paprika and natural flavor. If you want real mayonnaise, simply make your own!

Mayonnaise ©cadwu made with oil, white wine vinegar, white pepper, one organic egg and mustard, using a (immersion) hand blender
Mayonnaise ©cadwu

Oven Roasted Tuberous Chervil

Tuberous chervil, also known as turnip chervil and bulbous chervil, is a forgotten vegetable. It was popular throughout continental Europe in the 19th century, but today it’s hard to find. Tuberous chervil is very tasty and easy to prepare. Its flavour will make you think of chestnuts, without a hint of bitterness. The ‘chervil’ in the name does not mean it’s the tuber of the chervil plant (like parsley and parsley root are related). It’s included because the leaves of tuberous chervil look like the leaves of chervil. The two are not related.
As more often, the tubers were replaced by potatoes: cheaper, easier to handle and easier to grow.

Earlier we made a purée with tubers, cream, butter and nutmeg. Combine it with lamb chops and you have a very tasty meal.

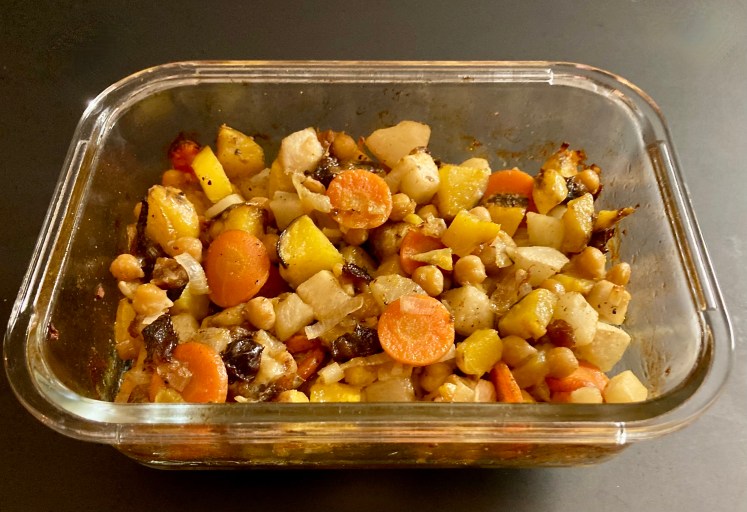
This colourful, flavourful and aromatic oven dish goes very well with pork and chicken.

What You Need
  • 5 Tuberous Chervil
  • 1 Parsnip
  • 1 Shallot
  • 1 Carrot
  • 1 Garlic Clove
  • 1/2 teaspoon of Cumin
  • 3 Pruneaux d’Agen
  • Handful of Chick Peas, drained and washed
  • Chicken Stock
What You Do
  1. Preheat your oven to 180 °C or 355 °F
  2. Chop the shallot
  3. Chop the garlic
  4. Chop the pruneaux
  5. Wash and peel the parsnip and the carrot
  6. If the tuberous chervils are young and fresh, you don’t need to peel them. The ones we bought were a bit older, so we peeled them
  7. Quartered tuberous chervils
  8. Slice the carrot
  9. Dice the parsnip
  10. Gently fry the shallot
  11. Add garlic
  12. Add cumin
  13. Transfer to a shallow dish
  14. Add tuberous chervils, parsnip, pruneaux, carrot and chickpeas
  15. Mix
  16. Add stock
  17. Cover the oven dish with aluminium foil
  18. Transfer to the oven for 30 minutes
  19. Flip the vegetables after 15 minutes
  20. Remove foil
  21. Leave in the oven for another 15 minutes
  22. Serve warm
Oven Roasted Tuberous Chervil ©cadwu with parsnip, pruneaux, carrots, shallot, cumin and garlic
Oven Roasted Tuberous Chervil ©cadwu

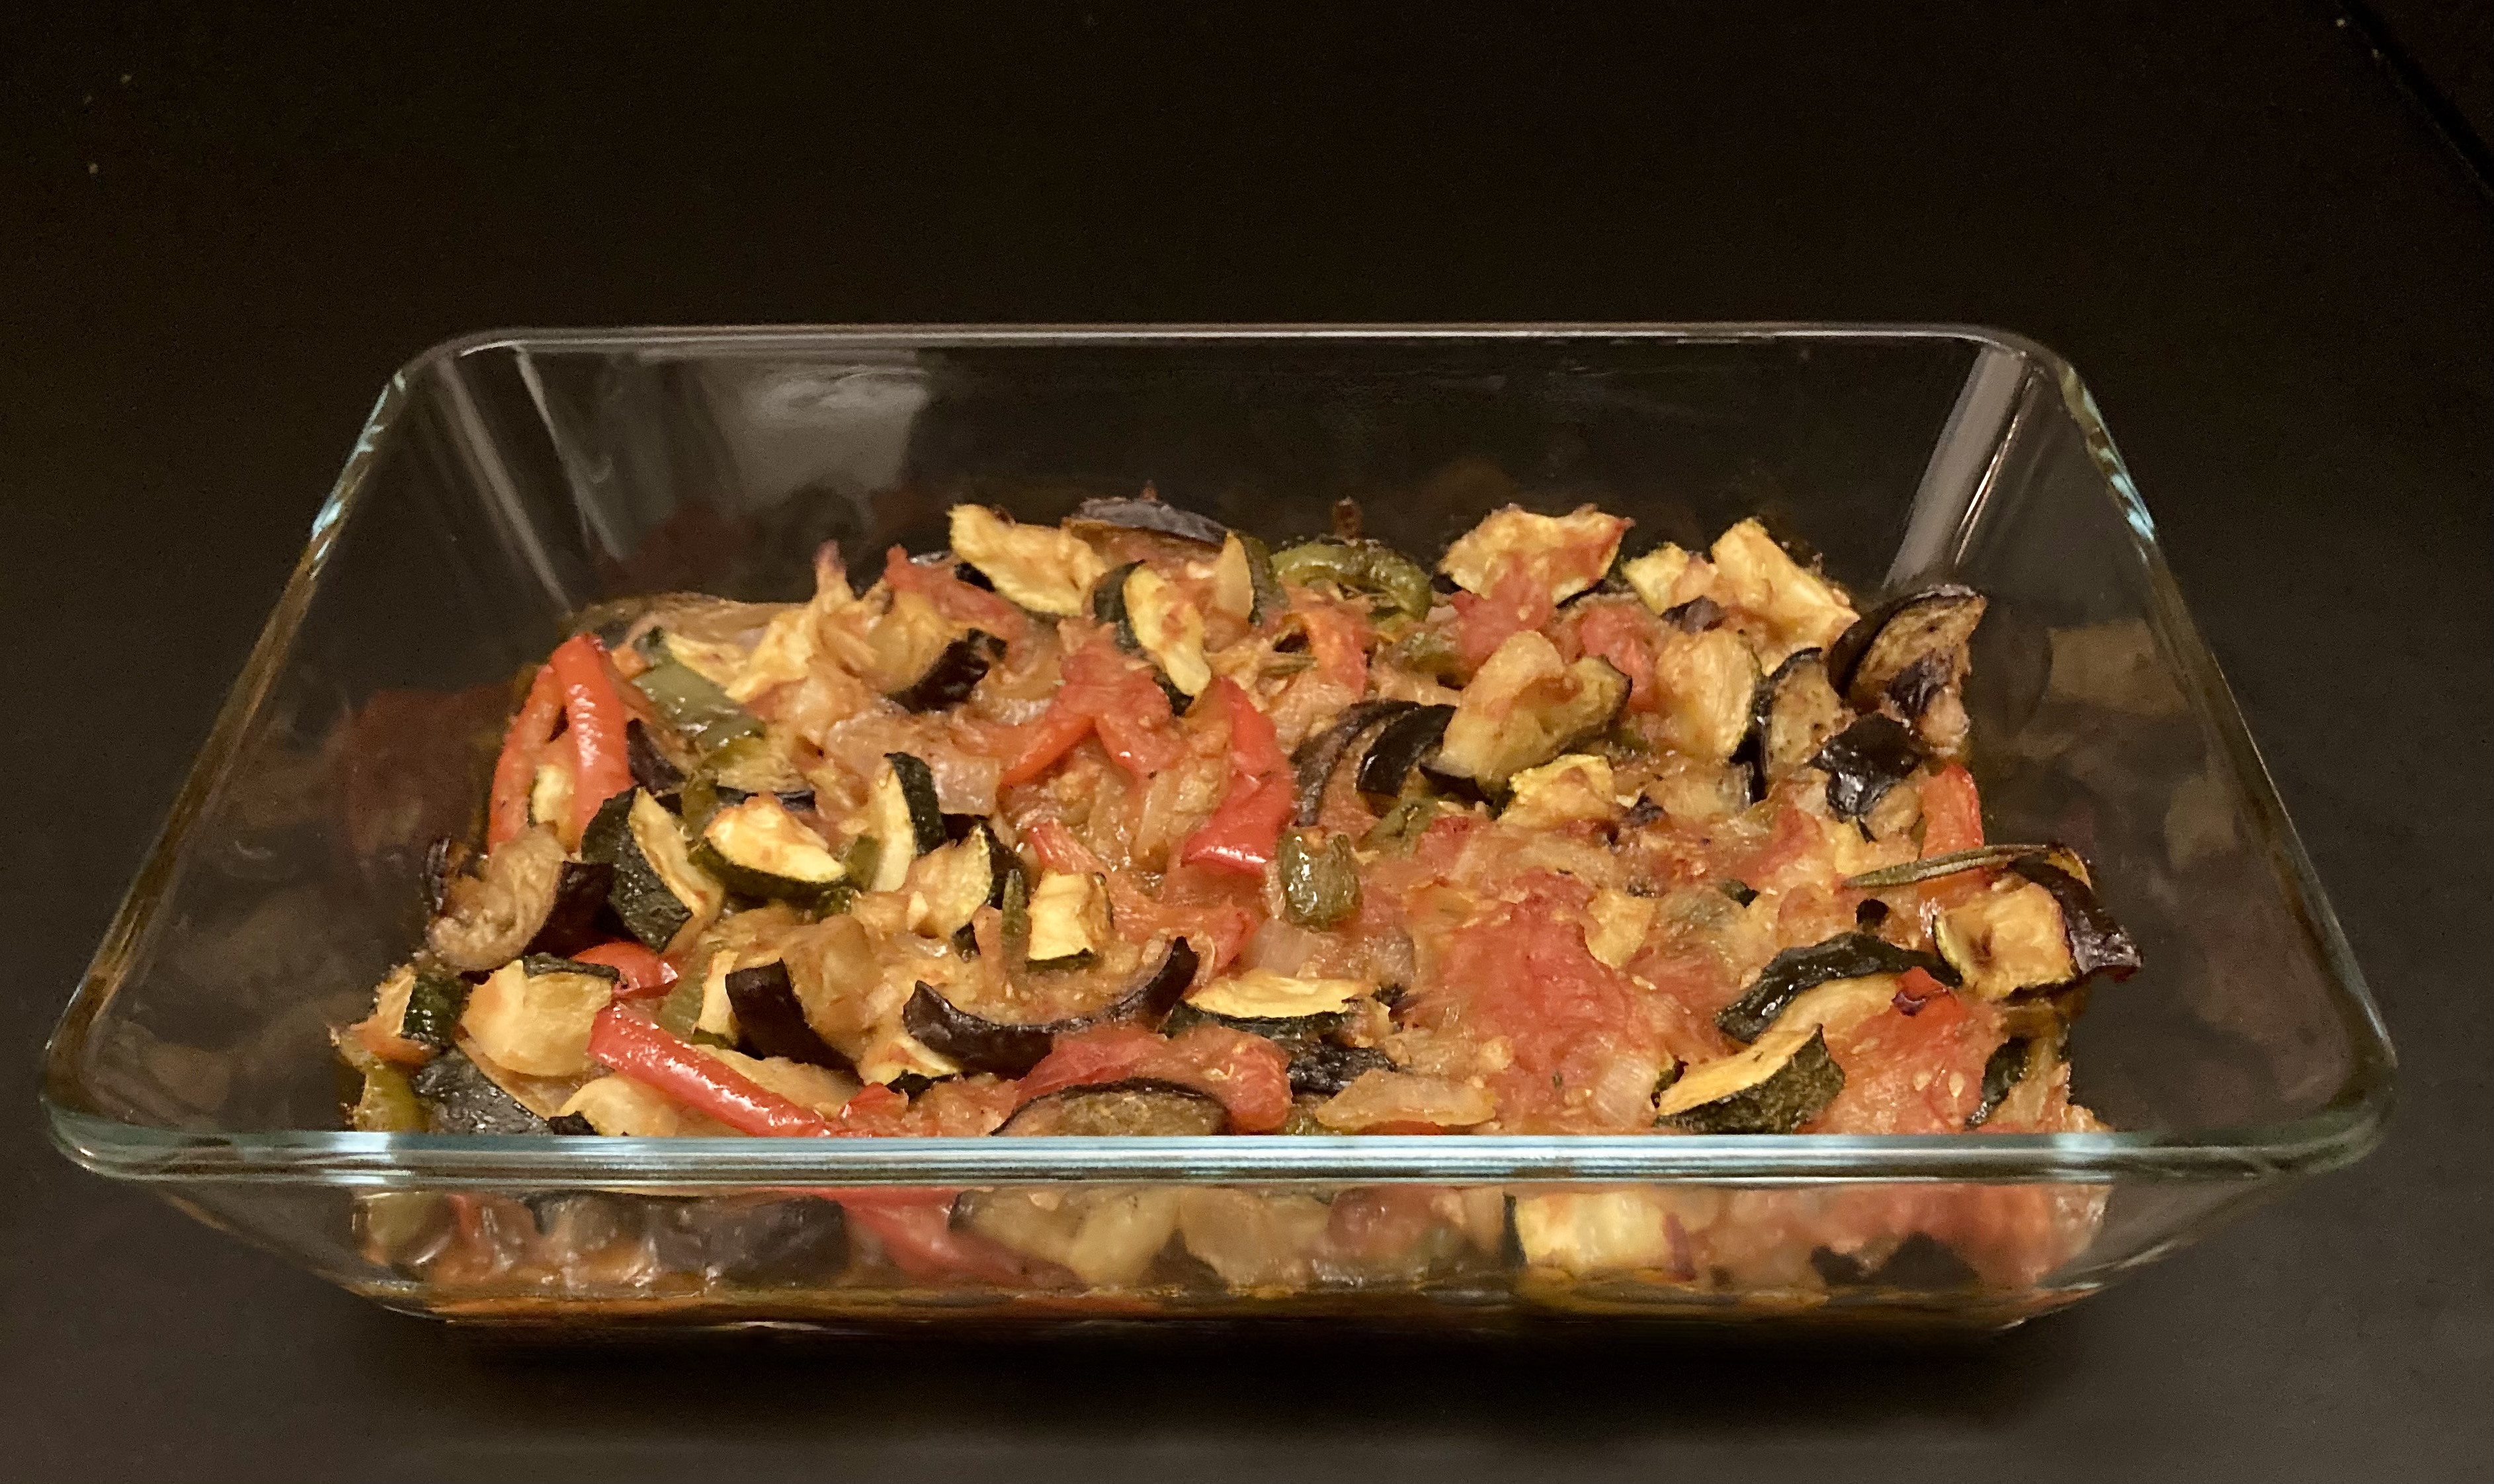
Ratatouille Niçoise

It’s always hard to say what the original version of a dish is, assuming it even exists. In most cases recipes evolve over time, influenced by people, availability of ingredients and culinary trends. Ratatouille is a good example: it originates in the Provence, or more precisely: in the Niçoise region. Its local name is ratatolha. Ingredients are typical for this area: tomatoes, onions, garlic, zucchini, eggplants and herbs like thyme and marjoram. Meaning that we don’t really know what the ingredients were before the introduction of tomatoes and bell peppers in the region.

In 1976 chef Michel Guerard in his book Le Cuisine Minceur introduced Confit Bayaldi, a variation whereby the vegetables (and mushrooms) are thinly sliced and baked in the oven.
In 1999 chef Thomas Keller added a piperade and a vinaigrette to the Confit Bayaldi. This is the ratatouille that features in the classic film Ratatouille.

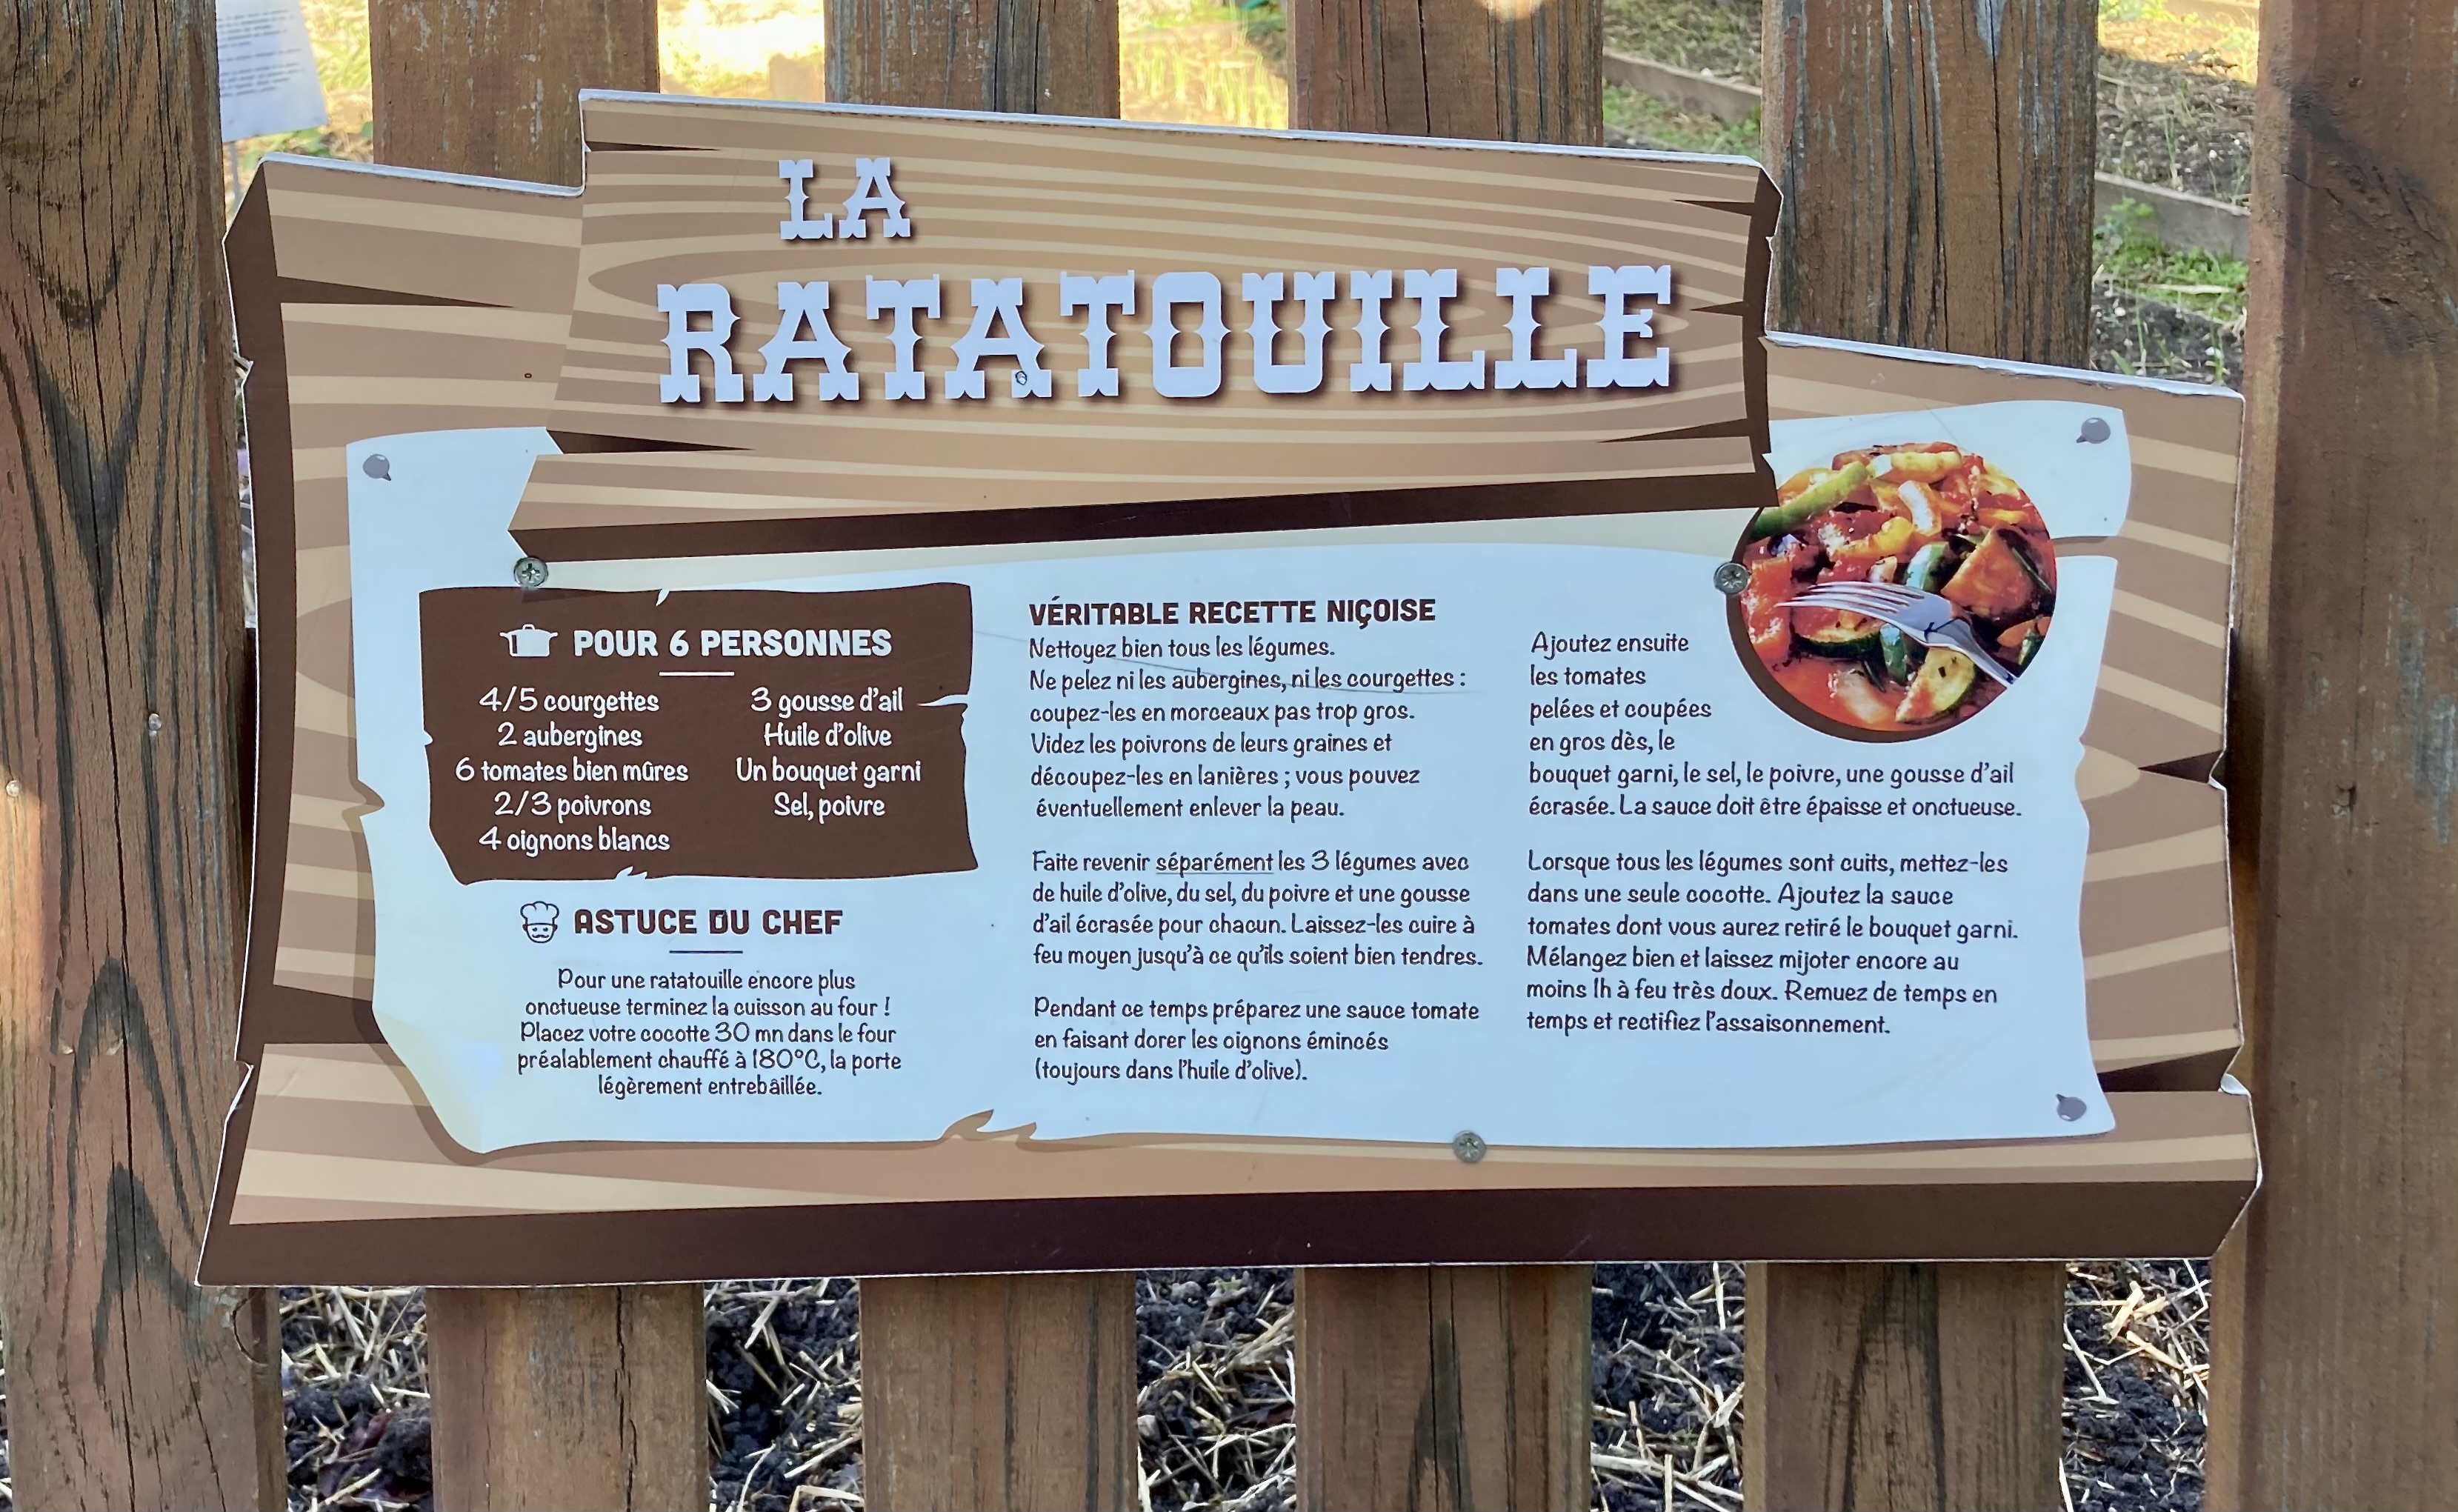
When reading the recipe for Ratatouille Niçoise, we noticed that the vegetables are fried separately, the onions are caramelised and the tomatoes are used to make a sauce that is added to the other vegetables towards the end.
The result is a very tasty, rich and powerful dish. Thanks to the way it’s prepared you will be able to taste the individual flavours and the combination. Making your ratatouille this way is perhaps a bit of work, but’s it’s not difficult and it’s worth the effort.
We served our Ratatouille Niçoise with grilled lamb chops.

Wine Pairing

We decided to enjoy a glass of red wine from the French Languedoc-Roussillon area, made with Syrah grapes by Les Jamelles. The wine has an intense dark colour and aromas of dark berries and a touch of vanilla. The flavour is a combination of some spiciness, dark fruit and mild tannins. In general, we suggest a not too complex red wine with some oak, dark fruit and character.

What You Need
  • 1 Zucchini (Courgette)
  • 1 Eggplant (Aubergine)
  • 4 Tomatoes
  • ½ Green Bell Pepper
  • ½ Red Bell Pepper
  • 1 large White Onion
  • 4 small Garlic Cloves
  • Olive Oil
  • Bouquet Garni (Thyme, Marjoram, Rosemary, Oregano)
  • Black Pepper
What You Do
  1. Clean the vegetables
  2. Coarsely chop the zucchini, the eggplant and the bell peppers
  3. Slice the onion
  4. Peel the tomatoes (heat a pan with water, dip 1 tomato in the hot water for 10 seconds and use a sharp knife to peel. If it doesn’t come off easily, dip for another 10 seconds)
  5. Chop the tomatoes
  6. Warm a Dutch oven, add olive oil and fry the onion until golden
  7. Add the chopped tomatoes, one crushed garlic clove, the bouquet garni and black pepper. Leave on low heat, no lid required. The sauce must become thick and smooth. This will take some time!
  8. In parallel: heat a skillet, add olive oil and fry the zucchini. When nicely coloured reduce the heat and add 1 crushed garlic clove and some black pepper. After a few minutes transfer to a plate and set aside
  9. In parallel: we used the same skillet to repeat step 8 twice, first with the bell peppers and then with the eggplant
  10. Once the vegetables are fried and the sauce is ready: warm a second Dutch oven, add the vegetables and combine with sauce
  11. Leave on low heat for one hour. No lid required
  12. Set your oven to traditional and 180 °C or 355 °F
  13. Transfer the pan to the oven for 30 minutes, leaving the door slightly open
  14. Just before serving remove the bouquet garni
PS

The recipe is on display in Parc Phoenix in Nice, so it must be the original! 

The 2026 Johannes van Dam Prize

On February 2nd, the prize-giving ceremony of the 2026 Johannes van Dam award took place in the main auditorium of the University of Amsterdam. Previous winners of the prestigious Johannes van Dam award are Harold McGee, Yotam Ottolenghi, John Halvemaan, Carlo Petrini, Alice Waters, Claudia Roden, Alain Passard, Asma Khan and Jeroen Meus

The 2026 Johannes van Dam prize was awarded to Jonnie and Thérèse Boer. In 1992 they opened their restaurant De Librije in Zwolle (the Netherlands). One year later they received their first Michelin star and since 2004 the restaurant holds three Michelin stars.

Inspiration

In 1965 Jonnie Boer was born in Giethoorn, not far from Zwolle. He was proud to use and serve local products (fish, game, herbs, plants, roots, meat) in his restaurants. One of his many signature dishes was zander with apple syrup and Riesling accompanied by a glass of Chardonnay. Very often guests were impressed by the quality of the zander. Jonnie would happily explain that the fish was caught in a river, two kilometers from the restaurant. If they served lamb, it wasn’t from New Zeeland or from Sisteron or Pauillac, it was from a farm in Giethoorn, managed by Jonnie’s nephew. Why import it from France when quality is available next door?

Nature was the basis of his food and techniques. In this video (in English) for instance, he uses oysters to kick-start the fermentation process. Brilliant idea! His style was imaginative with a focus on the food and the customer.

Thérèse Boer is co-owner of De Librije, sommelier and overall responsible for the restaurant. Together they wrote several books, most of them in Dutch. One of their books in English (PURER: Cooking, Wine & Spirits Bible) is available via the usual channels.

Sadly, Jonnie Boer passed away in April 2025 at the age of 60. Thérèse and her team continue running the restaurant, and they were able to keep the three Michelin stars.

The Prize

Professor Louise Fresco, chair of the jury of the Johannes van Dam award, emphasised that for decades Jonnie and Thérèse Boer led the gastronomic development in the Netherlands. With the award the jury also wanted to recognise their mentorship for younger generations. Jonnie and Thérèse Boer have put the Netherlands firmly on the global culinary map. They are pivotal in the history of Dutch food and cooking.

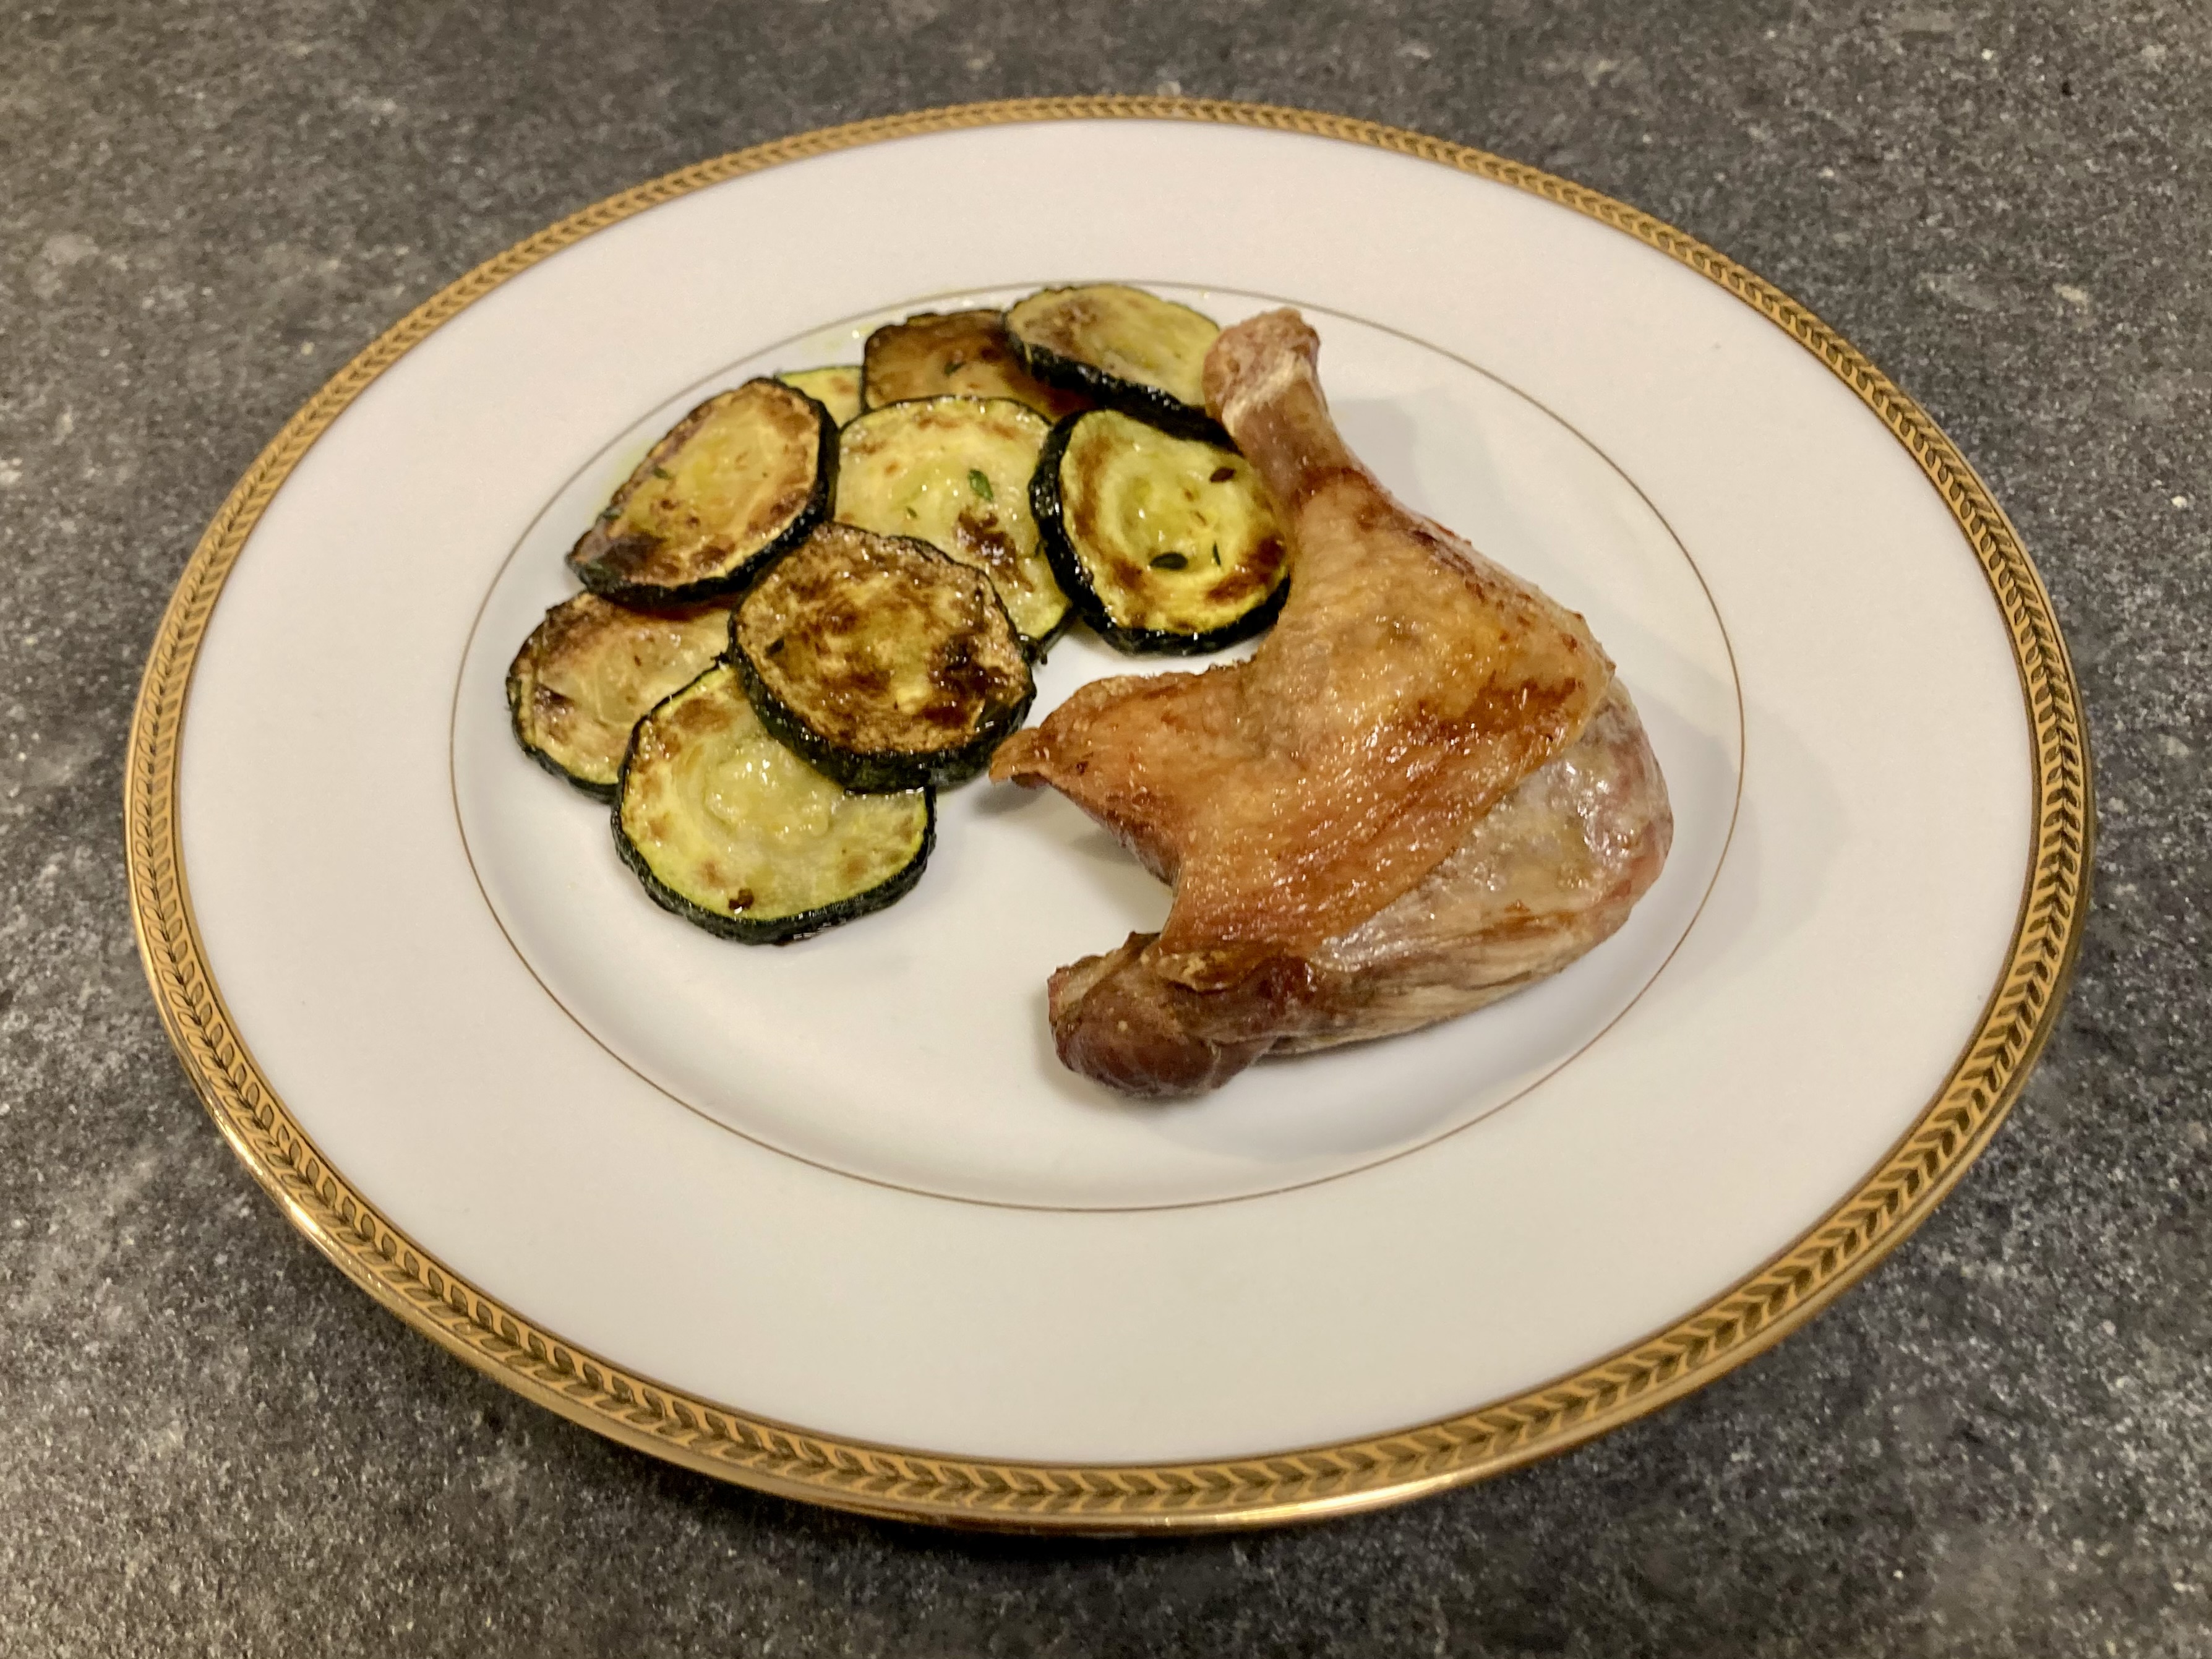
Duck and Zucchini

Fresh leg of duck is hard to find, which is a pity because it’s juicy and flavourful. We used it to prepare Pasta with Duck (Pappardelle al Ragù d’Anatra), a classic Italian dish that goes back to a recipe by Pellegrino Artusi, published in 1891. It inspired us to do more with leg of duck. This very simple dish combines fried leg of duck with excellent zucchini. Just a few ingredients, which means that quality is crucial.

Wine Pairing

We enjoyed our Duck and Zucchini with a glass of Chiroubles, produced by Didier Desvignes. The label of the wine shows a snail, indicating that the wine is made with respect for the environment. Chiroubles is one of the 12 appellations of the Beaujolais. All red Beaujolais wines are made with gamay grapes. Wines from the Chiroubles appellation are in general fresh, generous and expressive. They have flavours such as strawberry, raspberry and cherry. This Chiroubles had a hint of earthy and rustic aromas, which added to the complexity of the wine. Excellent pairing with the rich duck and the aromatic, slightly sweet and bitter zucchini.

What You Need
  • 2 Legs of Duck
  • Olive Oil
  • Zucchini
  • Black Pepper
What You Do
  1. Start by preparing the duck by removing the bits that you don’t like to eat
  2. Preheat the oven to 150 °C or 300 °F
  3. Heat a skillet, add olive oil and fry both sides of the legs until golden.
  4. Transfer the duck, skin on top, to the oven for 30 – 60 minutes depending on the size, 
  5. Bate every 15 minutes
  6. Remove from the oven and allow to rest for 10 minutes
  7. Wash, dry and slice the zucchini
  8. Warm a skillet, add olive oil and fry the zucchini until a touch golden
  9. Add black pepper to both the zucchini and the duck
  10. Serve the zucchini with some of the (green) oil and duck on a warm plate
PS

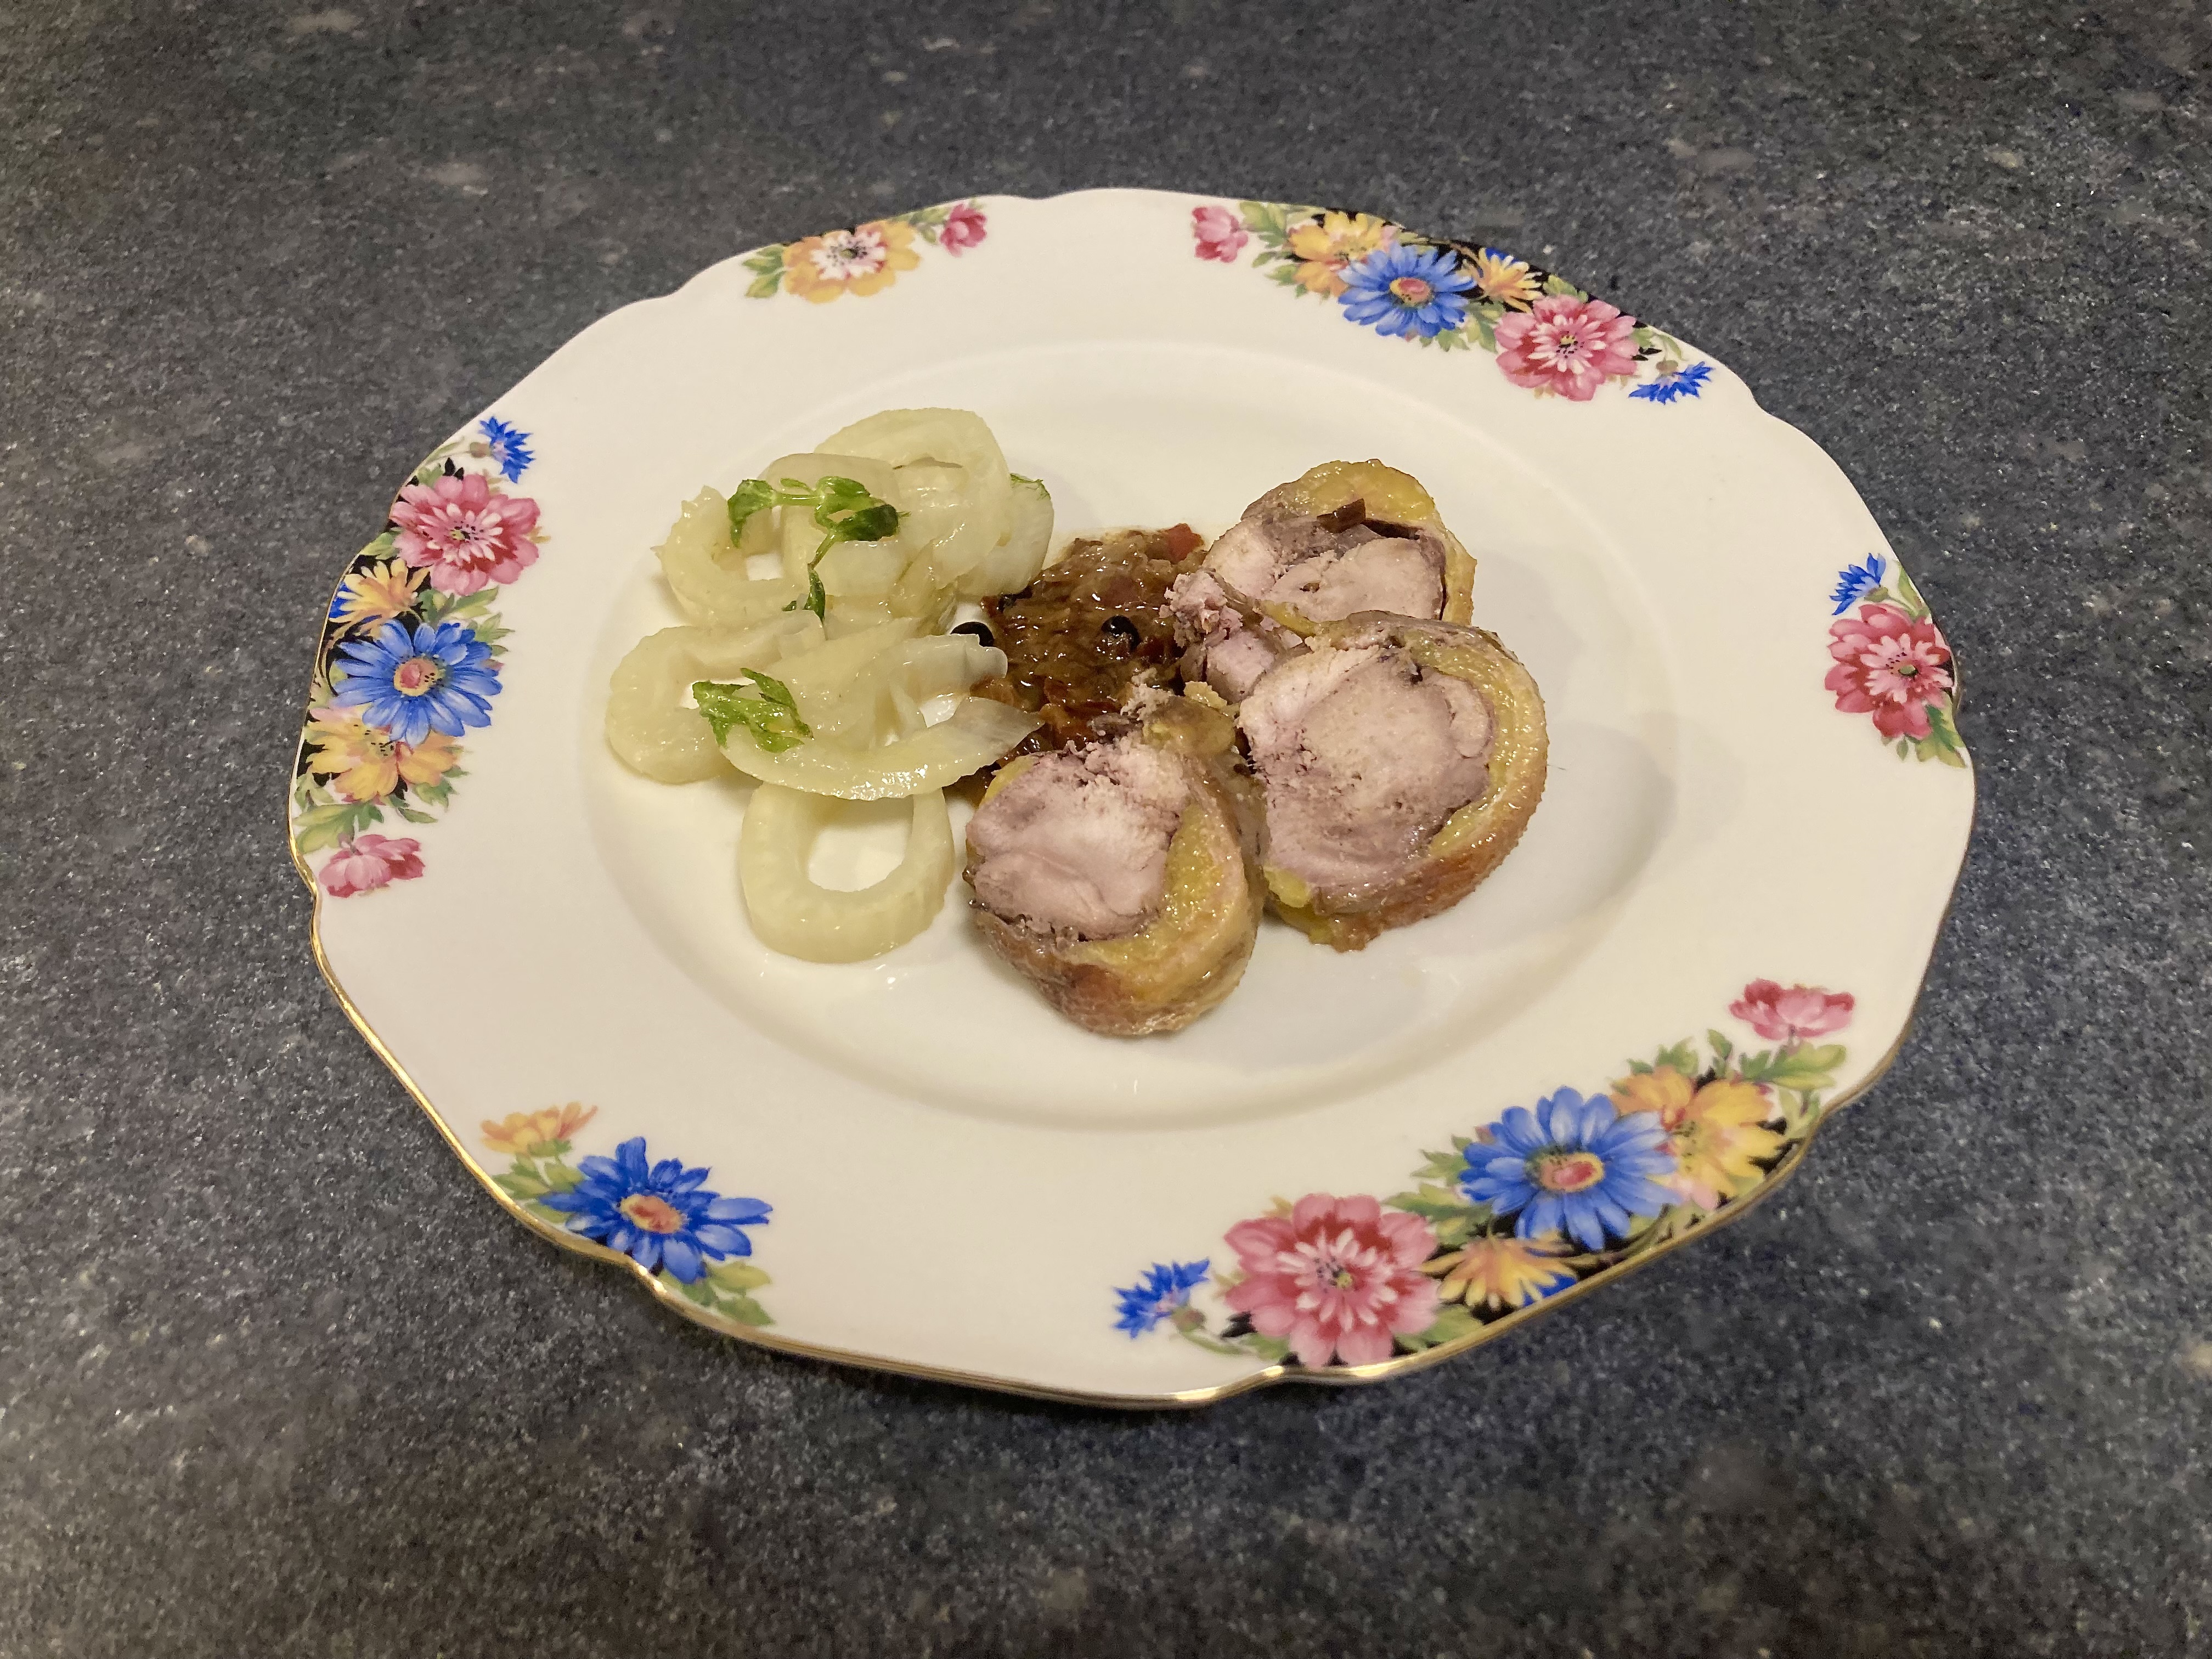
An alternative is to remove the bigger bone of the leg, season the meat and use kitchen wire to close the leg. Fry as above. When the meat is in the oven, slice the fennel and add to a pan with some olive oil. Leave on low heat. Alternatively for a lighter version you steam the fennel and add some olive oil just before serving. When the meat is resting, fry shallot, garlic, finely chopped carrot and/or celery and/or chopped pancetta. Add juices from the duck and make a sauce. Slice the meat and serve with fennel.
You could also fill the leg of duck with for instance a combination of thyme and chopped rosemary.

Cacio e Pepe

It takes only four ingredients to create an international culinary incident: a classic Italian recipe, a well-known British food website, Parmesan cheese and butter. What happened? BBC Good Food published a recipe for a quick and easy lunch meal, called Cacio e Pepe, with Spaghetti, Butter, Black Pepper and Parmesan Cheese. Claudio Pica, president of the Fiepet Confesercenti Roma (an association representing restaurants in Italy) couldn’t disagree more and expressed his astonishment in several letters, including one to the UK Ambassador.

Cacio e Pepe is a traditional, Italian classic, typical for the Lazio region, made with Tonnarelli or Spaghetti, Water, Salt, Pecorino Romano and Black Pepper. No cream, no butter, no olive oil, no Parmesan cheese. And it may seem simple to prepare, but serving Cacio e Pepe requires skills, passion and experience, according to Claudio Pica.

The incident made us think of Sophia Loren adding cream to her Spaghetti Carbonara and Jamie Oliver putting chorizo on his Pizza. Don’t mess with Italian traditions!

Now that we agree on the ingredients, we need to understand how to prepare the dish. The heart of the dish is a sauce made with pasta water and pecorino. We found various ways of making this sauce, ranging from adding pepper and grated cheese to the pasta just before serving (no sauce, just sticky pasta) to a scientific one whereby the sauce is made au bain marie (complicated).

We think the main points of the recipe are:

  • Use less water than usual, because you need starchy water to create the sauce
  • Use less salt in the pasta water because the Pecorino cheese is rather salty
  • The Pecorino must be relatively young, older cheese may make the sauce lumpy
  • The Pecorino must be very finely grated

We humbly present our version of this delicious Italian classic dish.

Wine Pairing

We enjoyed a glass of Pima Luna Frascati with our Cacio e Pepe. This is a white wine from the Lazio region, or to be more precise: from the hills overlooking Rome. The wine is made by wine maker Mauro Merz with malvasia bianca di candia and trebbiano grapes. It’s a light and refreshing wine with hints of green apple and citrus. Notes of slightly bitter almond on the finish. Its freshness matched very well with the creamy Cacio e Pepe. The aroma of the wine comes with a hint of butter, which is a nice connection to the Pecorino.

What You Need
  • 130 grams of Spaghetti
  • 70 grams of Pecorino cheese
  • 2 grams of Black Pepper
  • 1 litre of Water
What You Do
  1. Heat the water in a large pan and add the spaghetti
  2. Warm your plates (50 °C or 120 °F)
  3. Cook the spaghetti for a few minutes. Our spaghetti needed 11 minutes in total; we cooked it for 7 minutes in the pan.
  4. Crush the peppercorns
  5. Roast them in a pan over medium heat until they become very aromatic
  6. Reduce heat and wait for the spaghetti to be somewhat cooked
  7. Add some pasta water to the pan with the toasted pepper
  8. Increase the heat
  9. Transfer the pasta to the pan and combine
  10. Add a large spoon of pasta water to the pan
  11. Leave to cook
  12. Repeat steps 10 and 11 until the pasta is al dente. At this moment the pan should be nearly dry
  13. In parallel add some pasta water to the finely grated pecorino and make a smooth paste
  14. When the pasta is al dente remove the pan from the heat
  15. Allow to cool for perhaps one minute
  16. Quickly add the paste and combine everything in the pan
  17. Add pasta water to reach the right consistency
  18. Serve immediately on warm plates
  19. No need to add pepper or cheese
PS

The Good Food website mentioned they would be happy to post the original recipe. We looked for it, but couldn’t find it. We did however find a recipe for Cacio e Pepe with Gnocchi (and butter and Parmesan cheese, obviously).
Perhaps another letter to the Ambassador? Or one to the Prime Minister?

Paupiette

When you visit a French butcher or supermarket, you are bound to find paupiettes. In general, it is a thin slice of meat, stuffed, rolled up and tied. Lots of possibilities: the outside could be veal, beef, pork, chicken, lamb or even fish. The inside could be meat, or a mixture of meat and vegetables, or a duxelles or well, you get the idea.
In the Provence you will find so called Alouettes sans Tête (meaning larks without a head). A thin slice of beef is stuffed with bacon, parsley and garlic. The alouettes are quickly fried until golden and then cooked in a sauce with onions, wine and various herbs.
In the Netherlands and Belgium a paupiette is called Blinde Vink (meaning blind finch). This is a thin slice of pork or veal, stuffed with minced (pork) meat.  

Preparing paupiettes is not obvious. Many recipes suggest cooking the paupiette in a sauce, but that’s not what we recommend. The paupiettes will be a bit dry and bland. Others suggest transferring the paupiettes to a hot oven, with an even more disappointing result. We think the best way is to quickly fry the paupiettes until golden and then transfer to the oven and braise with some liquid on low temperature.

We asked our favourite butcher to make paupiette de veau (sometimes called melon de veau). A thin layer of veal stuffed with a mixture of minced veal and pork meat, with a generous amount of chopped sage and a hint of salt. It is decorated with two leaves of sage.

Wine Pairing

We enjoyed the dish with a glass of Portuguese red wine, produced by Vidigal. The wine is made with aragonez, castelão and cabernet grapes. The wine has a nice red colour and aromas of fruit and herbs. Its taste is light, with some tannins and a touch of oak. In general, you’re looking for a smooth, easy to drink red wine with character.

What You Need
  • 2 Paupiettes de Veau
  • 1 small Carrot
  • 1 Celery stalk
  • 1 Leek
  • Veal Stock
  • Dried Oregano
  • Olive Oil
  • Butter
  • Black Pepper
What You Do
  1. Pre-heat your oven to 120 °C or 250 °F
  2. Thinly slice carrot, celery stalk and leek.
  3. Heat a heavy iron skillet, add butter and olive oil
  4. Quickly fry the paupiette, top and bottom only
  5. Transfer paupiettes to a plate
  6. Reduce heat
  7. Add carrot, leek and celery
  8. After a few minutes deglaze with veal stock
  9. Add oregano
  10. Transfer the paupiettes back to the skillet
  11. Transfer the skillet to the oven
  12. Leave until the internal temperature is 68 °C or 155 °F
  13. Remove the paupiettes from the skillet and allow to rest for 5 – 10 minutes (depending on the size). You could wrap them in aluminium foil
  14. Put the skillet back on the cooktop or hob
  15. Reduce the sauce, taste, adjust, add black pepper
  16. Serve on a hot plate with potato puree combined with wild garlic, watercress or rapini
Paupiette ©cadwu
Paupiette ©cadwu

Tarte Au Citron

The key to a tasty lemon pie is the quality of the lemon. Sounds obvious but unfortunately not every lemon is tart, aromatic and a touch sweet. Best are lemons used for limoncello: Sorrento (or Femminello), Eureka, Amalfi or Lisbon lemons. In all cases the lemons must be fresh, vibrant yellow, firm, untreated and organic.
The lemons we used needed a small aromatic push, that’s why we added one mandarin to the filling.
This recipe is for a classic tarte au citron or lemon pie. You could also make it with lemon curd, which we will do in a few weeks. 

What You Need 
  • Pâte Sucrée
    • 50 grams of Unsalted Butter
    • 40 grams of Caster Sugar
    • 125 grams of All Purpose Flour
    • 1 gram of Salt
    • 1 Organic Egg
    • Water (optional)
  • Filling
    • 2 Organic Eggs
    • Juice and Zest of 2 Organic Lemons
    • Juice and Zest of 1 Organic Mandarin
    • 50 – 70 grams of Caster Sugar (depending on the flavour of the Lemons)
What You Do
  1. Recipe for a 16 cm or 6 inch form or baking tin
  2. Combine sugar, flour and salt.
  3. Dice butter, add to the mixture and combine. Use a hand mixer with kneading hooks.
  4. Beat the egg and add.
  5. Use your hands to make the dough. It should not be sticky, so it must be easy to make a ball. If too dry, add just a bit of water. If too wet, add some flour.
  6. When done, remove from the bowl and wrap in kitchen foil. Store in the refrigerator for at least two hours. It can be stored for a few days.
  7. Flour your work surface and roll out the pastry to a circle larger than the top of the form. The dough should be approximately 4 mm thick.
  8. Coat the form with butter.
  9. Line the form with the pastry. Press the pastry well into the sides and bottom. Use a knife to remove the excess dough.
  10. Cover and let rest for 30 minutes in the refrigerator.
  11. Preheat the oven to 190 °C or 375 °F.
  12. Use a fork to prick small holes in the pastry.
  13. Line the pastry with greaseproof paper or aluminium foil, add baking beans and bake blind for 15 minutes.
  14. Remove the paper and the baking beans.
  15. Reduce the oven temperature to 160 °C or 320 °F.
  16. Transfer back to the oven for 5 minutes.
  17. Transfer to a wire rack and let cool.
  18. Mix eggs, sugar and zest.
  19. Add the mixture to the pastry case.
  20. Bake for 20 – 30 minutes or until set.
  21. Transfer to a wire rack, allow to cool. Remove from the tin and allow to cool completely.
Tarte Au Citron ©cadwu