Dashi with Nameko and Shrimps

Nameko (or Pholiota Nameko) is a very popular, cultivated mushroom in Japan. It’s used in stir-fries and miso soup. The taste is nutty, the color amber brown and the texture is firm, also after cooking. The flavor combines very well with (home-made) dashi and shrimps.  The kamaboko (made from processed seafood) and the mitsuba (Japanese parsley) add colour and extra flavour to the dish. Light, delicate and refreshing: a memorable starter.

Sake Pairing

If you want to serve a drink with the soup, then serve taru sake. This dry sake is characterized by its refreshing taste and the aroma of Yoshino cedar. The sake was stored in a barrel (taru) made of cedar. Taru sake is about skills, history, dedication and refinement. Yes, you guessed right, we simply love it. Our choice? The one made by Kiku-Masamune.

What You Need

  • For the Dashi
    • 500 ml Water
    • 10 gram Konbu
    • 10 gram Katsuobushi
  • 100 gram Nameko
  • 2 large Shrimps
  • Sake
  • Light Soy Sauce
  • Yuzu
  • Kamaboko
  • Mitsuba

What You Do

Clean the shrimps and cut lengthwise in two. Let the shrimps marinade in two tablespoons of sake and transfer to the refrigerator for an hour. Clean the mushrooms with kitchen paper if necessary. Prepare the dashi; add a small tablespoon of sake and a similar quantity (or less) of soy sauce. Add the mushrooms to the soup. After a few minutes (depending on the size of the mushrooms) add four slices of kamaboko and the shrimps.  Taste and add some more soy sauce and or perhaps yuzu if necessary. Serve immediately when the shrimps are ready. If possible add some mitsuba.

Dashi with Nameko and Shrimps ©cadwu

Scallops with Cauliflower Purée

Three very different ingredients make for an excellent starter. The combination of seared scallops with soft, fluffy cauliflower purée and crispy grilled pancetta offers lots of flavours. For instance a touch of sweetness thanks to the caramelised scallops and the cauliflower plus lovely saltiness thanks to the scallops and the pancetta.

The combination of these three is not new and many recipes have been published. Various ingredients are added, for instance basil, lemon, capers, an infused oil (with for instance curcuma and fennel), a vinaigrette, apple beignets et cetera. But why would you add something if the combination is already close to perfection? And not difficult to make!

Wine Pairing

Best to combine with a wine with long, fruity aromas. Given the complexity of the combination the wine should be fresh and light. A Chardonnay with just a touch of oak could also be interesting because it will combine very well the grilled pancetta and seared scallop.
We enjoyed our scallops with a glass of Chateau Mourgues Du Gres Rosé. A wine with an intense pink colour, aromas that made us think of strawberries and lemon and with a fruity, long taste with a hint of pepper.

What You Need

  • For the Seared Scallops
    • 6 fresh Scallops (best if in their shell)
    • Olive Oil
    • White Pepper
  • For the Cauliflower Purée
    • One Cauliflower
    • Excellent Olive Oil
    • Crème Fraîche
    • White Pepper
  • For the Crispy Pancetta
    • 6 slices of Pancettta

What You Do

Clean and steam (or cook) the cauliflower until nearly done. Using a blender combine the cauliflower and some olive oil. When smooth pass through a sieve. Add some crème fraîche and fresh white pepper. If you’re happy with the purée, keep it warm and ready. You could prepare the purée a day in advance. Clean the scallops. In parallel set your oven to grill. Transfer the pancetta to the grill. 4 minutes? Heat a non stick pan and fry the scallops quickly. Add a last drop of excellent olive oil to the purée, mix with a spoon and plate up. Perhaps some white pepper on the scallops.

Artichoke Pie

A few days after we published our recipe for Tourte de Blette a friend told us about the great taste of artichoke pie and how popular this dish is in Italy, especially in Liguria. Since we love artichokes, we dived into our cooking library, looking for recipes.
Interestingly most recipes refer to canned or marinated artichokes. But wouldn’t it be much better to use fresh, young artichokes? Other ingredients are cheese (Prescinsêua, or a combination of Parmesan or Pecorino and Ricotta, perhaps some Crème fraîche or even Feta), herbs (parsley, thyme or oregano) and eggs.
We like the combination of artichoke and thyme (as we did in our salad), but we could imagine oregano to be a good choice as well.
We remained close to Tourte de Blette and prepared a rustic, open pie, but feel free to create one with pastry on top.

Wine Pairing

It’s not straightforward to pair artichokes with wine. According to various researchers this is due to cynarin, a chemical especially found in the leaves of the artichoke. When the wine and the cynarin meet in your mouth, the natural sweetness of the wine is amplified, making it taste too sweet. So you have to pair freshly cooked or steamed artichokes with a bone-dry, crisp, unoaked white wine with clear, present acidity. For instance Sauvignon Blanc, Grüner Veltliner or Albariño.
We enjoyed our Artichoke Pie with a glass of Château Pajzos Tokaj “T” Furmint, a dry, bright, fresh wine with zesty, nutty and mineral flavours made from the Hungarian Furmint grape. A unique wine and perfect in combination with the artichokes.
Cynarin and wine are not a match made in heaven but the good news is that cynarin seems to protect your liver and even helps it regenerate.

What You Need

  • For the Dough
    • 100 gram of Flour
    • 50 gram of Water
    • 10 gram of Olive Oil
    • 1 gram of Salt
  • For the Mixture
    • 4-6 young Artichokes
    • One Shallot
    • Olive Oil
    • 30 grams of Rice
    • 2 Eggs
    • Fresh Thyme
    • 20 gram Freshly Grated Parmesan Cheese
    • Black Pepper

What You Do

Cook the rice and leave to rest.  Combine flour, salt, water and olive oil. Make the dough, kneed for a minute or so and store in the refrigerator for at least 30 minutes.
Clean the artichokes, steam for 30-45 minutes depending on the size and let cool. Chop the shallot. Warm a heavy skillet, add olive oil and gently fry the shallot. Transfer to a plate and let cool. Using a spoon remove the ‘meat’ from the leaves (bracts) of the artichokes. Chop the hearts in four. You may need to remove the centre choke (the hairs). Strip a generous amount of thyme.
Whisk two eggs and combine with the artichokes, the shallot, the rice, the thyme and the freshly grated Parmesan cheese. Add some black pepper.
Roll out the dough with a rolling pin on a lightly floured surface. Coat a 15 cm or 6 inch round baking form with oil (or use a sheet of baking paper). Place the dough in the baking form and add the filling. Transfer to the oven for 40-50 minutes on 180˚-200˚ Celsius or 355˚-390˚ Fahrenheit. Immediately after having removed the pie from the oven, brush the outside with olive oil. This will intensify the colour of the pastry. Let cool and enjoy luke warm.

Tourte de Blette

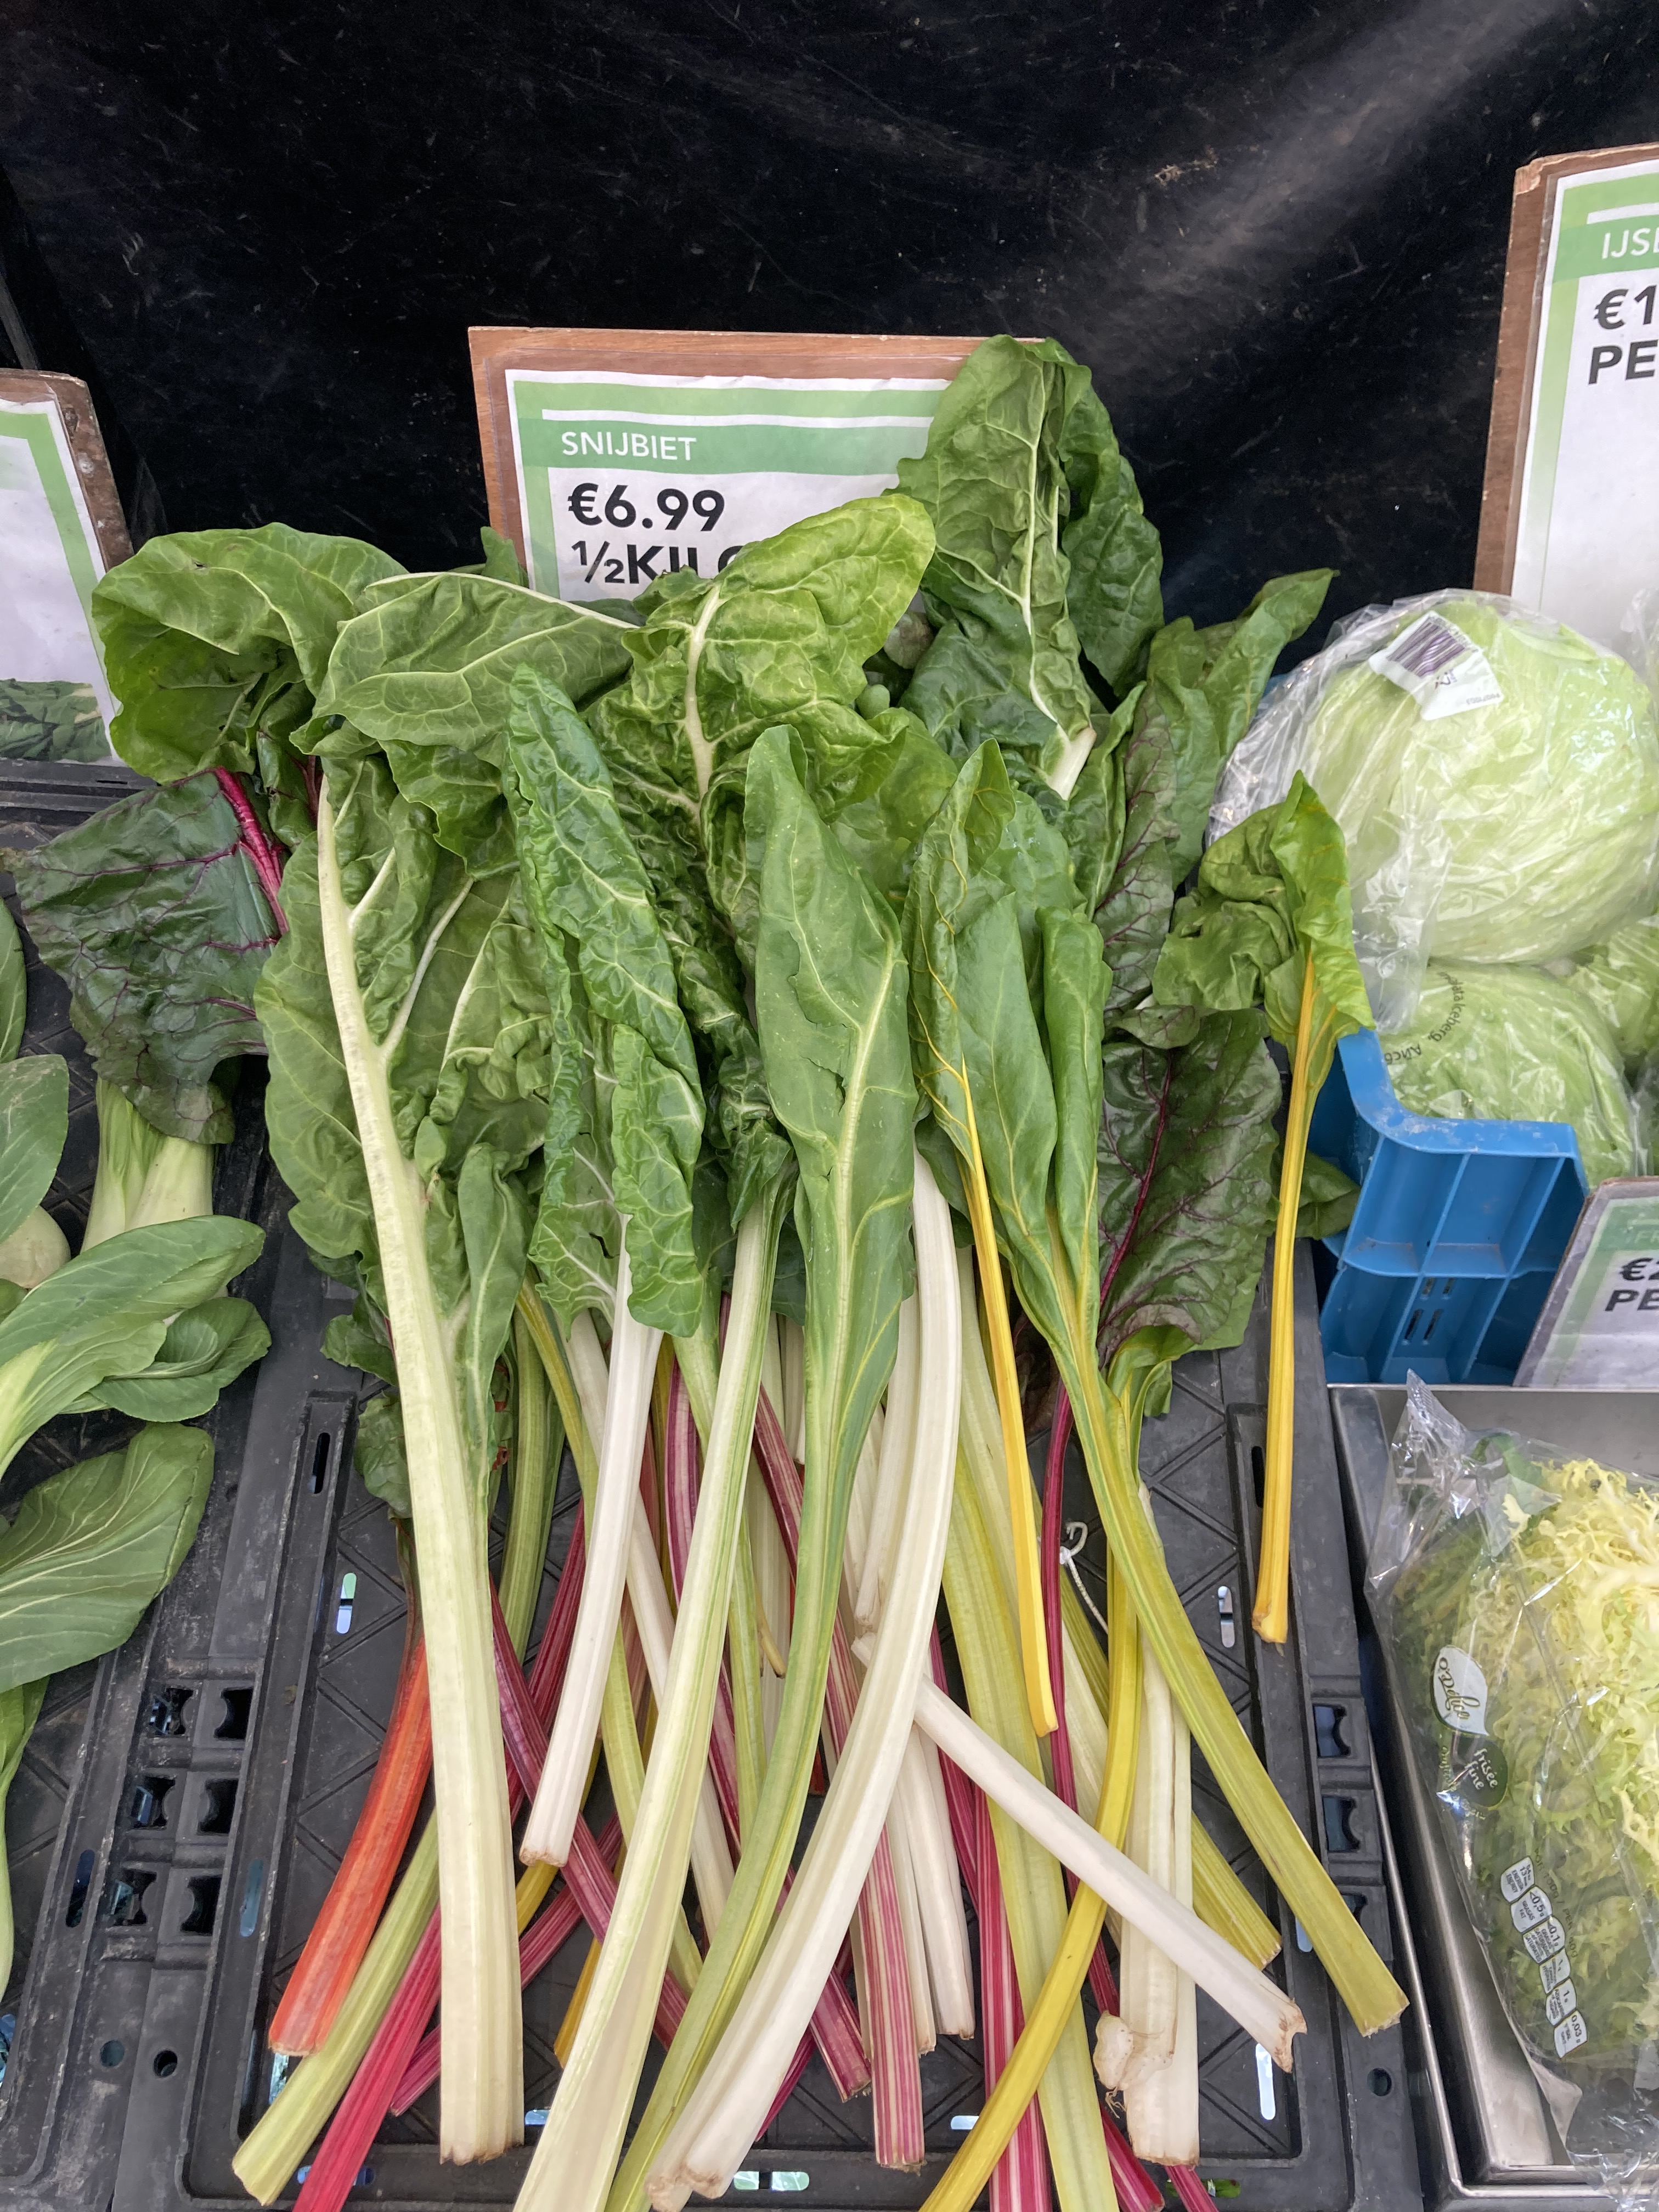
For many years Chard was a popular and cheap vegetable. It has many names, including Bietola (Italy), Blette, Bléa (France), Acelga (Spain), Krautstiel, Stielmangold, Mangold (Germany, Switzerland), Snijbiet (the Netherlands) and also Swiss Chard, Leaf Beet, Silver Beet, Spinach Beet and Seakale Beet.
Many names equals many recipes and easy to buy? Not at all. Nowadays it’s hard to find chard and the number of recipes is limited. According to Dutch Food Critic and Culinary Legend Johannes van Dam the chard leaves wither quickly, making it a difficult product for supermarkets. The image of chard is not positive: ‘Poor Man’s Asparagus’ for the stems for instance. Another reason is probably the fact that the leaves require a different preparation than the stems.
Johannes van Dam gives a number of recipes, including what he refers to as the primal recipe from Italy for Tourte de Blette and the recipe for Bledes amb panses I pinyons from Menorca.
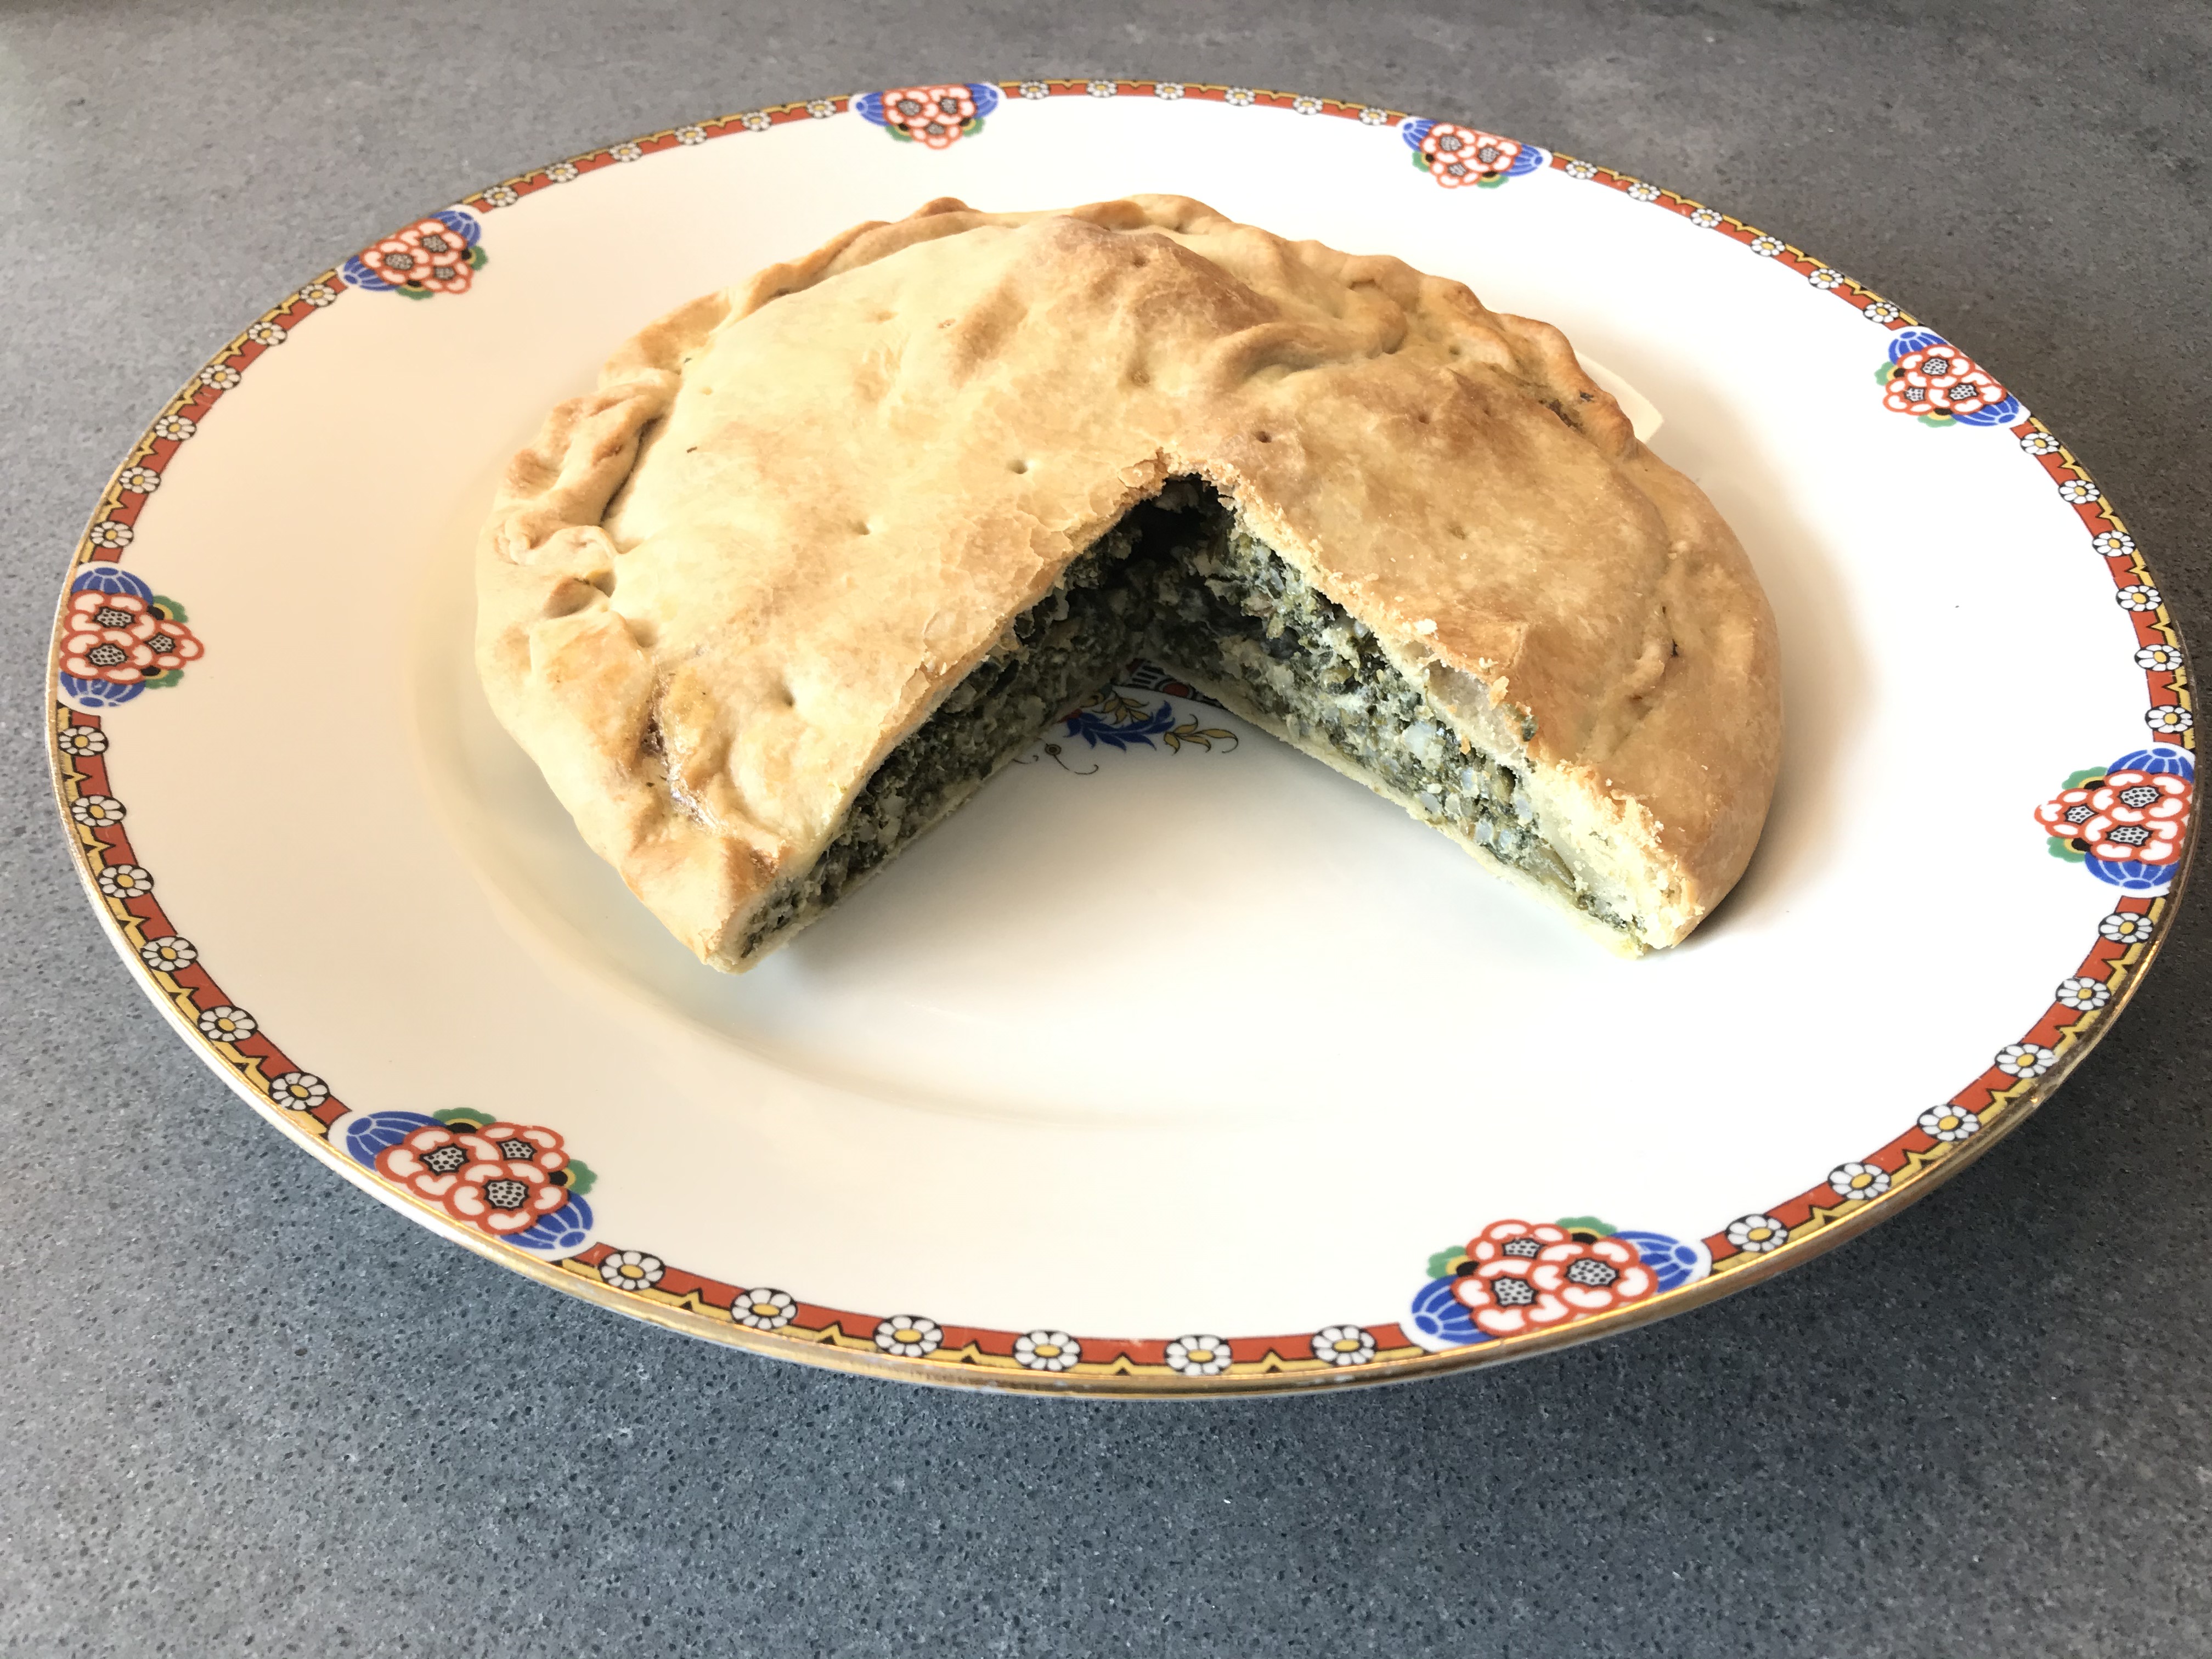
Tourte de Blette

When in Nice we very much enjoyed our Tourte de Blette, locally known as Tourta de Bléa. It comes in two varieties: sweet and savoury. If you want to prepare the sweet one, please visit the inspiring Variations Gourmandes.

The crust of the Tourte de Blette is not straightforward. In most cases it’s a combination of flour, water, butter (or olive oil) and eggs. We were inspired by a dear friend who bases her Tourte on the Italian Torta Verde del Ponente Ligure. This is a very similar dish with zucchini, chard, basil, sage, rise, onion, Grana Padano or Parmesan and eggs. The dough of the Torta Verde is easy to work with and the result is both tasty and crunchy.

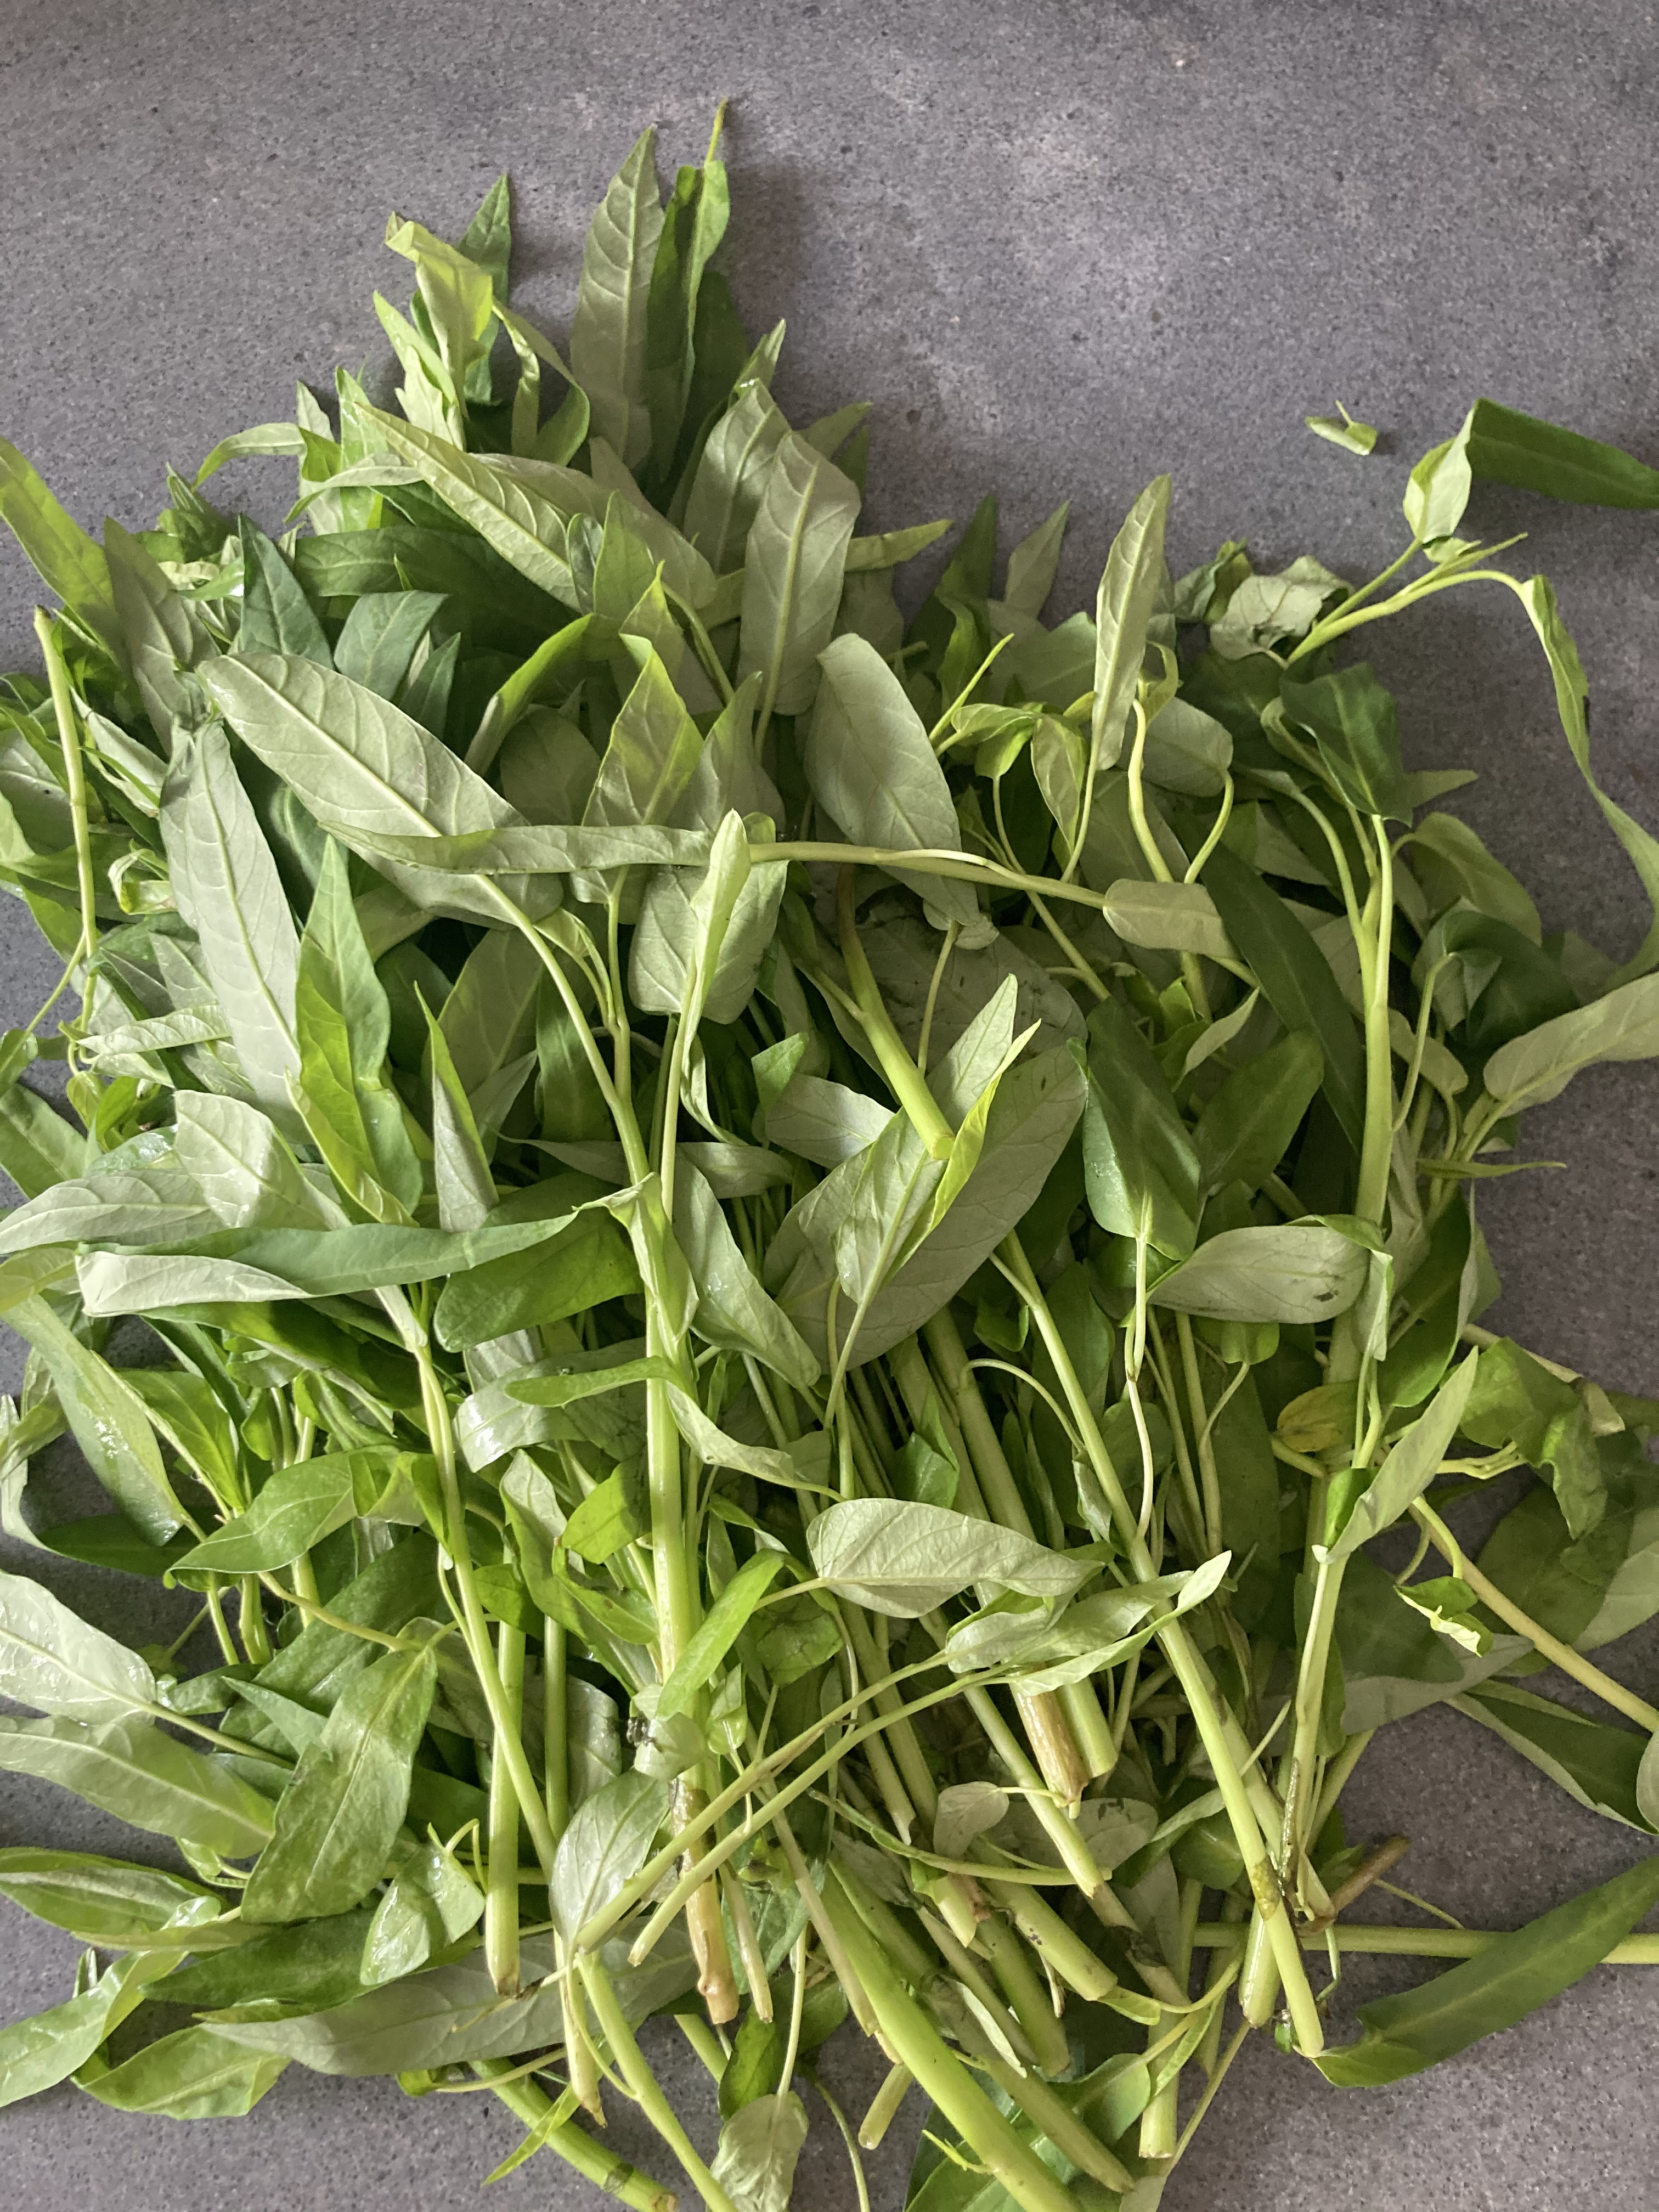
Back to the main ingredient of the Tourte de Blette: the chard. We found it on the Amsterdam Albert Cuyp market but were shocked by the price, so we had to look for an alternative. We decided not to use normal spinach because it doesn’t have the right structure. We choose water spinach (also know as Kang Koen or Ong Choy): a very popular vegetable in Asia. The leaves have lots of structure and the (hollow) stems are tasty and crunchy.

Wine Pairing

Obviously a wine from the region, for instance a Côtes de Provence (preferably rosé) or a more expensive Bellet Blanc.

What You Need

  • For the Dough
    • 200 gram of Flour
    • 100 gram of Water
    • 20 gram of Olive Oil
    • 2,5 gram of Salt
  • For the Mixture
    • 500 gram of Water Spinach
    • One Shallot
    • Olive Oil
    • 50 grams of Rice
    • 2 Eggs
    • Fresh Nutmeg
    • 75 gram Freshly Grated Parmesan Cheese

What You Do

  1. Cook the rice and leave to rest
  2. Combine flour, salt, water and olive oil
  3. Make the dough, kneed for a minute or so and store in the refrigerator for at least 30 minutes
  4. Remove the leaves from the stem and chop half of the stems. Best is to have the stem slices the size of cooked rice
  5. Same for the shallot
  6. Warm a large heavy skillet
  7. Gently fry the shallot
  8. After 10 minutes add the chopped stems
  9. Leave for 5 minutes and then add the leaves
  10. Cook for a few minutes until done
  11. Transfer to a plate and let cool
  12. Slice the leaves using a kitchen knife
  13. Whisk the two eggs
  14. Combine the vegetables, the egg, the rice and the freshly grated Parmesan cheese
  15. Generously add freshly grated nutmeg
  16. Cut the dough in two, one part slightly bigger than the other. The bigger part will be the bottom, the smaller part the top
  17. Roll out the bigger one with a rolling pin on a lightly floured surface
  18. Coat a 22 cm or 9 inch round baking form with oil (or use a sheet of baking paper)
  19. Place the first disk in the baking form, add filling and close with the second disk of dough
  20. Fold the edge of the top piece of dough over and under the edge of the bottom piece of dough, pressing together
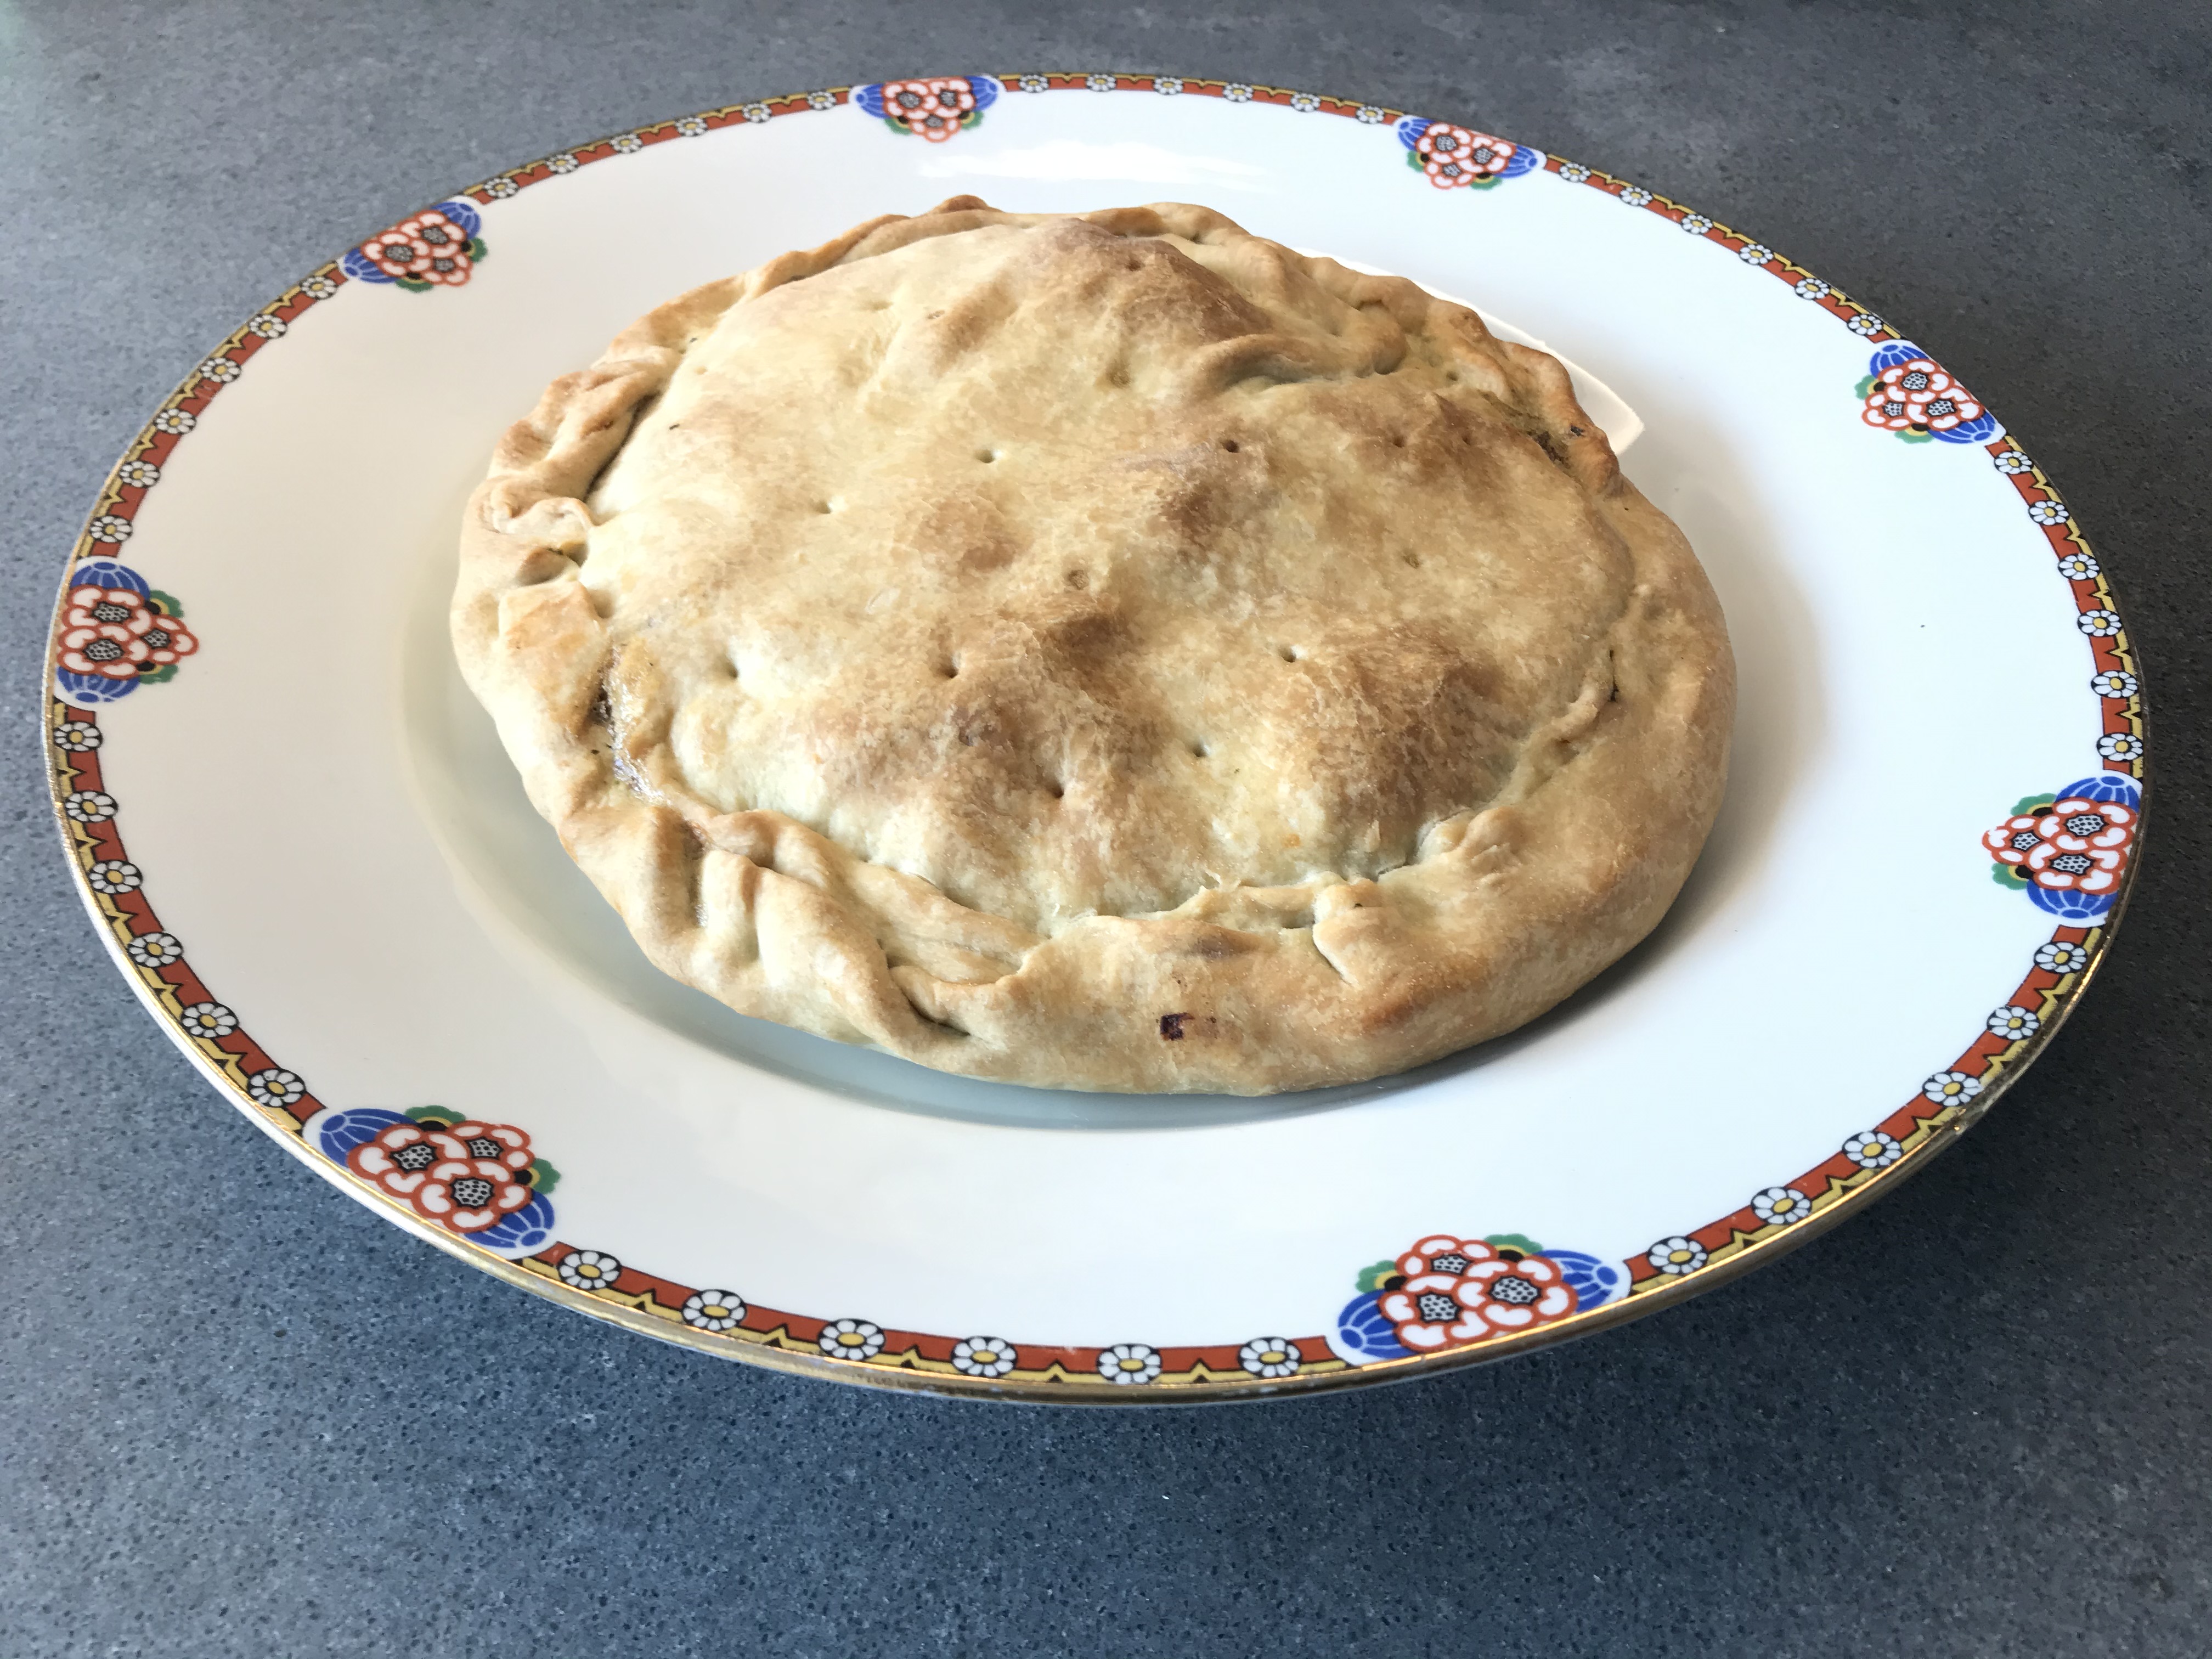
  21. Make holes in the top, allowing for the steam to escape
  22. Transfer to the oven for 40 – 50 minutes on 180˚ – 200˚ Celsius or 355˚ – 390˚ Fahrenheit
  23. Immediately after having removed the tourte from the oven, brush the top with olive oil. This will intensify the colour of the crust
  24. Let cool and enjoy luke warm.

Duck Breast with Sichuan Pepper

Why call something pepper when actually it is not hot and spicy like black pepper or chili? Perhaps because of the shape? The Chinese name is huā jiāo, meaning something like flower pepper. Actually it is a dried berry from western China. Other names are Szechuan Pepper, Chinese Prickly Ash, Mala Pepper et cetera. The quality may vary, depending on the actual species used. The taste has two components: the aroma of citrus and an intriguing tingling effect on the tongue.
The Sichuan cuisine combines it with chili pepper, star anise and ginger.

Wine Pairing

A cup of Jasmine Tea is an excellent choice. You could also go for white wine, for instance a German Riesling or Gewurztraminer. We decided to go for a Pinot Noir from La Cour Des Dames. In general you’re looking for a red wine with aromas of berries, floral notes and delicate wood. The tannins should be soft or well-integrated.

What You Need

  • Duck Breast
  • Sichuan Pepper
  • Light Soy Sauce
  • Normal Soy Sauce
  • Mirin
  • Chicken Stock
  • Corn Starch

What You Do

  1. Start by warming a non-stick frying pan
  2. Add the Sichuan pepper (we suggest one or two teaspoons)
  3. Gently roast the peppers until you can smell their lovely aroma
  4. Transfer the berries to a mortar and let cool
  5. Take the duck breast from the refrigerator, clean it if necessary and transfer to the now hot non-stick frying pan. By starting with cold meat, you will get the best result: crispy fat, a golden brown colour and seignant meat
  6. Fry the duck breast for 2 minutes, then reduce the heat, give it 10 more minutes on the fat-side and finish with 2 or 3 minutes on the meat-side
  7. Wrap the breast in foil, making sure the fat is not covered
  8. Crush half of the Sichuan peppers
  9. Add stock to the pan, soy sauce, crushed Sichuan pepper and a teaspoon of mirin
  10. Stir and add liquid from the duck
  11. The duck must rest for 10 minutes, so occasionally add liquid and stir the sauce
  12. Taste the sauce and adjust
  13. When ready, make the sauce thicker using corn starch
  14. Coarsely crush the remaining Sichuan peppe.
  15. Slice the meat and serve with the sauce
  16. Sprinkle the remaining Sichuan pepper on top of the meat.

We served the duck breast with a combination of stir fried (Chinese, napa or oxheart) cabbage, spring onion, chili pepper and sesame oil.

Duck Breast with Sichuan Pepper ©cadwu

Cod with Kimizu Sauce

Fashion

Isn’t it interesting how our preferences for aromas and flavours change over time, influenced of course by producers, restaurants and chefs. In general we prefer dry white wine, we think a ragout made of pied de moutons, morels, Comté, oranges, bread crumbs and samphire is really intriguing and why not serve tea with your main dish?
Years ago we probably would have loved poached cod with Hollandaise Sauce and a small carrot sautéed in butter accompanied by a glass of Muscadet. But not today. No poached fish and no soft buttery carrots.
Fashion is about change; not improvement.

Let’s revisit the fish with Hollandaise Sauce and give it a ‘modern’ twist: we very gently fry the fish and serve it with a delightful Kimizu.

We mentioned Kimizu earlier when we wrote about White Asparagus. In this case we will make the sauce lighter by adding extra water. It’s wonderful to see and feel the consistency of the Kimizu in combination with the soft, opaque fish.

Wine Pairing

We enjoyed our fish with a glass of Chardonnay, produced by Antonin Rodet. The wine is made from 100% chardonnay grapes. Its aromas made us think of peach. It has clear floral notes. The taste is rich, with flavours of ripe fruit, subtle oak  and minerality.
In general we would suggest a chardonnay with a little oak and a long finish.

What You Need

  • For the Fish
    • Fresh Cod
    • Olive Oil
    • Butter
    • White Pepper
  • For the Kimizu
    • 2 Egg Yolks
    • 1,5 tablespoon of Rice Vinegar (depending on the size of the egg yolks and the acidity of the vinegar)
    • 3 tablespoons of Water
    • 2 teaspoons of Mirin (1 could also be fine, depending on your taste)

What You Do

Warm a non-stick frying pan. Lightly coat the pan with olive oil and butter and then place the pan over medium-high heat. Gently fry until nearly done. Best would be to buy tail end with the skin on, allowing you to fry the fish on its skin. Turn it for a few seconds, allowing for a light golden colour. The fish is ready when the flesh has become opaque.
In parallel whisk the two egg yolks, add the rice vinegar, the mirin and the water. Whisk well. Now set your microwave to 90 seconds and 30% power. Give the mixture 10 seconds and whisk, Repeat this with 5 seconds of warmth followed by whisking. You will notice the change in the consistency. Depending on the size of the eggs, the temperature of the ingredients and the quality of your microwave this may take something like 60 seconds.
Serve the fish with white pepper and a generous helping of kimizu. And if it makes you smile, please add some carrots, sautéed in butter!

Cod with Kimizu ©cadwu

Panna Cotta with Raspberry Coulis

Cream, Cream and More Cream

Such a lovely and simple dessert! Provided of course it’s made the right way. So no milk, no yoghurt, no cream cheese, no whipped cream and most certainly no whipped egg white! Just cream. Cooked Cream. And preferably cream with lots of fat because then you will need less gelatine. 
Fresh raspberries are preferred, but no worries, the frozen ones are also very tasty and suitable for making a coulis.

What You Need (for 4)

  • For the Panna Cotta
    • 500 ml fresh Cream
    • 3,5 leaves of Gelatine (5,25 grams)
    • 1 Vanilla Bean
    • 25 gram Sugar
  • For the Raspberry Coulis
    • 250 grams of Raspberries
    • 25 grams of Sugar
    • 1 tablespoon of Water

What You Do

The recipe is for 4 panna cotta (actually we should say 4 panne cotte). Slowly bring the cream to the boil. Add the seeds of the vanilla but also add the remainder of the bean. Now keep close to boiling for 15 minutes. Stir when necessary. Remove from the heat and while stirring add the sugar until totally dissolved. Now pass through a sieve to make sure you remove all the bits you don’t want. Follow the instruction of the gelatine and add the leaves. Stir well until homogeneous. Cool the liquid somewhat before filling the forms. We used a silicone mold. Nice and easy! The only thing you need to do is to make the mold a bit moist with water. Let the panna cotta cool and then store in the refrigerator until set. Don’t forget to seal with cling foil, otherwise your panna cotta will absorb aromas from other food in the refrigerator.
Heat the raspberries with the sugar and water. Cook gently for 5 minutes. Pass through s sieve (if necessary twice) making sure you apply some pressure but not too much. You don’t want pips in your coulis! Let cool for 30 minutes before transferring to the refrigerator.

Panna Cotta with Raspberry Coulis © cadwu

Kohlrabi with Pickled Radish

A Vegetable to Remember

A cabbage or a turnip? Or both? Kohlrabi (or turnip-rooted cabbage, German cabbage) is a bit different from other vegetables. It’s the swollen stem of a plant. It looks like a turnip, but it actually grows above the ground, hence the leaves and the fairly thick skin. Kohlrabi is not the most popular of vegetables, probably because it requires rather long cooking and the taste is a bit bland. The good news is that when you prepare the kohlrabi in a hot oven, you will have an easy to peel and very tasty vegetable. Its flavour is sweet, it comes with a touch of spiciness and its texture is a real surprise: juicy and crunchy!
The thinly sliced and lightly coated kohlrabi in combination with pickled dried radish is a great vegetarian starter, one that you will remember.

Sake or Wine Pairing

Best choice is a mild, dry, floral sake but a glass of white wine is also a good idea. Go for a Pinot Blanc or a German Grauburgunder. In general a white wine with medium body and aromas of ripe white fruit and flowers.

What You Need

  • Kohlrabi
  • Light and Normal Soy sauce
  • Rice Vinegar
  • Mirin
  • Pickled Dried Radish

What You Do

Set your oven to 200˚ Celsius or 390˚ Fahrenheit. Transfer the kohlrabi to the oven without wrapping it in foil, so ‘as is’. Leave it for 60 minutes. Now turn your oven to 235˚ Celsius or 455˚ Fahrenheit for 15 minutes or until the kohlrabi is slightly charred (see picture). Let cool, transfer to the refrigerator and use the next day.
Start making the dressing by adding light soy sauce to a small bowl. Add a teaspoon of mirin and a teaspoon of rice vinegar. We also add a teaspoon of normal soy sauce to give the dressing a bit more oomph. Remove the skin of the kohlrabi (be generous) and thinly slice the kohlrabi, either with a mandoline slicer or with a cheese slicer. Now it’s time to improve the dressing: combine small slices of kohlrabi with the dressing, taste and keep adjusting (soy sauce, mirin, rice vinegar) until you’re happy. Coat each slice with the dressing, plate up and serve immediately with the chopped pickled dried radish.

Artichoke Salad

Love Your Artichoke

A beautiful flower and an intriguing ingredient. A large artichoke with some mayonnaise, mustard and vinegar makes for a wonderful, relaxing starter. The smaller ones are great when turned into a salad or when served with tagliatelle as a starter.
Steaming is the ideal way to prepare artichokes. The flavour remains intact and the leaves will become soft yet firm.
Don’t be tempted to buy preserved artichokes hearts. In most cases these are only about marinade, vinegar, sugar and unidentified spices. Whereas artichokes should be about taste and especially texture. It’s a thistle you’re eating and not something white and fluffy from a jar.
Key to this salad is the combination of artichokes and thyme. Lots of thyme! Enjoy the light, earthy and slightly bitter flavour of the artichokes in combination with the aromatic thyme.

Wine Pairing

You can serve this salad to accompany an aperitif, or with some bread as a starter.

What You Need

  • 6 small Artichokes
  • Olive Oil
  • (White Wine) Vinegar
  • Mustard
  • Thyme
  • Black Pepper

What You Do

Remove the stem of the artichokes and steam the artichokes for 30 – 45 minutes, depending on the size. Remove and let cool. Peel of the first layers of the outer leaves. Make the dressing by combining the oil and vinegar and then adding the mustard. Cut the artichokes in 6 or 8 parts. Add the dressing to the artichokes, mix well, making sure all artichokes are coated. Sprinkle lots of thyme and carefully mix again. Put in the refrigerator for at least 3 hours. Mix again, taste, add black pepper and perhaps some more thyme and serve!

Moules Marinière

A Delicious Classic

Moules Marinière, Mosselen met Look, Mussels in Beer, Mussels with Piri Piri and Mussels with Anise, served with crusted bread, with French Fries or just a glass of wine, as a starter or for lunch: mussels are great to combine. And did we mention delicious?
Preparing Moules Marinière is not difficult at all. Make sure you buy tasty mussels (we prefer small ones) and lots of tarragon and parsley. Don’t simply add the herbs; create a simple sauce. You want to coat the mussels with the powerful flavour of tarragon and parsley. A drop of Henri Bardouin’s award winning Pastis is recommended.

Wine Pairing

White wine of course: Pinot Blanc, Sylvaner, perhaps Pinot Gris or Riesling. In general a fresh, dry white wine with medium acidity and fruit aromas like citrus. Mussels are very flexible, both in preparation and accompagnement.

What You Need

  • 1 kilo of Mussels
  • 1 Shallot
  • 1 Garlic Clove
  • Olive Oil
  • White Wine
  • Bouquet Garni (Parsley, Bay Leaf, Thyme)
  • Tarragon
  • Parsley
  • Pastis
  • Black Pepper

What You Do

Start by finely chopping the shallot and the garlic. Take a large, heavy pan and heat the oil. Add the shallot and the garlic, cook for 5 minutes until soft and glazed. Add a glass of white wine and the bouquet garni. Cook on low heat for 10 minutes. In parallel clean the mussels. Increase the heat to (nearly) maximum, add the mussels, close the lid and cook until all mussels are open; perhaps 4 minutes. Shake the pan during the cooking process or give the mussels a quick stir with a wooden spoon. Remove the mussels with a slotted spoon, transfer to a large plate and put in a luke warm oven. Discard the bouquet garni, add chopped parsley and tarragon, a splash of pastis, some black pepper and leave to simmer for 1 or 2 minutes. Transfer mussels to two warm (soup) plates and pour the sauce over the mussels.

Moules Mariniere ©cadwu