The Art of Sauces: Gribiche

This is a classic French sauce, made with boiled egg yolks, oil, various herbs (chives, chervil, parsley, tarragon), cornichons and capers. Sauce Gribiche is ideal with cold meat and fish. It’s a great combination of flavours and textures, also thanks to the chopped egg white.
As with mayonnaise the oil you use is an important ingredient. The range of flavours in Sauce Gribiche allows you to use a combination of oils, depending on the dish it should accompany. For instance olive oil when you’re looking for a more powerful sauce or arachis (peanut) oil when the sauce should be more delicate.
In this case we use chives only because especially tarragon would be too much for the asparagus. Chives give it a touch of onion, which is exactly what the sauce needs.

Wine Pairing

We enjoyed our Asparagus with sauce Gribiche with a glass of Macon (Louis Jadot Mâcon Villages Grange Magnien). The wine (100% chardonnay) comes with some gentle acidity and minerality, which is great with the acidity of the Sauce Gribiche. It’s fruity with a floral scent.

What You Need
  • Sauce Gribiche
    • Two Eggs
    • Dijon Mustard (1 teaspoon)
    • Olive Oil (100 ml)
    • (White Wine) Vinegar (1 tablespoon)
    • Black Pepper
    • Chives
    • Cornichon
    • Capers (in brine)
  • Asparagus
What You Do
  1. Boiling the eggs, making sure the yolk is completely set. Depending on the size add them to boiling water and leave them in simmering water for 12 minutes. We steamed them for 15 minutes
  2. Cool quickly, peel and separate the white from the yolk.
  3. Cut the white in very small bits and store
  4. Push the egg yolk through a sieve. It should be a powder-like substance
  5. Add the mustard and stir well until it’s a smooth paste
  6. Continue stirring and very slowly add the olive oil, as if making a mayonnaise. Which is basically what you’re doing anyway! Main difference is that cooked yolk is less powerful when it comes to emulsifying. So the amount of olive oil you can add is limited and the process is more challenging
  7. Once you’ve added the olive oil, add white wine vinegar, whisk, taste and decide if more mustard, vinegar or pepper is needed.
  8. Add the chopped egg white, the finely chopped chives, the drained and chopped capers and the thinly sliced cornichon
  9. The sauce should be ‘stable’ so feel free to store in the refrigerator.
  10. Steam or cook the white asparagus and enjoy!
PS

It’s actually a very tricky sauce, one that splits easily. If it does, no worries, just add a tea spoon of (home made) mayonnaise and the problem is solved. If that doesn’t work, then take a bowl, add some mayonnaise and slowly add the split mixture.

Veal with Mai Take and a Madeira jus

The Dancing Mushroom

In Japan and China Mai Take (or Hen of the Woods) is a much-loved culinary mushroom. Legend has it that Mai Take got its name because foragers danced with happiness when finding it. Mai Take can be wild or cultivated but in both cases its taste is powerful, intense and nutty. Make sure you cook Mai Take through and through, otherwise you may upset your stomach (and other parts of your body).
Mai Take combines very well with beef and thyme. It is also great when combined with shrimps, crab, coquilles St Jacques, coriander, dill and parsley; a salad created by Antonio Carluccio and published in 2003 in the Complete Mushroom Book. The book has a wealth of wonderful, simple recipes.

In this case we combine beautiful veal rib eye with Mai Take, using a Madeira jus to bring the flavours together. The fried Mai Take comes with a lovely crunch. We love the way the taste of the combination develops in the mouth. We use rib eye because it is the most tender and delicate part of the veal. It is nicely marbled making it an excellent choice to grill or fry.

Don’t be tempted to buy so called ‘cooking Madeira’. This is some horrible, sweet liquid that is not even close to Madeira. One for the bin. We bought a bottle of medium dry Madeira (Santa Maria). It is perfectly suited for this recipe.

Wine Pairing

A Rioja Crianza is a good choice. In general a Rioja Crianza is a high-quality, affordable wine. It’s not too rich, but with Tempranillo’s natural high tannin it has quite a bit of body. The wines are commonly aged for one year in used oak casks, so the oak flavours are not too strong. The wine will show notes of sweet spice, vanilla, black and red fruit.

What You Need

  • Veal Rib Eye (let’s say 300 grams)
  • Veal stock
  • 75 gram Mai Take
  • Olive Oil
  • Butter
  • Madeira
  • Black Pepper

What You Do

The veal must be at room temperature. So take it out of the refrigerator let’s say 2 hours in advance. Heat a heavy iron skillet, add olive oil and butter. Fry and cook to perfection (pink is the colour you’re looking for). You could also transfer it to the oven for an internal core temperature of 60° Celsius or 140° Fahrenheit. When ready wrap in foil and allow to rest for 15 minutes. Add some veal stock and Madeira to the pan and warm. Add the liquid from the veal on a regular basis.
Remove the base of the Mai Take and then slice in 2 of 4 parts and fry for a few minutes. Apply some pressure, you want the Mai Take to look like a fan, perhaps the suggestion of coral.
Slice the veal and serve with the Mai Take, a generous amount of jus and some black pepper.
PS In case you have too much meat, simply store it in the refrigerator for the next day and serve as Vitello Tonato.

Halibut Marinated in White Miso

Saikyo Yaki

Grilling is an art in its own right in Japan. A simple way is Shioyaki: the fish is salted, left to chill overnight and grilled the next day. An essential element of a Japanese breakfast, together with pickled plums (Umeboshi),  sweet yet savoury omelet (Tamagoyaki), rice, a bowl of miso soup and green tea. As you can imagine a traditional Japanese breakfast is rather nutritious and packed with flavours.

A well known grilling method is Teriyaki: the fish is marinated in a combination of soy sauce, mirin and sake for a few hours and then grilled, with the fish dipped in the sauce several times during the grilling process.

Another way is Saikyo Yaki: the fish is marinated in Saikyo miso for 5 days and then grilled. Saikyo miso is a white, slightly sweet, low sodium miso from Kyoto. The marinated and grilled fish is served with pickled ginger. Originally a way to preserve the fish, it’s now much liked because of the umami and the intriguing combination of flavours and aromas.

Sake Pairing

Best served with dry sake. We prefer Junmai Taru Sake as produced by Kiku-Masamune. The sake is matured in barrels made of the finest Yoshino cedar. The aroma has indeed clear hints of cedar. The sake will clear your palate and allow for a more intense taste of the marinated halibut.

What You Need

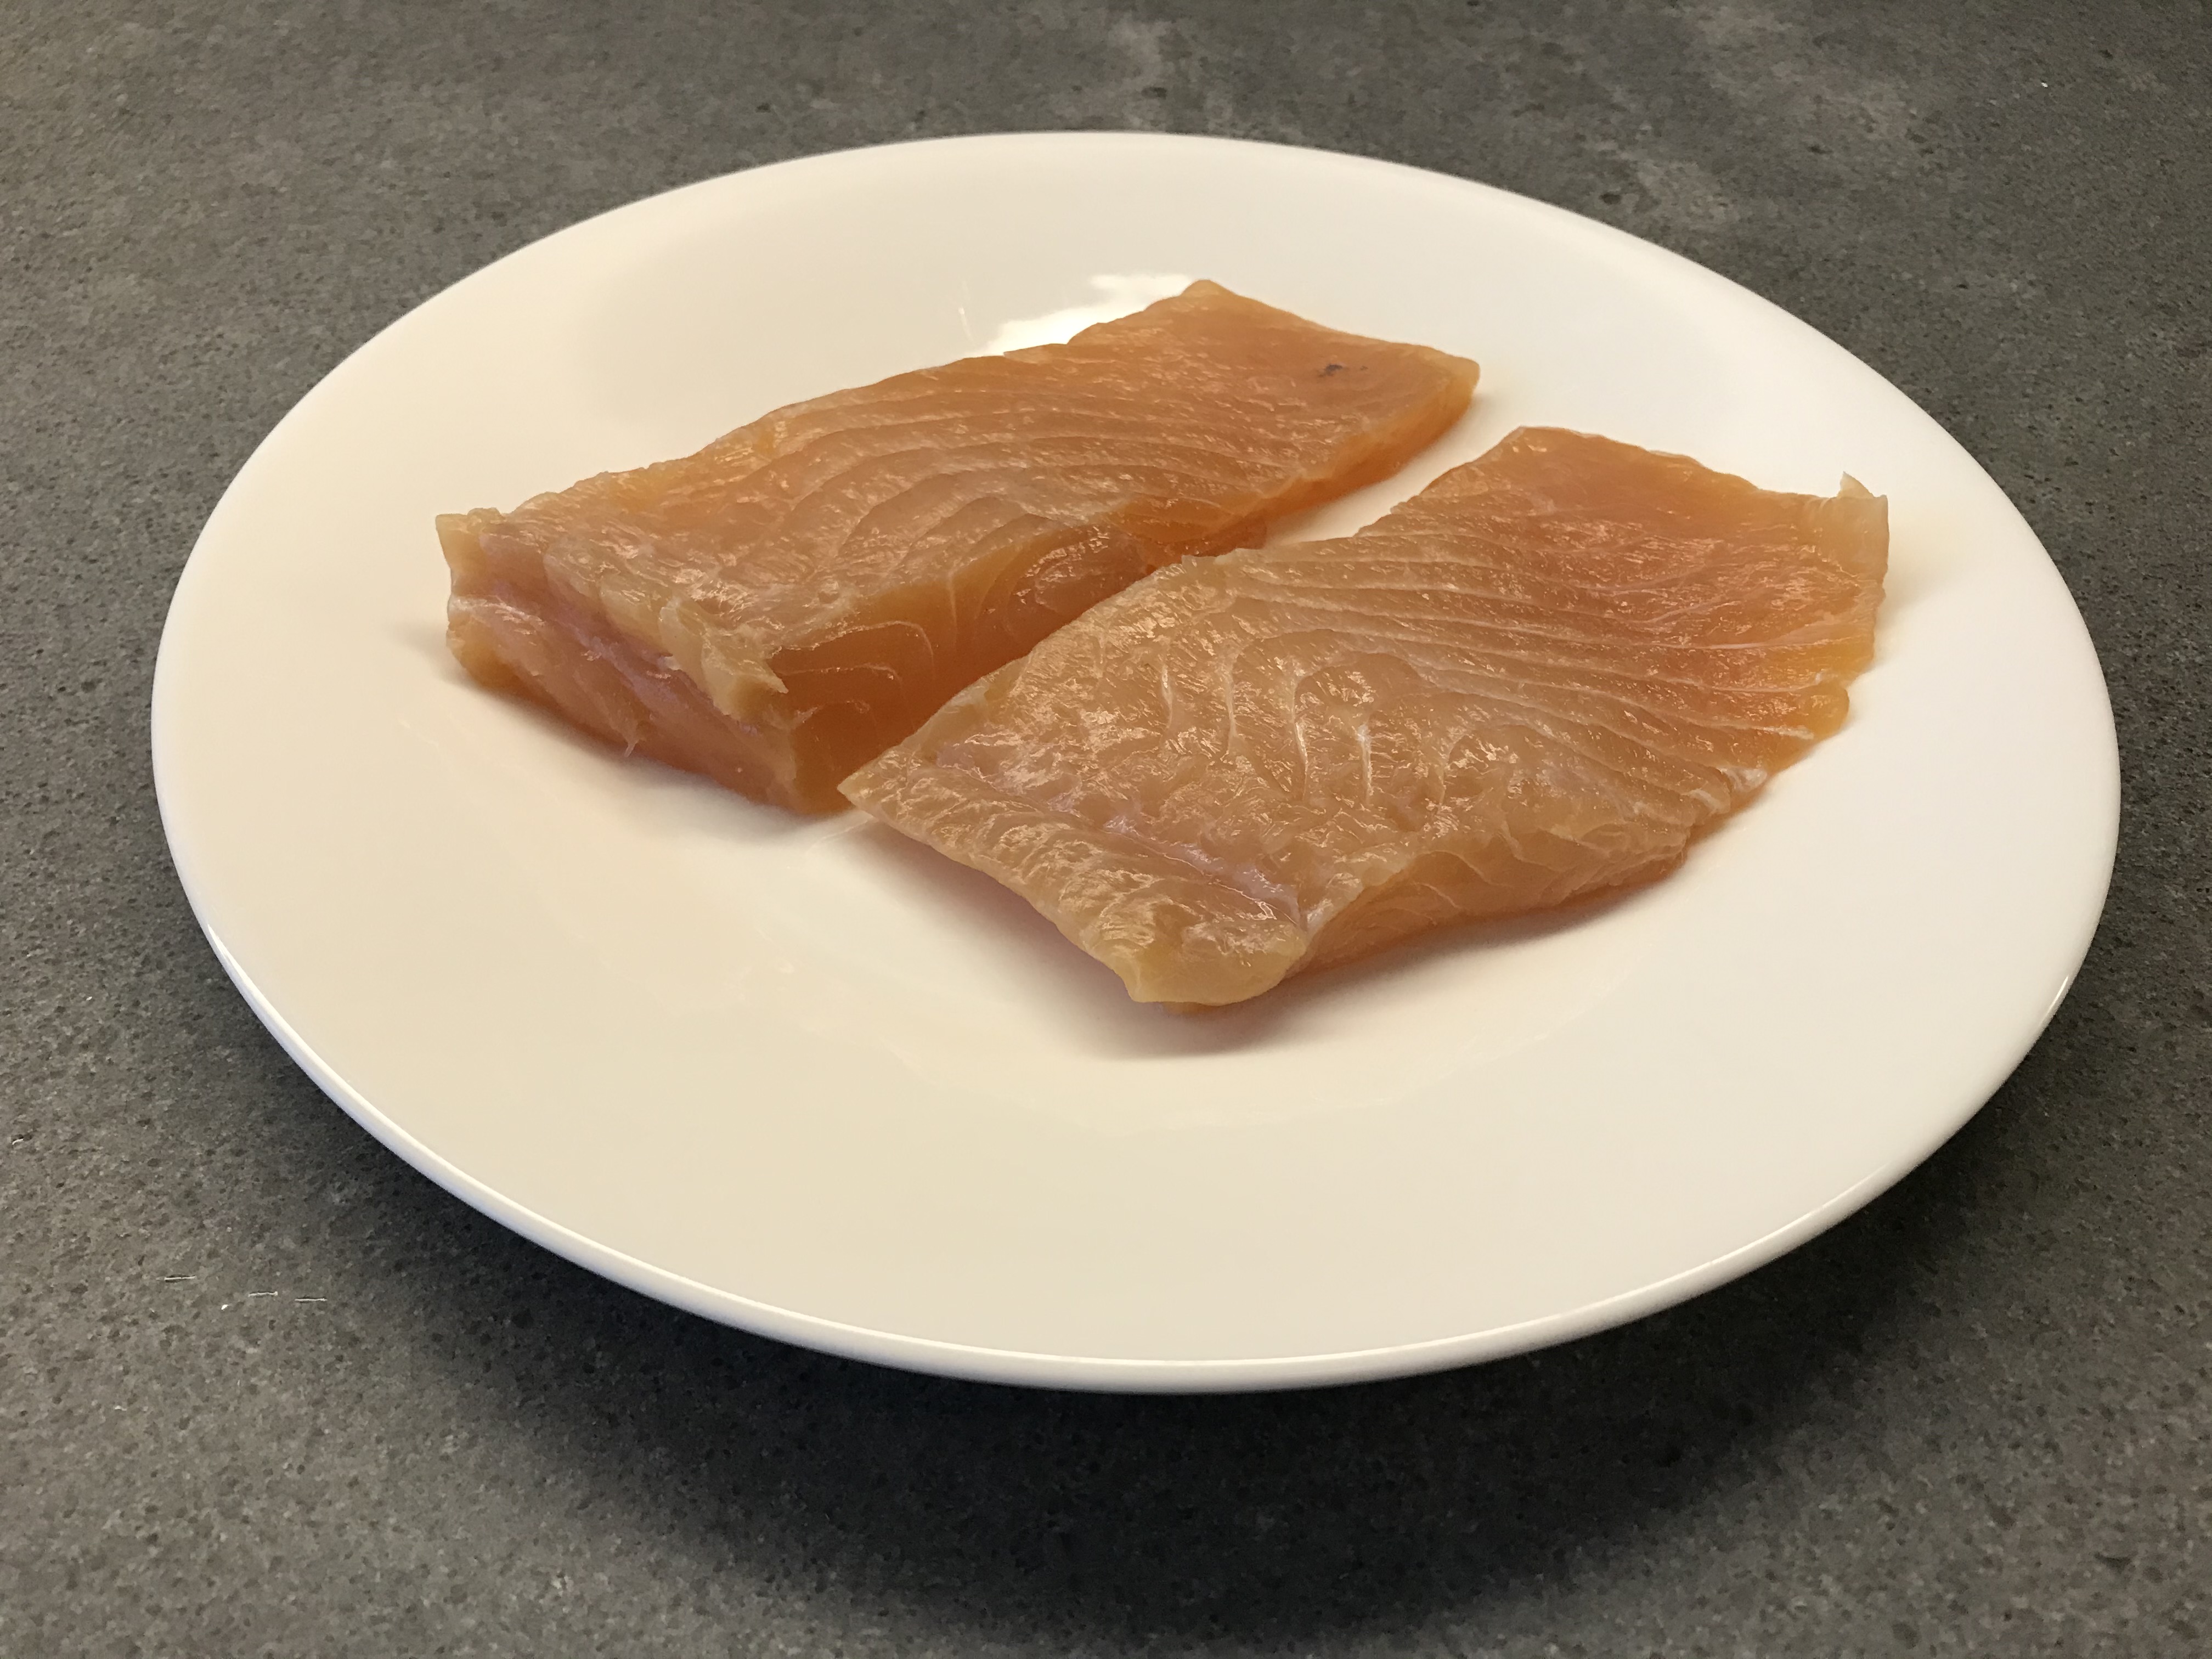
  • Two slices of fresh halibut (thin is best)
  • White Miso (preferable with less salt)
  • Pickled Ginger or Cucumber
  • Karashi (Japanese mustard)

What You Do

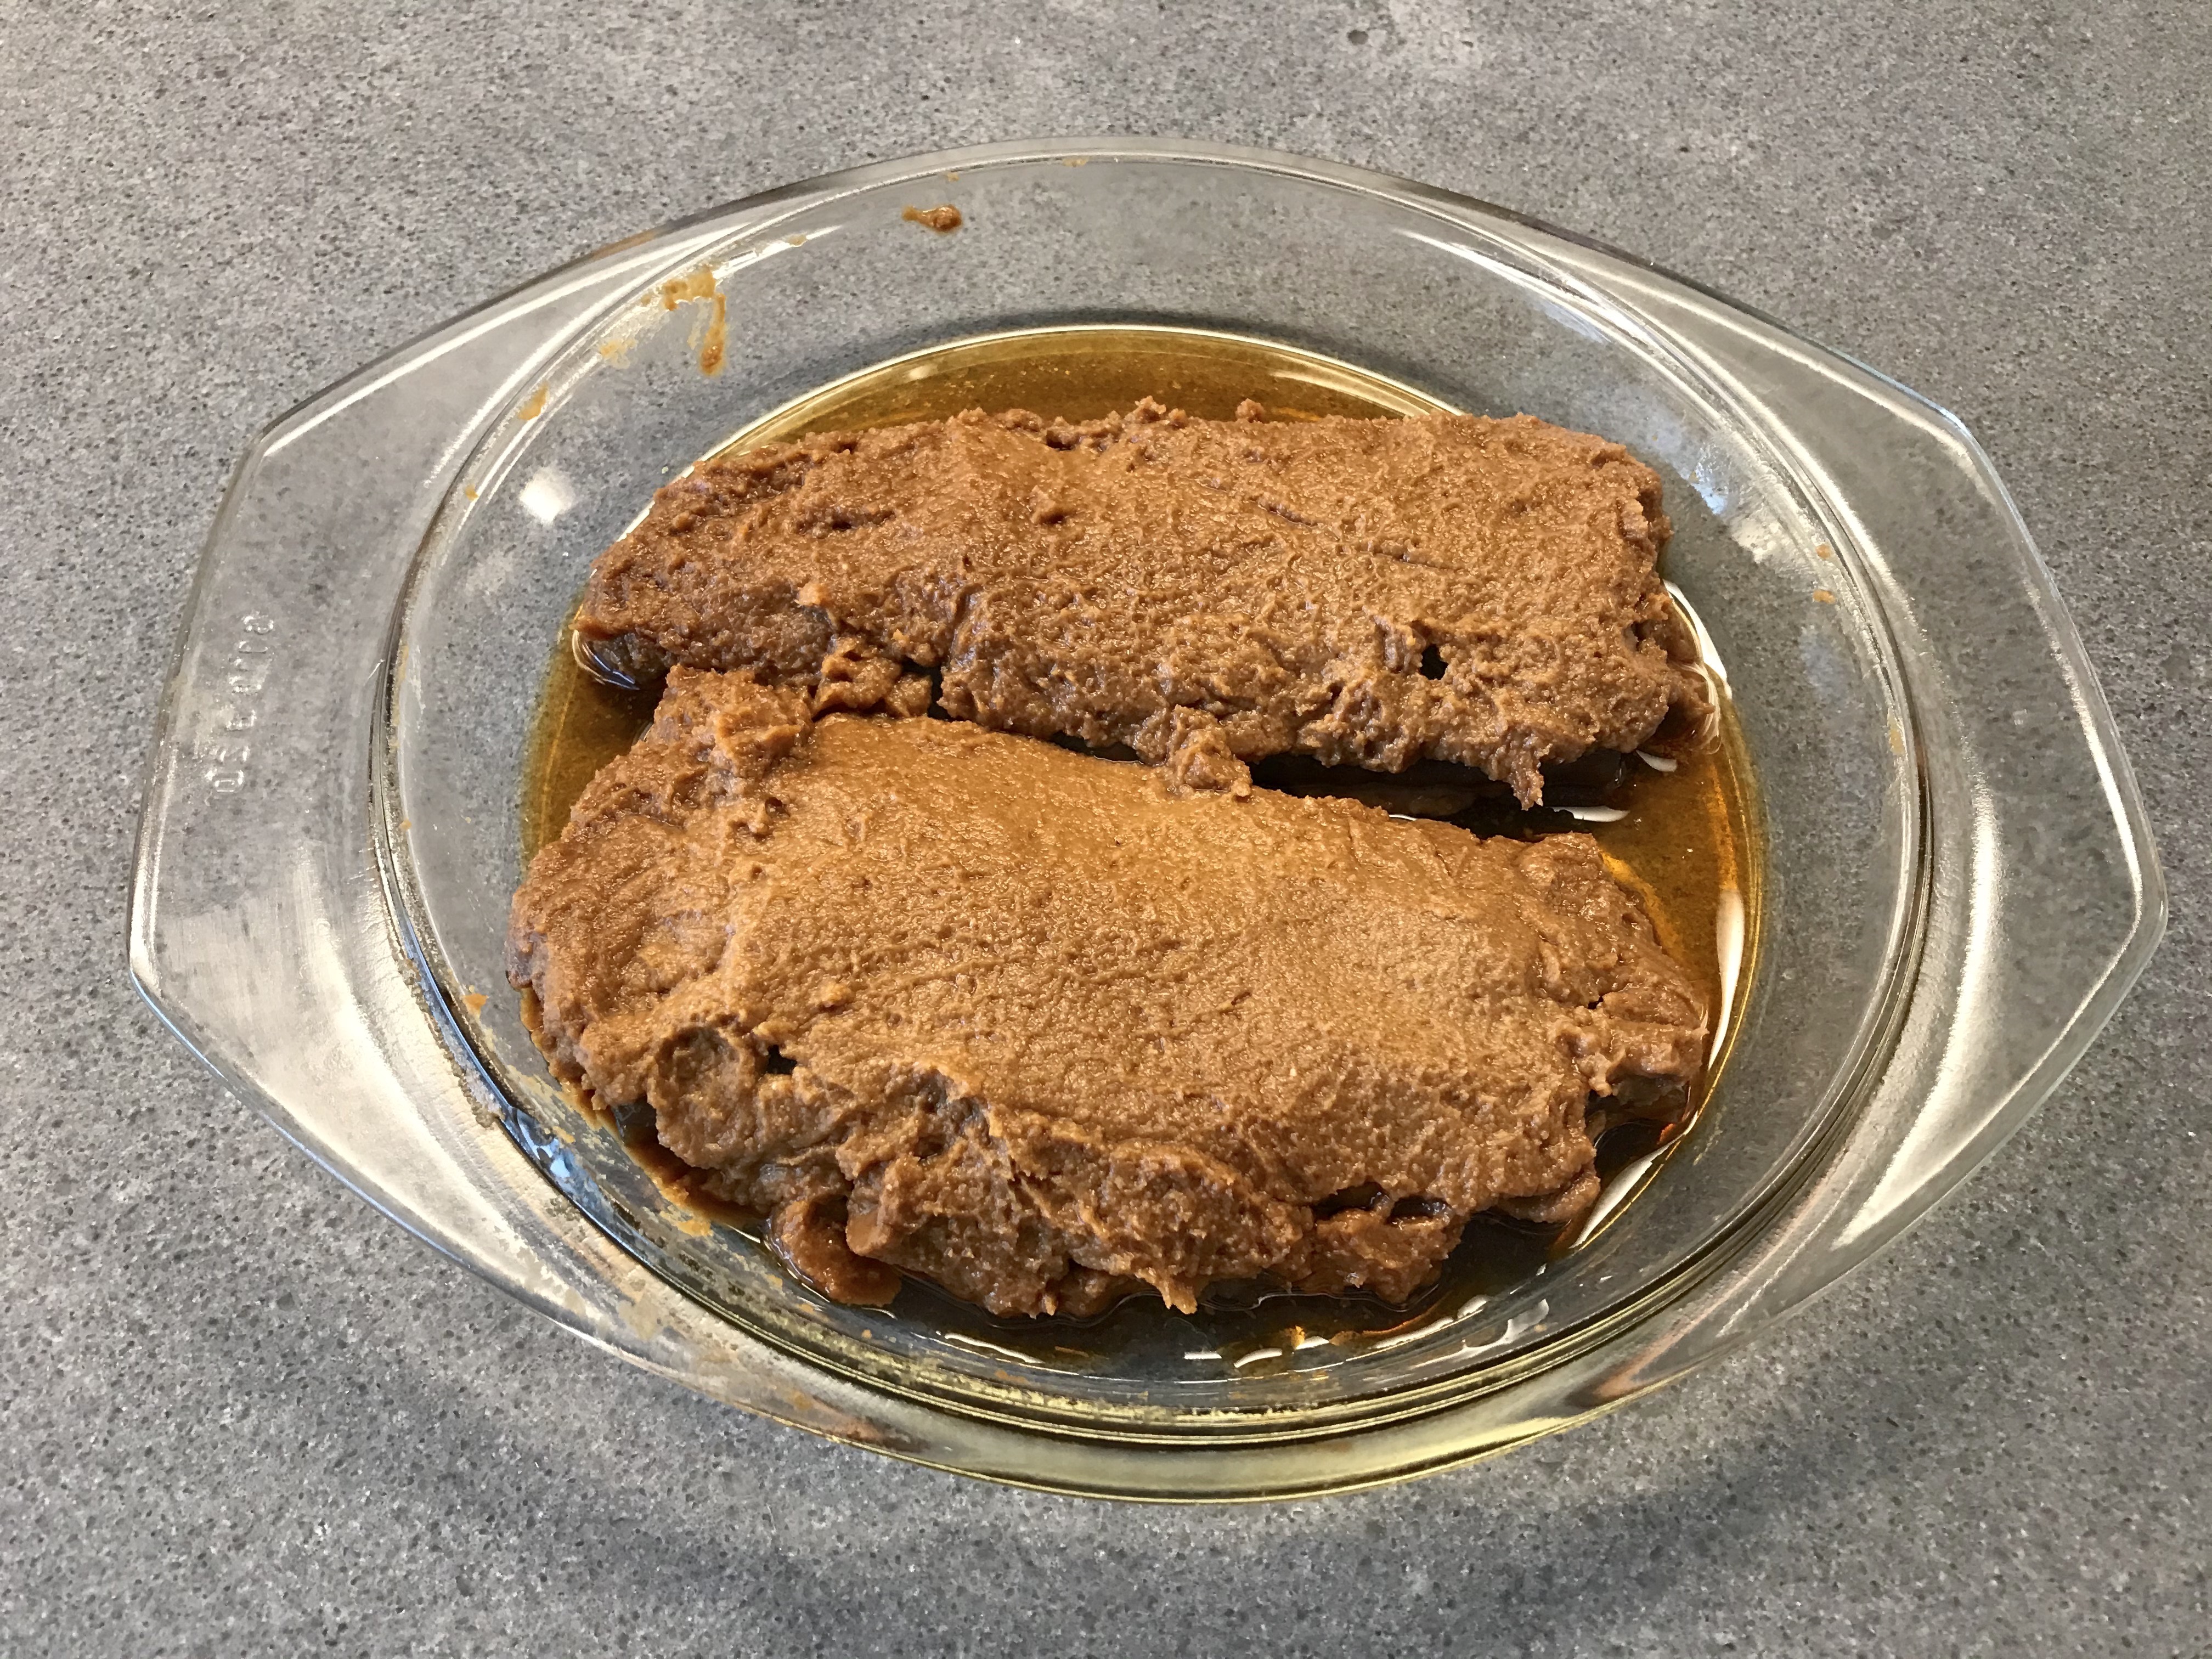
Start four or five days in advance. Coat the halibut with miso making sure the halibut is fully coated. Cover with foil and transfer to the fridge. Check on a daily basis if the fish is still covered.
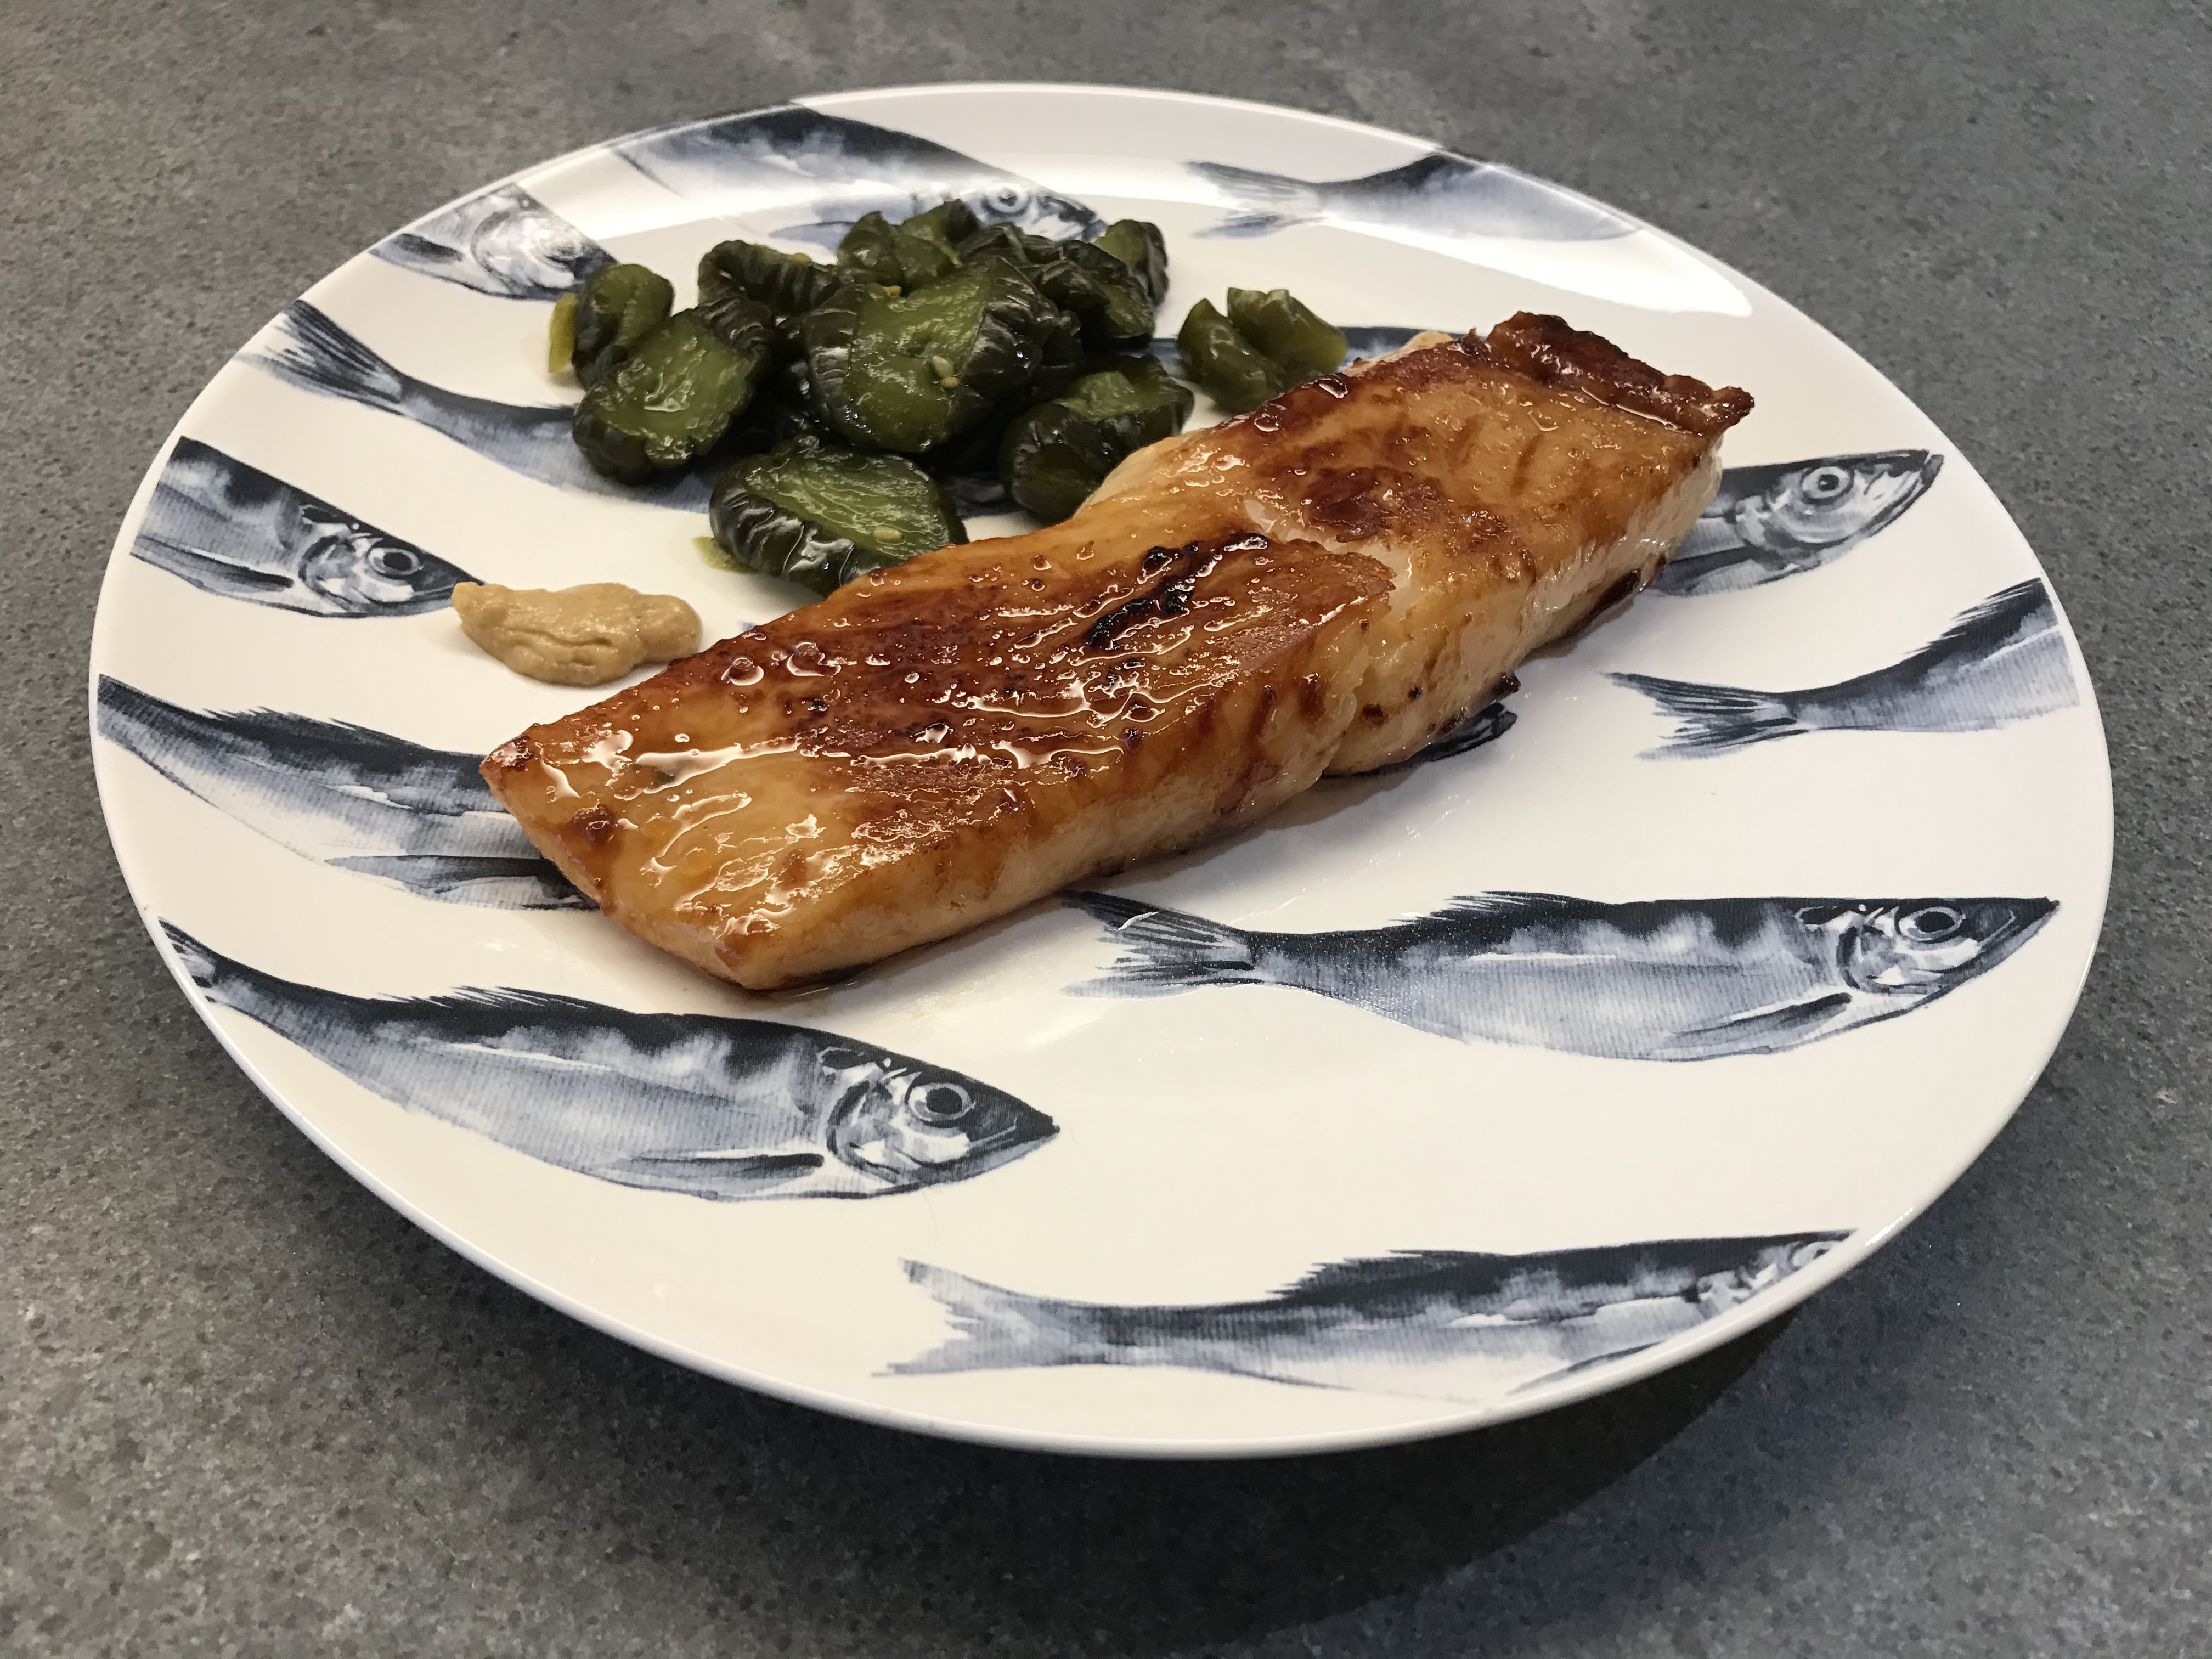
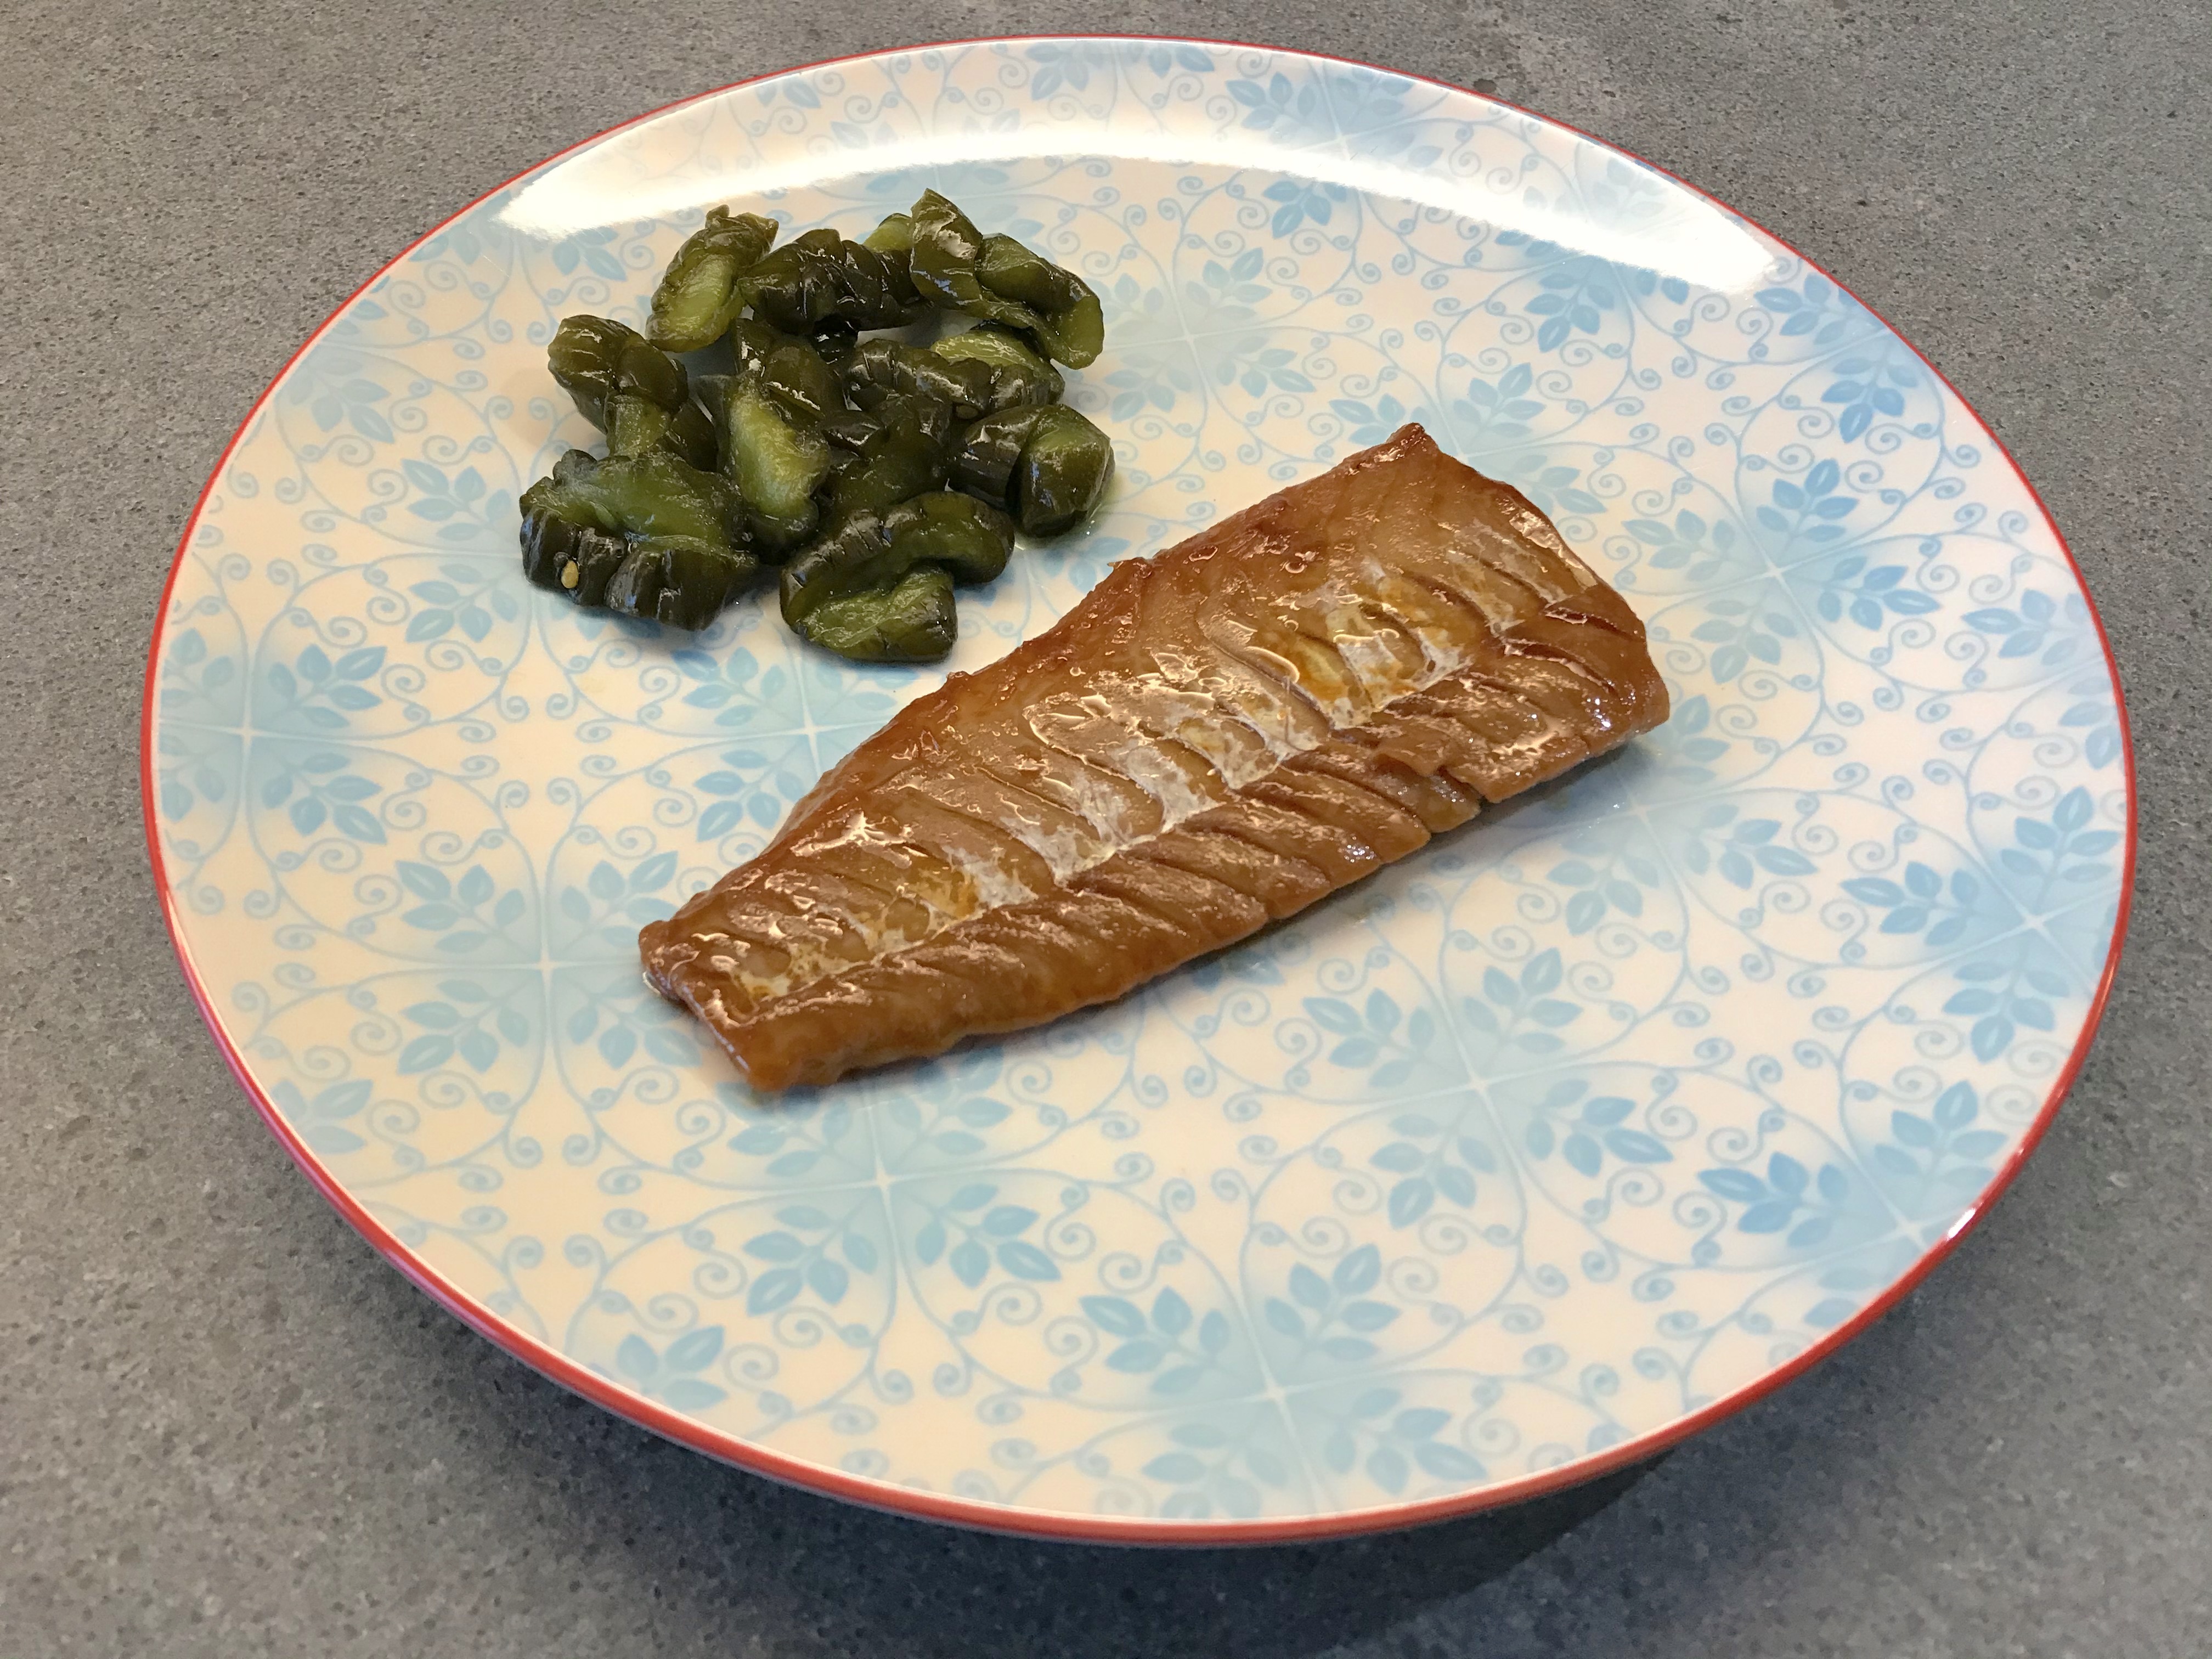
Using a small spoon carefully remove most of the miso. Rinse the halibut with water and dry with kitchen paper. The white flesh should now be slightly orange. Heat a non sticky pan until warm, but not hot, through and through. If too hot, the fish will burn. We set our induction hob to 6 (where 9 is the maximum). Add a bit of olive oil and then fry the fish for 2*2 minutes. Serve on a warm plate with pickles and karashi.


Tisane of Rosemary

Pruning is perhaps not the easiest thing to do, but with thyme, lavender and rosemary it’s not too difficult. They only downside is that after having pruned the plants you have a huge bundle of (in our case) rosemary. What to do? You could dry the rosemary and make flavoured oil or vinegar. But how to make use of lots of fresh rosemary?
This tisane of rosemary is a very delicate and powerful yet light and vibrant infusion. The tisane combines the aromatic flavours of the fresh rosemary with the stock. It’s all about rosemary, but in a surprisingly complex way. The edible flowers add an extra dimension to the tisane.
It’s best served in a small cup, size double espresso. It goes well between two more substantial dishes because it works as a palate cleaner. You could also serve it between two very different dishes.

The fun in preparing is that you need to find the right balance between the strength of the stock and the rosemary. Timing is also important. It simply requires some trial-and-error.

What You Need
  • Strong chicken or vegetable stock, preferably home made
  • Fresh Rosemary
What You Do

Heat the stock to 80° Celsius or 175° Fahrenheit. Warmer will make the tisane bitter. Now use the leaves (needles) of the rosemary and find out how many you need for let’s say 100 millilitre. Take 4 gram and set your alarm to 2 minutes. Remove the rosemary and taste. Too bitter: try again and set the alarm to 80 seconds. Not strong enough: increase the number of needles. Not intense enough: try 140 seconds. Keep testing until you have the perfect result!
Decorate with one or two rosemary flowers; their sweetness and colour adds value.


Risotto with Beetroot and Gorgonzola

Contemporary Classic

Enrico Bartolini (Castelmartini, Italy, 1979) is an extremely talented chef with restaurants in Italy, Hong Kong and Dubai. He is the only chef to have been awarded four Michelin stars at the same time. In his restaurant Mudec in Milan he showcases his motto Contemporary Classic by exploring new worlds and new flavours, without forgetting origins and traditions. One of his many signature dishes is Risotto with Beetroot and Gorgonzola (Risotto alle rape rosse e salsa al gorgonzola). An intriguing combination because beetroot can be very sweet which could easily ruin the taste of the risotto. Which is exactly what happened the first time we prepared this dish. We did more research only to read recipes we didn’t like because the beetroot was added at the beginning of the preparation process (giving the risotto a gluey texture) or honey, mint, balsamic vinegar, oranges or salty goat cheese (to balance the sweetness of the risotto!) was added.

We decided to take a different approach and see this as a combination of two dishes with the gorgonzola as connection. Now we could focus on preparing a savoury beetroot puree that would be tasty in its own right and create a brilliant combination with the risotto.

Wine Pairing

We enjoyed our risotto with a glass of Bianco di Custoza 2018, made by Monte del Frà from Italy. It is a well-balanced, dry white wine, with a fruity nose. Its colour is straw yellow, with pale green highlights. In general you’re looking for a light, aromatic dry white wine.
You could also serve a glass of Chardonnay; one that has a touch of oak and vanilla plus a lightly buttery finish. Our choice would be the Chardonnay of La Cour des Dames

What You Need

  • For the Risotto
    • 70 gram Carnaroli Rice (for instance from Acquerello)
    • (Vegetable) Stock
    • 1 Bigger Shallot
    • Parmesan Cheese
    • Butter
  • For the Beetroot Puree
    • 1 Fresh Beetroot
    • 2 Tablespoons of White (Cider) Vinegar
    • 1 Tablespoon of White Wine
    • 3 Freshly Grated Cloves
    • Black Pepper
  • For the Sauce
    • Gorgonzola Dolce
    • Milk

What You Do

The day before wash the beetroot and wrap in aluminium foil. Leave in the oven on 180° Celsius (or 355° Fahrenheit) for 60+ minutes. Cool and store in the refrigerator.
Thinly chop the shallot and glaze in butter. In parallel peel the beetroot and chop. Combine a third of the shallots with the beetroot, the white wine, the vinegar and finely grated clove. Blend until smooth. Taste and adjust. In the mean time prepare the risotto. With a fork combine the soft Gorgonzola Dolce with the milk until it’s smooth and has the consistency of custard. Depending on the ‘blue’ in the cheese you may want to use a blender. Warm both the beetroot puree and the Gorgonzola sauce in the microwave or Au Bain Marie.
Time to start assembling the dish. Add butter and Parmesan to the risotto. Add more Parmesan than usual to create the right balance. Now start adding the beetroot puree, spoon for spoon. You’re looking for a balanced taste and a bright red colour. Perhaps add a drop of lemon and some black pepper. Transfer to the plate and using a spoon or a small sauce bottle add the sauce (drop-wise).

Risotto with Beetroot and Gorgonzola © cadwu

Haddock Marinated in Miso

The original recipe is from Kyoto and combines fresh fish with Saikyo miso. This is a white, slightly sweet, low sodium miso. The fish is marinated in miso and then grilled and served with pickled ginger. Lots of umami of course and the intriguing combination of miso and fish. Nowadays salmon is often used when preparing this popular dish.

Our approach is slightly different. We use white fish (haddock preferred, but rouget, halibut or cod are also fine) and marinate it in red miso for four or five days. The flesh will become beautiful deep red and the miso will gently flavour the fish, without overwhelming it. It’s not a subtle starter but the taste is great especially when combined with pickled cucumber and karashi (Japanese mustard). 

Sake Pairing

Best served with a dry sake. We prefer Junmai Taru Sake as produced by Kiku-Masamune. This fine sake is matured in barrels made of the finest Yoshino cedar. The aroma has indeed clear hints of cedar. The sake will clear your palate and allow for a more intense taste of the marinated haddock.

What You Need
  • Two slices of Haddock (thin is best)
  • Red Miso (preferable with less salt)
  • Cucumber Pickles
  • Karashi
What You Do
  1. Start four or five days in advance
  2. (optional) Combine miso with some sake
  3. Fully coat the haddock with the mixture
  4. Cover the dish with foil and transfer to the fridge
  5. Check on a daily basis if the fish is still fully coated
  6. Use a small spoon to carefully remove most of the miso
  7. Rinse the haddock with water and dry it with kitchen paper
  8. The white flesh should now be red
  9. Heat a non sticky pan until warm, but not hot, through and through. If too hot, the fish will burn. We set our induction hob to 6 (where 9 is the maximum)
  10. Add a bit of olive oil and then fry the fish for 2*2 minutes
  11. Serve on a warm plate with pickles and karashi.

A Royal Sabayon

Happy Birtday!

Today April 27th we celebrate the King’s Birthday in the Netherlands. Hip hip hurrah! The Dutch Royal Family is known as the House of Orange-Nassau, hence the link to anything orange (oranje in Dutch), including a liqueur called Oranje Bitter. It’s not many people’s favourite; most people prefer another traditional drink: lots of beer.

There are many recipes for Oranje Bitter; most of them with too much sugar and undefined herbs. We prefer the more classic version produced by Van Wees and De Ooievaar. Their Oranje Bitter is made with Pomerans (Citrus Aurantium, the bitter orange) and Curaçao peel.

Our grandmother wasn’t a big fan of Oranje Bitter, but she felt she had to serve it on the (then) Queens Birthday. She combined one tradition with another: she made Dutch Advocaat using Oranje Bitter. Basically Advocaat (similar to Eggnog) is a sabayon-like drink made with egg yolks, sugar, vanilla and a strong alcohol (brandewijn, gin, vodka or grappa), served in a nice glass with a small spoon and possibly topped with whipped cream (but no need for that).

Grandmother cooked her advocaat Au Bain Marie; we prepare our Royal Sabayon using a microwave oven.

What You Need

  • 3 Egg Yolks
  • 30 grams of Sugar
  • 80 ml of Oranje Bitter

What You Do

Mix the egg yolks and the sugar well. Make sure the sugar is dissolved before adding the liquid. Transfer to the microwave and very gently heat the mixture. We used intervals of 10 seconds to start with and intervals of 5 seconds to finish. In total only 75 seconds on 30% power. Duration depends on the power of your microwave. Stir well (or whisk, but not too much) after every interval until it becomes thick. The consistency must be similar to a thick pastry cream (crème pâtissière). Cool quickly and store in the refrigerator.

PS Obviously you need fresh eggs when making  a sabayon, mayonnaise, béarnaise et cetera. We don’t think eating fresh, organic eggs is a problem. Eating all kinds of additives, unclear syrops, modified milk ingredients, guar gum, monoglycerides et cetera, that’s a problem.

PS Use the egg whites to make madeleines.

Roulade of Chicken with Rosemary and Pancetta

A Kitchen Puzzle

Roulade sounds terribly old-fashioned. And if not old-fashioned it will probably make you think of meat in a net, seasoned with something like ‘chicken herbs and spices’. Yuk! You have two options: ask your butcher to make one for you or the much-preferred option: Do It Yourself.
The key to a roulade is to buy smaller bits of meat. In this case we used 4 chicken thighs. This is the very tasty, boneless half of a chicken leg. To create a roulade you need fairly thin slices of meat that will be the outside of the roulade. For the inner part of the roulade you can use smaller, chunkier bits. Take your time to solve the puzzle. It may seem easier to buy one thin slice of meat and simply roll it up, and that could work very well with beef, but building a roulade with smaller bits of pork, veal or chicken is very rewarding. Use plenty of kitchen string to make the roulade.
After having tied the last knot, leave the roulade in the refrigerator for a few hours. This will help the roulade to become firm, which is helpful when frying it. It will also help the flavours to integrate.

Wine Pairing

We enjoyed our Roulade with a glass of excellent Austrian Zweigelt. This red wine is fruity and elegant which combines really well with the powerful rosemary and the full-bodied chicken roulade.

What You Need

  • 300 grams of Chicken Thigh
  • 3 sprigs of Rosemary
  • 2 slices of Pancetta
  • Butter
  • Olive Oil
  • Thyme
  • Chicken stock
  • Cream

What You Do

When you’ve solved the puzzle, simply add two slices of pancetta and the two sprigs of rosemary. Tie the roulade together with kitchen string. Cool for a few hours in the refrigerator. Heat some butter and olive oil in a skillet. Fry the roulade making sure you fry the seam first. A few minutes should be sufficient. Transfer the roulade to the oven, let’s say 160 °C. A higher temperature will shorten the cooking time and enhance the color, but you risk an overdone roulade. That’s why we prefer 160 °C or lower. When your roulade is bigger, feel free to turn it every 10 minutes.
Remove the roulade when the temperature in the centre is 70 °C. Wrap in foil and leave to rest for at least 15 minutes.
Start building the sauce by adding chicken stock, the third sprig of rosemary (leaves only) and some thyme. Cook gently for 5 – 10 minutes. Use a blender to make a smooth mixture and pass through a sieve. Transfer back to the skillet and add some cream. Remember to add the juices of the roulade as well. The juices should be clear. If not, the roulade needs to rest longer.
When the sauce is ready to be served, transfer the roulade from the foil, carefully remove the string and slice the roulade with a very sharp kitchen knife. Serve with the sauce on a hot plate.

Baba Ghanoush

Eggplant

Baba Ghanoush is tasteful and easy to make. Combine it with olives, pickles and flat bread (naan) to create a delicious starter to share. Don’t be tempted to buy Baba Ganoush at the supermarket. Most of these products lack the typical taste as a result of charring the eggplant.
Sumac is an ingredient from the Levantine cuisine. Basically sumac powder is the result of crunching dried berries of the sumac plant. The taste vaguely resembles cranberries with a touch of lemon. In this case it adds fruitiness to the dish. The sweetness of the berries combines well with the garlic.

Wine Pairing

Enjoy Baba Ganoush with a glass of white Lebanese wine, but since that’s hard to find a nice glass of Cava is also a good choice.

What You Need

  • 1 Eggplant
  • 1 Garlic glove
  • 1 Tablespoon of Tahini
  • Olive Oil
  • Greek or Turkish yoghurt
  • Lemon Juice
  • Sumac
  • Pomegranate

What You Do

Start by grilling the eggplant (in the oven in our case) to the point of charring. Ideal would be a char coal grill, but an oven grill also does the trick. Then leave the eggplant in the hot oven until very soft; maybe 30-45 minutes in total, depending on the seize of the eggplant. Some suggest rubbing the eggplant with olive before grilling it that’s not necessary.
Transfer the eggplant to a plate and let cool. Now cut in half and use a spoon to separate the flesh from the skin. Use a kitchen knife to cut the flesh very thinly. Put the mixture in a sieve and reduce the amount of liquid in the mixture. Add the garlic and mix well.  Add tahini and while stirring slowly add olive oil to create a thick mixture. Add yoghurt and some lemon juice. Taste well and adjust by adding more tahini, yoghurt or lemon juice. Allow to integrate for at least 15 minutes before serving.
Spread the baba ghanoush on a small plate, add a splash of excellent olive oil and sprinkle some pomegranate seeds and sumac to finish.


Farfalle with Wild Garlic (or Ramson) and Parmesan Cheese

In a number of countries ramson is a protected plant, so we don’t suggest you run out of the door and start picking it. But if it’s not protected, feel free to start running!
Ramson is much-loved in Germany, Austria (Bärlauch) and other parts of Europe. Its taste is like a combination of onion and garlic, but much greener, more intense, longer lasting and with a touch of bitterness at the end. Works very well as a pesto, but equally nice with potatoes or gnocchi. Once we made ramson soup, but that was not the best idea ever.
The flowers may have (if you’re lucky) a touch of sweetness because of the nectar in the flower. Always taste the leaves and the flowers before using and feel free to adjust quantities.

Wine Pairing

We would suggest a Soave to go with the dish. The Garganega grape combines very well with the specific taste of the ramson, given the wine is fresh with a subtle bitterness.

What You Need

  • 20 or so leaves of Ramson
  • Olive Oil
  • Parmesan Cheese
  • Farfalle
  • Lemon Juice

What You Do

Cut the leaves in smaller bits and blitz the leaves with grated Parmesan cheese. If you want to soften the taste, now is the moment to add some toasted almonds or pine nuts. Slowly add the olive oil until blended and smooth. Maybe you want to add a bit of lemon juice.
Cook the farfalle and serve with the pesto and some grated Parmesan cheese.
You can store the pesto for a week or so in the refrigerator if you add some extra olive oil to the jar, covering the pesto.