Warm Tapenade

On one of the last, warm, long evenings of this summer we wanted to enjoy something with lots of flavours and depth, but we didn’t want to spend too much time in the kitchen. Then we remembered a tapenade like mixture that worked nicely with monkfish. Why not combine it with excellent beef? The result was what we hoped for: lots of flavours and we only needed 15 minutes to prepare it.

Wine Pairing

Enjoy with a glass of full-bodied red wine, for instance Syrah, Cabernet Sauvignon or Malbec. The tannins of such a wine will combine very well with the depth and richness of the tapenade and the beef.

We enjoyed a glass of Les Terrasses Occitanes Fitou produced by Mont Tauch from the Languedoc region in France, made with Grenache, Carignan and Syrah grapes. A not too complex, full bodied dry wine with aromas of red fruit and a lasting taste.

What You Need

  • 150 grams of Excellent Beef (Sirloin, Bavette)
  • For the Tapenade:
    • Shallot
    • Garlic
    • Black Olives
    • Capers
    • Thyme
    • Rosemary (optional)
    • Anchovies
    • Olive Oil

What You Do

Let the beef rest on a plate until it reaches room temperature. This could take an hour. Chop the shallot and the garlic, halve the black olives and remove the thyme leaves from the stalk. If using fresh rosemary, make sure to chop the leaves. Dry the capers with kitchen paper. Mash the anchovies with a fork until you have a paste-like substance. Warm a pan, add some olive oil and glaze the onions. After a few minutes add the garlic. Add the olives, the thyme, the capers and the anchovies. The result should be a rather chunky, rich tapenade.
Add olive oil to a hot skillet and quickly fry the beef. Leave to rest for a few minutes before serving with the warm tapenade. Add some black pepper.

PS

Not using anchovies is not an option. They bring umami and saltiness to the tapenade. One fillet is enough to have the right result.

Beef with Warm Tapenade ©cadwu

Mushroom Soup with Pancetta and Thyme

This morning when we looked outside, we saw a grey, foggy city. Knowing it would take hours for the fog to clear, we started thinking about something warm for lunch. Perhaps some soup with crusty bread? We opened our refrigerator. Various mushrooms, thyme, rosemary, cream, a carrot, some left over stock. Yes! We knew what we wanted to cook for lunch: Mushroom Soup with Pancetta. A hearty, rich soup, ideal for a cold, grey day. The combination of mushrooms, pancetta and cream works very well; the celery and leek add complexity and the thyme brings character.

Wine Pairing

It was much later that afternoon before the fog left the city, but since we also had some left over Chardonnay in the fridge, which we enjoyed with our soup, we didn’t mind that much.

What You Need

  • Pancetta
  • Shallot
  • Mushrooms (Best is a Mix of Champignons, Shiitake etcetera)
  • Celery
  • Leek
  • Carrot
  • Garlic
  • Stock (Chicken or Vegetable)
  • Bouquet Garni (Thyme, Rosemary and Bay Leaf)
  • Black pepper
  • Cream
  • Fresh Thyme
  • Olive Oil

What You Do

Keep two strips of pancetta apart (to be grilled just before serving). You probably need 4-6 strips in total. Slice the remaining pancetta and fry in olive oil on medium heat. Remove the pancetta from the pan, chop the shallot and glaze it in the fat and perhaps some extra olive oil. Clean and slice the mushrooms, slice half a stalk of celery, half a leek, a small carrot, chop two gloves of garlic and add this to the shallot. Gently fry for a few minutes. Add the pancetta, the stock and the bouquet garni. Allow to simmer for 30 minutes. Remove the bouquet garni. Blender the soup, pass through a sieve and leave on low heat for 10 minutes. The mushrooms will emulgate the soup, so no need to add a roux. Now it’s time to taste the soup and perhaps add some black pepper. Add cream and fresh thyme and leave for another 5-10 minutes. In the meantime grill the two strips of pancetta until brown and crispy. Cut the stripes in five pieces depending on the size. Serve the soup in a warm bowl with the pancetta on top of it.

Chicken with Fresh Oregano

Thyme, Oregano, Basil, Rosemary, Saffron, Sage: all powerful Mediterranean herbs. Oregano, or Wild Marjoram, is an interesting one. Probably best known as the herbal ingredient of pizza. A dried herb, one to store in a jar, forget about and then use beyond its ‘use-by date’ and be disappointed.
Such a pity because fresh oregano is aromatic, slightly bitter, pungent and perhaps chemical, depending on the variety, of course. Great to combine with lamb, a tomato salad, grilled fish and of course chicken. It’s also great to flavour olive oil with oregano. So ask your supermarket or local greengrocer for fresh oregano!

Wine Pairing

We enjoyed our chicken and oregano with a glass of Rioja Paternina Reserva 2015 produced by Marques de la Concordia. Reserva means that the wine ages for a minimum of 3 years, with at least 1 year in oak barrels. The grapes are tempranillo, mazuelo and garnacha; very typical for Rioja. It’s a powerful, full-bodied red wine with aromas of black cherries and touch of vanilla and various spices. The wine goes very well with the velvety chicken and the very present flavours of the oregano.

What You Need

  • Chicken Thighs
  • Olive Oil
  • Black Pepper
  • Chicken Stock
  • Lots of Fresh Oregano

What You Do

Halve the thighs, heat a heavy iron skillet, add olive oil and quickly fry the meat on all sides. Reduce the heat and add two third of the chopped oregano. Keep on low to medium heat for 10 minutes or so. Add some chicken stock, just to deglaze the pan. You will notice that the juices becomes green thanks to the oregano, so please coat the meat with the cooking liquid. Just before serving add the remaining oregano, some freshly ground black pepper and mix.
Serve with green beans, cooked in water with fresh garlic, wrapped in pancetta (after having grated some nutmeg over the beans) and then fried for 5 minutes in some olive oil.

  • Chicken with Fresh Oregano ©cadwu
  • Federico Paternina Rioja Reserva 2015 ©cadwu
  • Fresh Oregano ©cadwu


Artichoke Salad

Love Your Artichoke

A beautiful flower and an intriguing ingredient. A large artichoke with some mayonnaise, mustard and vinegar makes for a wonderful, relaxing starter. The smaller ones are great when turned into a salad or when served with tagliatelle as a starter.
Steaming is the ideal way to prepare artichokes. The flavour remains intact and the leaves will become soft yet firm.
Don’t be tempted to buy preserved artichokes hearts. In most cases these are only about marinade, vinegar, sugar and unidentified spices. Whereas artichokes should be about taste and especially texture. It’s a thistle you’re eating and not something white and fluffy from a jar.
Key to this salad is the combination of artichokes and thyme. Lots of thyme! Enjoy the light, earthy and slightly bitter flavour of the artichokes in combination with the aromatic thyme.

Wine Pairing

You can serve this salad to accompany an aperitif, or with some bread as a starter.

What You Need

  • 6 small Artichokes
  • Olive Oil
  • (White Wine) Vinegar
  • Mustard
  • Thyme
  • Black Pepper

What You Do

Remove the stem of the artichokes and steam the artichokes for 30 – 45 minutes, depending on the size. Remove and let cool. Peel of the first layers of the outer leaves. Make the dressing by combining the oil and vinegar and then adding the mustard. Cut the artichokes in 6 or 8 parts. Add the dressing to the artichokes, mix well, making sure all artichokes are coated. Sprinkle lots of thyme and carefully mix again. Put in the refrigerator for at least 3 hours. Mix again, taste, add black pepper and perhaps some more thyme and serve!

Partridge with Courgette and Thyme

Delicate

Partridge is perhaps the most delicate of game birds. They come in two sorts: the red-legged and the grey-legged. The grey-legged ones are more expensive and in general they may be hunted for a few days per year only. In all cases it is best to buy them early in the year (September until mid November). The season is short, so don’t wait too long!

The meat of a partridge is lean and tends to become very dry when preparing it. So what to do? Of course! Put a strip of bacon on each breast and transfer the poor bird to a hot oven.
Not really. The bacon will impact the characteristic taste of the partridge which is of course not something you want to do. And placing such a small, lean bird in a hot oven is a massive risk. Just a few minutes too long (simply because something else you are preparing takes a bit longer than expected) and the meat is bone dry. Stuffing the bird doesn’t help, the filling will be moist but the meat will be dry anyway.

The key to an excellent partridge is to be brave enough to use an oven on a really low temperature, meaning the temperature the meat should have when you serve it. Restaurant owner and celebrated Chef Peter Lute introduced this method in the Netherlands.

Another interesting aspect is that, different from many other birds, the legs of the partridge are not that special. They are fairly small and have lots of tendons.
So, no bacon, no hot oven and focus on the breast.

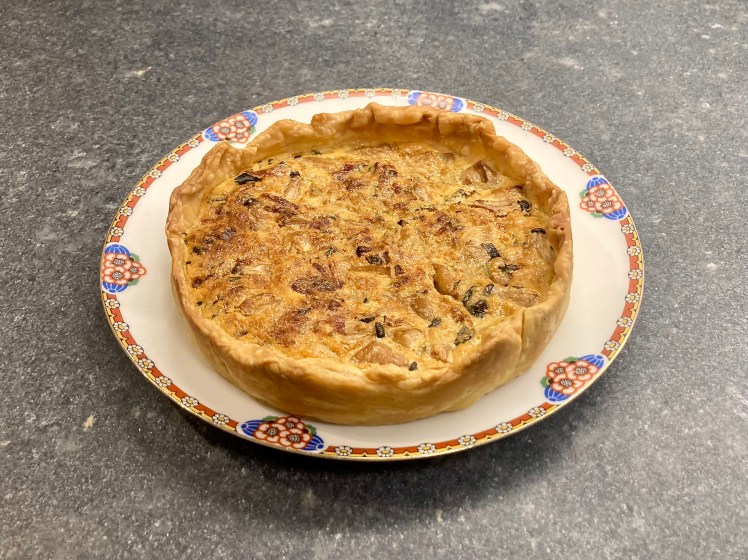
Partridge combines very well with a range of vegetables and herbs. The classic combination is with choucroute (Alsace style). We wanted to link our partridge to late summer by combing it with a thyme-courgette cake. Easy to make and full of flavours.

Wine Pairing

A red wine is preferred, one that is not overpowering, with hints of red fruit, a touch of oak and soft tannins. Our choice was a 2016 Shiraz from Australia: the River Retreat Murray Darling Shiraz. Great value for the price.

What You Need

  • For the partridge
    • One Partridge
    • Two Garlic Gloves
    • Bay Leaf
    • Butter
    • Olive Oil
  • For the thyme-courgette cake
    • One Courgette
    • One Egg
    • Thyme
    • Parmesan Cheese
    • Olive Oil
  • Black pepper

What You Do

Start with preparing the partridge. This means carefully cutting of the two legs and removing the lower part of the back of the bird (the tail bone area, see picture). Warm a heavy iron pan and add butter. Add bay leaf and halved garlic gloves. Coat the bird with butter, making sure you get a very light brown colour. Put the legs on a plate and cover with foil. Now transfer the pan and the plate to a warm oven: 70° Celsius or 160° Fahrenheit. Leave in the oven for 50 – 60 minutes. Since the oven is on the ideal temperature for the meat, it doesn’t really mater if you leave them in the oven for 70 minutes. Remove the two breasts from the bird. Remove the bigger bone from the leg. Coat the meat with the fat from the pan. Transfer to a plate and cover with plastic foil.

Grate the courgette, transfer to a bowl, add a teaspoon of salt, mix and transfer to a sieve. Let rest for at least two hours. Discard the liquid. Wash the courgette with cold water and put the grated courgette in a clean cloth. Squeeze out as much liquid as you can. Beat the egg slightly; mix with the courgette, the grated Parmesan cheese and a generous amount of thyme. Add olive oil to a fairly hot non-sticky pan and start frying the courgette mixture. This takes longer than expected! In the mean time make sure your heavy iron skillet is heated through and through. Flip the courgette cake and fry the other side. In parallel add olive oil to the skillet, and quickly brown the meat. Separate the tenderloin from the breast and remove the fleece before serving the breasts. If all is well you will see a beautiful pink colour, indicating your cuisson is perfect and your partridge as tasty and delicate as possible. Before serving add some black pepper and extra thyme.

Caesar’s Mushrooms with Udon

Caesar’s mushroom (or Amanita Caesarea) is a true delicacy, especially when eaten very young. And raw. Since the young ones have the shape of an egg, they are called ovoli in Italian. It is not recommended to pick these young ones yourself, unless you’re an expert. The young Caesar’s mushroom looks very similar to young Fly Agaric, Death Cap or Destroying Angels. Ones we would not like to see on (y)our plate. The mature Caesar’s mushroom looks very distinct from these very dangerous mushrooms, so fewer risks involved.
When you’re in North America, you will probably be able to buy Amanita Jacksonii or Amanita Arkansana, which seem to be very similar, but not completely. As far as we know eating cooked Amanita Caesarea and Arkansana is not a problem; eating them raw could be.

The classic recipe for ovoli is to include them in a salad, with shaved white truffle, parsley, olive oil and parmesan cheese. Another option is to add them to your risotto.

In this recipe we combine the delicate flavour of the Caesar’s mushroom with lots of thyme, rosemary, bay leaf, a touch of garlic, Parmesan cheese and olive oil. Best would be to use Calamintha Nepeta, but using thyme will also do the trick. A garlic glove must be added because the garlic will turn black if your mushrooms are poisonous (not a story to rely on).

Ideally served with Japanese udon because the noodles will be nicely coated with the cooking juices, but feel free to use good pasta as an alternative. One of the benefits of udon is that it is really white, allowing for the yellow of the mushroom to be more present.

We enjoyed our Caesar’s mushrooms with a glass of traditional Burgundy wine from France (100% pinot noir). The wine should have delicate fruit aromas (black cherries, plum) and some earthiness. The wine should be medium bodied and have a crisp acidity. Not too much oak, because oak will overpower the mushrooms. The pinot noir should also be relatively light, allowing for herbal and floral tones.
Pinot Noir wines from the new world are in general rounder and higher in alcohol, making these wines more like Syrah or Malbec. We don’t recommend these wines, however tasty, in combination with the dish.
A glass of Chardonnay is also an option provided it’s fresh with just a touch of oak and butter.

Here is what you need

  • 200 grams of Caesar’s mushrooms
  • Olive Oil
  • Thyme
  • Rosemary
  • Bay Leaf
  • Garlic glove
  • Parmesan cheese
  • Japanese Udon (for instance from Hakubaku)

Clean the Caesar’s mushrooms and remove the white veil (or volva). Make a bouquet garni with lots of thyme, rosemary and a bay leaf. Start by making flavoured olive oil by warming the olive oil in a large skillet and adding the herbs and the garlic glove. Not too hot, you only want the flavours and essential oils to be added to the olive oil. After 15 minutes or so remove the garlic and the bouquet. Now add the sliced Ceasar’s mushrooms and very gently fry them. Just cooked is perfect. In parallel cook the udon. When ready (12 minutes in our case, you don’t want the udon to be al dente), drain the udon but keep some of the cooking liquid. If there is too much starch on the pasta, then think Japan and wash your pasta with cold water. This will remove the starch and allow for a better result. Remove the Caesar’s mushrooms from the pan and keep warm. Add the pasta to the pan, stir and make sure the pasta is fully coated. Add a spoonful or two of the cooking liquid to the pan. Add some grated Parmesan cheese and black pepper. Transfer the Caesar’s mushroom back to the pan and stir very gently, making it into one yellow, tasty mixture. Just before serving sprinkle with extra Parmesan cheese.

Duck Breast with a Green Pepper Corn Sauce

Ignore The Obvious

Duck is often combined with a sweet ingredient. Think fruit (orange, clementine, apple and even peach), with honey, Port Wine or Marsala. All these combinations make sense because the idea is to relate to the taste of the duck. In this case we ignore the obvious and combine it with a green pepper corn sauce. The thyme is the bridge between the duck and the sauce. The garlic brings a touch of sweetness to the sauce. The combination works beautifully!
Green pepper corn is available dried and in brine. We prefer the brine version because it integrates better with the other ingredients of the sauce. The dried corns work well after leaving them in a nice vinegar for 24 – 48 hours.

Wine Pairing

A simple Bordeaux wine will work very well. But Syrah, with its hint of spiciness, will be the perfect wine with this dish. If available go for an Australian Syrah because of the full-bodied character.

What You Need

  • 2 small Breasts of Duck or 1 large one
  • Thyme
  • Chicken stock
  • Garlic
  • Single or Double Cream
  • Green Pepper Corn in Brine (slightly crunched)
  • Mustard

What You Do

Check the breast of duck for remainders of feathers. Remove the vein on the meat side of the breast (and the odd membrane you don’t like). Cut the skin (not the meat!) in a crosshatch pattern, let’s say 1-2 centimeter apart. Doing this helps the fat render and it will give a crispy result. Put thyme in the pattern. Put on a dish, cover and transfer to the fridge. Leave in the fridge for a few hours, making sure it’s nice, firm and cold.
Fry the duck in a hot, non-sticky skillet for 10-12 minutes on the skin side. Reduce the heat after a few minutes. You don’t need oil or butter, the duck fat will do the trick. Now fry for 2-3 minute on the meat side and remove. Cover with aluminum foil is such a way that the crispy skin is not covered. The foil should only cover meat.
Remove most of the fat from the pan, but not all. Add chicken stock, garlic and thyme. Stir and add the crunched green pepper. We like their taste so we tend to add quite a few. Now start building the sauce by adding juices from the duck. Maybe you want to add a bit of mustard. This will not only add complexity to the sauce, it will also make it thicker. Add the cream but please remember that cream needs a few minutes to integrate in the sauce. If you add cream last-minute, you will, indeed, taste cream.
After 10 – 15 minutes it’s time to carve the duck. Make sure to add all the juices to the sauce. Cut the duck in slices (we like fairly big slices, you may prefer thinner ones) and place these on top of the sauce when serving.
If you have a bit of extra time, pass the sauce through a sieve, removing the thyme and other bits, before adding the green pepper.