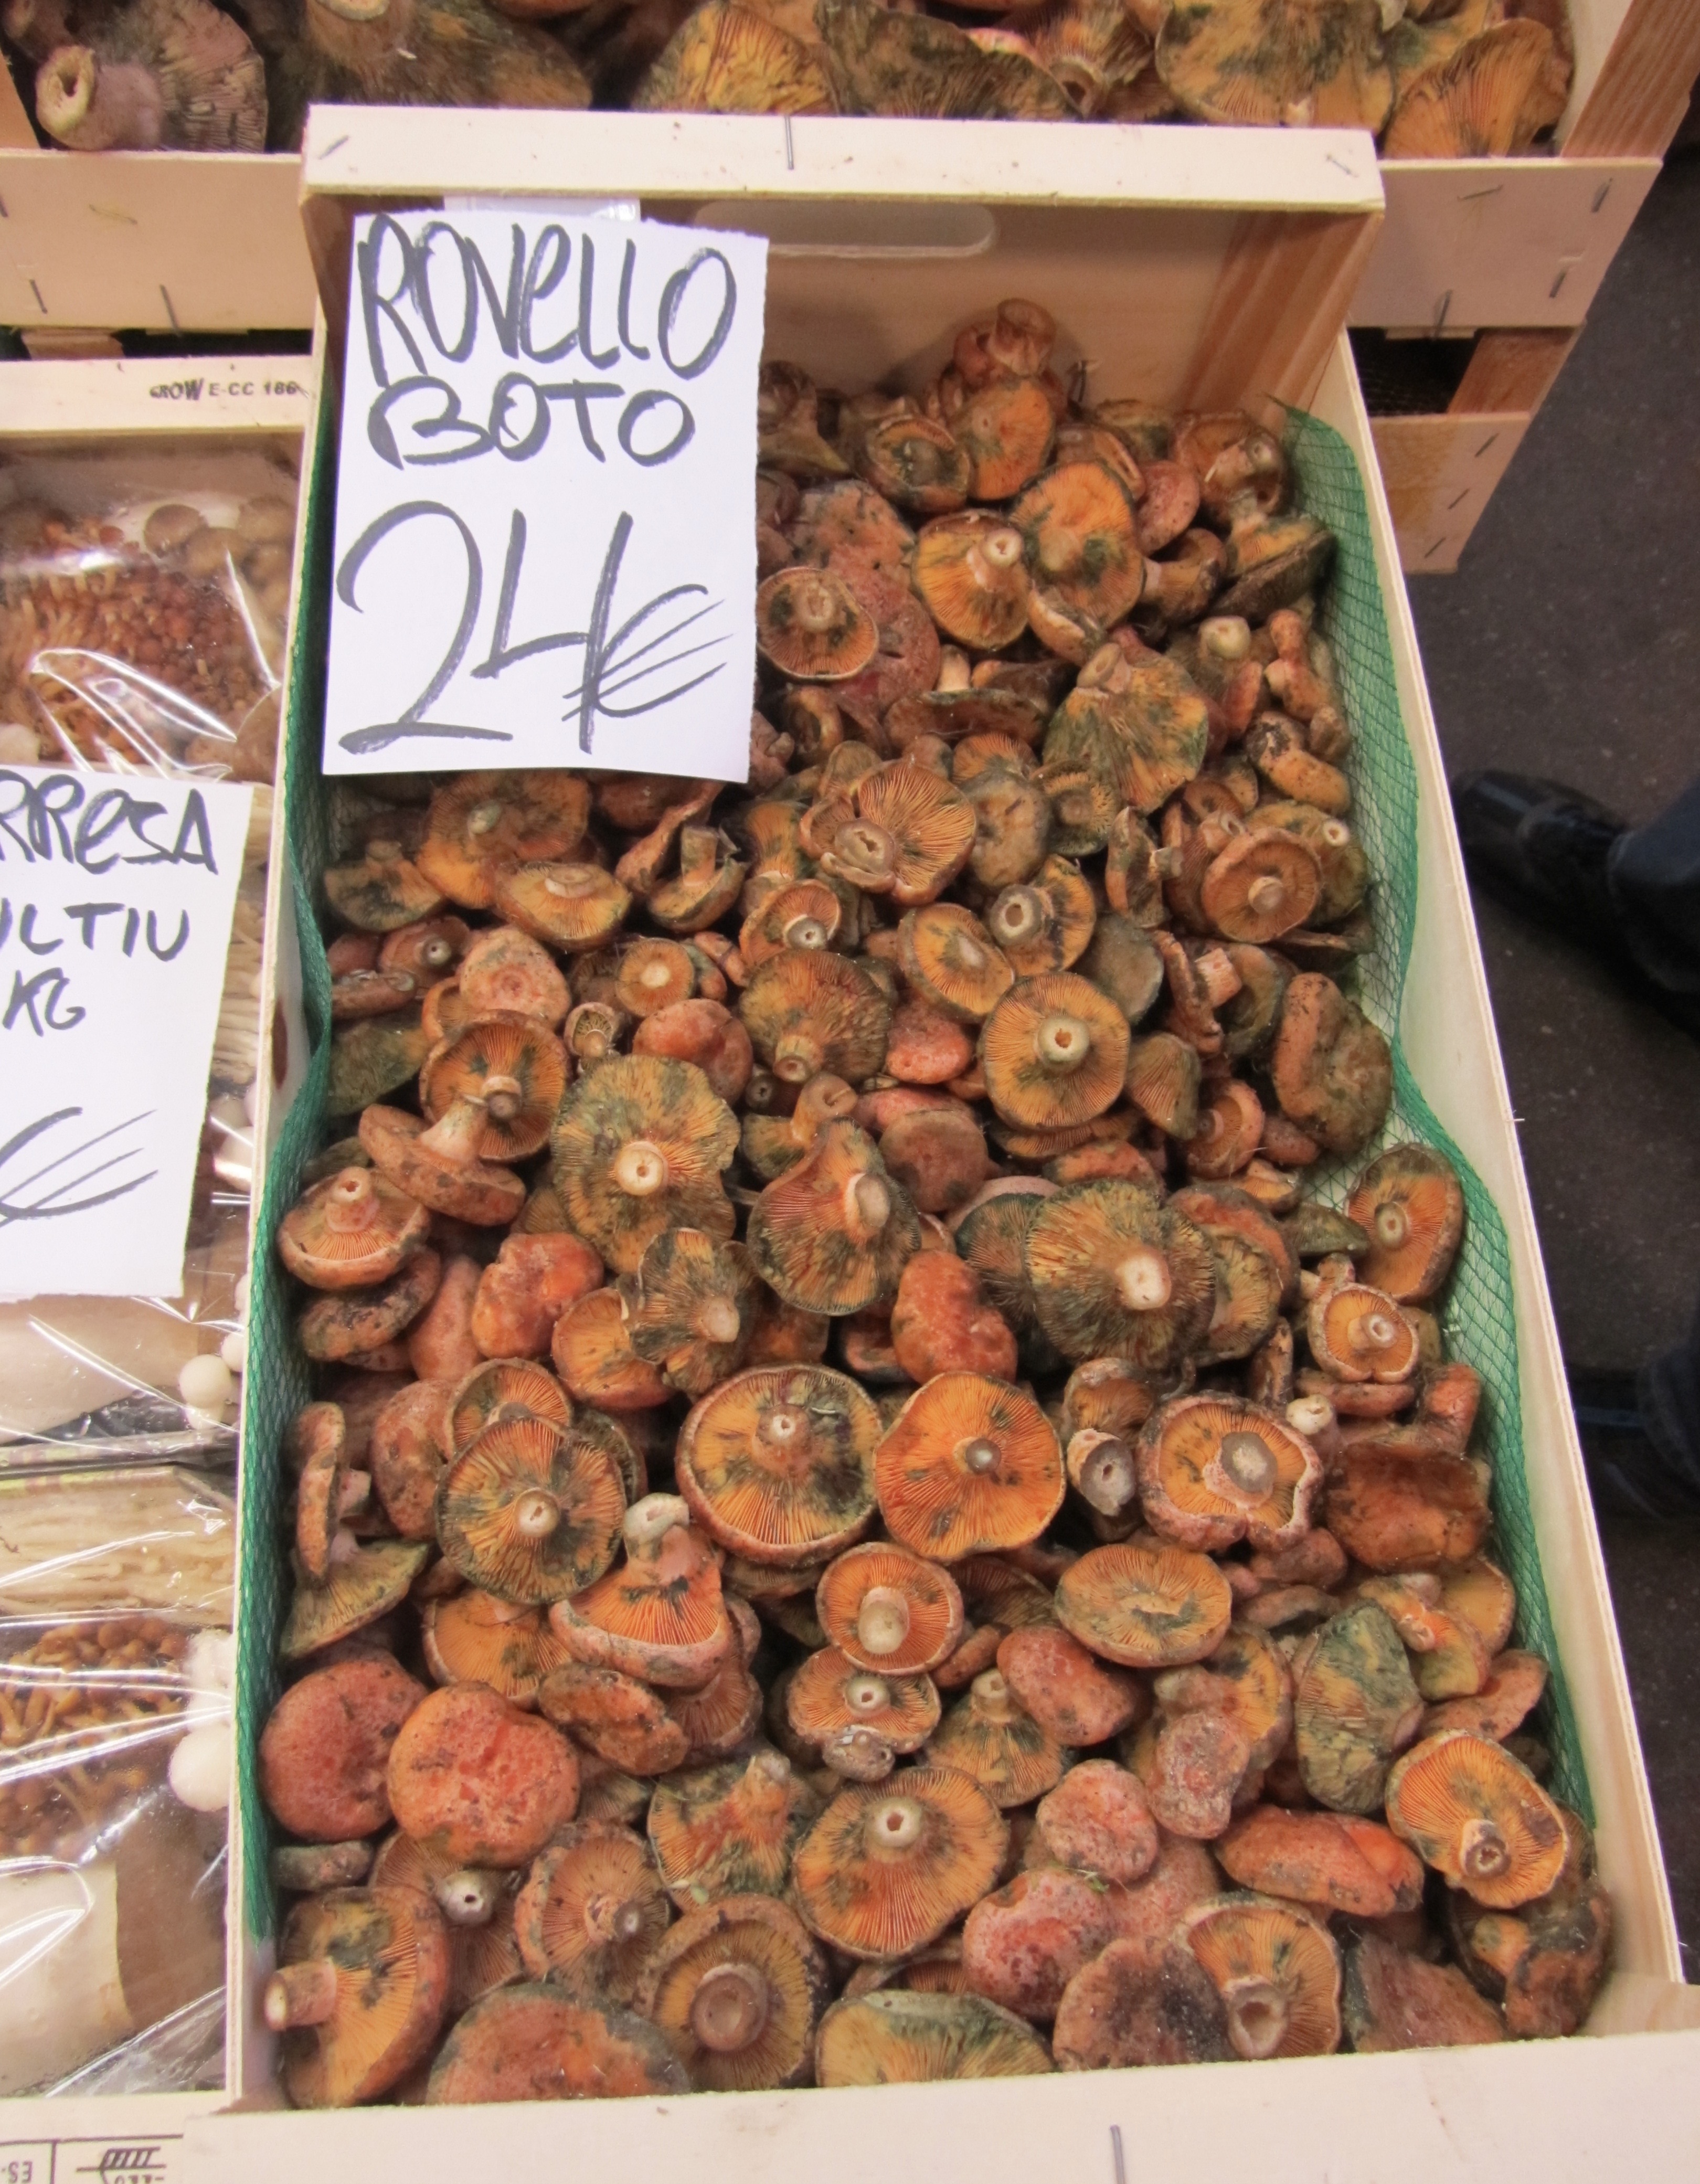
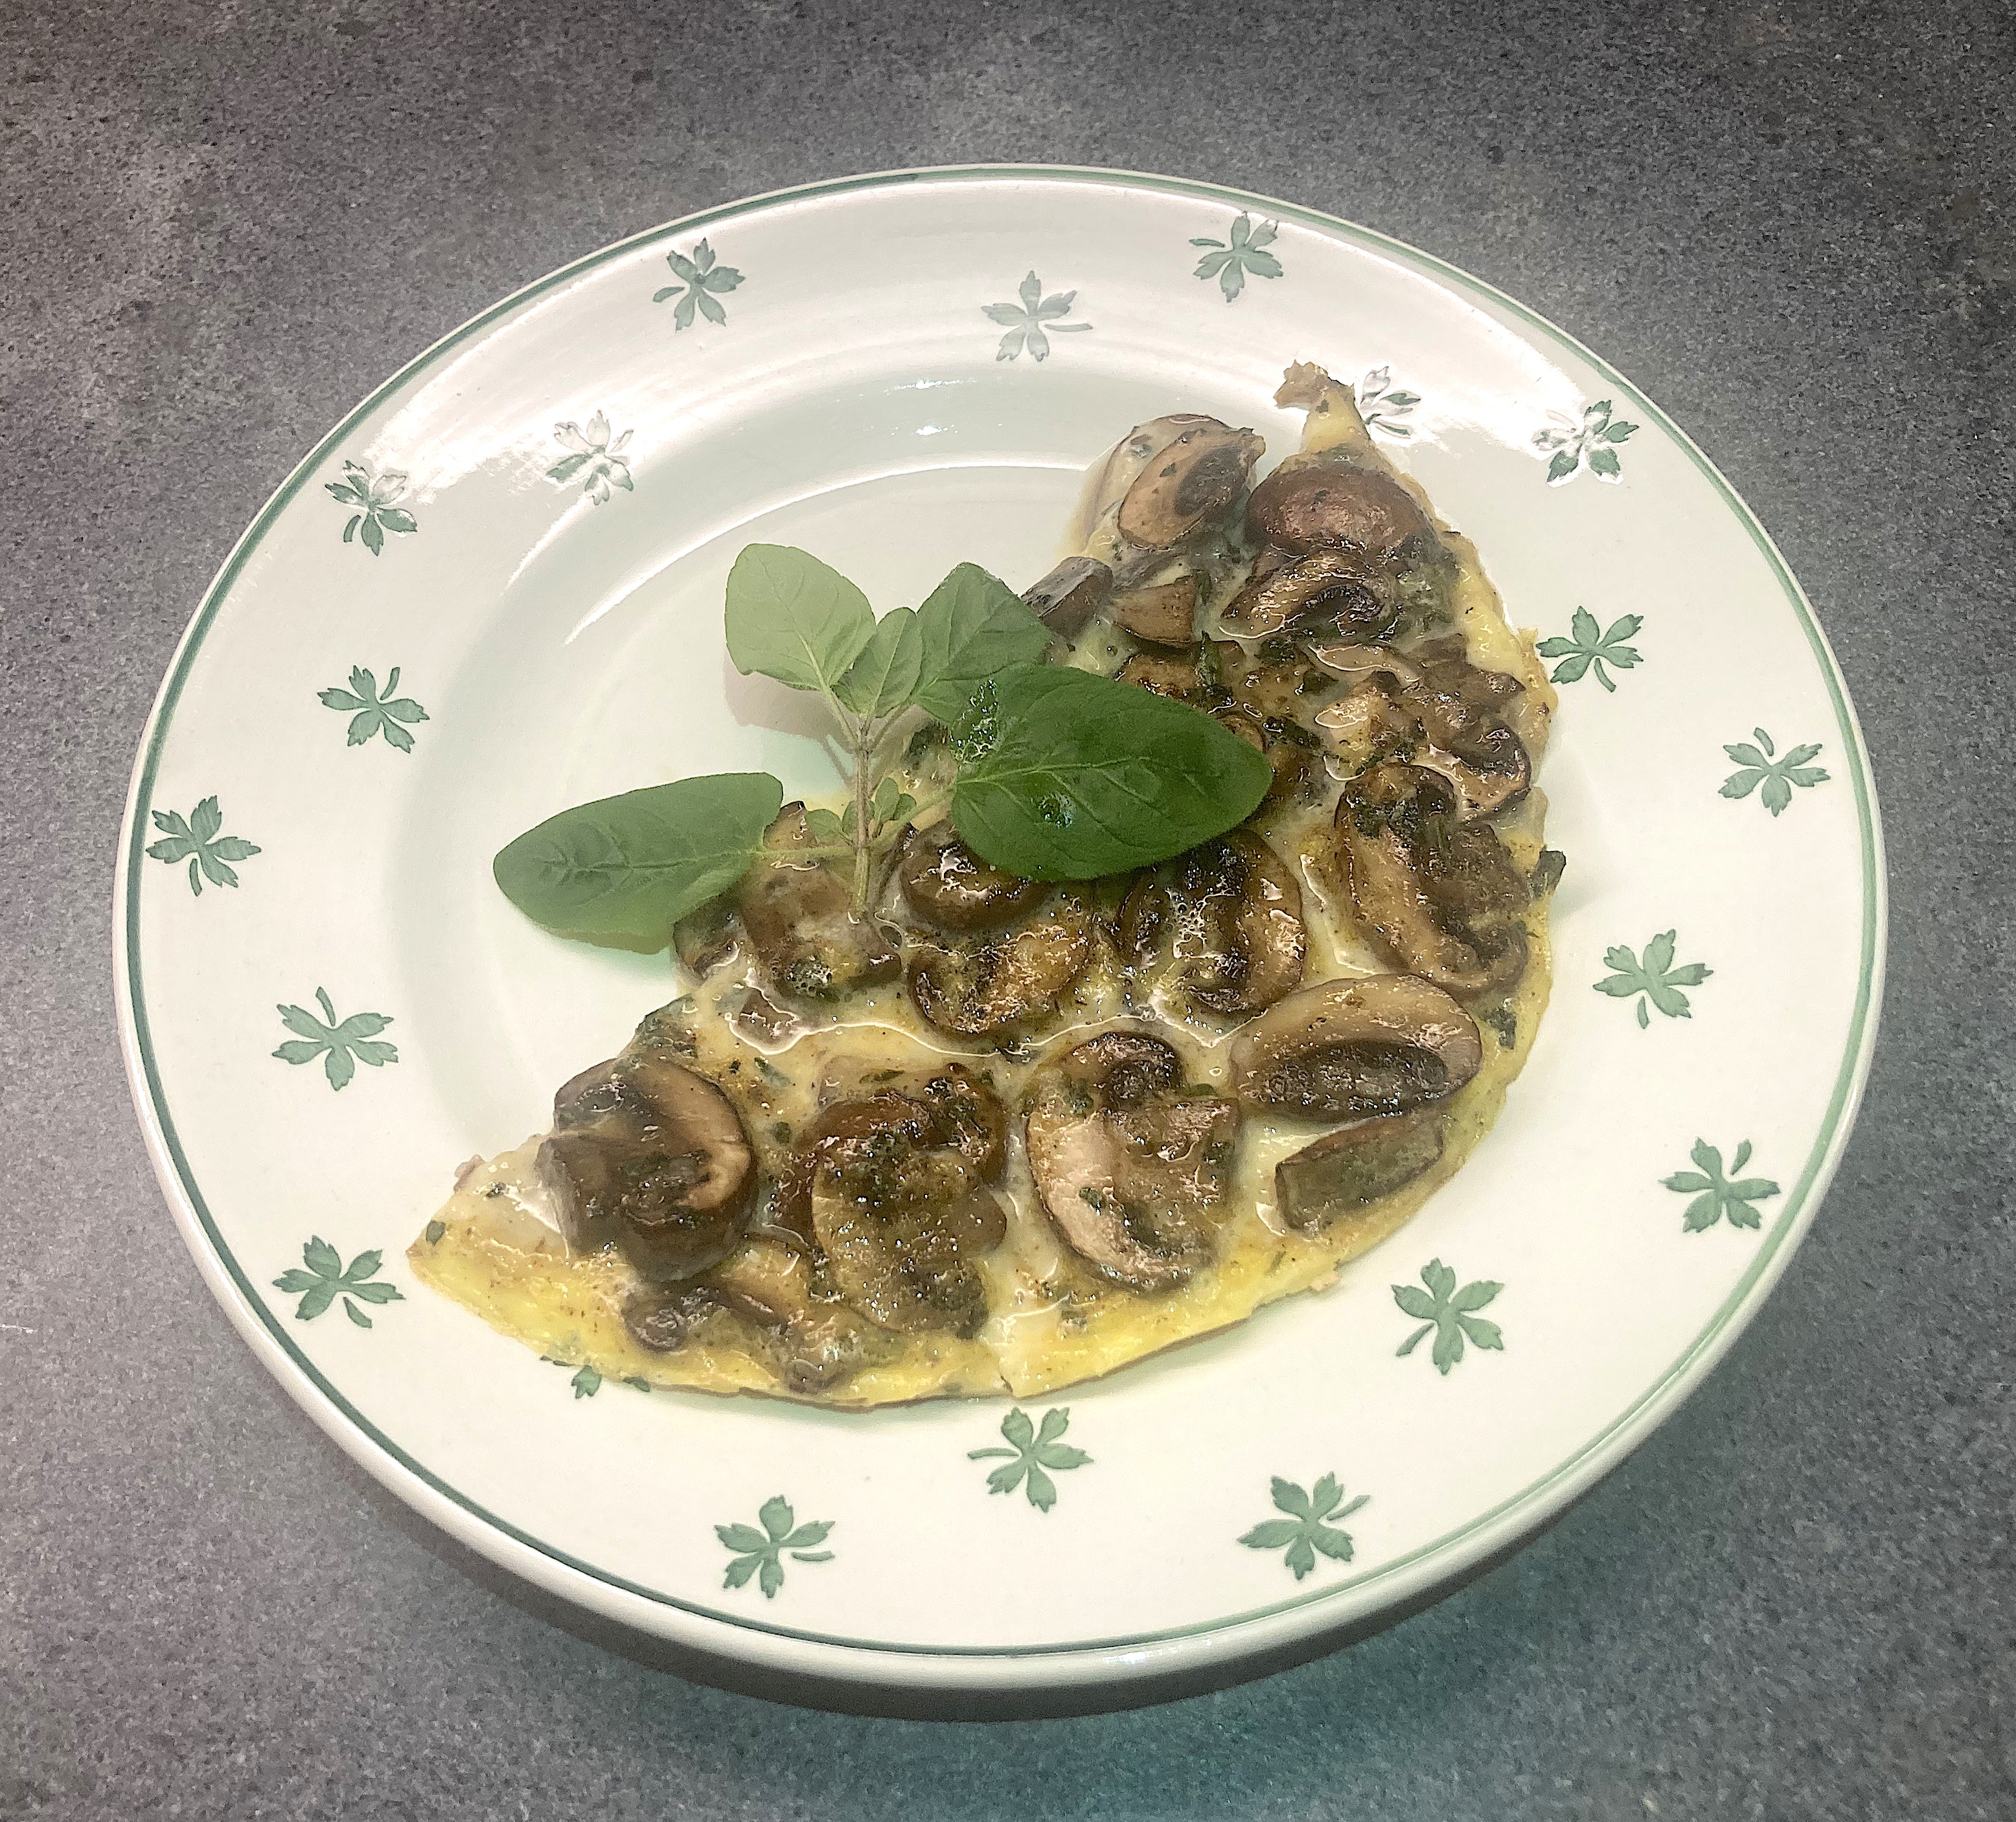
Ragù Napoletano

Ragù Napoletano is all about beef and tomatoes. Combining these two creates umami, one of the five tastes, because the tomatoes contain amino acid glutamate and the beef inosinate
Whereas Ragù Bolognese is made with finely chopped meat, Ragù Napoletano is prepared with whole cuts of beef, seasoned and rolled up. Best is to use Blade Steak (or Top Blade), Rump Cap or Top Rump. Our butcher suggested using Knuckle Side Roast (or Knuckle Plate Muscle) which is rather lean so a touch dry after simmering for many hours. On the other hand, it kept its structure and flavours very well. Best is to ask your butcher for advice.
Many recipes suggest adding pork ribs to the dish, but we wanted to focus on the combination of beef and tomato. We did however add a bit of fatty bacon.
Tomato-wise you need lots of tomatoes: fresh ones, passata, puree and/or canned.
Best to prepare one day ahead.

Wine Pairing

A red, full bodied wine from Italy made with Sangiovese grapes will be a great accompaniment for both the starter and the main dish. We opened a bottle of Les Petits Rigolos, a red wine from the Tolosan region in south western France made with Merlot and Cabernet Sauvignon. A round wine with notes of strawberry and blackcurrant. A touch spicy, which worked very well with the rich flavours of the Ragù Napoletano.

What You Need
  • For the Beef
    • 2 slices of Beef
    • Parmesan Cheese
    • Raisins
    • Fresh Parsley
    • Fresh Oregano
    • 1 small Garlic Clove
    • Optional: Pine Nuts
    • Olive Oil
  • For the Sauce
    • Small Onion or Shallot
    • Olive Oil
    • Bacon (or better: Lardo)
    • 250 ml of White Wine
    • Fresh Tomatoes
    • Tomato puree
    • ½ can of Tomatoes
    • Passata
  • For the Starter
    • Rigatoni
    • Parmesan Cheese
  • For the Main Course
    • Vegetables
What You Do
  1. Soak the raisins in water for an hour
  2. Drain
  3. Chop parsley, oregano, raisins and garlic
  4. In a bowl, combine raisins, garlic, oregano, parsley and freshly grated cheese
  5. Flatten the meat if it’s difficult to roll up
  6. Scatter the mixture over the meat, roll the meat up and tie with two strings of kitchen twine.
  7. If using fresh tomatoes, peel and seed them. Chop coarsely
  8. Chop the onion and slice the bacon
  9. Heat a large saucepan, add olive oil, add onion and bacon
  10. Leave on low heat for some 10 minutes or until the onion is glazed
  11. Add the two rolls and fry them on all sides until evenly golden brown
  12. Take you time to do this
  13. Add the wine, let the alcohol evaporate and reduce
  14. Add the tomatoes, the passata and the puree
  15. Leave the stew on low heat and turn the meat occasionally. This stage is about stewing the meat as gently as possible and reducing the sauce. If you feel it’s going too fast, then put a lid on the pan, but only partially.
  16. Once the meat is ready (this may take 4+ hours) remove the meat from the sauce, keep it warm (an oven at 50 °C or 120 °F will be perfect) and allow the sauce to reduce even more, as slowly as possible.
  17. Wait for the sauce to become dark and shiny
  18. For the first course: serve the sauce with pasta and freshly grated Parmesan cheese (we used Rigatoni because of the ridges)
  19. For the second course: warm the meat in the remaining sauce, slice it and serve with sauce and vegetables.

PS

We would probably be kicked out of Naples (and Italy) with our version of Ragù Napoletano (oregano? French wine?). It is, however, a very tasty two course meal with lots of umami, as expected.

Mushroom Fricassee

A few weeks ago, we wrote about History on Our Plate (2019) written by food historian and award-winning author Peter G. Rose. She writes about America’s Dutch past and the influence of the Dutch settlers on today’s American food. She explains how the founders of New Netherland (1609 – 1664, currently the states of New York, Delaware, Connecticut and New Jersey) brought Dutch recipes, tools, herbs and fruit to the US. Most recipes are based on publications like Een Notabel Boecxken van Cokeryen (a Notable Little Book of Cookery, 1514) and the 13thcentury publication Le Viandier de Taillevent. Peter Rose includes both the original and a modern version, allowing you to recreate food from the 17th century. 

Two Recipes

We were intrigued by a recipe for Mushroom Quiche without a Crust that made us think of a savoury clafoutis. We were also intrigued by another mushroom recipe, called Mushroom Fricassee, partly because of the unusual combination of eggs, mushrooms, onion, marjoram, thyme, orange juice, sherry, nutmeg and (optional) beef juice. The recipe is included in a manuscript written by Anne Stevenson Van Cortlandt (1774- 1821). She was married to Pierre Van Cortlandt, a well-known influential family with Dutch origins. Anne Stevenson was born in Albany, a city linked to Dutch settlers until the British took over in 1664.
We tried this imaginative combination of ingredients and prepared an omelette. The result was tasty and beautifully balanced, with a nice twist thanks to the herbs, sherry and orange juice. Peter Rose suggests preparing it like scrambled eggs, which is probably a better idea. Turning the mixture into an omelette was a bit of a challenge.
You’ll find a detailed recipe in History on Our Plate.

Wine Pairing

We enjoyed our Mushroom Fricassee with a glass of Conde Valdemar Tempranillo Blanco Rioja DOCa 2020, produced by Bodegas Valdemar. Its colour is slightly yellow with greenish tones. The wine has notes of tropical fruit (pineapple) and its taste is fresh and pleasantly persistent. A beautiful, unoaked white Rioja made with 100% tempranillo blanco grapes.
In general, you’re looking for a lean, dry, slightly fruity white wine with notes of lemon, melon and/or pineapple, preferably with a long finish.

Buy The Book

History on Our Plate is available via the well-known channels and your local bookstore for approximately 15 euro or 10 US$.

Guacamole

It’s very tempting to buy ready-made tapenade, guacamole, mayonnaise or fish paté. It’s easier, much quicker and you don’t need to worry about ingredients and recipes. Very true. On the other hand, we also know that most of these ready-made products contain far too much salt plus additives that shouldn’t be in there. For instance, we found a trout paté with rapeseed oil, vinegar, egg, salt, lemon juice, sugar and paprika. The ingredients in a jar with guacamole included mascarpone, cellulose gum, sugar (again) and coconut oil.

The good news is that making your own guacamole is very simple. The only challenge is to buy ripe and tasty avocados. When in doubt, ask your greengrocer.
Guacamole combines very well with nachos, chips and toast, but also with baked potatoes, fried fish and smoked salmon. We like to enjoy it with our beloved (Flemish) grey small shrimps.

Wine Pairing

If you serve guacamole with small shrimps as a starter, then we suggest a refreshing white wine, for instance a glass of Viognier. You could also serve a glass of dry rosé.

What You Need

  • 2 Ripe Avocados
  • Small Red Onion or Shallot
  • Small Garlic Clove
  • Red Chili Pepper
  • Lemon
  • Soy Sauce
  • 100 grams Small (Grey) Shrimps
  • Black Pepper
  • Cilantro (optional)

What You Do

Peel both avocados, remove the seeds and chop coarsely. Finely chop the shallot, the garlic clove and some red chilli pepper. How much you use depends on the spiciness of the pepper and your preference. Add one avocado to the beaker of your blender. Add the shallot, garlic and chili pepper. Add a small splash (start with half a teaspoon) of soy sauce and a bigger splash of lemon juice. Add the remaining avocado and blender until smooth. Taste and decide if you want to add more lemon juice or soy sauce. Transfer to the refrigerator.
Serve with small shrimps, black pepper and cilantro.

PS

We know, we start by mentioning that ready-made guacamole contains odd ingredients like mascarpone and then we suggest adding soy sauce to this typical Mexican dish. Inconsistent to say the least. Well, guacamole needs a pinch of salt. You could (of course) add regular salt, but by adding a drop of fish sauce or soy sauce, you also add some umami, which seems to work well with the avocado and the shrimps. 

Guacemole ©cadwu
Guacamole ©cadwu

Classic Cèpes

What better way to start the mushroom season than serving Classic Cèpes? The recipe is very simple and the result is about cèpes and cèpes alone. The stems a bit firm, the caps moist, the flavours intense and the taste rich and earthy, with a touch of freshness from the parsley. It’s a classic in Germany (Steinpilze auf klassische Art), France (similar to Cèpes a la Bordelaise), Italy and many other countries. 

Wine Pairing

If you want to enjoy the cèpes with a glass of white wine, then we suggest drinking one that is fresh, fruity, round and balanced, for instance of a glass of Bodegas Mocén Selección Especial made from verdejo grapes. A glass of rosé with similar flavours is also a good idea. The idea is to support the cèpes by adding fruitiness and freshness to the dish.

When you decide to drink a glass of red wine, then we suggest a full-bodied red wine with gently fruit and present tannins. 

What You Need

  • 200 gram Cèpes
  • Butter
  • One small Shallot
  • Parsley
  • Black Pepper

What You Do

Clean the mushrooms and slice lengthwise. Finely chop the shallot and the parsley. Add butter to a relatively hot heavy iron skillet. Reduce the heat and fry the cèpes for a few minutes. Add the shallot. Cook on medium heat for 2 minutes. Add chopped parsley, add more butter, black pepper and stir. Serve on a warm plate.

Green Gnocchi

We love eating Gnocchi, preferably as a starter with some olive oil and Parmesan cheese. Tasty and rich. Perhaps sometimes a bit too rich and too filling, especially the ones you can buy at your local shop or supermarket. Therefore it’s best is to make your own gnocchi, which is not too difficult, just time consuming.

We were pleasantly surprised when we found Green Gnocchi in Nice (France), made with Swiss Chard. The chopped leaves help improve the structure of the Gnocchi and add complexity and freshness to the dish. Yummy!

So all is good? Well, the name is a bit odd, to say the least. This Niçoise speciality is called Merda de Can, which translates into something from a dog – not very pleasant and certainly not something you want to eat. Very odd.

The name shouldn’t stop you from enjoying it. Merda de Can with Sage Butter is truly delicious.

Wine Pairing

We enjoyed our Merda de Can with a glass of Saint Roman Sable de Camargue Rosé. In general you’re looking for a well-balanced, fresh wine. Given the butter and sage sauce you could serve a Chardonnay or perhaps an Italian white wine such as Gavi di Gavi or Soave

What You Need for 8 starters

  • For the Merda de Can 
    • 600 Grams of Starchy Potatoes
    • 300 Grams of Swiss Chard, Spinach or Water Spinach (cleaned and ready to use)
    • Olive Oil
    • Nutmeg
    • 1 Egg
    • All Purpose Flour
  • For the Sauce
    • Butter
    • Sage
  • Parmesan Cheese or (preferred) Vacherin de Fribourgeois)

What You Do

Best is to follow the instructions by a Niçoise chef. 
Or prepare gnocchi as you would normally. Quickly fry the leaves in olive oil, remove from the pan, chop finely and drain. Add to the potato mixture, add the beaten egg, add freshly grated nutmeg and combine. Now start adding flour until you have the right consistency. You’re looking for a flexible, non-sticky dough. Flour your hands and start making short, small, thin, sausage like pasta. (Perhaps this is the moment to think about a small dog. Or perhaps not.) Don’t worry about the shape, it’s okay if they are not very similar. Devein the sage leaves. Warm butter in a pan and add the sage. In parallel heat a generous amount of water. Add the pasta to the boiling water and wait until the pasta surfaces. Remove from the water, add the pasta to the pan with sage butter, coat the pasta and freshly grated Parmesan cheese and serve.

PS

The Merda de Can we enjoyed was bought at a local Niçoise shop and had a more elegant shape.

Green Gnocchi (Merda de Can) ©cadwu

Chervil (Pan-) Cakes

Maastricht is one of the Netherlands most beautiful cities. It’s located in the very south of the country, on both sides of the river Maas. It’s close to Germany (Aachen, Aix-La-Chapelle is only 30 km) and the Belgian city of Liège (25 km). Its culture and cuisine are strongly influenced by France. Maastricht is well known for its excellent local wines (Hoeve Nekum, Apostelhoeve), the hilly countryside and its ceramic.

In 1737 Marie Michon was born in Maastricht. In 1768 she married Albert de Milly. Both families were related to Hugenoten: protestant people who escaped from persecution in France because of their religion and moved (in this case) to the Netherlands in 1685. One of her daughters was Thérèse Elisabeth de Milly, who married the German Baron Friedrich Ludwich Behr in 1792. Clearly a rich and influential family. Mother and daughter wrote down recipes and practical households tips. There are two ‘cahiers’, known under the title ‘Natuurlijk Kookboek van Beproefde en Ondervonden Echte Recepten voor een Zindelijk Huijshouden’. The title would translate into something like ‘Natural Cookbook of Tried-and-Tested Real Recipes for a Proper and Clean Household’. In 2008 44 recipes were included in a book written by Marleen Willebrands.

In the Historisch Kookboek Vega written by Manon Henzen we noticed a recipe for chervil (pan-) cakes, based on one of the recipes of Marie Michon and Thérèse Elisabeth de Milly. Chervil, although its taste is delicate, was considered to be a very powerful and useful herb. It relieved symptoms of gout, high blood pressure, gas, eczema etcetera. The original recipe suggest frying the pancakes per 3. Which made us think of the traditional Dutch dish ‘drie in de pan’. These are small pancakes made with flour, yeast, eggs, milk and (optional) raisins. Fried per three, indeed.

The dough of the chervil pancakes is a combination of eggs, all-purpose flour, bread crumbs, melted butter, yeast, sugar and cinnamon. Add lots of chopped chervil, allow to rest and fry in a pan. We also added chopped parsley and chives.
The pancakes looked very nice and inviting. When eating them we were slightly disappointed (a bit heavy, a bit dry). Perhaps we should have thought about a sauce?

More information (Dutch only) about the original recipes from 1785 can be found on the website of DBNL.

Chervil (Pan-) Cakes
Chervil (Pan-) Cakes ©cadwu

Inari Sushi

Sushi has become such a mainstream product! We all seem to enjoy Nigiri (sushi rice topped with fish or egg, sometimes held together with a ribbon of nori), Maki (rice and stuffing rolled in nori), Uramaki (as maki but with rice on the outside), Temaki (in the shape of a cone) and Oshi (pressed rice, in the shape of a block).

Inari and Nare sushi are clearly the less known kinds of sushi.
Nare Sushi is made with fish and is fermented for 6 months. Impossible to buy where we live.

Inari Sushi is made with a pouch of deep-fried tofu (inari age) and sushi rice, originally without a topping. The tofu pouch is fried in oil, then cooked in water to remove excess oil, then cooked in dashi with soya, squeezed to remove most of the cooking liquid and then stuffed with hand-warm sushi rice. Fortunately, the pouches you can buy are ready to be stuffed, so making inari sushi is not too much work. The challenge is of course in cooking the rice and turning it into shari (the vinegar seasoned rice that is the key to tasty sushi). Another challenge is eating Inari Sushi because the pouches tend to be rather oversized.

The art of cooking rice, regardless if you make risotto or sushi, starts with the right rice. Cutting corners will lead to a disappointing result. You need short grain Japonica rice (uruchimai) when making sushi.

Drink Pairing

A dry, cold, crisp sake will be very nice with your Inari Sushi.

Choosing the right wine is not straightforward. You could think of a sparkling wine (great with the sweetness of the sushi), for instance a prosecco from Italy. We would suggest a prosecco produced by Corvezzo. An affordable, vegan, organic wine with just a touch of sweetness.

Another approach is to serve a sweeter wine, for instance a glass of Pacherenc du Vic-Bilh from the Southwest of France. Wine that comes with aromas of fruit and honey. The wine has freshness and is well balanced.

What You Need

  • Tofu Pouches
  • Sushi Rice
  • Rice Vinegar
  • Salt
  • Sugar
  • (optional) Topping

What You Do

Gently wash the rice, until the water is clear. Leave to soak for 30 minutes. Cook the rice according to the instructions on the package but use less water. Leave to rest for 15 minutes.
Make awasezu by adding some salt and sugar to the vinegar. If it doesn’t dissolve, heat the mixture gently.
Now transfer the rice to a low bowl (a hangiri) and add the vinegar to the rice. After 30 seconds use a broad spoon (or spatula) to combine the rice and the vinegar. This is the moment to use a fan. According to some this is to cool the rice, according to others it should be done to remove excess vinegar. Leave the rice to rest at room temperature under a damp cloth for one hour.
Depending on the package you may want to wash or squeeze the pouches. Stuff them with rice, serve on a plate with the open side down and enjoy your traditional Inari Sushi.
We love to combine the rice with some sliced kimchi, stuff the pouch and top it with fish eggs.

PS

Ratios are very important when preparing shari. We suggest using the following:

  • 1 cup of rice
  • 1 cup of water (or a bit less, depending on the instructions)
  • 30 cc of rice vinegar
  • pinch of salt
  • ½ – 1 tablespoon of sugar (depending on your taste)

Salmorejo

A delicious, rich, creamy, velvety, elegant, complex, delicious, cold tomato soup from Andalucía (southern Spain) with lots of generous flavours. It is ideal on a hot summer’s evening and great as a vegetarian starter. It is very simple to make: purée skinned, fresh, ripe tomatoes with stale, white bread, olive oil and garlic. Garnish with Jamón Serrano (also from Andalucía) and hard-boiled egg.

Salmorejo and Gazpacho are very different soups. Gazpacho comes with red bell pepper, chili and onions; Salmorejo is purely about tomatoes and is much creamier and softer, because bread is a key ingredient. It’s nice to decorate gazpacho; Salmorejo must be garnished. Salmorejo is a beautifully balanced soup.

Removing the skin is mandatory when making Salmorejo. The idea to roast the tomatoes is a twist that enhances the flavours of the tomatoes, but it is not part of the original Salmorejo, so feel free to skip this step.

What You Need

  • 500 grams of Excellent Ripe Tomatoes
  • Slice of stale White Artisanal Bread without the crust
  • 1 small Garlic Clove
  • 1 tablespoon of Jerez Vinegar
  • Olive Oil
  • 1 hard-boiled Egg
  • (optional) diced Serrano Ham
  • Black Pepper
  • (optional) Salt

What You Do

Peel the tomatoes. Soak the bread in water for 10 minutes. Optional: slice the tomatoes in two and transfer to an oven (200 °C or 390 °F) for 15 minutes and let cool. Chop the garlic clove. Blender the tomatoes, the bread (and the water) and the garlic until very smooth. It should be really smooth, cream like; this may take 1 minute on turbo! On low speed add the vinegar and slowly add the olive oil. Taste, add salt and pepper if required and perhaps some more olive oil. Allow to cool for at least 2 hours.
Serve in cold bowls and garnish with roughly chopped hard-boiled egg and diced Serrano ham.

PS

If you enjoy cold soups as much as we do, then we have more recipes for you: Gazpacho, Ajo Blanco and Avocado and Cucumber Soup.

Salmorejo ©cadwu
Salmorejo ©cadwu

Mussels with Dashi and Kimchi

A few weeks ago we enjoyed dinner at l’Épicerie du Cirque “under the Palm Trees” in Antwerpen (Belgium). The restaurant is owned and run by Dennis Broeckx and Ellen Destuyver and offers contemporary Flemish cuisine with a focus on local products. Excellent choice of wines, great service, very original menu. One of the dishes was a combination of dashi, homemade kimchi, wasabi and Belgian mussels topped with foam. Lots of umami and great textures.

Back home we tried to replicate the dish, but the result was disappointing. The foam is a crucial aspect of the dish and sadly our foam collapsed after 2 seconds. But we did manage to buy some very tasty, mild Korean kimchi so the next day we prepared a dashi-based soup with mussels instead. Very tasty and the combination works really well.

What You Need

  • 500 ml of Dashi
  • Handful of Mussels
  • Kimchi (mild)
  • ½ tablespoon of Sake
  • Light Soy Sauce

What You Do

Prepare the dashi. Clean the mussels and discard broken ones. Quickly cook the mussels, add kimchi, sake and a drop of light soy sauce to the dashi, keep warm, remove the mussels from the shell and add to the soup. Serve immediately on warm plates.

Spanish Tortilla

We have fond memories of the Mercat Central in Valencia, one of the largest markets in Europe. Its architecture is amazing, but even more stunning are the products on sale: fruit, vegetables, mushrooms, chicken, fresh meat, sausages, hams, herbs, spices, fish, bread, wine, pickles, snails, weeds, offal, rice, nuts: anything and everything you can dream of.
And of course various bars with the tastiest tapas ever. We would go shopping early in the morning, buy what we needed that day (perhaps a bit more than just that) and buy two bocadillos de tortilla: a small crunchy roll with tortilla made with egg, onions and potato. We would run back to our apartment, make coffee, sit down and enjoy the rich, velvety, long taste of bread and tortilla.
Fond memories indeed.

Making Spanish tortilla is a matter of combining the best ingredients and being patient.

What You Need

  • 200 grams of Potato (waxy ones, we used Roseval)
  • 1 large Spanish (White) Onion
  • ½ Grilled Red Bell Pepper
  • 4 Eggs
  • Black Pepper
  • Olive Oil

What You Do

Heat a pan and gently fry the thinly sliced potatoes, slowly, in plenty of oil. You don’t want crunchy, golden potatoes, they should be nearly done, that’s all. In a separate pan glaze the quartered and sliced onion, also for let’s say 15 minutes. Let both cool. Dry the sliced grilled red bell pepper with kitchen paper. Beat the eggs and add potatoes and onions. Allow to rest for 15 minutes. For some reason this is a crucial step, one that should not be skipped. Add sliced red bell pepper and fresh black pepper. Warm a medium sized non-stick pan (22 cm or 9 inch), add oil and fry the tortilla until the top is slightly set. It could take 20 minutes so please don’t be tempted to increase the heat. Transfer to a plate, put the pan on top of the tortilla and flip. Fry a few minutes.
Serve lukewarm, perhaps with some chopped parsley and a crunchy roll.

PS

You could peel a fresh red bell pepper, but better is to clean it, slice in 4 to 6 chunks, flatten these and grill for 10 minutes. This should char the pepper significantly. Transfer to a plastic container and close. Leave for a few hours. Now you can easily remove the skin. This way a bell pepper has a richer, more complex taste and is easier to digest, but it is of course not as crunchy as a fresh bell pepper.