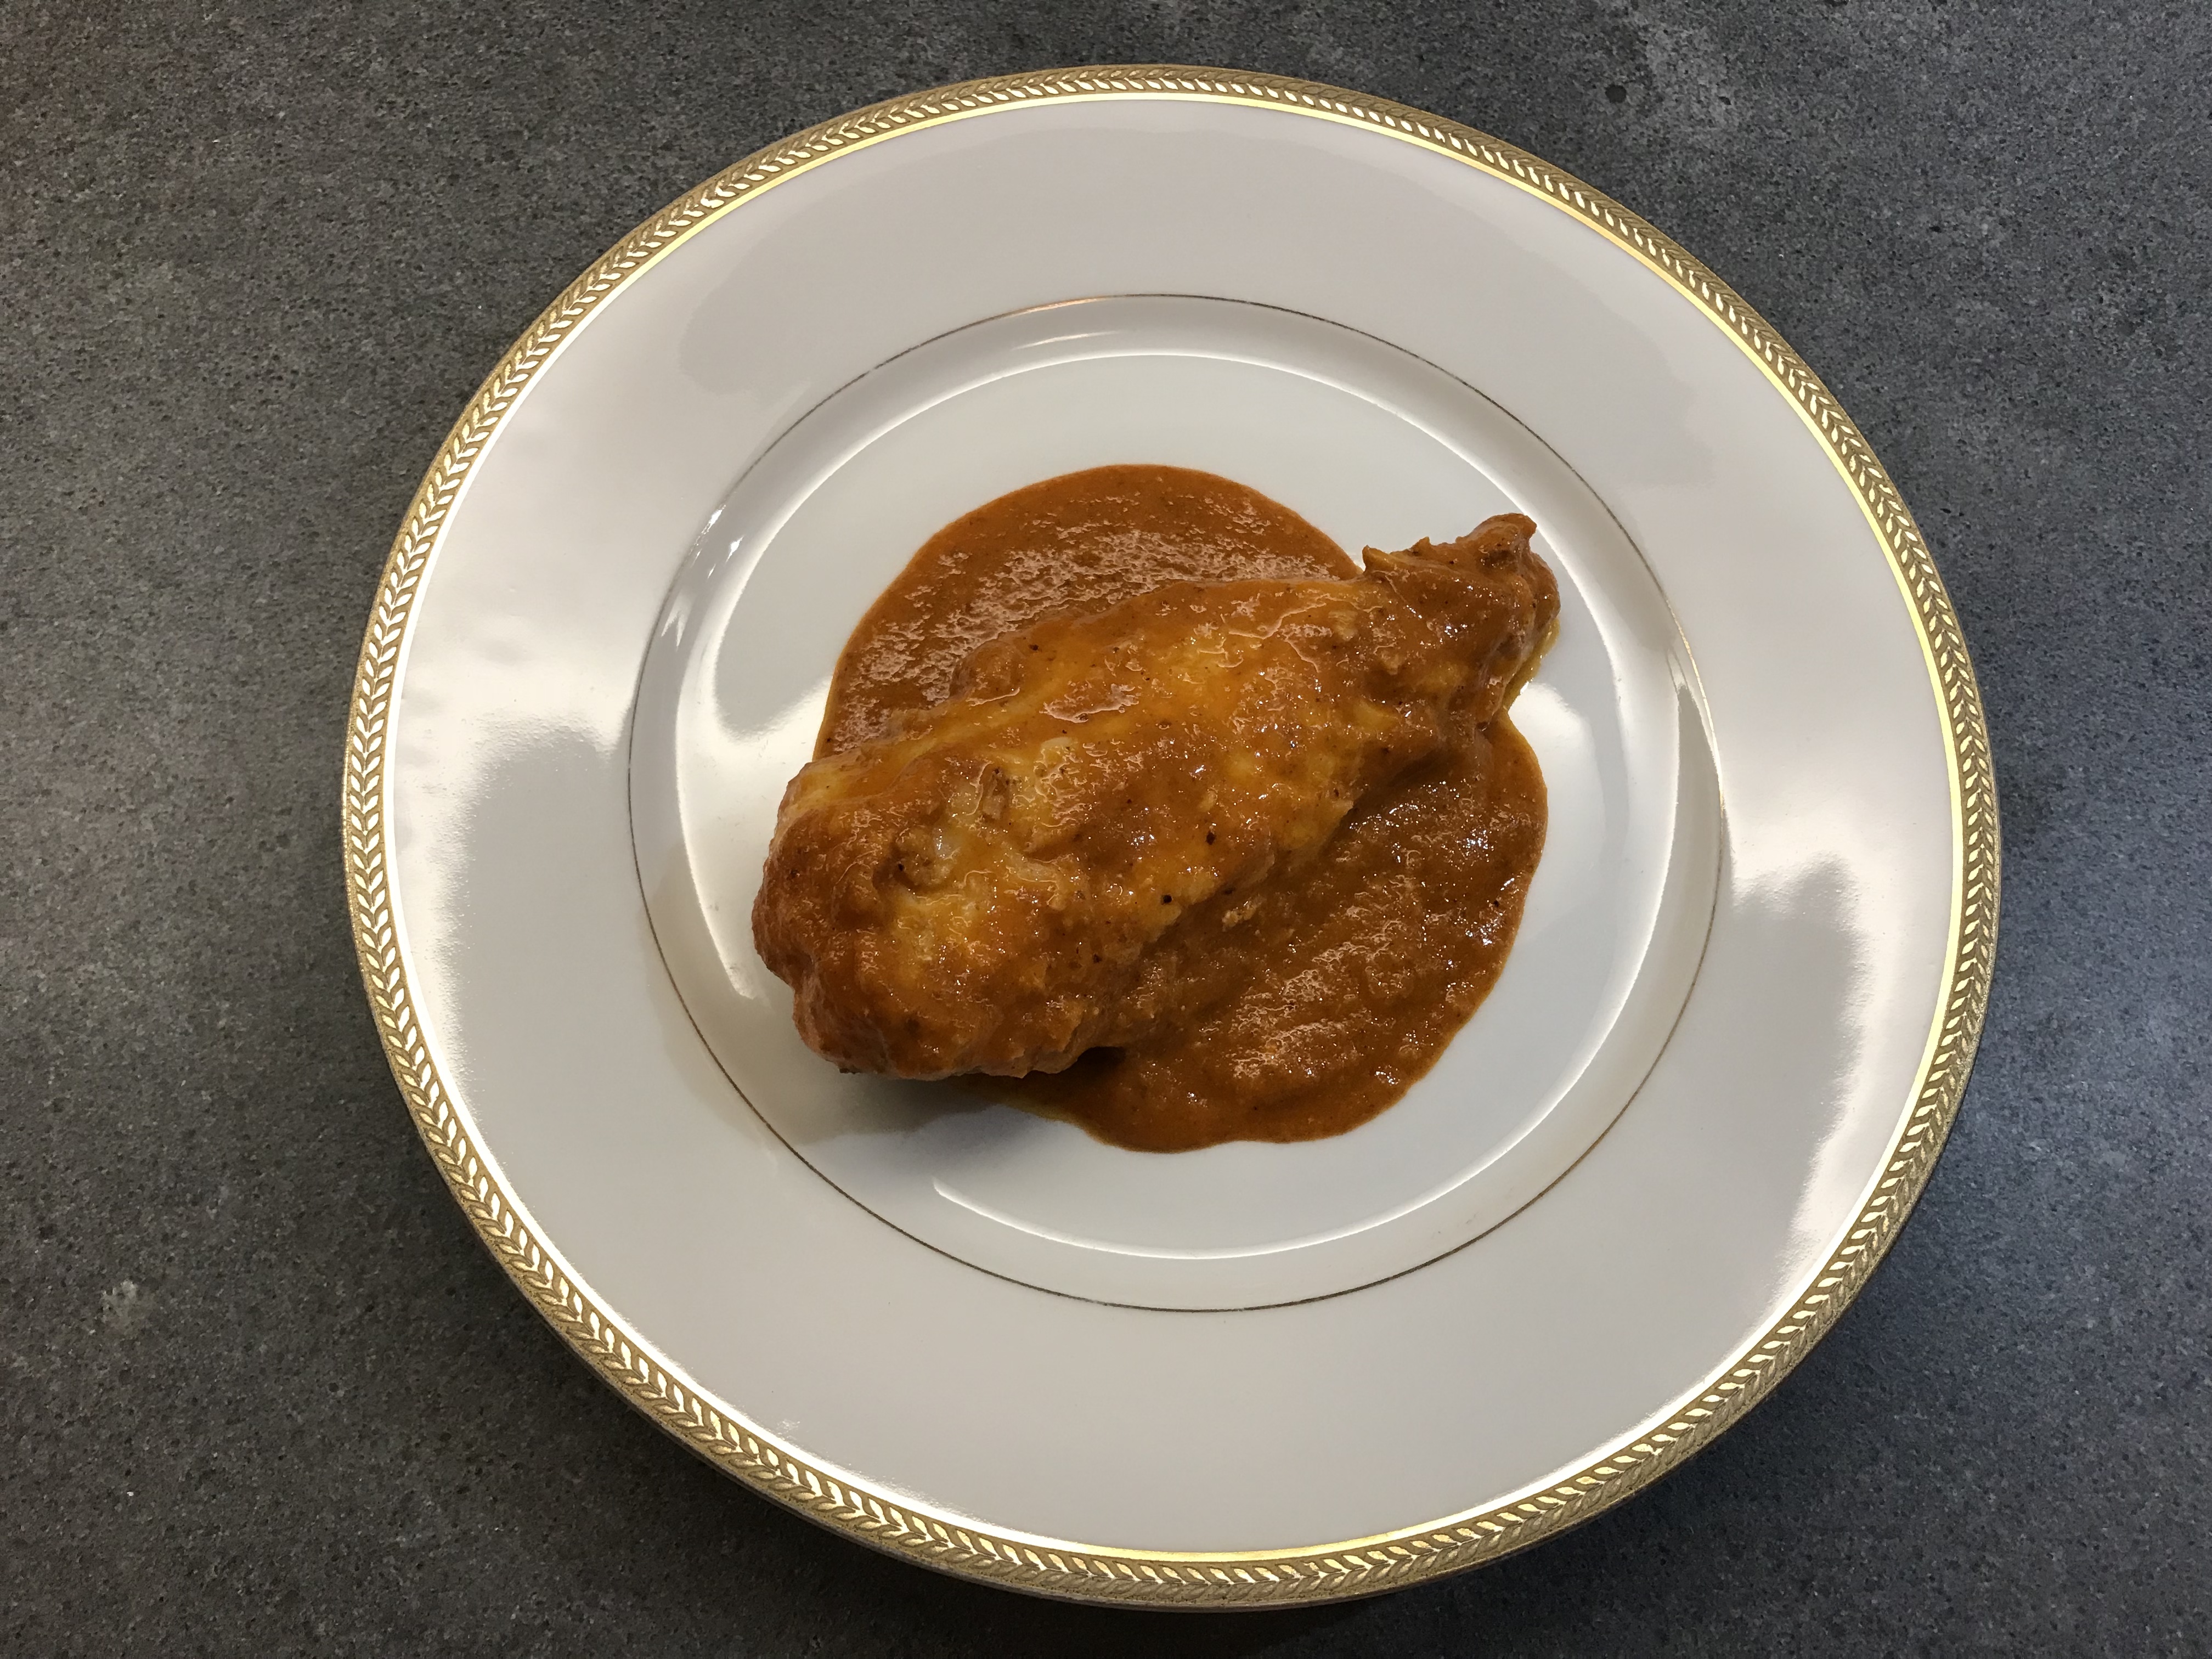
Monkfish with Tomato Olive Sauce

Not the kind of fish you want to meet when swimming in the sea, but definitely one you want to meet when shopping at the fishmonger. Make sure you bring some money because monkfish tends to be expensive. Great meat, delicate yet distinctive taste and not difficult to prepare as long as you’re not in a hurry.
The sauce has to be made a day in advance. It needs time to cook and time to integrate.
You will need to remove the skin of the monkfish. There seem to be several layers of skin and one is (when cooked) really rubbery and inedible. So take you knife, start at the tail end and move forwards, thus removing the membrane. You will find useful videos on the Internet. Unfortunately these videos suggest removing the main bone of the fish, which is a mistake for three reasons. You lose taste and meat plus you lose a natural indicator of the cuisson of the fish.

Monkfish is an essential ingredient of Zarzuela because of its texture and taste. In this recipe we combine the obvious: monkfish and tomato. We add a bouquet garni consisting of rosemary, thyme and bay leaf. The black olives give the required twist to the sauce and the dish as a whole.

Wine Pairing

We suggest a glass of Chardonnay to accompany the monkfish, provided the wine is not too woody; a light touch of oak will be best. Soave could also be a good combination.

What You Need
  • one Shallot
  • one Garlic Glove
  • Olive Oil
  • two Tomatoes
  • Pitted Black Olives
  • Bay Leaf
  • Thyme
  • Rosemary
  • Monkfish (200 gram per person, bone included)
  • Black Pepper
What You Do
  1. Start by making the sauce
  2. Gently fry the chopped shallot in a splash of olive oil
  3. After a few minutes add the chopped garlic
  4. Add the chopped tomatoes and the pitted black olives (depending on their taste we suggest between 10 and 15)
  5. Add the bouquet garni and allow to cook on low heat for a number of hours
  6. Make sure to check on a regular basis
  7. When ready, remove the bouquet garni and transfer the sauce to a blender
  8. Pass the mixture through a sieve. The sauce should be as smooth as possible
  9. Transfer to the refrigerator and use the next day.
  10. Clean the fish
  11. Use a heavy iron skillet to fry the monkfish in olive oil
  12. When nicely coloured, reduce the heat and start adding the sauce
  13. Since the sauce is cold, you need to do it spoon by spoon
  14. Coat the fish with warm sauce, again, and again
  15. Use your knife to try separating the meat from the bone. When this is possible without applying too much pressure, the fish is nearly perfect
  16. Remove the bone, turn the fish on the side that was connected to the bone and cook for one or two minutes
  17. Taste the sauce; maybe you want to add some fresh black pepper.
  18. Serve on a warm plate with some crusted bread.

Pissaladière

Pissaladière is a very tasty combination of onions, local French herbs, anchovies and black olives. It originates from the South of France (Côte d’Azur) and many a local boulangerie will offer their home-made, original pissaladière. We compared many recipes, enjoyed lots of slices of Pissaladière when in France and are pleased to present our version. It does not include tomatoes, milk, almonds, sugar, coconut oil and is not made with puff pastry.

Best is to make your own pastry (especially because it’s very simple) and use fresh yeast. Since it’s more and more difficult to buy, we use dried yeast. Key to making pissaladière is time. The onions need an hour, they need to cool and the dough needs to proof twice. But we’re not in a hurry!

We combined our pissaladière with French charcuterie; think Paté en Croûte (recipe to follow), Rossette (from Lyon), Rillettes d´Oie, Jambon persillé and cornichons. You could also combine pissaladière with a nice simple green salad.

We enjoyed our Pissaladière with a glass of Cô­tes de Pro­ven­ce ro­sé made of Cinsault, Grenache and Shiraz grapes. Dry, with a touch of grapefruit and wonderfully pale pink.

Here is what you need

  • 600 grams of White Onions (or a combination of White Onions and Shallots)
  • Olive Oil
  • Butter
  • Bay Leaf
  • Anchovies
  • Halved Black Olives
  • Pastry
    • 125 grams of Flour
    • 2 grams of Yeast (depending on the yeast you use)
    • 75 ml of Water
    • Dash of Salt
    • Some Olive Oil
    • Herbes de Provences (or thyme)

Start by caramelizing the onions. Peel the onions, cut in 4 and slice. Not too thin, the onions will shrink. Fry gently in olive oil and butter. When starting to color reduce the heat, add the bay leaf and allow to simmer for one hour, stirring every 15 minutes or so. Check the taste, the bay leaf can be overpowering. Let cool and set aside (for instance until the next day).
Mix flour, yeast, salt and herbes de Provences. Add water and olive oil and knead for 10 minutes. Let proof for 2 hours. Transfer to kitchen top and create a thin rectangular pastry. Coat a baking plate with oil and transfer the pastry to the plate. With a fork make small holes in the pastry (not in the edge). This is important given the fact that the onions are cold and moist. Now add the onions and make a nice pattern with the anchovies and the halved olives. Bake in a hot oven (top half, 220˚ Celsius or 430˚ Fahrenheit) for 15 minutes. Serve warm (or cold) but not hot.

Chicken with Tarragon, Leek and Nero d’Avola

Some combinations are made in heaven. Chicken and Tarragon is such a combination: it simply works brilliantly. Tarragon is a very powerful, aromatic herb, full of flavors such as anise and licorice. It’s the key ingredient of the sauce Béarnaise and it is of course wonderful when combined with vinegar and mustard. For kitchen purposes you need to buy French tarragon. The other well-known variety is called Russian tarragon. It’s a nice plant for your garden or balcony, with flowers and lots of leaves, but the taste is very bland, so not one to use in the kitchen.

We use butter to carry the taste of the tarragon to the chicken and to the sauce. It’s the principle behind enfleurage and maceration in the perfume making industry: fat is used to absorb the fragrance. So yes, you need an excellent chicken with lots of fat under the skin.

This recipe works with a whole chicken, with breasts and legs, provided they come with a skin. The crux of this recipe is to create a layer of tarragon butter between the meat and the skin, allowing for a crispy skin in combination with rich, flavored meat. You can stuff the chicken in the morning or the day before. Ideal when you’re having guests!

The sauce is very rich, so instead of using flour or cream, we create an emulsified sauce by blendering the mixture. The result is a velvety, filming sauce.

We enjoyed our chicken with a glass of Inycon Nero d’Avola. The wine is elegant, fruity, not too full bodied and it has soft tannins and a gentle acidity. You will also taste licorice, which is a nice reflection of the tarragon and the Pastis. The balance of the acidity of the wine and the filming structure of the sauce is essential to the dish.

Here is what you need

  • 2 Chicken Legs
  • 8 Sprigs of Tarragon
  • 20 + 10 grams of Butter
  • Olive Oil
  • Pastis
  • Chicken Stock
  • Optional: Leek, olive oil and water

Strip the tarragon leaves from the stem and chop. Let’s say you need one or two sprigs of tarragon per chicken leg. Use a fork to make the tarragon butter. Use your fingers to create space (a pocket) between the skin and the meat. Start for instance in the middle of the leg (outside) or at the rear of the whole chicken. Be careful not to open the edges, otherwise the tarragon butter can’t do its work. Put some of the butter between the skin and the meat and use your fingers to create a thin layer by pressing the butter to the sides. Coat the bottom of a shallow baking pan with olive oil.
Transfer the chicken legs to the pan. Add some additional butter to the pan (not on top of the chicken). Also add the sprigs you haven’t used. Put the pan in an oven of 200˚ Celsius or 390˚ Fahrenheit for 30 minutes.
Transfer the chicken legs and two sprigs of tarragon to a plate and keep them warm in the oven (just switch it of and keep the door open). Deglaze the pan with chicken stock and Pastis. Deglazing simply means that you add a liquid and then by stirring the mixture you capture the residue in the pan. As if you are cleaning the pan. Blender the mixture and poor through a sieve into a small saucepan. You now have a homogenous, emulsified sauce. Warm the sauce and stir occasionally for five minutes. Serve the chicken with the sauce, the fried sprigs of tarragon and the briefly cooked leek.

(P.S. Clean the leek, making sure you have removed the sand and dirt. Slice thinly and cook with some olive oil and a drop or two of water. Five minutes maximum should do the trick.)

Neck of Lamb with Star Anise, Ginger and Djeroek Poeroet

We can hear you thinking, ‘Shouldn’t that be rack of lamb?’.

Isn’t it interesting how much we are focused on specific parts of an animal? We love our steak, but what to do with an oxtail? We love pork loin, but how about the pig’s nose? And we enjoy grilled rack of lamb, but how about the lamb’s neck?
Supermarkets and butchers know all about our focus. So if you would like to cook pig’s feet (or trotters), kidneys, liver, sweetbread or lamb’s neck: where to go? Try finding a ‘real’ butcher, one that buys the whole animal, not just the parts that can be sold directly.

Lamb’s neck is very underrated, inexpensive and tasty. Some feel it’s okay for your dog only, but we completely disagree. When cooked slowly for hours it is great. Tasty, well structured, juicy and tender.

The obvious way to prepare the lamb is to fry it briefly in oil en butter and then cook for hours in red wine with a bouguet garni of rosemary, thyme, parsley and sage. Maybe add a small tomato to help the sauce. We take a different approach by adding strong tastes like ginger, cilantro seeds, star anise, soy sauce and the leaves of the Makrut or Thai lime (also known as Djeroek poeroet or Djeruk purut). You will get a full, complex sauce in combination with lovely, aromatic meat.

We very much enjoyed our Neck of Lamb with a glass of Alsace Gewurztraminer, Cave de Beblenheim. The wine has a beautiful gold colour, and an expressive nose with rose notes. The palate presents a nice structure with a fruity and spicy association which of course goes very well with the oriental twist to the stew. In general we suggest an aromatic white wine with just a touch of sweetness.

What You Need
  • 300 grams Neck of Lamb
  • Shallot
  • Olive Oil
  • Fresh Ginger (4 cm, depending on your taste)
  • 1 red Chili
  • 1 Garlic Clove
  • Noilly Prat
  • Cilantro Seeds
  • Star Anise
  • Low Salt Soy Sauce
  • 4 leaves of Djeroek Poeroet
What Yoi Do
  1. Cut the meat in not too small cubes – they will shrink during the cooking process
  2. Fry the meat in oil, giving it a nice colour. If so required, do so in multiple batches.
  3. In the mean time cut the shallot, peel the ginger and slice, remove the seeds from the chili and cut the garlic glove (but not too fine)
  4. Remove the meat from the pan and glaze the shallot, chili, ginger and garlic
  5. Add the Noilly Prat, crushed cilantro seeds, star anise, some low-salt soy sauce and the djeroek poeroet
  6. Stir
  7. Transfer the meat back to the pan and add some water, making sure the meat is just covered
  8. Leave to simmer for 6 hours in total
  9. Check the pan every hour and add water is so required
  10. Also check if the djeroek poeroet and/or chilli are not overpowering
  11. After 5 hours check the taste, add soy sauce, remove the djeroek poeroet or the star anise if so required
  12. After 6 hours cool the stew and transfer to the refrigerator. You could also decide to transfer it to the freezer for use at a later date.
  13. The following day remove as much of the fat as possible.
  14. Warm the stew, check taste and tenderness and continue to simmer if so required.
  15. When the meat is ready you may want to reduce the liquid.
  16. Serve with steamed Pak Choi, tossed with sesame oil.

PS

As an alternative use 2 lamb shanks.

Fried Large Prawns

Enjoying the Sea

Shrimps and Prawns, delicacies from the sea, just like lobsters, scampi and crabs. Popular food in many countries, just think shrimp cocktail, paella, salad with shrimps, pasta with seafood, stuffed eggs with shrimps, curry with prawns and of course, fried shrimps with garlic and lemon.

We think shrimps and prawns are as subtle, delicate and tasty as lobster. The prawn should be at the center, not just another ingredient of your fish soup. Not hidden by loads of garlic and lemon. Or even worse, wrapped in bacon (whoever came up with the idea of wrapping prawns and oysters (angels on horseback) in bacon is not a seafood lover).

We will use the shell, the legs and the so-called swimmerets of the prawns to create a sauce; a bisque like sauce.

Wine Pairing

We enjoyed our fried large prawns with a glass of rose. This Italian rose (from Garofoli) is made from 100% Montepulciano. It comes with beautiful scent of cherries and peaches. The flavor is full, velvety, present and balanced. A great companion for seafood. Other options are Chablis and Soave. A Viognier will probably be too fruity.

What You Need

  • Two large Prawns, either wild or organic
  • One small Shallot
  • Chili Pepper
  • Butter
  • Olive oil
  • Armagnac or Cognac
  • Garlic
  • One Cherry Tomato
  • One Saffron Thread
  • Water
  • Bouquet Garni (Thyme, Parsley)
  • Black Pepper
  • Crusted Bread

What You Do

We start by making a bisque-like sauce, using the shell of the prawns.
Chop the shallot and a bit of chili pepper and glaze gently for 10 minutes in butter and olive oil. In parallel use scissors to cut the shell of the prawn. Start behind the head and cut towards the tail. Just before the tail turn 90 degrees and make a cut around the prawn. This allows you to remove the shell and the legs of the body but keep the head and the tail on the prawn. Remove the black vein (the prawn’s intestines) and the slurry in the head (if any). Since you serve the prawn with the head (and tail) it is essential that the prawn is clean. You could gently rinse the prawn if you want to be absolutely sure about this. Transfer the prawns to the refrigerator.
Break the shell into smaller chunks. Add these to the pan and fry for a few minutes until red. Add a small splash of Cognac or Armagnac and flambé. Never do this when using the exhaust or range hood. Add one garlic glove, water, the quartered cherry tomato, the bouquet garni and the saffron. Stir well, cover the pan and let rest on low heat for 30 minutes.
Remove the bouquet and the shells from the pan and using a spoon and a sieve squeeze the juices from the bouquet and the shells, then discard. Blender the mixture and pass through a sieve. Taste the mixture, add pepper if so required. Leave for another 30 minutes on very low heat, allowing for the flavors to integrate and for the liquid to reduce.
Dry the prawns and fry them in a skillet in oil (depending on the size maximum 4 minutes in total) on both sides and on the back. Use warm plates, and serve the prawn on top of the sauce. Touch of black pepper on the prawn is fine. Enjoy with crusted bread.

Tellines with Parsley

This Week’s Special

Many, far too many years ago we were walking along the Mediterranean coast, enjoying the sea, the sun and the company of a dear friend. She asked us if we would like to eat tellines for dinner. Of course, we replied, but what are tellines? She smiled and said I’ll show you. She walked to the sea and kneeled down, just where the sand and the sea meet. All you needed to do was move your fingers through the sand, just under the surface and feel. She harvested a few tellines, opened them with her fingers, washed them in the sea and that’s how we enjoyed our very first tellines, fresh from the sea. So simple, to tasty, so good.
We harvested many more and went back to her house where we cooked the tellines in a hot skillet and enjoyed them with a beautiful local ro­sé.

Harvesting tellines (or in France tenilles) is simple; knowing where you can do this is the challenge. Fortunately you can (occasionally) find them on the market.

It’s possible to use other small clams, but the fun of tellines is that they open quickly when in the pan, making sure they remain juicy.

Here is what you need:

  • 300 grams of tellines
  • one Shallot
  • one Garlic glove
  • Olive Oil
  • Parsley
  • White Wine
  • Black Pepper

Wash the tellines, preferably using salted water. Discard ones with a small hole and ones that are broken. Chop the shallot (you probably need half of it) and the garlic very fine. Heat the skillet, add the oil, the shallot, the garlic and the tellines and cook until the tellines are open. You probably want to add a splash of white wine during the cooking process. Serve the tellines on a warm plate with black pepper. Sprinkle with chopped parsley. Enjoy with a glass of Cô­tes de Pro­ven­ce ro­sé, for instance an Estandon from the Var region. No cutlery needed!

Grilled Asparagus with Parmesan Cheese

We enjoyed this dish as a starter when in Milan, on a beautiful evening, eating al fresco and enjoying the wonderful combination of the sweetness and bitterness of the asparagus, the slightly caramelised sugars as a result of grilling the asparagus and the salty and sweet cheese. A glass of Pinot Grigio was all we wanted. In Milan they served us green asparagus, but it works even better with white asparagus.
This is typically a dish you would make when the asparagus season is at its high and outside temperatures feel like summer. You could drink a Pinot Grigio, a Muscat from the Alsace region or a Rose with character. Remember the wine needs to combine with a range of very diverse flavours in the dish.

Here is what you need:

  • 2 Asparagus per person
  • Olive Oil
  • Parmesan Cheese
  • Black Pepper

Peel the asparagus and cook or steam until slightly tender. Depending on the size we would say 10-15 minutes in the Russel Hobss steamer. Leave and let cool. Take a plate, add some oil to the plate and use it to cover the asparagus in oil. Heat the pan and grill the asparagus for 4*1 minute, making sure you have a lovely brown (not too dark) pattern. Serve on a plate, add some grated Parmesan cheese and pepper. Add a generous drizzle of very good olive oil.


Duck Breast with a Green Pepper Corn Sauce

Ignore The Obvious

Duck is often combined with a sweet ingredient. Think fruit (orange, clementine, apple and even peach), with honey, Port Wine or Marsala. All these combinations make sense because the idea is to relate to the taste of the duck. In this case we ignore the obvious and combine it with a green pepper corn sauce. The thyme is the bridge between the duck and the sauce. The garlic brings a touch of sweetness to the sauce. The combination works beautifully!
Green pepper corn is available dried and in brine. We prefer the brine version because it integrates better with the other ingredients of the sauce. The dried corns work well after leaving them in a nice vinegar for 24 – 48 hours.

Wine Pairing

A simple Bordeaux wine will work very well. But Syrah, with its hint of spiciness, will be the perfect wine with this dish. If available go for an Australian Syrah because of the full-bodied character.

What You Need

  • 2 small Breasts of Duck or 1 large one
  • Thyme
  • Chicken stock
  • Garlic
  • Single or Double Cream
  • Green Pepper Corn in Brine (slightly crunched)
  • Mustard

What You Do

Check the breast of duck for remainders of feathers. Remove the vein on the meat side of the breast (and the odd membrane you don’t like). Cut the skin (not the meat!) in a crosshatch pattern, let’s say 1-2 centimeter apart. Doing this helps the fat render and it will give a crispy result. Put thyme in the pattern. Put on a dish, cover and transfer to the fridge. Leave in the fridge for a few hours, making sure it’s nice, firm and cold.
Fry the duck in a hot, non-sticky skillet for 10-12 minutes on the skin side. Reduce the heat after a few minutes. You don’t need oil or butter, the duck fat will do the trick. Now fry for 2-3 minute on the meat side and remove. Cover with aluminum foil is such a way that the crispy skin is not covered. The foil should only cover meat.
Remove most of the fat from the pan, but not all. Add chicken stock, garlic and thyme. Stir and add the crunched green pepper. We like their taste so we tend to add quite a few. Now start building the sauce by adding juices from the duck. Maybe you want to add a bit of mustard. This will not only add complexity to the sauce, it will also make it thicker. Add the cream but please remember that cream needs a few minutes to integrate in the sauce. If you add cream last-minute, you will, indeed, taste cream.
After 10 – 15 minutes it’s time to carve the duck. Make sure to add all the juices to the sauce. Cut the duck in slices (we like fairly big slices, you may prefer thinner ones) and place these on top of the sauce when serving.
If you have a bit of extra time, pass the sauce through a sieve, removing the thyme and other bits, before adding the green pepper.

Omelet with Oyster Mushrooms and Nasturtium

Try This at Home

Oyster mushrooms were among the first mushrooms to be cultivated. They grow very well on straw so great to grow at home. See pictures!
The vast majority of oyster mushrooms are grey, but we have seen and tasted the yellow and sensational pink oyster mushroom. Since you can eat oyster mushrooms raw, the pink and yellow variety is great in a salad. Oyster mushrooms can be a bit watery, which impacts the taste. A pity because the taste is delicate and soft anyway. Not a mushroom to combine with more powerful mushrooms like shiitake. Oyster mushrooms cook quickly, so great to use in a stir-fry or a soup. You can try using them in a stew, but make sure your chunks are not too small.

Wine pairing

A crisp, floral white wine goes very well with this omelet. Best would be a Pinot Grigio or a combination of Chardonnay and Viognier.

What You Need

  • 250 grams Oyster mushroom
  • 3 Eggs
  • 1 Spring Onion
  • Butter
  • Olive Oil
  • Black Pepper
  • Chives
  • Nasturtium

What You Do

Harvest your oyster mushrooms or buy really fresh and tasty ones. Tear the mushroom into smaller but not too small chunks. Slice the spring onion in small rings. Fry the oyster mushrooms in olive oil and butter for 3 minutes or so until slightly cooked. Add the white of the spring onion. Perhaps you want to add some butter to the pan. Now make sure the pan is nice and hot. Whisk the eggs well, add the green of the spring onion and add to the pan. After a few seconds reduce the heat to very low and wait 5 to 10 minutes until the egg is nearly set. Take your time but keep an eye on the surface and the consistency. Check with your fingers if the omelet is beginning to set. A good omelet must be baveuse so Timing is All. There is no alternative to baveuse!
Serve the omelet on warm dishes with black pepper, chives and nasturtium (not just for fun, also for the peppery taste of the nasturtium leaves).

Guineafowl with Morels and Gnocchi

Guineafowl

Preparing guineafowl can be a bit of a challenge. Easily overcooked and easily prepared the wrong way. Given its size you could think it should be prepared like chicken but that’s not the case. Compare chicken with guineafowl and notice the difference: the meat of a guineafowl has much more structure, it’s fatter and firmer.
Cooking quineafowl requires some liquid (oil, butter, wine, stock) but not too much. Cooked like coq au vin it’s a disaster. Spit-roasted guineafowl? Not a good idea.

In The River Cafe Classic Italian Cookbook (written by Rose Gray and Ruth Rogers) you will find a great recipe of guineafowl with grappa, junipers, white wine and pancetta. The combination of grappa and junipers is amazing and the idea to have these two support the guinea fowl is simply stunning. The combination emphasises the wild and nutty taste of the guinegowl. Buy the book and start cooking!

Dried mushrooms: expensive and actually not very tasty. Not even close to the real thing. With the exception of dried morels: these are as tasty as fresh ones.
Also important: unlike most mushrooms, morels are to be found (and bought) in Spring. So the best season to cook this dish is in Spring, but given dried morels are equally tasty, it doesn’t really matter.

Wine Pairing

We enjoyed our guineafowl with a glass of Bergerac, La Vaure, 2015. This is a full-bodied wine with a hint of oak, red fruits and great flavours overall. Made from Merlot and Cabernet Sauvignon. A mature Bergerac with a lasting taste.

What You Need

  • 2 legs of Guineafowl
  • 10 gram of dried Morels
  • Butter
  • Olive Oil
  • Chicken Stock
  • Mustard
  • Cream
  • Black Pepper
  • Gnocchi

What You Do

Pre-heat the oven to 180 ˚Celsius. Add the two legs of guinea fowl to a shallow dish with butter and olive oil. Cook for 10 minutes. In the mean time add the morels to hot water. Soak for 15 minutes. Turn the legs upside down after 10 minutes. Cook for another 10 minutes. Turn them a second time, skin up. Add the morels to the dish, leaving the skin free. In parallel start preparing the sauce using chicken stock and some morel-water, but not too much. Taste the water before adding. The legs should be ready after 30 minutes. Add the cooking juices to the sauce, grill the legs quickly if the skin is not yet nicely coloured and keep the morels warm. Add mustard and pepper to the sauce, stir well, add some cream and allow to heat through and through for 5 minutes. Taste the sauce and if necessary add more mustard or morel-water.
Serve with gnocchi.