Pear Pie with Frangipane

Juicy, sweet ripe pears, frangipane and a crunchy crust, what more can you ask for! This very tasty pear pie is not difficult to make. The only challenge is finding ripe pears. The juicer the better!

Frangipane is a classic from the French pâtisserie and was first mentioned in 1652 by François Pierre (de) La Varenne. His recipe for Tourte de Franchipanne describes a crust made with puff pastry and a filling with what we would call crème pâtissière, enriched with crushed pistachios and almonds.
In her book Tarte TatinGinette Mathiot includes a recipe for Strawberry Frangipane. Same approach, but with crushed almonds only.

The current Larousse Gastronomique takes a different approach by beating sugar and butter until creamy (beurre pommade in French), then adding the eggs, one at a time, and the almond flour. No cooking required. Our approach is fairly similar, we combine soft butter, sugar and almond flour and then add the beaten egg.

Obviously, the recipe provided by Varenne is for a rich sauce whereas the second method is about making a paste, which is very suitable for a Pear Pie.

What You Need
  • For the Crust
    • 50 grams of White Caster Sugar
    • 100 grams of soft Unsalted Butter
    • ½ Egg (beaten)
    • 1 gram of Salt
    • 150 grams of All Purpose Flour
    • Cold Water (optinal)
  • For the Frangipane
    • 50 grams of Almond Flour
    • 40 grams of Sugar
    • 40 grams of Unsalted Butter (room temperature)
    • One Egg
    • Lemon Zest (optional)
  • For the Filling
    • 4 Ripe Pears (Williams, Bartlett, Conference)
  • For the Coating
    • Apricot Jam
    • Water
What You Do
  1. Start by making the dough
  2. Combine sugar and butter. Use a hand mixer with kneading hooks
  3. When mixed, add halve of the beaten egg
  4. Combine salt and flour
  5. Pass through a sieve and add to the mixture
  6. (optional) add some baking powder if you want a crispier crust)
  7. Use the kneading hooks to mix
  8. If the dough is too dry, add some cold water
  9. It’s ready when the pastry comes together in a ball that doesn’t stick to the surface
  10. When done, remove from the bowl and wrap in foil. Store in the refrigerator for at least two hours. The dough freezes well, so it’s a great idea to make a bit extra
  11. Now make the frangipane
  12. Combine almond flour, sugar and butter. Beat until fluffy
  13. Add the beaten egg
  14. Mix
  15. (optional) Add lemon zest
  16. Transfer to the refrigerator
  17. Preheat the oven to 180 °C or 355 °F
  18. Roll out the dough on a lightly floured surface and use it to line a 16 cm (6 in) tin. Best is 2 millimetres
  19. Transfer to the refrigerator and leave for 30 minutes
  20. Prick the pastry with a fork, to prevent air bubbles forming during baking
  21. Add the frangipane to the pastry case and spread evenly
  22. Peel and slice the pears, add on top of the frangipane
  23. Transfer to the oven for 30 – 40 minutes or until golden
  24. Use a fork to combine apricot jam and water, ratio 4:1
  25. Warm the apricot mixture
  26. When the pie is still warm, coat with the apricot mixture
PS
  • We made the crust with pâte sucrée, or sweet shortcrust pastry. The result is a flaky, crumbly crust. You could also use (ready-made) puff pastry or pate sablée. Adding a few grams of baking powder is an option when you want a lighter, crispier crust.
  • When we first saw a recipe for frangipane with pistachios, we wondered if that would be a good idea. Now that we have read the 1652 recipe, we will definitely give it a try.
Pear Pie ©cadwu
Pear Pie ©cadwu

Asparagus Salad with Basil and Olives

Over the years we posted a range of recipes with asparagus, such as classic asparagus with ham and eggs, Mediterranean grilled asparagus with Parmesan cheese or Asian asparagus with miso. During one of the first warm evenings of this year we prepared a very tasty, simple salad with green asparagus, basil and black olives. A very limited list of ingredients, but there is no need to add anything else. The olives bring umami, the asparagus sweetness and bitterness, the basil is aromatic, sweet and a touch peppery. A very uplifting combination.

Wine Pairing

Best to enjoy with a nice glass of Rosé: dry, crisp, floral and flavourful. For instance Monte del Frà Bardolino Chiaretto. It’s a wine with delicate scents of berries accompanied by light and refreshing hints of green apples and subtle spicy tones. On the palate the wine reveals juicy sensations of red berries along with an appealing and refreshing acidity.

What You Need
  • Green Asparagus
  • Black Olives
  • Basil
  • Black Pepper
  • Olive Oil
What You Do
  1. Wash the asparagus and dry
  2. Remove the bottom of the asparagus. Be generous, you don’t want to serve a chewy salad
  3. Heat a heavy iron pan, add olive oil
  4. Slice the asparagus and transfer to the pan. Don’t add the tips
  5. Stir.
  6. After 5 minutes add the tips
  7. After another 5 minutes the asparagus will be ready. Taste and leave on medium heat if you feel they need more time
  8. Let cool
  9. Halve the olives
  10. Combine the asparagus with olives, basil and black pepper
Asparagus Salad ©cadwu

Zucchini with Taleggio

Zucchini, or courgette, is a favourite summer vegetable. Just think about sliced Trombetta’s, or Stuffed Flowers, or a combination with Farfalle and Fennel. Recently we bought beautiful round zucchinis, ideal to stuff and serve as a side dish. We’ve made these many times, with herbs like rosemary, thyme, oregano and Parmesan cheese. Tasty and not difficult to make. However, we think there’s room for improvement. How would it taste if we would use a richer, fatter, more aromatic cheese? We looked in the fridge. Perhaps Appenzeller? Or a traditional Dutch cheese? We decided to use Tallegio, a semi-soft cheese from Italy made from raw cow milk, with a mild taste. It melts easily, which makes it very suitable for this dish and for instance crostini.

Wine Pairing

The zucchini will be a great accompaniment with grilled lamb or chicken. You could also combine the zucchini with pasta or rice, making for a vegetarian meal.
We decided to drink a glass of red wine from the Douro region, produced by Quinta do Crasto. The wine is made from traditional Douro red grape varieties: tinta roriztouriga nacionaltinta barroca and touriga franca. The wine is fresh, fruity and very pleasant. Its colour is deep ruby and the wine has aromas of ripe red fruit.
In general, we suggest a red wine with flavours and aromas of red fruit and with light tannins.

What You Need
  • 2 round Zucchinis
  • One Garlic Clove
  • Thyme
  • Black Pepper
  • Taleggio
  • Olive Oil
What You Do
  1. Remove the top of the zucchinis
  2. Preheat your oven to 180 °C or 355 °F
  3. Use a teaspoon to remove the inside of the zucchini, also of the cap. Be careful not to damage the skin of the zucchini
  4. Use a knife to chop the ‘meat’
  5. Add olive oil to a pan
  6. When warm, add the meat and fry/glaze for a few minutes
  7. Finely chop the garlic and add to the pan
  8. Finely chop the thyme
  9. Add thyme and black pepper. Mix and leave on low/medium heat for a few minutes
  10. Let cool
  11. Fill the bottom half of the zucchini with the mixture
  12. Add a slice of taleggio
  13. Fill the zucchini with the mixture
  14. Add a second slice of taleggio on top
  15. Transfer the stuffed zucchinis and the tops to the oven and fry for 15 minutes or until golden
  16. Serve with the top on the zucchini
PS

The winemaker, Quinta Do Crasto, provides excellent background information. Interesting to read about the weather, the harvest, the production and the timing.

Zucchini with Taleggio ©cadwu

Mushroom Balls

We were asked to prepare a vegetarian main dish for a buffet style dinner. We immediately knew what we wanted to cook: mushroom balls and oven baked vegetables. Tasty and colourful. Could we make it gluten free? Which in this case means not adding breadcrumbs to the mushroom mixture, so we needed to think about an alternative. We tried well cooked rice, but that didn’t do the trick. Next idea was to blender the rice and make a very sticky paste. It did what we hoped it would do: the mushrooms balls are firm, but not dense. Great! Plus, they go very well with the vegetables!

Wine Pairing

We enjoyed a glass of French Malbec with the Mushroom Balls. In general you’re looking for a long, full bodied red wine, smooth, with hints of berries and ripe dark fruit.

What You Need
  • 25 grams of dried Porcini
  • 150 grams of fresh Mushrooms (Button Mushrooms, Shiitake)
  • 1 Shallot
  • 2 cloves of Garlic
  • 1 sprig of fresh Oregano
  • 2 sprigs of Thyme
  • 1 sprig of Rosemary
  • 1 sprig of Sage
  • 40 grams of Rice
  • ½ beaten Egg
  • Parmesan Cheese
  • Black Pepper
What You Do
  1. Boil the rice in water (with a pinch of salt) or in vegetable stock for 40 minutes. The rice should be thoroughly cooked.
  2. Soak the dried mushrooms in hot water for 30 minutes. Drain and check for sand.
  3. Chop the shallot and fry in oil until translucent.
  4. Clean the fresh mushrooms, chop, add to the pan and fry on a higher heat.
  5. When the mushrooms are somewhat fried, add the chopped garlic for five minutes. Be careful not to colour the garlic.
  6. Transfer the mixture to a bowl and allow to cool.
  7. Chop the soaked mushrooms. Add to the mixture.
  8. Use a kitchen knife to chop all herbs and then add these to the mixture.
  9. Blender half of the rice until it’s a sticky paste.
  10. Add remaining rice, paste and a relatively large amount of pepper to the mixture.
  11. Beat ½ egg and grate a generous amount of Parmesan Cheese.
  12. Add cheese and egg to the mixture.
  13. Pulse with a blender. The mixture should have granularity.
  14. Taste and add pepper and/or Parmesan if necessary.
  15. Allow the mixture to cool and transfer to the refrigerator.
  16. Preheat the oven to 180 °C or 355 °F.
  17. Use your hands to make balls, line a rack with baking paper and place the balls on the paper.
  18. Bake for 15-25 minutes until the balls are slightly coloured and firm.
  19. Allow to cool and leave for a few hours at room temperature.
  20. Preheat oven to 160 °C or 320 °F.
  21. Bake mixed, chopped vegetables (beetroot, parsnips, sweet potato, potato, butternut squash, parsley root, kohlrabi) by placing them in a large oven dish with plenty of olive oil and sprigs of rosemary, thyme, sage, marjoram in the oven for 20 minutes under aluminium foil at 160 °C or 320 °F and then 15-20 minutes at 180 °C or 355 °F without foil.
  22. Warm the mushroom balls in the oven in a separate oven dish.
  23. Combine just before serving.
  24. If gluten are okay, use half the rice (no need to make the sticky paste) and add breadcrumbs. The mixture will firmer and drier, so perhaps use 1 egg.
PS

This recipe is for two. The picture shows the result of the recipe times 2.

 
Mushroom Balls ©cadwu

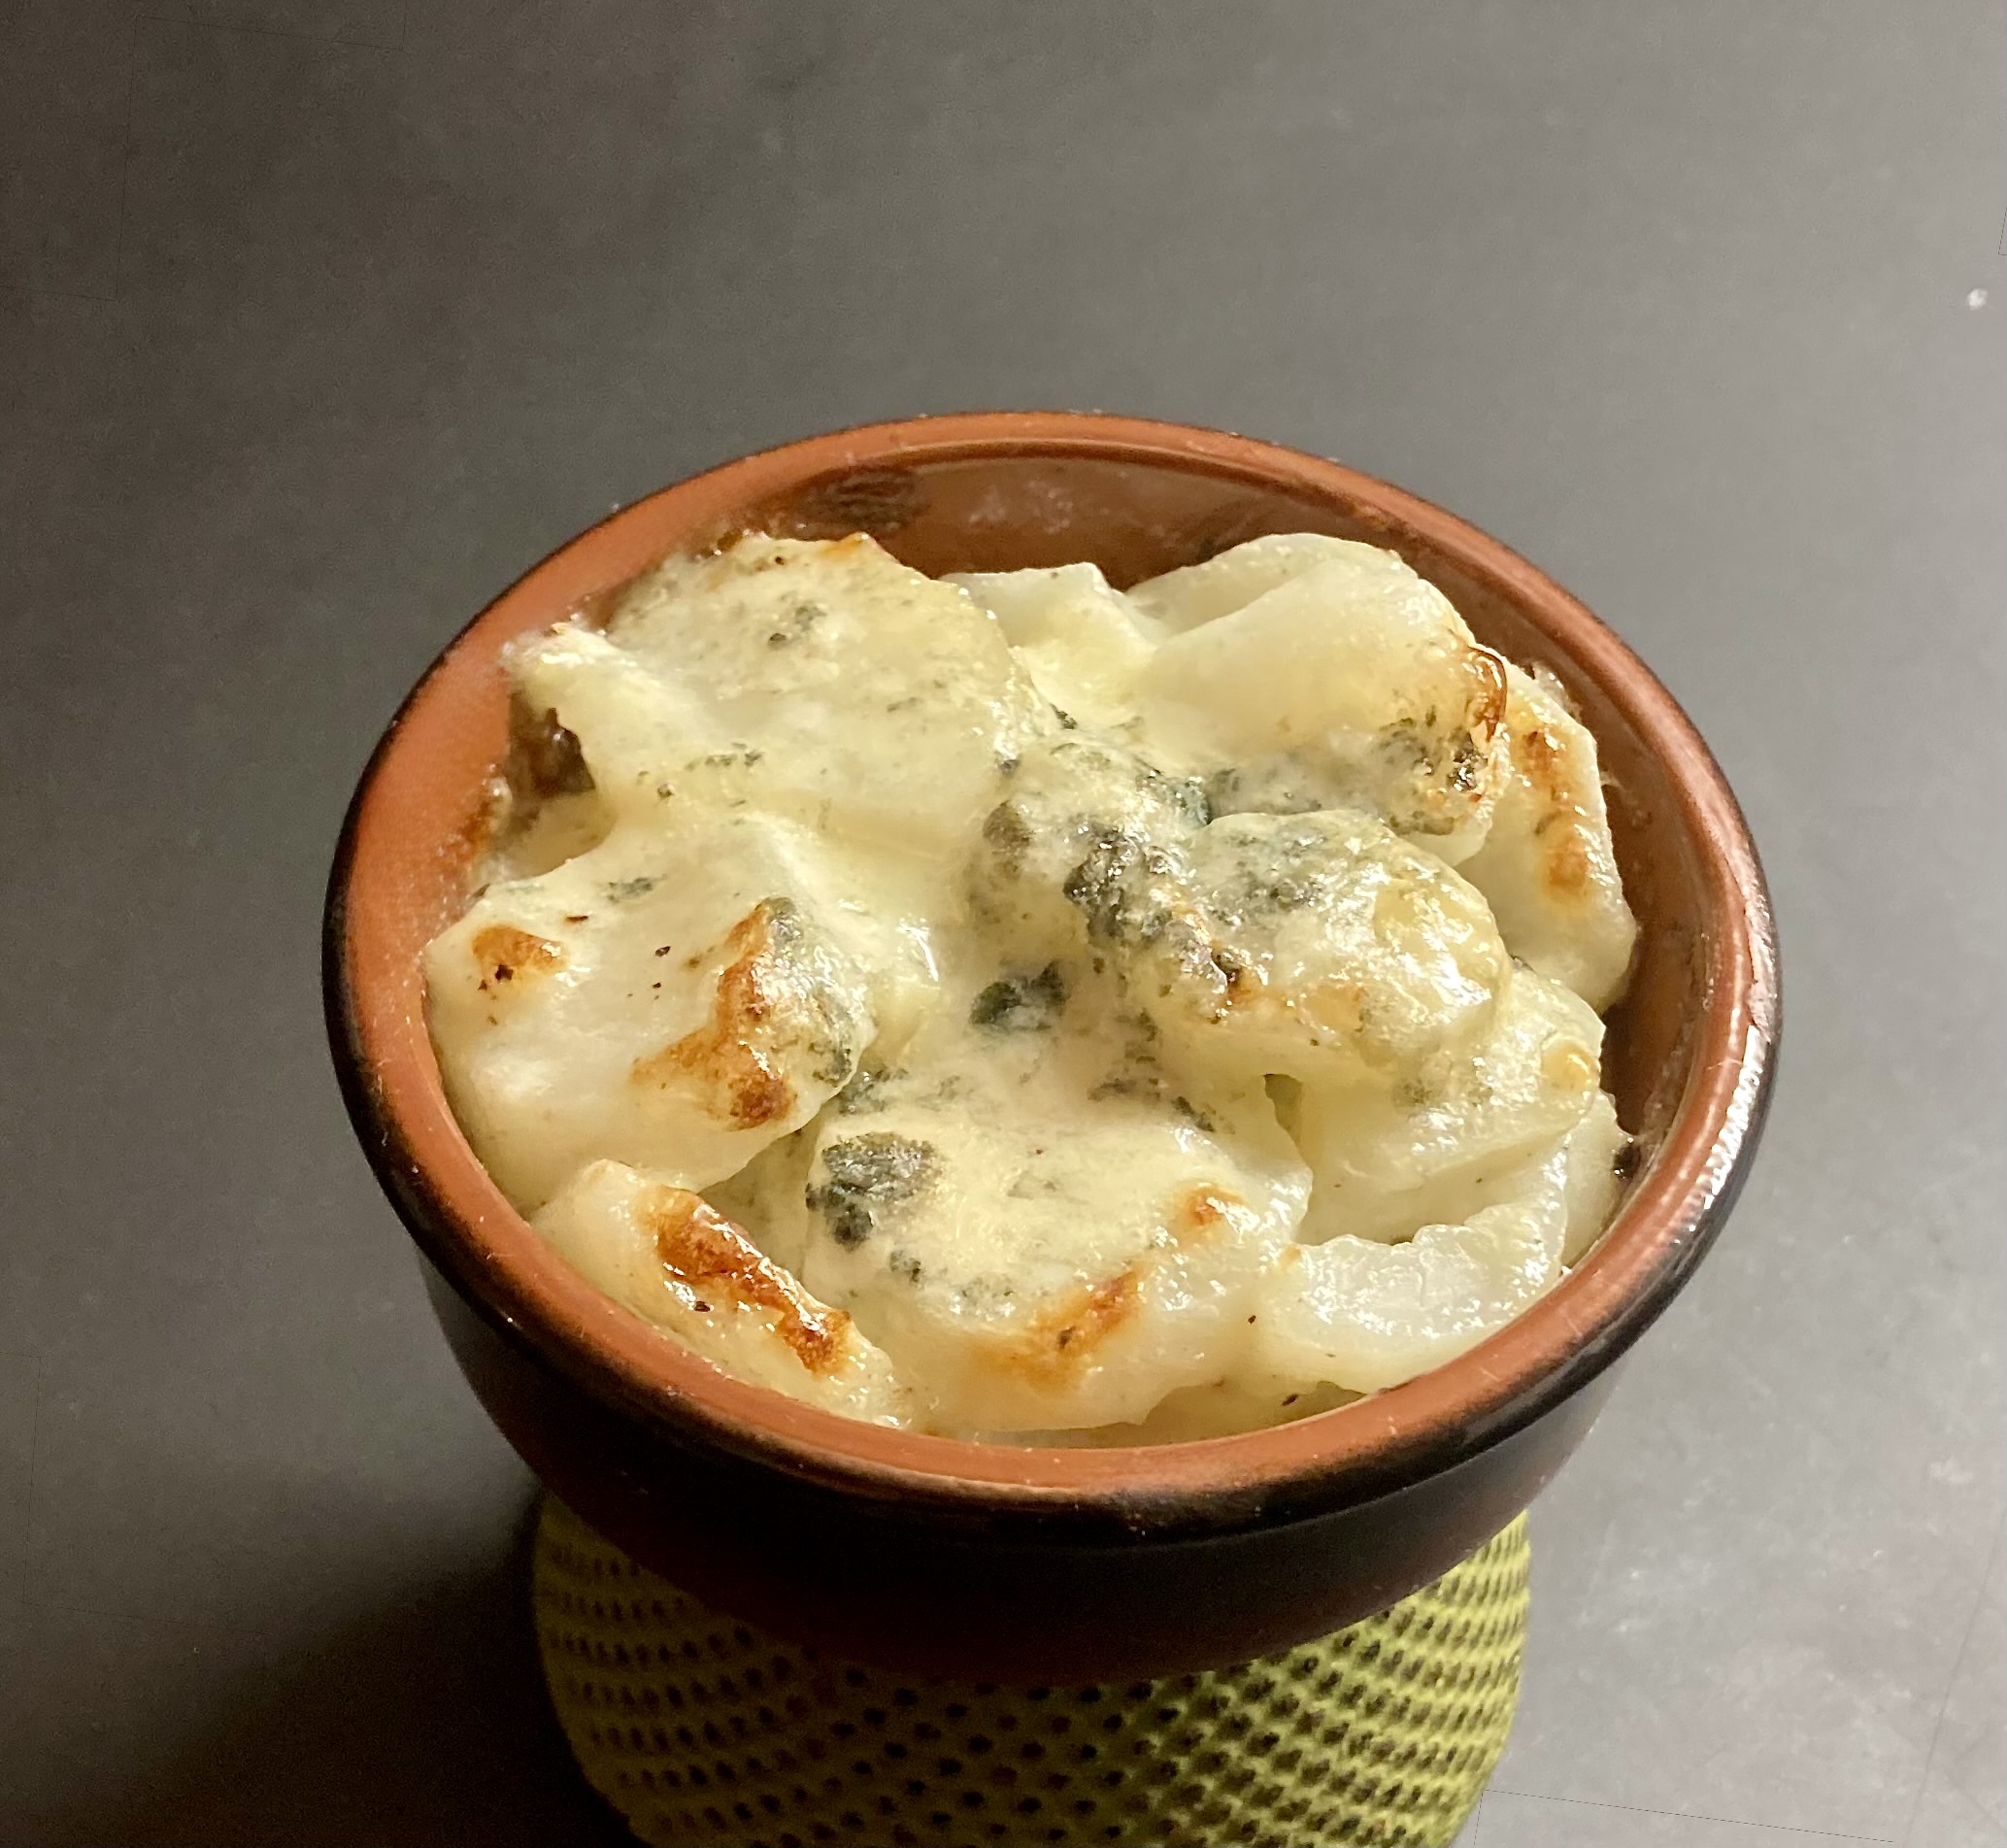
Helianthus with Blue Cheese

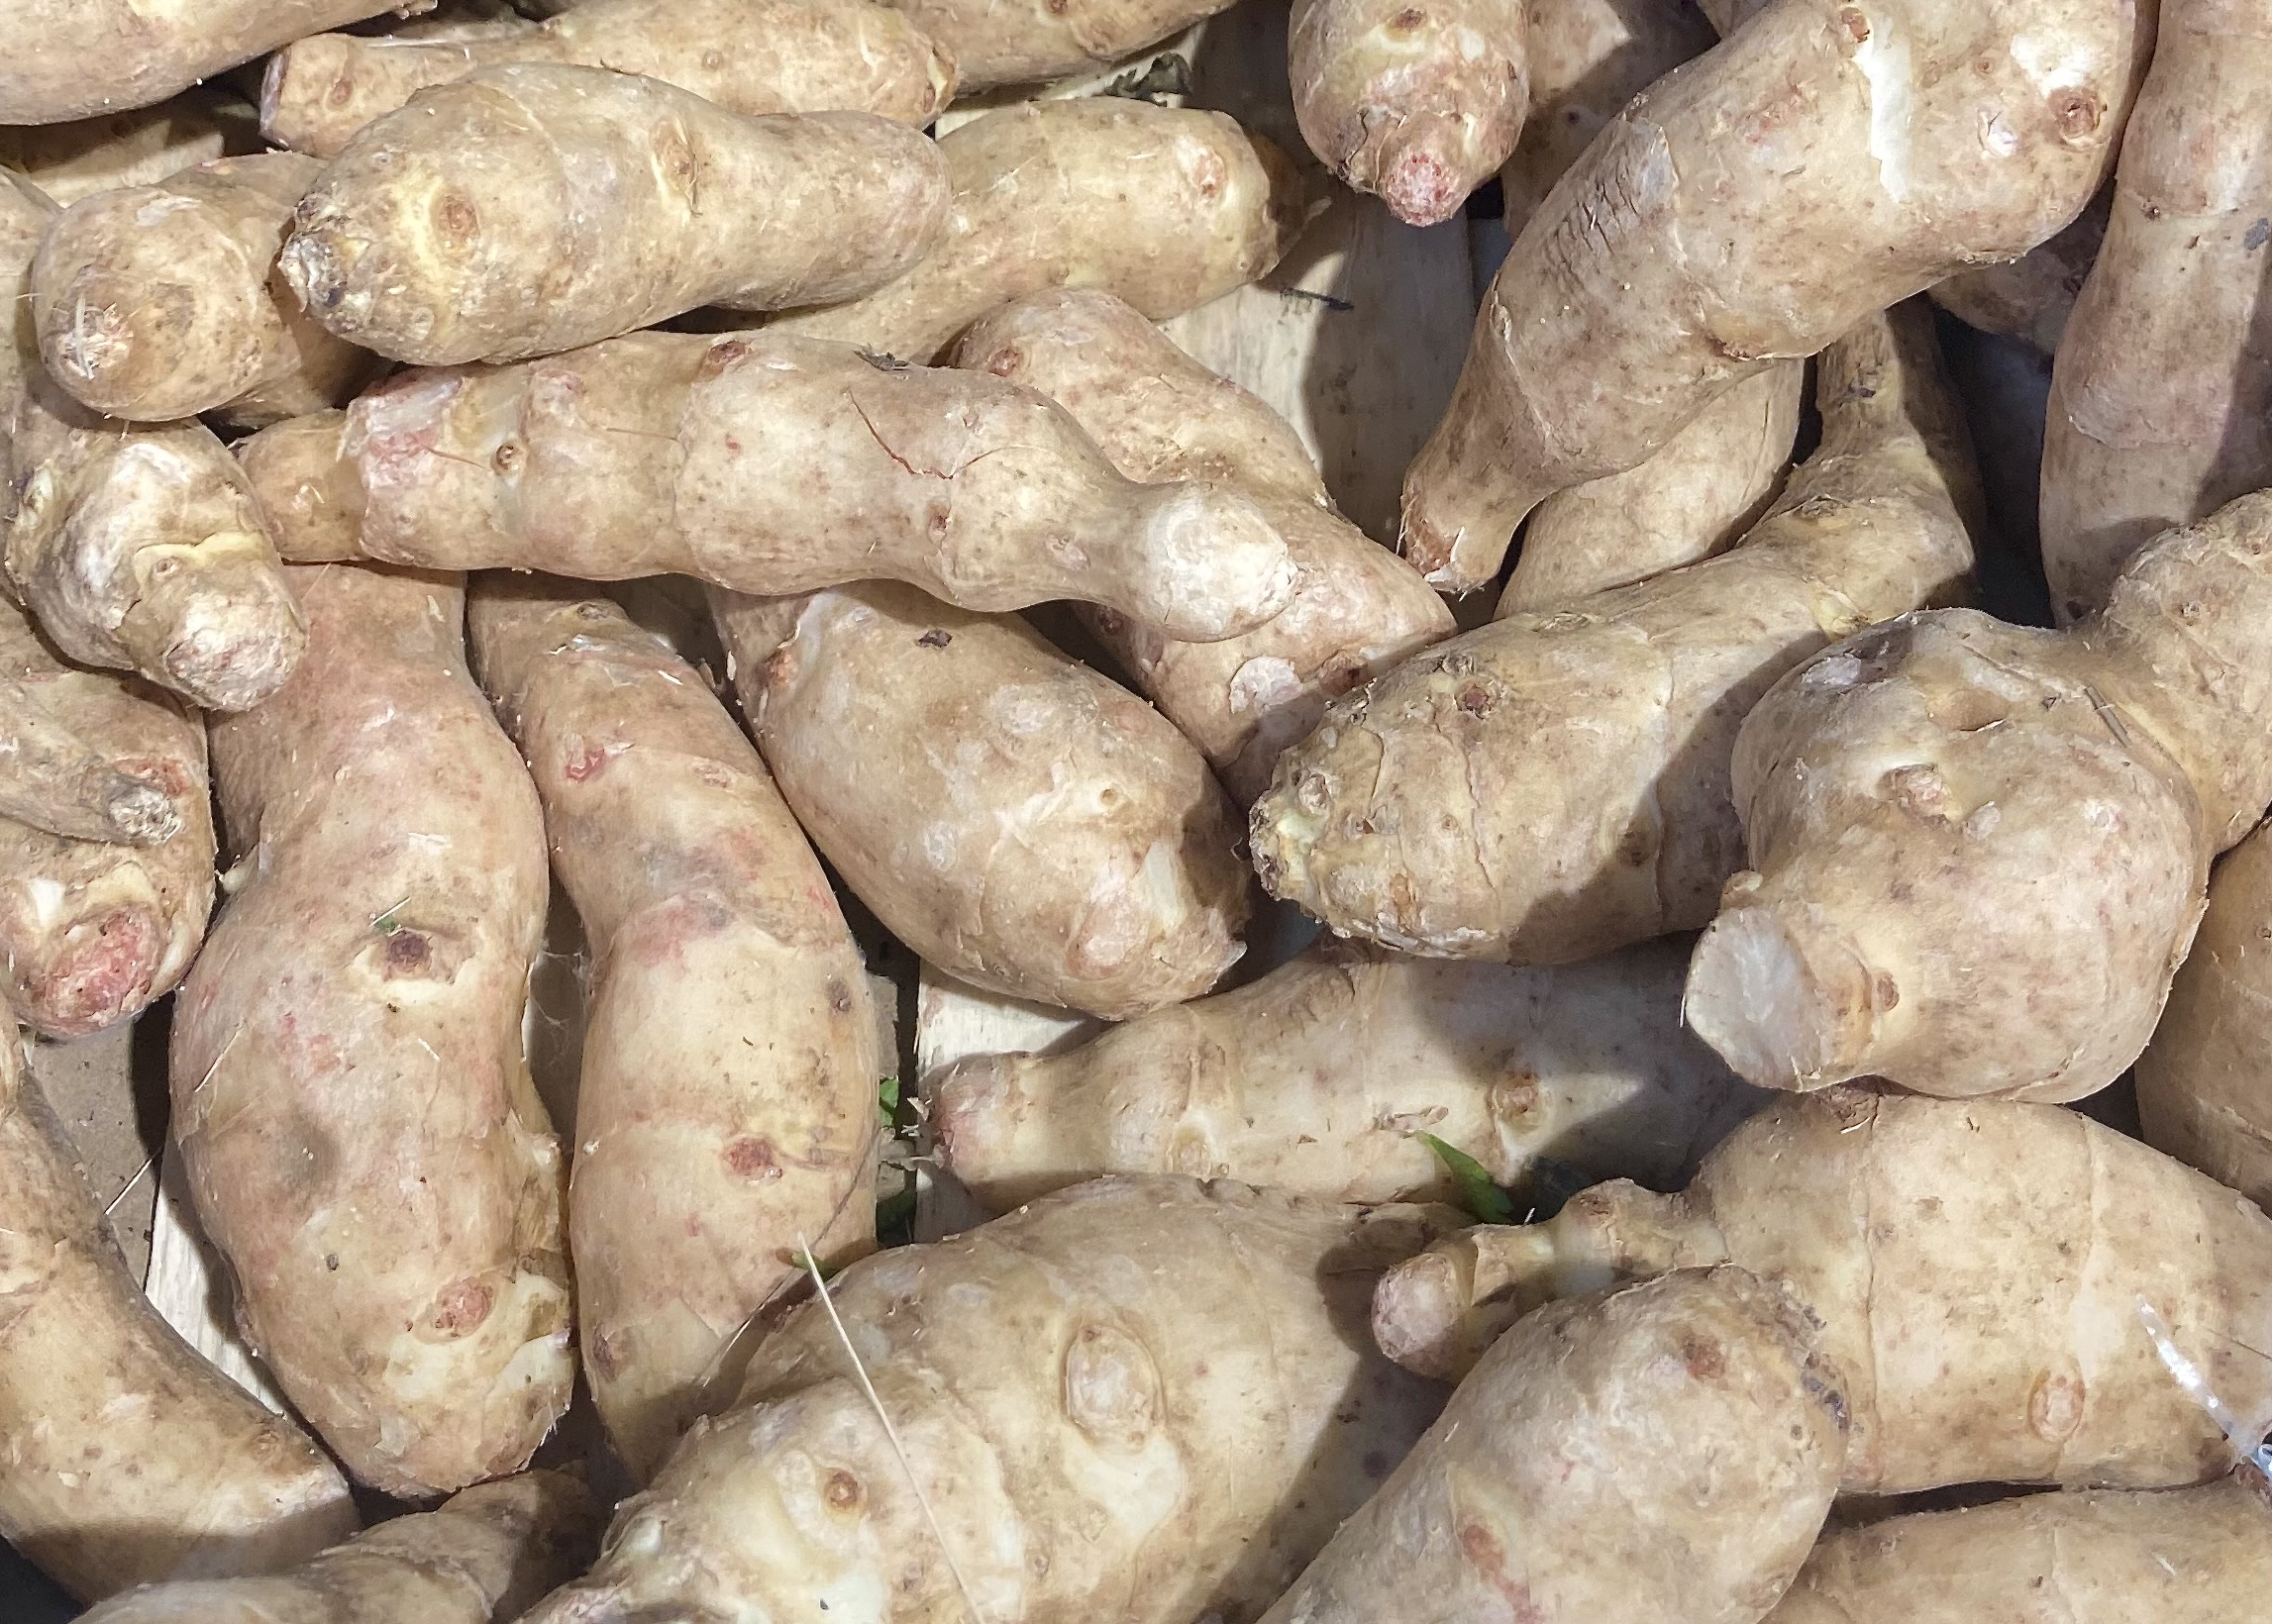
Always fun to shop at our organic supermarket and see what forgotten vegetables they have. This week they offered oca, Jerusalem artichoke (Helianthus Tuberoses), parsnip, black radish and helianthus, which was new to us. We bought a few of the helianthus roots and when at home we started thinking about ways to prepare them. Both Jerusalem artichoke and the helianthus roots are a touch sweet and nutty. A purée perhaps? We then noticed a recipe for a tartelette with blue cheese. Great idea, but not so sure about the combination with pastry. After a few minutes we came up with the recipe below. The helianthus roots are creamier than the Jerusalem artichokes and this worked very well in the combination with blue cheese and crème fraîche.The dish is rich with a touch of freshness.

Wine Pairing

In general, we suggest a full bodied, well balanced red wine, with aromas of black fruit, perhaps liquorice and with supple tannins. 

What You Need
  • Roots of the Helianthus Strumosus
  • Crème Fraîche
  • Roquefort
What You Do

Clean the roots and cook in boiling water for perhaps 5 minutes. They become soft very quickly. Drain and let cool. In parallel use a fork to combine equal parts of crème fraîche and Roquefort. Slice the roots and combine with the mixture. Place in ramekins and transfer to the oven at 200 °C or 390 °F for a few minutes, until hot and golden. You can also place them under the grill for a few minutes.

PS

Interested? Find out more about forgotten vegetables!

More PS

As Dorothy suggested (see below) it’s a great idea to fry or roast them with onions. We also added some garlic. Delicious!

Mushrooms and Miso

Shiitake is becoming more and more available. It has a unique flavour, savoury, meaty, earthy and it is rich in umami. The name is a combination of shii (a tree native to Japan and Korea, also known as the Japanese Chinquapin) and take (meaning mushroom, as in matsutake and maitake). The mushroom grows on decaying wood, not only on shii but also on other trees such as oaks and chestnuts. It’s fun to buy a shiitake log and grow your own mushrooms. 
In this dish we combine shiitake and oyster mushrooms. These two have very different structures, which adds value to the dish.

Wine Pairing

Enjoy your Mushrooms with Miso with a lightly oaked chardonnay. The oakiness of the wine will match well with the umami and miso flavours. The richness of the chardonnay will be very nice with the mushrooms.

What You Need
  • 100 grams Shiitake
  • 100 grams Oyster Mushrooms
  • Fresh Ginger
  • One Garlic Clove
  • One Scallion
  • Miso
  • Mirin
  • Soy Sauce (light)
  • Olive Oil
  • Black pepper
What You Do

Remove the stem of the shiitake, slice the caps and tear the oyster mushrooms. Fry in olive oil. Add thinly sliced white of the scallion. Add chopped garlic. Combine a teaspoon of miso with one tablespoon of mirin and one tablespoon of light soy sauce. If using thicker soy sauce, add some water. Mix and taste. It should be both salty and umami. Add some of the mixture to the mushroom. Coat the mushrooms with the miso mixture. Add more mixture if required. Be careful, you don’t want a sauce. When ready to serve add some black pepper, freshly grated ginger, the thinly sliced green of the scallion. Combine and serve. 

PS

Don’t throw the stems away! Simply add them to a pan with water, bring to a boil and leave to simmer for 30-60 minutes. Strain and store the broth. It freezes well.

Tuberous Chervil

Earlier we wrote about mashua and oca, two forgotten vegetables. This week we enjoyed tuberous chervil, another forgotten vegetable, also known as turnip chervil and bulbous chervil. Popular throughout continental Europe in the 19th century, but now hard to find. The tubers we bought had a length of approximately 4 cm and a thickness of 2 cm. They are white on the inside. The tuberous chervil is very tasty, easy to prepare, and its flavour will make you think of chestnuts, without a hint of bitterness.
As more often, these winter vegetables were replaced by potatoes: cheaper, easier to handle and easier to grow.
The ‘chervil’ in the name does not mean it’s the tuber of the chervil plant (like parsley and parsley root are related). It’s included because the leaves of tuberous chervil (see picture below) look like the leaves of chervil. The two are not at all related.
According to some sources tuberous chervil can be eaten raw. We tried it, of course, and yes, edible, but not great. We prefer to turn the tubers into a purée, with cream, butter and nutmeg. We combined the purée with lamb chops and with scallops. The second combination didn’t work, as if bringing the two together diminished the individual flavours. The first combination was delicious, the sweetness of the meat with the chestnut flavour, the freshness of the puree with the fatty lamb.

Wine Pairing

We enjoyed a glass of red wine from the Bordeaux region with our purée and lamb, produced by Château Picon. A very nice, affordable wine, with some dark fruit and acidity. In general, we suggest a not too complex red wine, made with for instance cabernet sauvignon and/or merlot grapes.

What You Need
  • 250 grams of Tuberous Chervil
  • Butter
  • Cream
  • Nutmeg
  • Black Pepper
What You Do

If the tuberous chervil are young and fresh, you don’t need to peel them. The ones we bought were a bit older, so we peeled them. Wash and cook for 5-10 minutes until soft. Drain. Mash using a fork, add butter and cream. Use a spoon to make the purée. The tubers love both, so you will probably need to add a bit more than expected. Keep warm on low heat, add black pepper and freshly grated nutmeg to taste. Quickly fry the lamb chops, add lots of herbes de Provence or a combination of thyme and oregano and serve with the purée.

Spicy Pumpkin Soup

It’s the time of year to enjoy simple, seasonal, rich and flavourful food, for instance spicy pumpkin soup. The trick in this case is in the coconut milk or cream. Coconut milk contains something like 15 grams of fat per 100ml. For this soup you need 25+ grams of fat per 100ml. The fat enhances the coconut flavour and it combines very well with the spicy and aromatic character of the soup (ginger, chili, djeroek poeroet).

What You Need (for 4)
  • Small Pumpkin
  • Large Shallot
  • 2 large Garlic Cloves
  • 4 cm Fresh Ginger
  • Chili Pepper
  • Olive Oil
  • 8 leaves of Djeroek Poeroet  
  • Coconut Cream
  • Cilantro
What You Do

Wash the pumpkin and chop. If the pumpkin is organic, then you don’t need to peel it. Peel and chop the shallot, garlic and the ginger. Ground dried chili pepper. Gently fry the shallot in olive oil. Add chilli pepper. Add ginger. Stir, mix and add pumpkin. Stir and add garlic. Now add the vegetable stock, the djeroek poeroet and allow to simmer for 30 minutes. If the pumpkin is soft, remove the djeroek poeroet and blender the mixture. Taste and adjust. Add 6 spoons of coconut cream, 1 by 1, mix and taste. When you’re happy with the flavours, leave the soup on low heat for 15 minutes. Serve with lots of chopped cilantro.

Spicy Pumpkin Soup ©cadwu

Burdock

Wintery weather in Amsterdam, cold and sunny. Time to enjoy some seasonal vegetables, such as beet root, fennel, leek, kale, turnips and Brussels sprouts. Our favourite vegetable and fruit stall on the market sells Burdock. We all know about forgotten vegetables (such as rutabaga, kohlrabi, parsnips and Jerusalem artichoke), but Burdock is not one of them. It’s an ignored vegetable.
According to chef Alan Bergo in his excellent book The Forager Chef’s Book of Flora, Burdock root is delicious with a mild and slightly nutty flavour. Native in Europe and Asia, and introduced worldwide. He offers six recipes with Burdock, using the flower stalks in summer and the root in winter. One of the recipes is for Kinpira Gobō, a common side dish in Japan in which Burdock is combined with carrots, lotus root, mirin and sesame seeds. All his Burdock-dishes look delicious. Which raises the question why we don’t eat Burdock more often. 
We prepare a Japanese dish called Ume Gobō (ごぼうの梅煮) which translates to Burdock with Plums, which is basically what it is.
We served our Ume Gobō with Tamagoyaki, which turned out to be a very tasty, uplifting combination.

Wine Pairing

We enjoyed a glass of Crémant d’Alsace, produced by Arthur Metz. A very pleasant dry sparkling wine, with hints of apple, almonds and peach. Excellent combination with the Ume Gobō and the Tamagoyaki. In general, we suggest a not too complex unoaked white wine.

What You Need
  • 250 ml of Dashi
  • 1 Burdock Root
  • 3 salted Plums
  • 2 teaspoons of Mirin
  • 2 teaspoons of light, reduced sodium Soy Sauce
What You Do
  1. Wash the burdock to remove the dirt; if necessary use a knife
  2. Trim off the ends
  3. Warm the dashi
  4. Slice the root in 5 cm long chunks
  5. Quarter these lengthwise; if the root is thick, slice again
  6. Transfer the chunks immediately to the dashi to stop the root from discolouring
  7. Remove the pits of the plums and add one plum to the dashi
  8. Use a cartouche to cover the vegetables
  9. Leave to simmer for approximately one hour
  10. Keep an eye on the pan, you may have to add some extra dashi
  11. After one hour the liquid should be evaporated and the vegetables relatively soft
  12. You could cook it longer if you prefer them really soft
  13. Finely chop the remaining plums and add the paste-like substance to a bowl with mirin and soy sauce
  14. Combine until relatively smooth
  15. When the burdock is lukewarm, it’s time to add the chunks to the bowl and mix
Burdock with Salted Plums ©cadwu

Palmiers au Fromage

It’s Friday evening, friends are coming over for dinner, a nice bottle of crémant d’Alsace is waiting to be opened, you switch on your oven, slice the dough and transfer the slices to the oven. An hour or so later you serve a glass of crémant, accompanied by crispy, lukewarm, aromatic Palmiers au Fromage. Aren’t they lovely?

What You Need
  • Puff Pastry
  • 50 grams of Butter
  • 25 grams of very, very old cheese
  • (optional) Black Pepper and Mustard
What You Do

We used three sheets (12* 12 cm) of puff pastry. Combine the sheets into one by folding the dough. You want to keep the layered structure of the puff pastry. Transfer to the refrigerator for 30 minutes or so. In the meantime, combine 50 grams of very soft butter with 25 grams of finely grated very old cheese until it’s fluffy and creamy. This may take some time! Taste and decide if you want to add more cheese, mustard and/or black pepper.
Dust your work top with flour, roll out the dough, size 12 by 36 cm. Used a brush to coat the dough with the butter mixture. Pick up the left short side of the dough and fold until halfway. Do the same with the right size. It should now be 12 by approximately 18 cm. Repeat. Probably you can’t repeat it after having folded the dough twice. If you think you can, please do so. Now brush halve the dough and fold. The result looks like a 12-cm-long sausage. Wrap in plastic foil, transfer to the refrigerator and let cool through and through.
Preheat your oven to 200 °C or 390 °F. Use a sharp knife to slice the dough-sausage, 0.5 cm is perfect. Cover a baking tray with parchment (baking) paper and bake the Palmiers au Fromage for 10 – 15 minutes or until golden-brown.

Palmiers ©cadwu
Palmiers ©cadwu