Pears (Slow Cooked)

In 1850 the Gieser Wildeman pear was created by Mr. Gieser Wildeman. The pear is hard, full of tannins and its texture is granulated. Not nice at all. However when cooked slowly, the unappealing pear turns into a red and refined pear. Its taste is sweet with a touch of vanilla. A true Gieser Wildeman will become red (through and through) without any problem, provided it’s cooked slowly.
Belle Angevine, Virulam, Black Worcester, Certeau, Sarrasin, Martin Sec and Saint Rémy (amongst others) will also do the trick although some will turn light red or pink. And perhaps you will have to add some sugar or honey to enhance the flavour.

If a pear doesn’t turn red, then you need to add port, crème de cassis or red wine. The colour of the outside will be red; the colour of the centre a disappointing white. Some people add cloves, prunes and vanilla to give additional flavour to their pears in red wine. No need for this, just buy the right slow cooking pear.

What You Need
  • Pears
  • One Cinnamon Stick
  • Water
What You Do
  1. Peel the pear and leave the stalks on
  2. Add some water to a heavy pan, add the pears and the cinnamon stick
  3. Allow to cook on low heat for at least 6 hours
  4. We cooked ours for 8 hours
  5. Cool and serve, perhaps the next day, for instance with home-made vanilla ice cream

Panna Cotta with Raspberry Coulis

Cream, Cream and More Cream

Such a lovely and simple dessert! Provided of course it’s made the right way. So no milk, no yoghurt, no cream cheese, no whipped cream and most certainly no whipped egg white! Just cream. Cooked Cream. And preferably cream with lots of fat because then you will need less gelatine. 
Fresh raspberries are preferred, but no worries, the frozen ones are also very tasty and suitable for making a coulis.

What You Need (for 4)

  • For the Panna Cotta
    • 500 ml fresh Cream
    • 3,5 leaves of Gelatine (5,25 grams)
    • 1 Vanilla Bean
    • 25 gram Sugar
  • For the Raspberry Coulis
    • 250 grams of Raspberries
    • 25 grams of Sugar
    • 1 tablespoon of Water

What You Do

The recipe is for 4 panna cotta (actually we should say 4 panne cotte). Slowly bring the cream to the boil. Add the seeds of the vanilla but also add the remainder of the bean. Now keep close to boiling for 15 minutes. Stir when necessary. Remove from the heat and while stirring add the sugar until totally dissolved. Now pass through a sieve to make sure you remove all the bits you don’t want. Follow the instruction of the gelatine and add the leaves. Stir well until homogeneous. Cool the liquid somewhat before filling the forms. We used a silicone mold. Nice and easy! The only thing you need to do is to make the mold a bit moist with water. Let the panna cotta cool and then store in the refrigerator until set. Don’t forget to seal with cling foil, otherwise your panna cotta will absorb aromas from other food in the refrigerator.
Heat the raspberries with the sugar and water. Cook gently for 5 minutes. Pass through s sieve (if necessary twice) making sure you apply some pressure but not too much. You don’t want pips in your coulis! Let cool for 30 minutes before transferring to the refrigerator.

Panna Cotta with Raspberry Coulis © cadwu

Gordon Ramsay’s Authentic Asian Cuisine

Lucky Cat

This spring Gordon Ramsay opened a new restaurant in London: the Lucky Cat. Offering Asian food in a restaurant inspired by Tokyo’s 1930s teahouses and Shanghai’s drinking dens. A pre-view opening night for critics and journalists triggered a debate about authenticity. Could Gordon Ramsey claim to offer ‘authentic Asian food’ or should he stick to mashed potatoes, fish and chips? Was Ramsay guilty of Cultural Appropriation (dominant cultures profiting from the preparations and traditions of other cultures while those cultures are unable to do the same)?

Which brings us to Authenticity. Can a country, a city, a culture claim ownership of food? Can Nice claim the Salade Niçoise, can France claim French Fries? Can Japan claim udon and soba?

Unfortunately the debate derailed because of the aggressive way people started to contribute (or contributed right from the start Gordon would say). A pity because it’s interesting to study the origin and background of food. Why do we eat the food we eat? Why do we cook the way we do? Why do we add certain herbs? What’s the origin?

Udon Noodles

Earlier this year we visited the inspiring city of Hakata, also to see the monument dedicated to Udon and Soba. There are not many food-related monuments, so this was special. The story is that Shoichi Kokushi (a Japanese Buddhist monk) returned from China in 1241 to Hakata where he founded the Joten-Ji temple. He introduced udon and soba (amongst other products) to Japan, notably to Hakata. People in Hakata claim to produce udon noodles based on Shoichi Kokushi‘s recipe. Authentic Udon Noodles.

Back to Gordon Ramsay

Cultural Appropriation is a nasty concept. It’s culinary theft based on perceived ownership. But in reality culinary traditions evolve and continue to evolve, for better and for worse. That’s how Udon became Japanese, that’s why you can order a Hawaiian pizza, that why some people prepare a Salade Niçoise with balsamic vinegar, cucumber, basil, croutons or even red bell pepper.

In the mean time Gordon Ramsay made a clever move: he dropped the tag ‘authentic’ and simply opened the doors of his restaurant.

(This week’s recipe: Caesar’s Mushrooms with Udon)


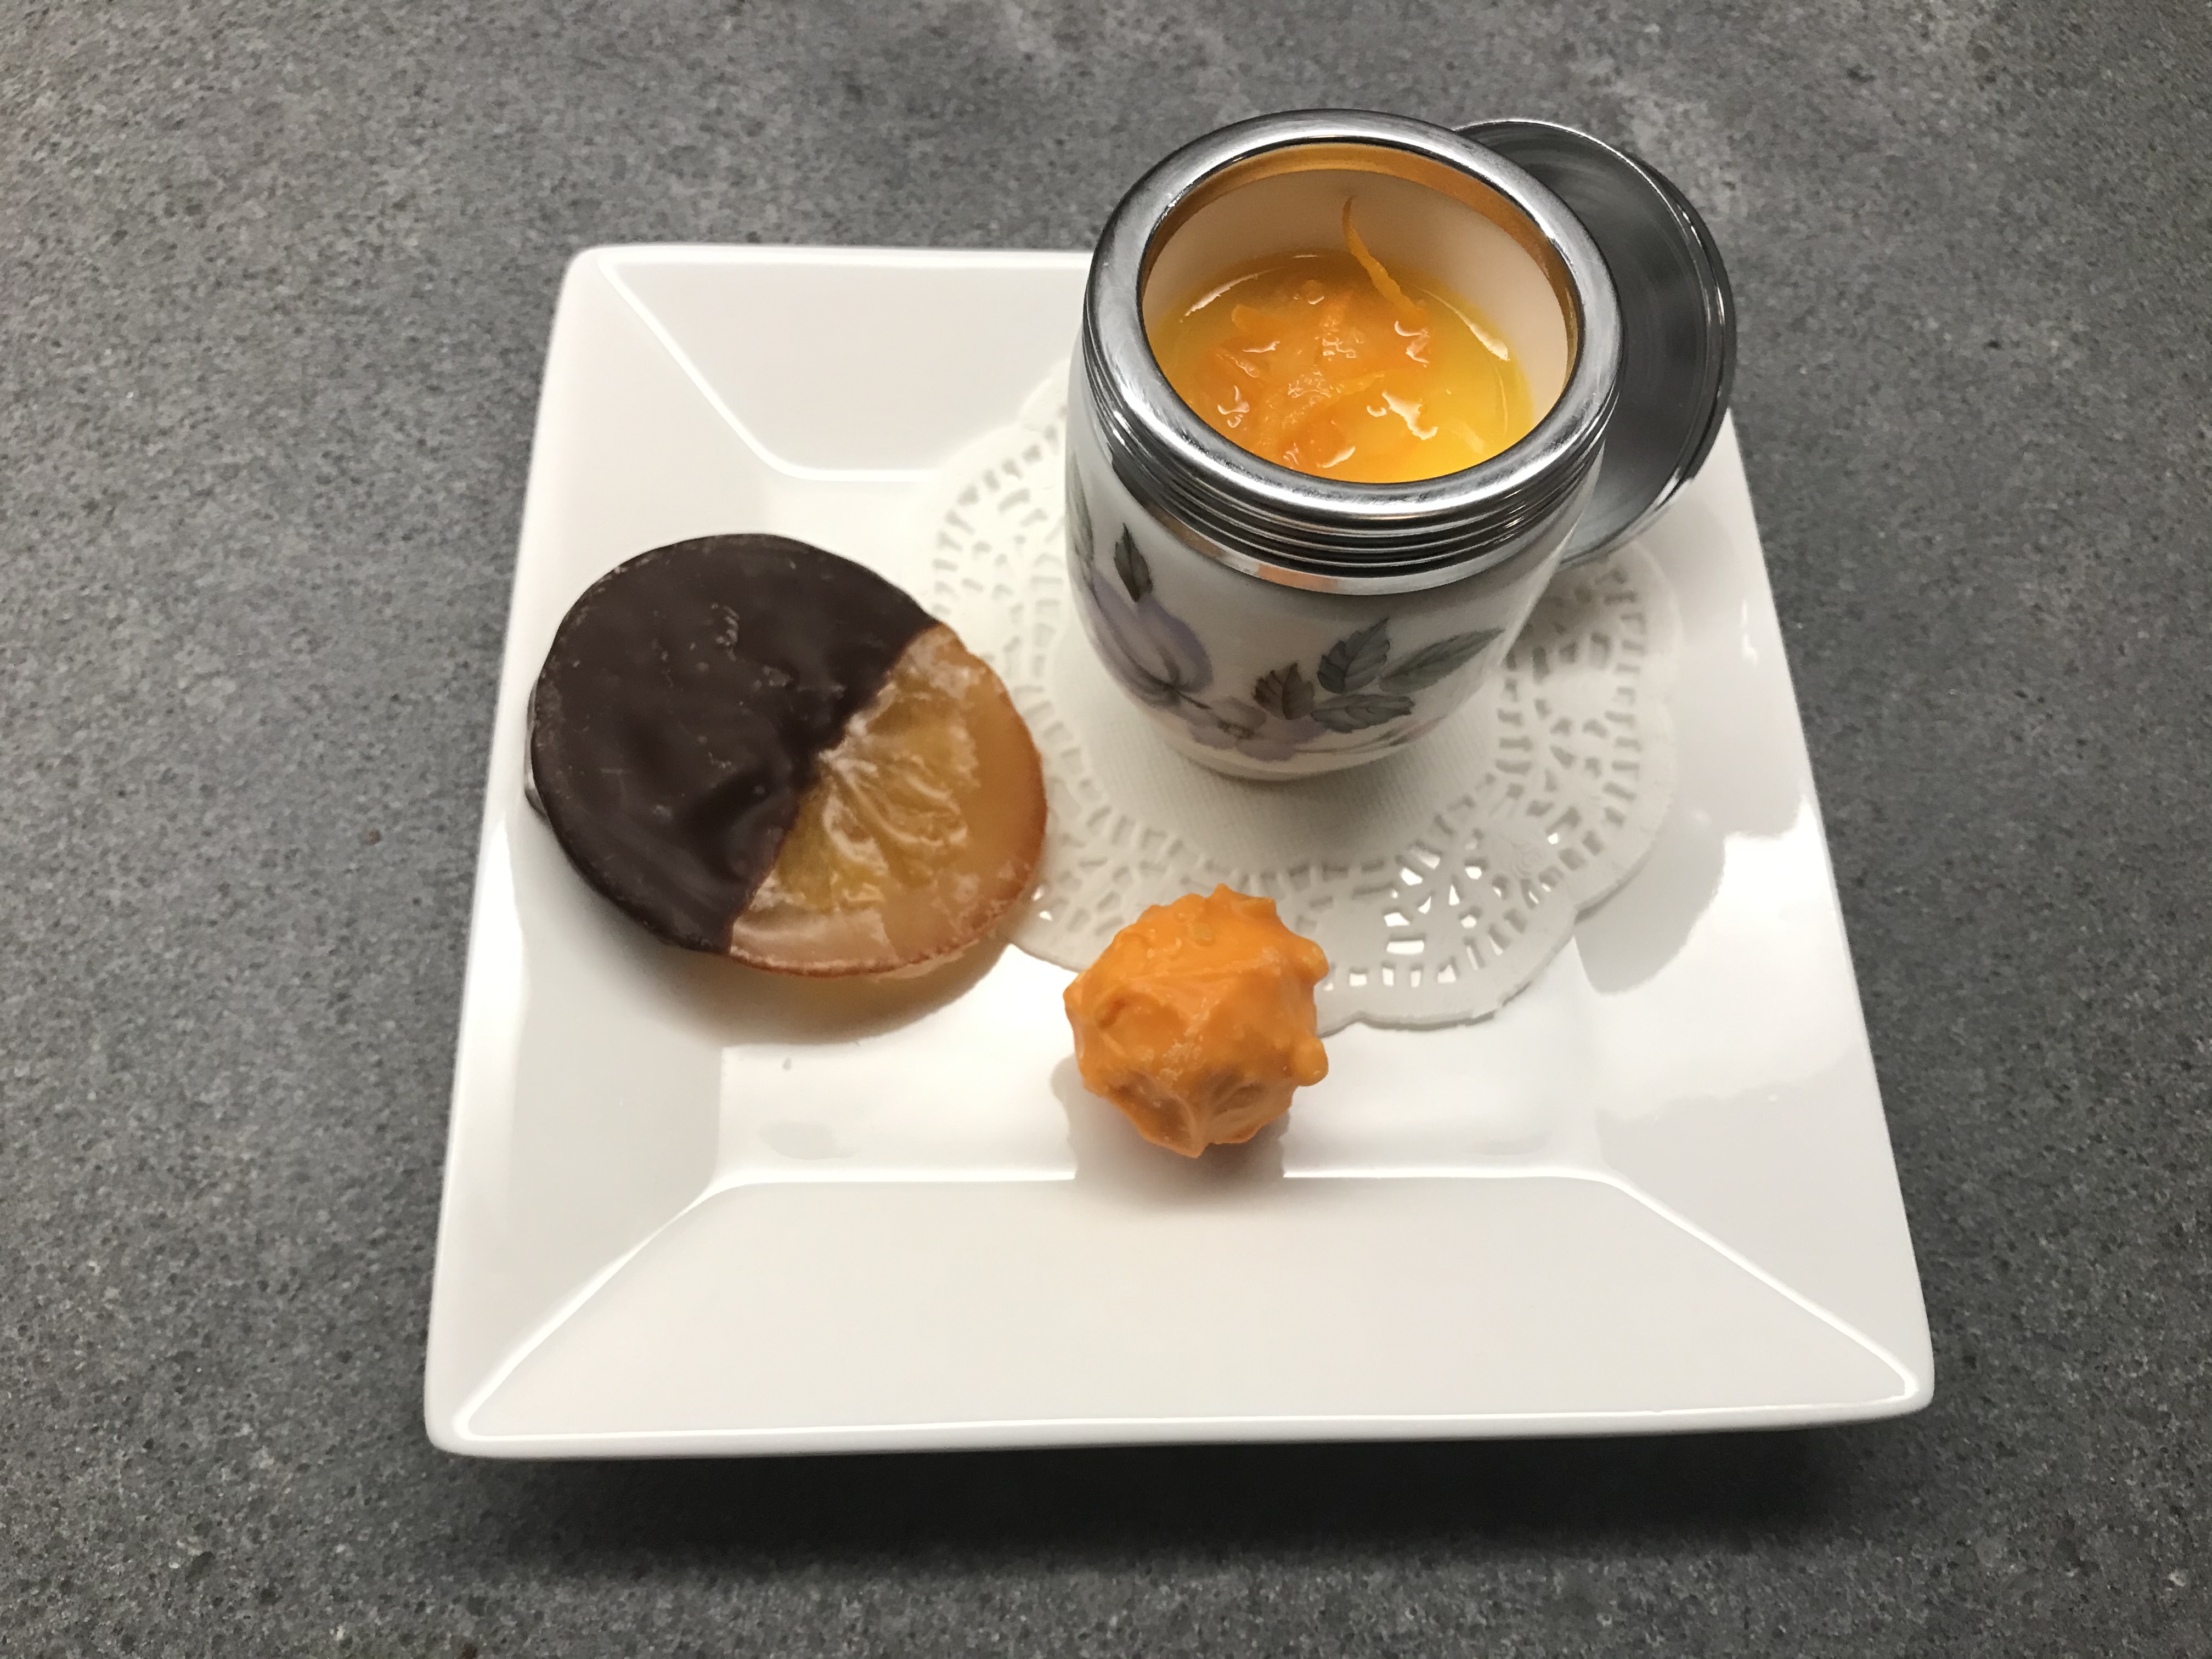
Orange Flan

Such a nice small dessert! It combines the gentle taste of a classic flan with the fruity orange. The fun is that the orange is in the flan itself, in the gel and of course in the zest. We’re sure you and your guests will appreciate the lightness and long taste.

We love to combine this dish with Rivesalte Ambré. If you can’t get hold of the Ambré, then go for another Rivesalte. The Ambré has a long, deep taste that supports the taste of the flan very well; it lifts it to an exquisite level. The Ambré comes with a hint of citrus; if it’s clementine even better.

 Here is what you need

  • For the flan
    • 8 small Coddlers (so-called standard size)
    • 2 Eggs
    • 2 Egg Yolks
    • 200 ml fresh Orange Juice
    • 20 grams of Sugar (depending on the sweetness of the orange juice)
    • butter
  • For the gel
    • 100 ml fresh Orange Juice
    • Grand Marnier or Cointreau
    • 0,5 gram of Agar Agar
  • And also
    • Orange Zest
    • Edible Flower

In a bowl mix the eggs and the egg yolks using a spoon. Make sure to do this very gently; we don’t want any bubbles in the mixture. Now add 20 gram of sugar to the orange juice and make sure it’s totally absorbed. Combine the juice and the egg and stir gently. Pass through a sieve. It’s important that the mixture is very smooth, so no bits of egg, sugar and orange. If not, pass through a finer sieve. If you have bubbles in the mixture then let rest in the refrigerator.
Apply a very thin layer of butter to the coddlers, just enough to cover the inside. Pour the mixture in the coddlers, but nor more than 2/3. The mixture will set but not raise (or only a little bit). Close the coddlers, but not too tight. You want to test one during the cooking process and you don’t want to burn your hands.
Set your oven to ‘classic’ and to 170° Celsius or 340° Fahrenheit . Place a large oven tray in the middel of the oven. When the oven has reached the right temperature, place the coddlers in the tray and add boiling water. The water should reach ¾ of the coddler, leaving ¼ free. Once in the oven reduce the temperature to 120° Celsius or 250° Fahrenheit and cook for 30 minutes. The flans are done when a metal pen comes out clean.
Remove the coddlers from the oven and allow to cool. You can do this by putting them in cold water, but you can also give it a bit of time. When cool, dry the inside of the metal lid (condense). Transfer to the refrigerator.
Reduce 100 ml orange juice and the Grand Marnier or Cointreau. When nearly reduced by 50% add the agar agar. Allow to simmer for a few minutes. You may want to test the consistency. Simply put some reduced liquid on a saucer, transfer to the freezer and wait for 2 minutes. The consistency will be a good indication of the final result.
Now for the zest: most citrus fruit is waxed, so you may need to rub the orange. Put a bit of very thin orange zest on top of the flan and finish by pouring some (still warm) gel over it. Ideally this will cover the top (and the zest) and flow between the coddler and the flan.
Put the coddlers in the refrigerator and let cool. Half an hour before serving, take them out of the refrigerator, remove the lid, dry the inside and put it back on again.
If you can get hold of a nice edible flower, then put it on top of the gel, just before serving.
You can serve them with a slice of confit of orange. And if you have made these anyway, why not dip them in deepest, darkest chocolate?

orange flan

Panna Cotta

Such a lovely and simple dessert! Provided of course it’s made the right way. So no milk, no yoghurt, no cream cheese, no whipped cream and most certainly no whipped egg white! Just cream. Cooked Cream. And preferably cream with lots of fat because then you will need less gelatine.
You can serve the panna cotta after a few hours (or the next day) with a rich strawberry or raspberry sauce, but we prefer to enjoy the panna cotta with a bit of candied orange zest, simply because we want to balance the sweetness and richness of the panna cotta with the acidity and bitterness of the orange. Home made is preferred, see the recipe for an Orange Flan.

What You Need (For 4)

  • 500 ml fresh Cream
  • 3,5 leaves of Gelatine (5,25 grams)
  • 1 Vanilla Bean
  • 25 gram Sugar
  • Candied Orange

What You Do

The recipe is for 4 panna cotta (actually should we say 4 panne cotte).
Slowly bring the cream to the boil. Add the seeds of the vanilla but also add the remainder of the bean. Now keep close to boiling for 15 minutes. Stir when necessary. Remove from the heat and while stirring add the sugar until totally resolved. Now pass through a sieve to make sure you remove all the bits you don’t want. Follow the instruction of the gelatine and add the leaves. Stir well until homogeneous. Cool the liquid somewhat before filling the forms. We used a silicone mold. Nice and easy! The only thing you need to do is to make the mold a bit moist with water. Let the panna cotta cool and then store in the refrigerator until set. Don’t forget to seal with cling foil, otherwise your panna cotta will absorb aromas from other food in the refrigerator.

Panna Cotta © cadwu
Panna Cotta © cadwu